If you’ve been looking for that amazing takeout flavor without the guilt, then you’ve hit the jackpot with this Chinese Orange Chicken recipe! I know exactly what it’s like wanting those comforting, satisfying meals but needing them to fit into a healthier lifestyle. That’s what my whole journey is about. I’m Jordan Bell, based right here in Asheville, NC, and after dropping over 80 pounds, I realized that “clean eating” doesn’t have to mean boring food.
My blog, Easy Detox Recipes, is built on showing folks like you how to take those rich Southern comfort foods—and yes, even Americanized classics like this fantastic Chinese Orange Chicken—and make them cleaner, fresher, and totally delicious. You don’t need complicated ingredients or hours in the kitchen. We’re going to get that perfect crispy bite and that sweet, tangy sauce coating every piece. Trust me, once you make this crispy chicken at home, you won’t be dialing that delivery number again! 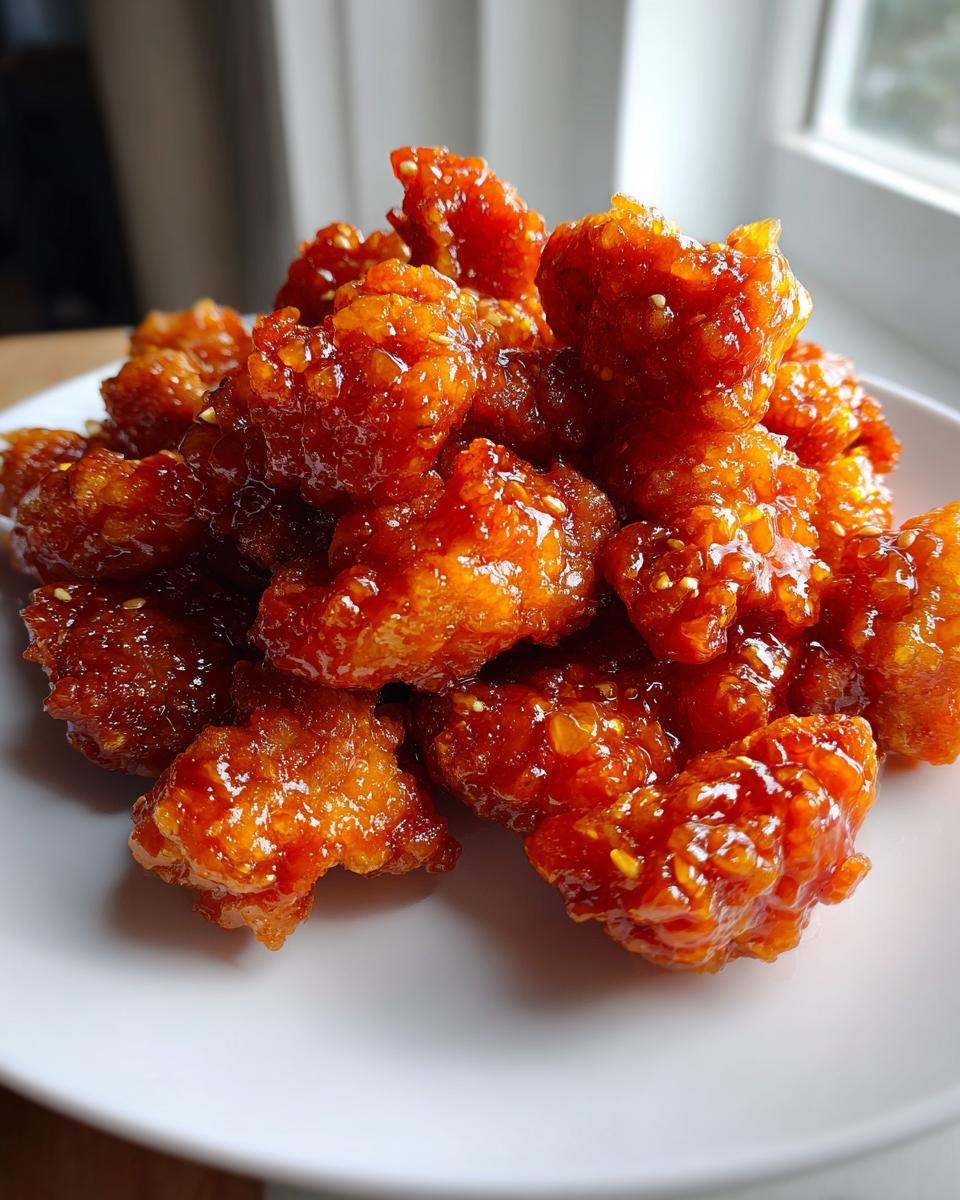
Gathering Your Ingredients for Chinese Orange Chicken
Getting ready for our Chinese Orange Chicken adventure is half the fun! Before we even think about heating up the oil, we need to make sure everything is measured out and ready to go. I always pull out all my bowls and line everything up—it saves so much time when the frying starts! Remember those notes I mentioned? They’re key here, especially deciding on chicken thighs over breasts for maximum juiciness. You’ll want to have your chicken cut into nice, uniform 1-inch cubes before you start mixing up that batter.
Essential Components for the Crispy Coating
For that crunch we all crave, the dry mix is super important. You’ll need 1 1/2 cups of all-purpose flour mixed right in with 1/2 cup of cornstarch—that cornstarch is our secret weapon for crispiness! Don’t forget the 1/2 teaspoon of salt and a pinch of black pepper. Once that’s mixed, we add the wet side: one large egg, 1 tablespoon of vegetable oil, and 1 1/4 cups of water. Whisk it gently until it’s smooth, but don’t go crazy whipping air into it!
Crafting the Signature Orange Sauce
This is where the magic happens! You absolutely need the juice and zest from one large orange; don’t cheat on the fresh stuff, it makes all the difference in the brightness of the sauce. We’re tossing that in with 2 tablespoons of soy sauce, 1/4 cup of rice vinegar, and the 1/2 cup of packed brown sugar. Make sure that brown sugar is nice and packed in your measuring cup! Then, mince up two large garlic cloves. We’ll save the cornstarch slurry for just before we thicken it up.
Necessary Equipment for Perfect Chinese Orange Chicken
You don’t need a ton of fancy gadgets for this Chinese Orange Chicken, but having the right tools makes the process so much smoother. First up, you absolutely need a heavy-bottomed saucepan or a deep fryer where you can maintain a good two inches of oil. Precision matters here! Then, grab a couple of medium saucepans—one for making that glorious sauce and maybe one just for holding your fried chicken while you work in batches.
Make sure you have a sturdy mixing bowl ready for that batter, and of course, a plate lined with paper towels for draining all that beautiful, crispy chicken. Having everything ready means you can focus on the heat and the tossing!
Step-by-Step Instructions to Make Chinese Orange Chicken
Okay, now for the fun part—turning those ingredients into the best Chinese Orange Chicken you’ve ever tasted right in your own kitchen! The key here is timing and keeping things moving once the heat is on. Follow these steps closely, and you’ll nail that takeout quality consistency every single time.
Preparing and Battering the Chicken
First things first: get your chicken ready. Cut about a pound of boneless, skinless chicken into nice, even 1-inch cubes. Remember what I said about thighs being juicier? If you can use thighs, go for it! Now, in a medium bowl, whisk together your dry coating ingredients: the flour, cornstarch, salt, and pepper. Then, pour in your wet stuff—the egg, that tablespoon of oil, and the water. Whisk it until it looks smooth, like a thin pancake batter. Don’t overmix, we just want it combined!
Toss those chicken pieces right into that batter and make sure every single cube is completely coated. This is important! Cover that bowl and pop it in the fridge to chill for about 30 minutes. If you’re starving and can’t wait, 10 minutes will do in a pinch, but that chill time really helps the batter stick better during frying.
Achieving Crispy Texture Through Frying
While the chicken chills, get your frying oil ready. You need about two inches of vegetable oil heated up to exactly 350°F (177°C). This temperature is crucial—I can’t stress this enough! If the oil is too cool, the batter soaks it up, and you get greasy chicken. If it’s too hot, the outside burns before the inside is cooked. That 350°F sweet spot ensures that beautiful, even golden-brown crispiness.
Once it hits temp, carefully add your battered chicken cubes in small batches—maybe 10 to 15 pieces at a time. Don’t overcrowd the pot! Shake off any really thick excess batter before dropping them in. Fry them for just 2 to 3 minutes, turning them gently so they brown evenly all over. Pull them out with a slotted spoon and set them on that paper towel-lined plate to drain while you work on the rest. Keep the oil temperature stable between batches!
Cooking the Tangy Orange Sauce
Now, switch gears to the sauce. In a separate saucepan over medium heat, combine your orange juice, zest, soy sauce, vinegar, brown sugar, and minced garlic. Stir this mixture until it just starts to boil gently. Taste it here—if you want it tangier, add a splash more vinegar; sweeter? A touch more sugar. Once it’s tasting perfect, it’s time to thicken it up. Mix that cornstarch and water together completely to make a slurry, then slowly pour it into the simmering sauce while stirring constantly.
Keep stirring. You’ll see it start to transform almost immediately. We want it thick enough that it coats the back of a spoon nicely—it shouldn’t be runny like water, but creamy and glossy. That means the starch has activated, and we’re ready for the final step!
Final Toss and Serving Preparation
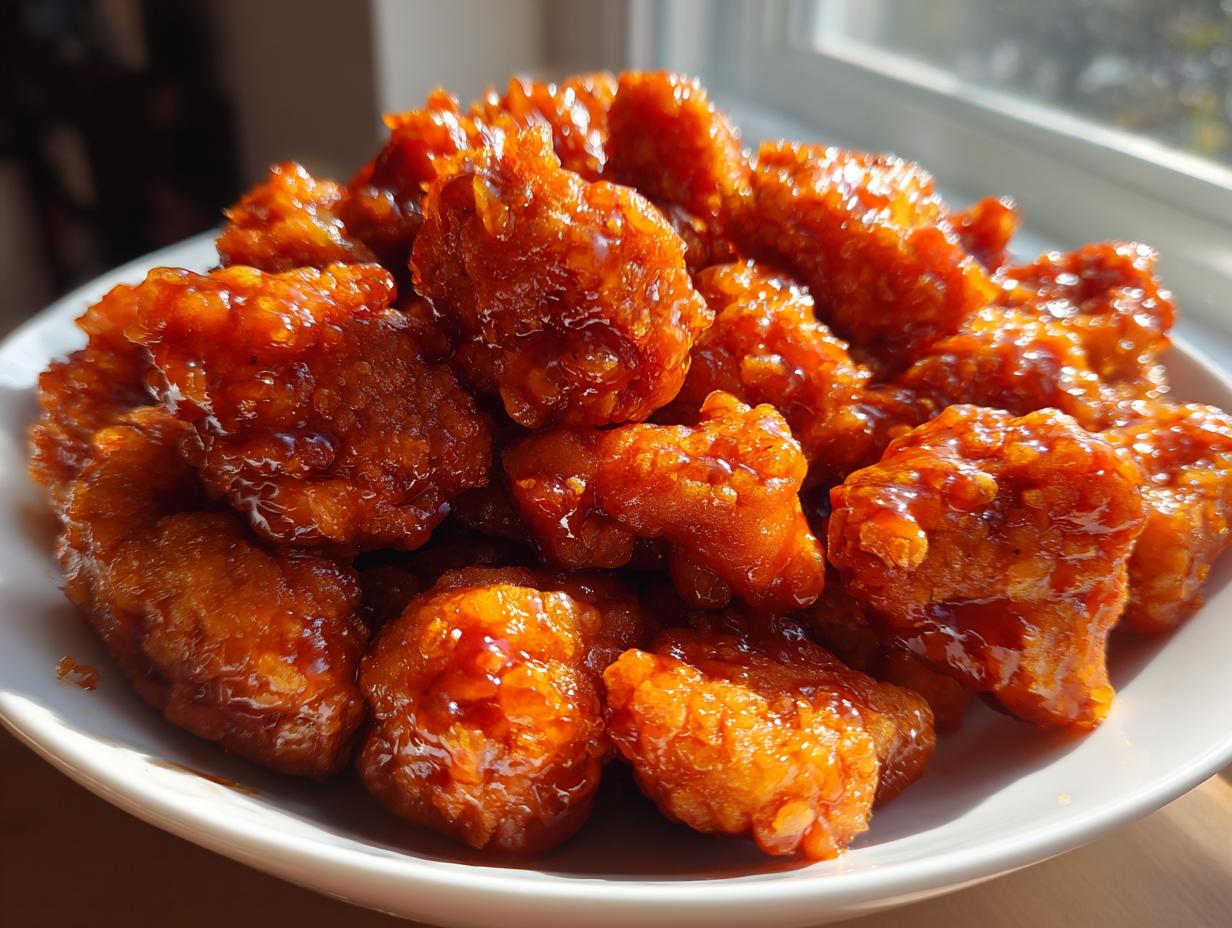
Turn the heat down to low for this last step. Dump all that perfectly crispy chicken right into the sauce pan. Use a spatula to gently toss everything together until every single piece of fried chicken is beautifully coated in that glossy orange glaze. Don’t let it sit too long once it’s coated, or the crispiness will soften! Serve this incredible Chinese Orange Chicken immediately. 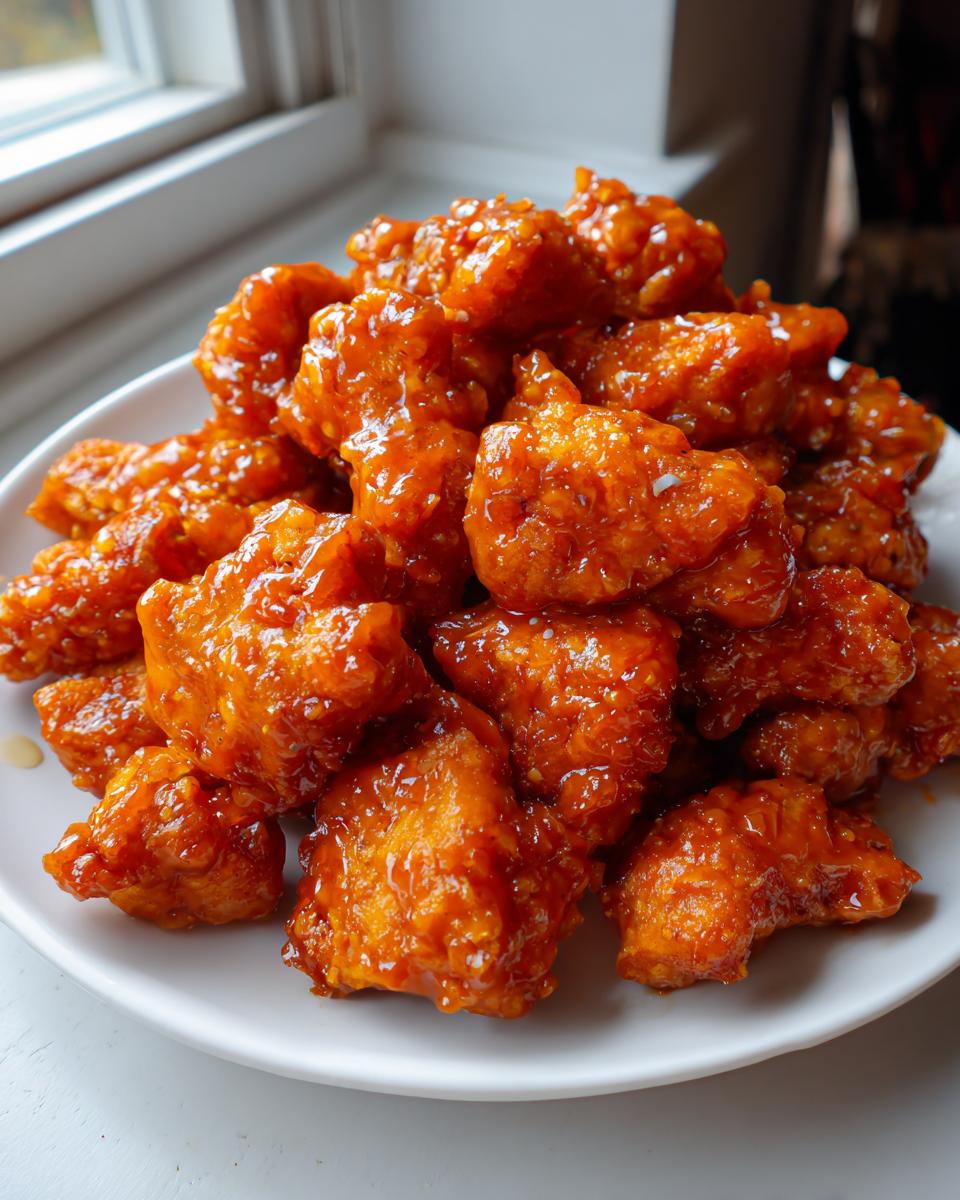
If you want to make it look restaurant-worthy, sprinkle on those optional garnishes: a scattering of sesame seeds, some bright green chopped onions, or a few red pepper flakes if you like a little kick!
Expert Tips for Next-Level Chinese Orange Chicken
If you want your Chinese Orange Chicken to seriously rival your favorite takeout spot, you have to pay attention to a couple of small details. Honestly, it’s the difference between good and *wow*!
First, let’s talk chicken again. I always recommend chicken thighs. Yes, chicken breasts are fine if that’s what you have, but thighs just hold up better during the frying process and stay incredibly juicy. They have a little more fat, which means they don’t dry out as easily when they hit that hot oil.
The biggest pro tip centers around that oil temperature. You must maintain 350°F. If you fry too many batches at once, the oil temperature plummets, and your chicken soaks up grease instead of getting crisp. Work in small batches and let the oil recover its heat between rounds. This stability is the secret to keeping that coating light and crunchy, which is exactly what you want on your Chinese Orange Chicken.
Also, a quick note on gluten-free folks: this recipe adapts beautifully! Just swap out the all-purpose flour for a good quality gluten-free blend, and make sure you use coconut aminos or certified gluten-free soy sauce when mixing up that tangy glaze.
Storing and Reheating Your Chinese Orange Chicken
Even though this Chinese Orange Chicken is best eaten piping hot right out of the pan, sometimes we end up with leftovers—which is totally fine! The good news is that this dish is actually pretty great for meal prep. You need to store the leftovers in an airtight container in the fridge, and they should keep well for about three or four days.
Now, when it comes to reheating, you have options. The microwave works in a pinch, just like I mentioned in the notes, but the texture won’t be quite as crisp. For the very best results, I highly recommend using an air fryer or a regular oven set to about 350°F. Spread the pieces out on a baking sheet—maybe even skip adding extra sauce if you’re reheating a lot—and warm them up until they are hot all the way through. That little bit of dry heat brings back some of that satisfying crunch to your Chinese Orange Chicken!
Frequently Asked Questions About Chinese Orange Chicken
I get so many questions about this recipe because everyone wants that perfect texture! Here are a few things I hear most often when folks are making their Chinese Orange Chicken at home.
Q1. Can I skip chilling the battered chicken?
You certainly can if you’re in a rush, but I really advise against it! Chilling the chicken for even 30 minutes lets the batter firm up just enough. If you skip it, you risk the batter sliding off into the hot oil, which means you won’t get that true crispy chicken coating we’re aiming for.
Q2. What if I don’t have fresh oranges?
Look, I preach fresh zest and juice because it really brightens the flavor, but if you’re in a bind, you can use 100% bottled orange juice. Just add a tiny bit of extra zest if you have an orange extract, or maybe a teaspoon of lemon juice to mimic the tartness you lose from fresh zest. It won’t be quite the same amazing orange chicken recipe, but it’ll still be tasty!
Q3. My sauce isn’t thick enough—what went wrong?
This usually happens for one of two reasons. Either your cornstarch slurry wasn’t mixed well enough before adding it, or you didn’t bring the sauce to a simmer after adding the slurry. You have to stir constantly while it bubbles gently for the thickening agent to fully activate. Just mix a tiny bit more slurry (a teaspoon of cornstarch in a tablespoon of cold water) and whisk it in until it coats your spoon!
Q4. Can I bake or air fry this instead of deep frying?
Yes! If you want a cleaner comfort food version, baking or air frying works. For the air fryer, spray the battered pieces lightly with oil and cook at 380°F until golden, flipping halfway. If baking, use a wire rack over a baking sheet. It won’t be *quite* as puffy or crispy as the deep-fried version, but it’s a great substitute! If you are looking for other air fryer recipes, check this out!
Understanding the Nutritional Estimate for Chinese Orange Chicken
When we talk about making comfort food cleaner, people always want to know the numbers, right? Because this Chinese Orange Chicken is deep-fried, it definitely has more calories and fat than a steamed dish, but knowing those numbers helps you fit it into your plan. I’ve put together the best estimates for serving size, Calories, Fat, Protein, and Carbohydrates based on the ingredients you use.
Please remember that these are just approximations! If you use chicken breasts instead of thighs, or if you use significantly more sugar in your sauce, those numbers will change. This information is here to help you track, not as a hard-and-fast rule for your orange chicken recipe. See more of my recipes on Pinterest!
Share Your Experience Making Chinese Orange Chicken
I truly hope this recipe brings that perfect takeout joy right to your dinner table! I love hearing how you all customize your meals. Did you go heavy on the red pepper flakes? What did you serve your crispy chicken with tonight? Drop a comment below, let me know how many stars you’re giving this one, and share your favorite serving suggestions! Learn more about my journey here.
Print
Amazing 1 Chinese Orange Chicken Fix
- Total Time: 65 minutes
- Yield: 4 servings 1x
- Diet: N/A
Description
Chinese Orange Chicken delivers that classic takeout flavor right to your kitchen. You get crispy fried chicken tossed in a sweet and tangy orange sauce. This recipe is straightforward and results in satisfying comfort food made cleaner.
Ingredients
- 1 pound boneless skinless chicken thighs (or breasts)
- 1 1/2 cups all-purpose flour
- 1/2 cup cornstarch
- 1/2 teaspoon salt
- 1/4 teaspoon black pepper
- 1 large egg
- 1 1/4 cups water
- 1 tablespoon vegetable oil (canola, sunflower etc.)
- Vegetable oil, for frying
- 1 large orange (juice and zest)
- 2 tablespoons soy sauce
- 1/4 cup rice vinegar (or white vinegar)
- 1/2 cup brown sugar, packed
- 2 large garlic cloves, minced (or 1 tsp garlic powder)
- 1 tablespoon cornstarch mixed with 1 tbsp water (for slurry)
- Sesame seeds (optional garnish)
- Green onions, chopped (optional garnish)
- Red pepper flakes (optional garnish)
Instructions
- Cut chicken into 1-inch cubes.
- In a medium bowl, mix flour, cornstarch, salt, and pepper.
- Add the egg, 1 tablespoon oil, and water; whisk until the mixture is smooth.
- Add the chicken cubes to the batter, ensuring full coating.
- Cover and chill for 30 minutes (or 10 minutes if rushed).
- In a medium saucepan or deep fryer, heat 2 inches of oil to 350ºF (177ºC). Line a plate with paper towels.
- Add the chicken cubes in batches (10–15 pieces), shaking off excess batter.
- Deep fry for 2–3 minutes until golden, turning for even browning.
- Remove the chicken and cover with foil to keep warm while preparing the sauce.
- To a medium saucepan, add orange juice, orange zest, soy sauce, vinegar, brown sugar, and garlic.
- Place over medium heat and bring to a low boil. Taste and adjust seasonings as desired.
- Mix the cornstarch and water in a cup to create a slurry, then pour it into the sauce.
- Stir constantly until the sauce thickens and coats the back of a spoon.
- Add the fried chicken and toss until completely coated with the sauce.
- Garnish with sesame seeds, green onions, and red pepper flakes if using. Serve right away.
Notes
- Chicken thighs provide juicier results than breasts, which can dry out quickly.
- Maintain the oil temperature near 350ºF for crispy chicken; lower heat makes it greasy, higher heat burns the outside.
- Avoid overcrowding the fryer to keep the oil temperature stable.
- This dish reheats well in the microwave and is suitable for meal prep.
- For a gluten-free version, substitute gluten-free flour and use gluten-free soy sauce or coconut aminos.
- Prep Time: 15 minutes
- Cook Time: 20 minutes
- Category: Main Dish
- Method: Deep Frying and Pan Cooking
- Cuisine: Chinese-American
Nutrition
- Serving Size: 1 serving
- Calories: Estimate needed
- Sugar: Estimate needed
- Sodium: Estimate needed
- Fat: Estimate needed
- Saturated Fat: Estimate needed
- Unsaturated Fat: Estimate needed
- Trans Fat: Estimate needed
- Carbohydrates: Estimate needed
- Fiber: Estimate needed
- Protein: Estimate needed
- Cholesterol: Estimate needed