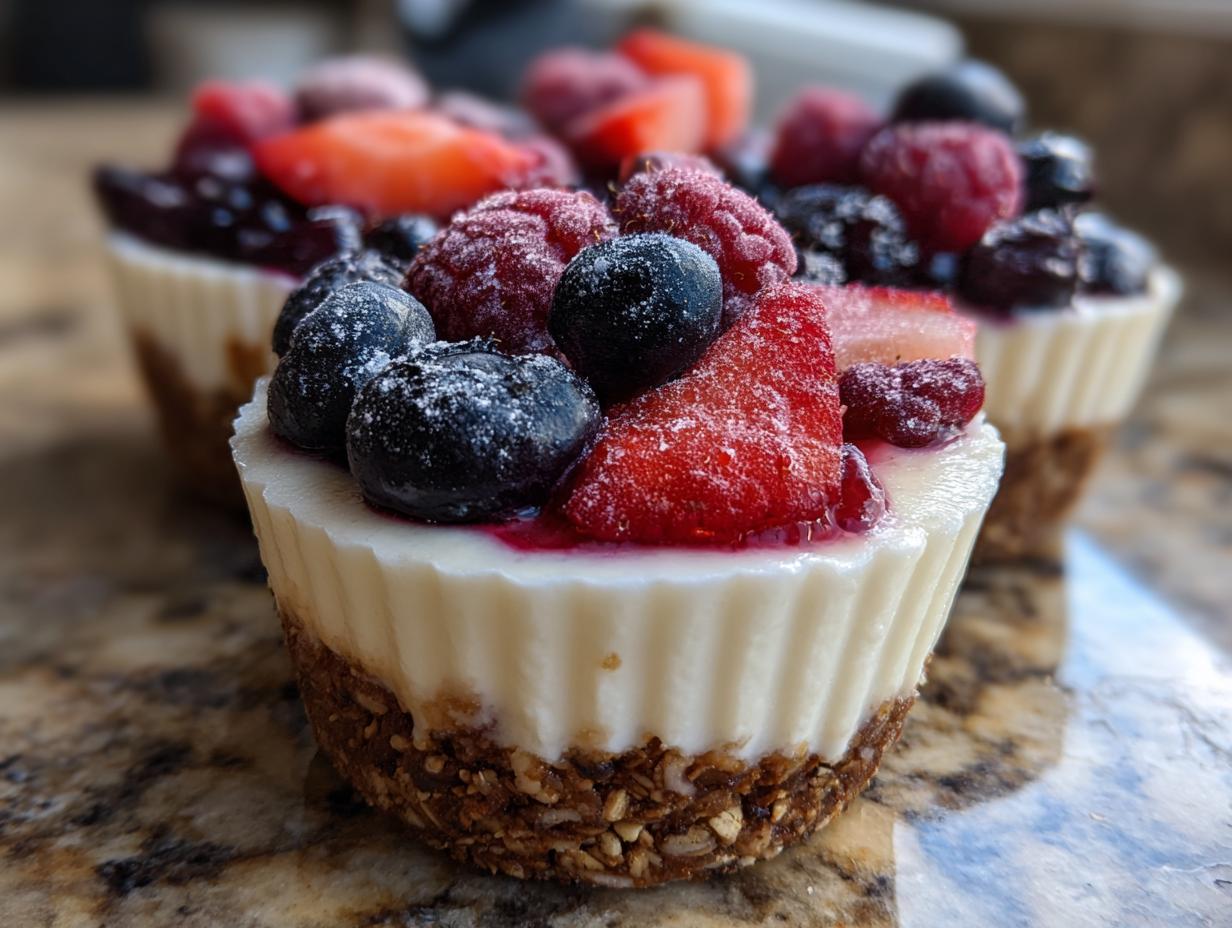
If you are tired of scrambling for something healthy when the morning alarm goes off, I have the answer for you! The Berry Yogurt Granola Freezer Cups Recipe is about to become your new favorite kitchen staple. I’m Jordan Bell, and I run the Easy Detox Recipes blog out of Asheville, NC. When I was working toward my 80-pound weight loss goal, I learned that convenience is everything, especially when trying to keep comfort food cravings clean.
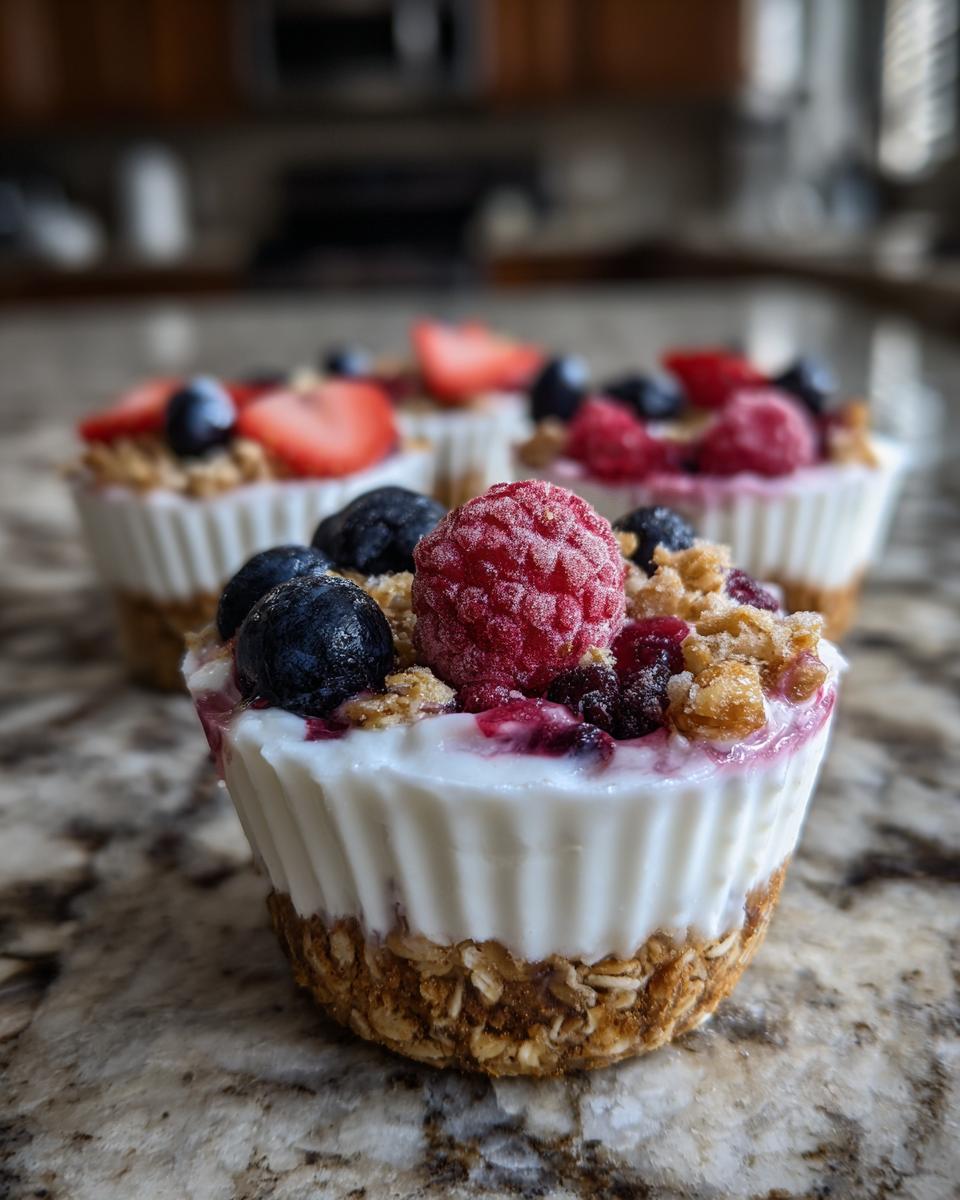
These layered cups are perfect because they give you a ready-to-eat, portion-controlled snack or breakfast straight from the freezer. Forget sugary cereals or complicated morning routines. These little gems mean you just grab one, wait three minutes, and you’ve got a perfectly balanced bite that tastes like a treat but works hard for your health goals. Trust me, once you see how easy this Berry Yogurt Granola Freezer Cups Recipe is, you’ll never look back!
Assembling Your Berry Yogurt Granola Freezer Cups Recipe Ingredients
Okay, making these grab and go breakfasts is really just a matter of organizing three distinct little jobs. We need to handle the crunchy bottom, the creamy middle, and the bright, fruity top. Don’t let the list scare you; it’s just three bowls of mixing! When you get everything ready beforehand, the assembly goes super fast. You’ll want to have your 12-cup muffin tin ready to go before you start mixing anything, because once that yogurt is ready, you want it in the tin fast.
Here is everything you need laid out clearly. I find that using a table helps me keep track of what goes where so I don’t accidentally mix the berries into the yogurt layer—oops!
| Layer | Ingredient | Amount |
|---|---|---|
| Base | Crunchy Granola | 1 and 1/2 cups |
| Base | Peanut or Almond Butter | 2 tablespoons |
| Base | Honey or Maple Syrup | 2 tablespoons |
| Base | Melted Coconut Oil | 1 tablespoon |
| Yogurt | Greek Yogurt (Plain or Vanilla) | 2 cups |
| Yogurt | Honey or Maple Syrup | 2 to 3 tablespoons (to taste) |
| Berry | Mixed Berries (Fresh or Frozen) | 1 and 1/2 cups |
| Berry | Honey or Maple Syrup | 1 tablespoon |
Granola Base Components for Your Berry Yogurt Granola Freezer Cups Recipe
This crust is what keeps the whole thing structurally sound once it’s frozen, so don’t skip the binding agents! You need that crunchy granola, of course, but it’s the peanut butter and the melted coconut oil that really glue it all together. Make sure your oil is melted—if it’s solid, it won’t coat the granola evenly. We mix that all up with just a touch of honey and salt until it feels like wet sand ready to be packed.
Crafting the Creamy Yogurt Layer
This is where you can really play with the sweetness! I use plain Greek yogurt because I like controlling the sugar, but vanilla works great too. Whisk the yogurt hard with your sweetener and a teaspoon of vanilla extract until it looks smooth and a little looser than when it came out of the tub. If it’s too stiff, it’s hard to spoon evenly over that crust we just made.
Preparing the Bright Berry Topping
The berries need just a little love before they go on top. Toss them with a little honey, and if you’re feeling fancy, that optional lemon zest really wakes everything up. If you are using bigger strawberries, just gently mash them a bit with the back of your spoon. We want them to release just a tiny bit of juice, but we don’t want a total berry soup on top of our nice yogurt layer!
Step-by-Step Instructions for the Berry Yogurt Granola Freezer Cups Recipe
Alright, let’s put this thing together! Since we aren’t actually baking anything, the prep work is key here. You’ll be working quickly once the yogurt is mixed, so have your muffin tin ready to go. Remember, these are going straight into the freezer, so we don’t need to worry about oven preheating, thank goodness!
Preparing the Muffin Tin and Granola Crust
First things first, line up those 12 cups in your standard muffin tin. I always use paper liners, but if you have silicone ones, even better! Give those liners a quick mist with nonstick spray—this is crucial, trust me. If you skip this, you’ll be fighting your frozen cups later. Now, take your fully combined granola mixture. Divide it up evenly into the 12 cups. This is important: grab the back of a spoon or a small measuring cup and press that granola down hard. You want a firm, packed crust at the bottom. If it’s loose, the whole cup will crumble when you try to eat it frozen.
Layering the Yogurt and Berry Toppings
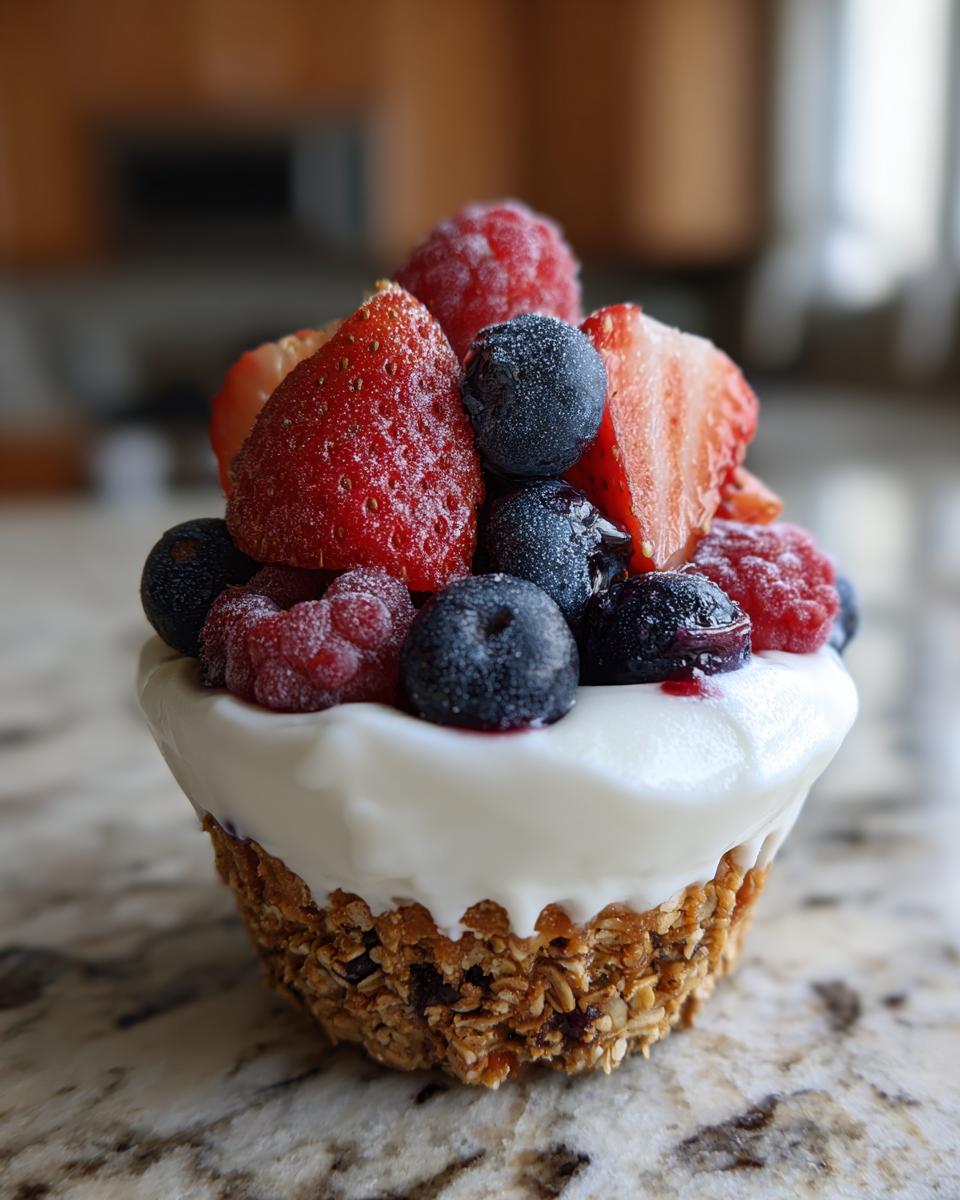
Next up is the yogurt layer. Spoon that whisked Greek yogurt mixture over the granola crusts, making sure you get an even amount in each cup. Try not to leave big air bubbles in there—just gently smooth the top with the back of your spoon. Now, take your prepared berries. Spoon the berry mix right on top of the yogurt. You can press a few of the berries down just slightly so they sit nestled in the yogurt, but leave some on top so they look pretty when they freeze. We want that nice, colorful contrast!
Freezing and Storing Your Berry Yogurt Granola Freezer Cups Recipe
Once everything is layered, gently tap the whole muffin tin on your counter a couple of times. This helps settle the layers and release any trapped air. Then, you need patience! Place the pan flat in the coldest part of your freezer. They need a good 4 to 5 hours to get completely rock solid, but honestly, I just leave mine overnight. When they are frozen solid, you can pop them out of the tin, peel those liners off, and transfer them into a heavy-duty freezer bag or airtight container. Make sure they are sealed up tight before they go back in for storage!
Preparing the Muffin Tin and Granola Crust
First things first, line up those 12 cups in your standard muffin tin. I always use paper liners, but if you have silicone ones, even better! Give those liners a quick mist with nonstick spray—this is crucial, trust me. If you skip this, you’ll be fighting your frozen cups later. Now, take your fully combined granola mixture. Divide it up evenly into the 12 cups. This is important: grab the back of a spoon or a small measuring cup and press that granola down hard. You want a firm, packed crust at the bottom. If it’s loose, the whole cup will crumble when you try to eat it frozen.
Layering the Yogurt and Berry Toppings
Next up is the yogurt layer. Spoon that whisked Greek yogurt mixture over the granola crusts, making sure you get an even amount in each cup. Try not to leave big air bubbles in there—just gently smooth the top with the back of your spoon. Now, take your prepared berries. Spoon the berry mix right on top of the yogurt. You can press a few of the berries down just slightly so they sit nestled in the yogurt, but leave some on top so they look pretty when they freeze. We want that nice, colorful contrast!
Freezing and Storing Your Berry Yogurt Granola Freezer Cups Recipe
Once everything is layered, gently tap the whole muffin tin on your counter a couple of times. This helps settle the layers and release any trapped air. Then, you need patience! Place the pan flat in the coldest part of your freezer. They need a good 4 to 5 hours to get completely rock solid, but honestly, I just leave mine overnight. When they are frozen solid, you can pop them out of the tin, peel those liners off, and transfer them into a heavy-duty freezer bag or airtight container. Make sure they are sealed up tight before they go back in for storage!
Essential Tips for Success with Your Berry Yogurt Granola Freezer Cups Recipe
Even though this is a no-bake recipe, there are a couple of little things that can go wrong if you rush, and I learned these the hard way! If you end up wrestling with a cup that won’t come out of the tin, or if the granola base falls apart the second you pull it out, don’t worry. It’s usually one of two simple fixes. My goal is for you to have perfect, handheld, portion-controlled snacks every time, just like I do for my easy detox routine. If you want more ideas on easy detox snacks, check out my low-calorie charcuterie chips recipe!
Achieving the Perfect Release from the Tin
I cannot stress enough how important that initial spray of nonstick is, even if you are using paper liners. The yogurt mixture can sometimes stick right to the paper when it’s frozen solid. My absolute best tip, born from ripping one too many liners, is using silicone liners if you have them. They peel away like magic! Also, make sure those cups are frozen rock hard—I mean totally solid—before you try to remove them. If they are even slightly soft, you’ll end up with a mushy mess instead of a crisp cup.
Adjusting Sweetness and Texture Before Freezing
Before you even think about putting the berries on top, taste that yogurt layer! Seriously, take a small spoon and test it. Since Greek yogurt can be quite tart, you might need that extra tablespoon of honey or maple syrup to balance it out. Also, go back and check your granola base. Give it one more good press down with the back of your spoon. You want that base to be tightly packed. If it’s crumbly when you press it in the tin, it will be crumbly when you try to eat it later!
Frequently Asked Questions About Your Berry Yogurt Granola Freezer Cups Recipe
I get so many questions about these little grab and go breakfast cups because everyone wants to make sure they come out perfectly! It’s simple stuff, but a few key details can make or break your batch. Here are the things people ask me most often about storing and enjoying their Berry Yogurt Granola Freezer Cups Recipe. For more tips on meal prep and easy recipes, follow my Pinterest board!
How long do the Berry Yogurt Granola Freezer Cups Recipe last in the freezer?
Since these are dairy-based, we want to keep them fresh! If you’ve sealed them up really well in an airtight container or a heavy-duty freezer bag, they are good to go for up to a month. I try to eat mine within the first two weeks for the absolute best texture, but they last longer than that. Just make sure they are completely sealed to avoid any freezer burn, which can make the granola taste a little stale.
Can I substitute the Greek yogurt in this Berry Yogurt Granola Freezer Cups Recipe?
You absolutely can! But you have to know you’re changing the game a little bit. Greek yogurt is thick and helps everything hold its shape nicely. If you use regular plain yogurt, it has much more water content, so your finished cups will likely be softer and might melt faster. If you use a dairy-free alternative like coconut yogurt, the texture might be a bit icier because of the fat content difference. I always recommend sticking to Greek yogurt for the firmest granola snack!
What is the best way to thaw these freezer cups before eating?
This is my favorite part of making these—the quick thaw! You do not want to eat them rock solid; the granola will break your teeth! I usually plan ahead and move one or two cups from the freezer into the refrigerator about an hour before I want to eat them. If you’re in a rush, just set them on the counter for about 3 to 5 minutes. That little bit of time softens the yogurt just enough so it’s creamy but still holds its shape perfectly.
Storing and Handling Your Berry Yogurt Granola Freezer Cups Recipe
When it comes to these dairy-based treats, safety is just as important as flavor, especially since we aren’t actually baking anything. The main thing you need to remember is that these are designed to be kept frozen solid. Once you take them out, time is ticking!
You should never leave these out on the counter for more than two hours total, period. That’s the rule I stick to for any food with dairy that isn’t actively being kept cold. If you plan to eat them later that day, you can keep them refrigerated, but remember they won’t last long once they start thawing. For more information on food safety and storage, you can check out resources like this article.
| Storage Location | Maximum Time |
|---|---|
| Freezer (Airtight) | Up to 1 Month |
| Refrigerator (Chilled) | Up to 3 Days |
| Room Temperature | Maximum 2 Hours |
Estimated Nutritional Information for the Berry Yogurt Granola Freezer Cups Recipe
I always like to keep an eye on what I’m eating, especially when I’m trying to keep things clean and light. Since these are portion-controlled, it’s easy to track! Remember these are just estimates, because the exact amount of honey or the type of granola you use will definitely shift the numbers. But this gives you a great baseline for enjoying your grab and go breakfast.
| Nutrient | Amount (Per Cup) |
|---|---|
| Serving Size | 1 freezer cup |
| Calories | 180 |
| Fat | 7 grams |
| Carbohydrates | 24 grams |
| Protein | 6 grams |
Share Your Berry Yogurt Granola Freezer Cups Recipe Experience
I truly hope these freezer cups help simplify your mornings! I’d love to hear how they worked out for you. Did you try using those silicone liners? Did you swap out the peanut butter for something else? Let me know your favorite substitutions in the comments below and don’t forget to give the recipe a rating so others can see how much you loved this easy snack!
Print
Amazing 12 Berry Yogurt Granola Freezer Cups Recipe
- Total Time: 4 hours 20 minutes
- Yield: 12 freezer cups
- Diet: Vegetarian
Description
Easy berry yogurt granola freezer cups made with Greek yogurt, mixed berries, and crunchy granola for grab and go breakfasts and snacks all week long. These layered cups offer a ready-to-eat, portion-controlled treat straight from the freezer.
Ingredients
- Granola base: 1 and 1 half cups crunchy granola
- Granola base: 2 tablespoons creamy peanut butter or almond butter
- Granola base: 2 tablespoons honey or maple syrup
- Granola base: 1 tablespoon melted coconut oil or neutral oil
- Granola base: Small pinch fine sea salt
- Yogurt layer: 2 cups plain or vanilla Greek yogurt
- Yogurt layer: 2 to 3 tablespoons honey or maple syrup
- Yogurt layer: 1 teaspoon vanilla extract
- Yogurt layer: Small pinch fine sea salt
- Berry layer: 1 and 1 half cups mixed berries such as blueberries, strawberries, and raspberries fresh or frozen
- Berry layer: 1 tablespoon honey or maple syrup
- Berry layer: 1 teaspoon lemon zest optional
- Berry layer: 1 tablespoon chia seeds or finely chopped nuts optional for extra texture
- To assemble: Nonstick spray or a little oil for the muffin tin
- To assemble: 12 cup standard muffin tin
- To assemble: Paper or silicone muffin liners
Instructions
- Line a 12 cup muffin tin with paper or silicone liners and lightly mist with nonstick spray so the cups release easily once frozen.
- In a medium bowl stir together the granola, peanut butter, honey, melted coconut oil, and salt until the granola is evenly coated and clumps together when pressed.
- Divide the granola mixture evenly among the 12 liners and press it firmly into an even layer on the bottom of each cup using the back of a spoon to form a packed crust.
- In a separate bowl whisk the Greek yogurt with honey, vanilla, and salt until smooth and slightly loosened so it is easy to spoon.
- Spoon the yogurt over the granola base, dividing it evenly between cups and gently smoothing the tops so there are no large air pockets.
- In another bowl toss the mixed berries with honey, lemon zest, and chia seeds or nuts if using, lightly mashing larger berries so they release a little juice.
- Spoon the berry mixture over the yogurt layer, pressing a few berries down into the yogurt and letting some sit on top for a pretty look.
- Tap the muffin tin gently on the counter to settle the layers, then place the pan flat in the freezer until the cups are completely firm, about 4 to 5 hours or overnight.
- Once frozen solid, pop the cups out of the muffin tin, peel away the liners, and transfer the freezer cups to an airtight container or freezer bag, then return to the freezer.
- For food safety, keep these dairy based snacks frozen or refrigerated and do not leave them at room temperature longer than 2 hours.
Notes
- Pack the granola base firmly so it holds together when you bite into the frozen cup.
- Use silicone muffin liners for easier release and better shape retention.
- Let cups sit at room temperature for 3 to 5 minutes before eating so the yogurt softens slightly.
- Taste your yogurt before sweetening and adjust honey to your preference.
- Store in an airtight container in the freezer for up to 1 month for best quality.
- If softening in the refrigerator, eat within 3 days.
- Prep Time: 20 minutes
- Cook Time: 0 minutes
- Category: Breakfast/Snack
- Method: Freezing
- Cuisine: American
Nutrition
- Serving Size: 1 freezer cup
- Calories: 180
- Sugar: Estimate varies
- Sodium: Estimate varies
- Fat: 7 grams
- Saturated Fat: Estimate varies
- Unsaturated Fat: Estimate varies
- Trans Fat: Estimate varies
- Carbohydrates: 24 grams
- Fiber: Estimate varies
- Protein: 6 grams
- Cholesterol: Estimate varies