
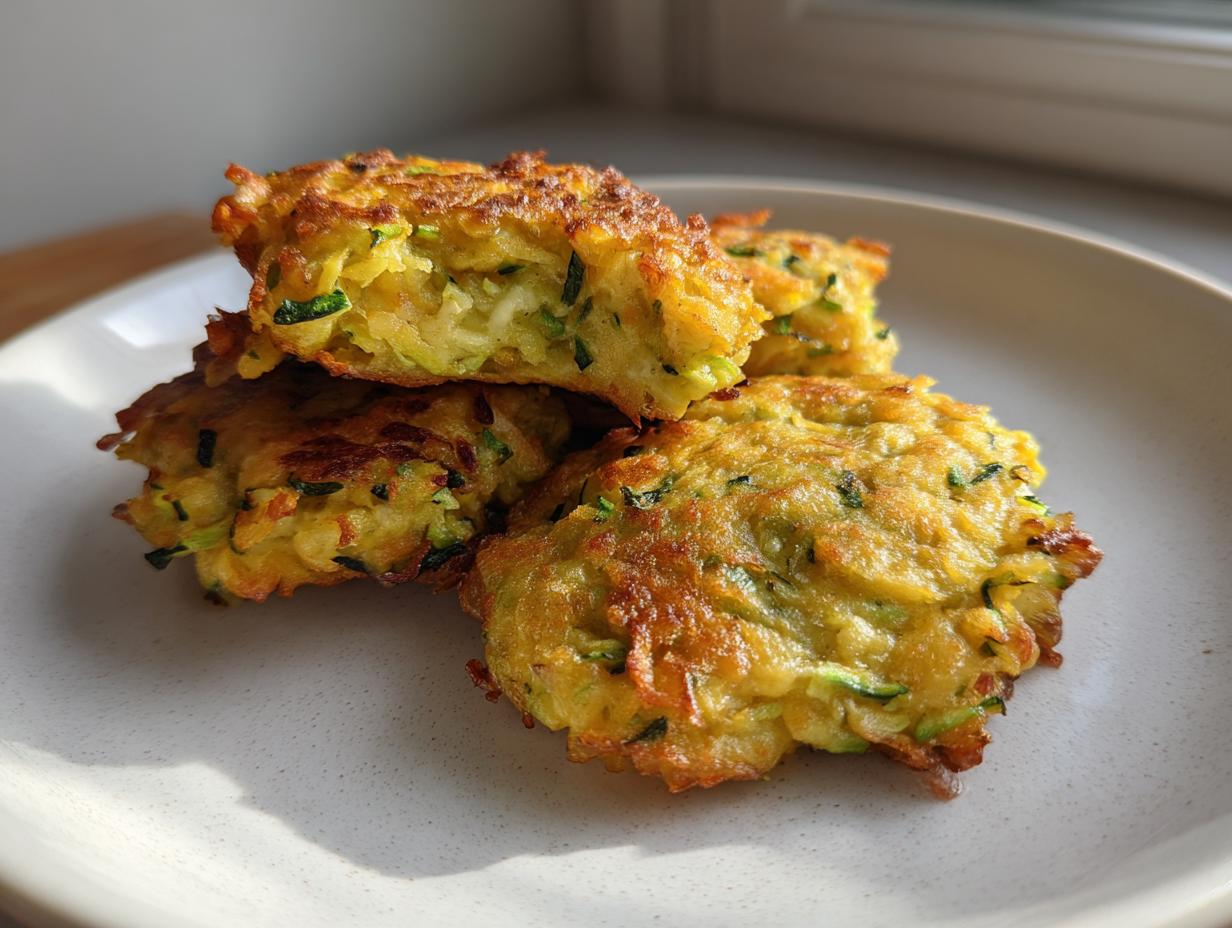
If you’ve ever wanted that satisfying crunch of a fried fritter without standing over a sizzling pan of oil, then oh boy, have I got the recipe for you! These baked zucchini fritters are my go-to side dish when I want something ridiculously tasty but don’t want to feel weighed down afterward. I used to fry mine—who didn’t?—but honestly, once I figured out the trick to getting them truly crispy in the oven, I never looked back.
The magic here isn’t in some fancy spice blend; it’s all about technique, specifically how we handle the zucchini before it even hits the baking sheet. Trust me, these oven-baked treats are just as good, if not better, than the fried ones. They come out golden, soft inside, and unbelievably neat to make!
Gather Your Ingredients for Baked Zucchini Fritters
Okay, the ingredient list for these baked zucchini fritters is super simple, which I love. When you’re working with fresh vegetables, you don’t need a million things throwing the flavor off balance. The quality of your zucchini really shines through here, so grab the firmest ones you can find at the market.
I’ve stuck to oat flour because it gives a slightly nuttier flavor than regular flour, but you can absolutely use all-purpose if that’s what you have on hand. And the nutritional yeast? It’s my little secret for that cheesy depth without adding actual cheese, but if you’re a Parmesan purist, go for it! Here’s what you need to pull together:
Essential Components for Baked Zucchini Fritters
| Ingredient | Preparation Note |
|---|---|
| 2 medium zucchini | About 1 pound total, grated |
| 1 teaspoon salt | Used specifically for drawing out moisture |
| 1 small onion | Finely grated |
| 2 garlic cloves | Minced super fine |
| 2 large eggs | Lightly whisked |
| &x2153; cup oat flour | Or all-purpose flour |
| 2 tablespoons nutritional yeast or grated Parmesan | For flavor depth |
| &xBD; teaspoon baking powder | Don’t skip this; it helps them puff slightly |
| &xBD; teaspoon black pepper | Freshly ground is best |
| 1 tablespoon olive oil | Plus extra for brushing the tops |
| 1 tablespoon chopped fresh dill or parsley | Optional, but I highly recommend the dill! |
| &xBD; teaspoon chili flakes | Optional, if you like a little kick |
Preparing the Zucchini: The Key Step for Baked Zucchini Fritters
Alright, listen up, because this is where 90% of people mess up their baked zucchini fritters. If you just grate the zucchini and throw it straight into the batter, you are going to end up with sad, soggy patties. We want crispy, golden edges, right? That means we have to commit to the draining process. It seems like an extra step, but trust me, it’s non-negotiable for oven baking.
First, you grate your zucchini—I use the medium side of the box grater—and then you immediately toss it with that teaspoon of salt. Don’t worry about the salt; we’re rinsing most of it out later. Let that sit for about ten minutes. You’ll actually see the moisture start pulling out onto the bowl surface. That’s the salt doing its job!
When the time is up, you grab the biggest, cleanest kitchen towel you have, or even a few layers of strong paper towels if you’re in a pinch. Pile all that salty zucchini right in the center. Now, twist it up tight—like you’re wringing out a wet sponge—and just squeeze. Squeeze like your life depends on getting every last drop out. Seriously, keep going until you think you can’t get any more water out, and then squeeze twice more!
Why Squeezing Water Out Matters for Baked Zucchini Fritters
It sounds dramatic, but it’s just simple kitchen physics. Zucchini is mostly water, and water turns to steam when it bakes. Steam equals sogginess! If you leave too much liquid in there, your batter becomes thin, and instead of baking up firm, it steams itself into mush on the baking sheet.
By removing that bulk of water ahead of time, you concentrate the zucchini flavor, and you leave room for the flour and eggs to actually hold the fritter together. Less water means the outside can crisp up beautifully under the high heat of the oven. It’s the difference between a dense, flavorful bite and something that collapses when you pick it up.
Step-by-Step Guide to Making Your Baked Zucchini Fritters
Now that we’ve handled the crucial water-squeezing part, assembling these baked zucchini fritters is quick work! Remember, we need the oven hot and ready to go. Before you even start mixing the batter, get that oven preheated to 400°F. I always line my baking sheet with parchment paper—it saves cleanup, and sometimes I give that paper a tiny brush of olive oil just to make sure nothing sticks.
Once your zucchini is bone-dry, you toss it into a big mixing bowl. This is where everything comes together. I like to add the onion and garlic right away because their flavors need to mingle with the zucchini. It smells amazing already, even before the baking starts!
Mixing the Batter for Perfect Baked Zucchini Fritters
We need to mix the wet and dry components separately in our minds, even if we toss them in one bowl. First, add your eggs, and then stir everything—the flour, the nutritional yeast (or Parmesan!), the baking powder, and that pepper. Stir it gently. You don’t want to overmix here! Overmixing makes the fritters tough, and we are aiming for tender on the inside.
If you’re using my favorite optional additions, like fresh dill or those little chili flakes, toss them in now. Just stir until you see no dry pockets of flour remaining. The batter will still look quite wet and loose because of the zucchini, but don’t panic! That’s exactly what you want. If it seems too loose, maybe add a tiny bit more flour, but usually, the recipe ratio is spot on if you squeezed hard enough.
Shaping and Oiling for Maximum Crispness
Time to get them onto the sheet! I use a regular tablespoon measure to scoop out the mixture—about two tablespoons per fritter. Try to keep them uniform in size, which helps them bake evenly. Place them on your prepared sheet, leaving a little space between each one so the hot air can circulate around them.
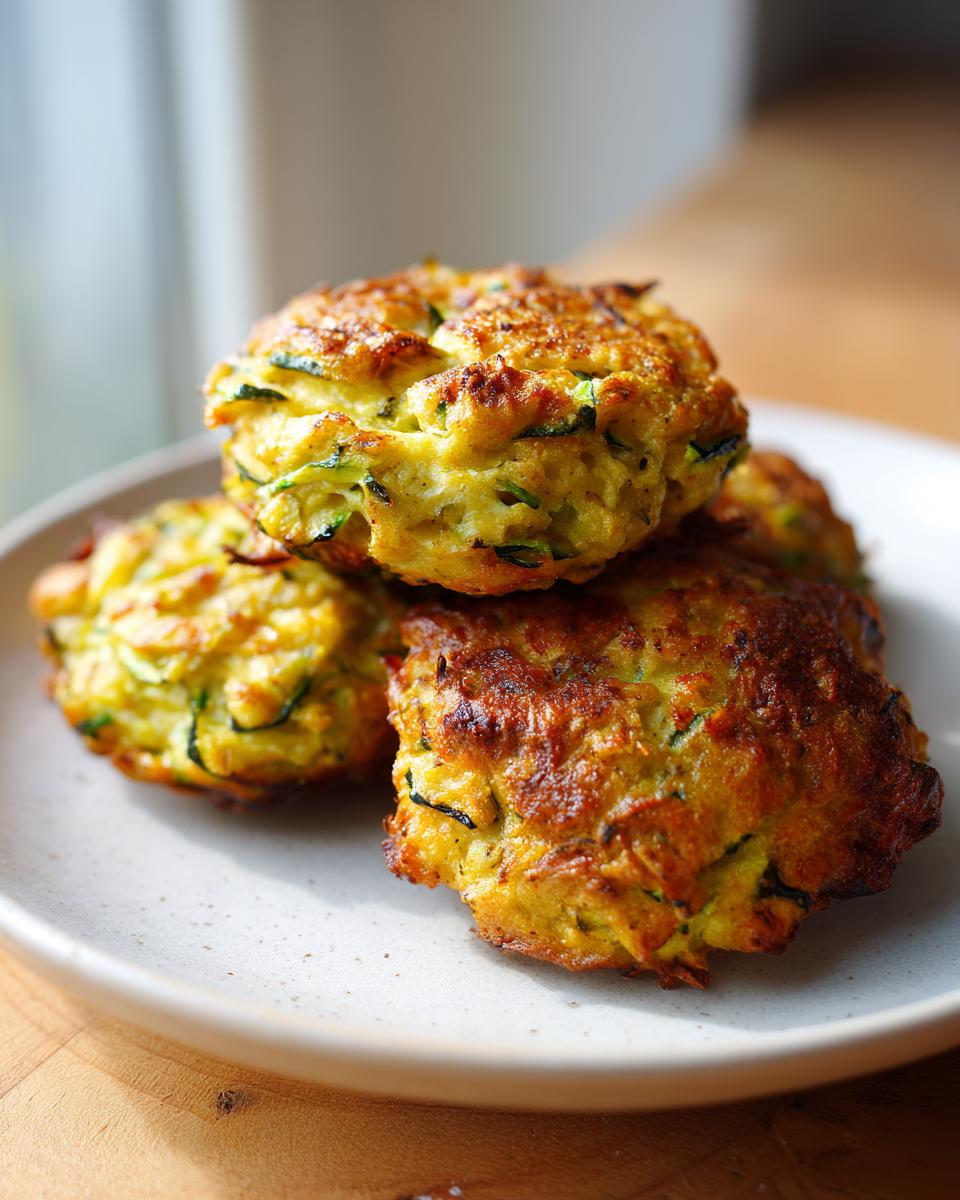
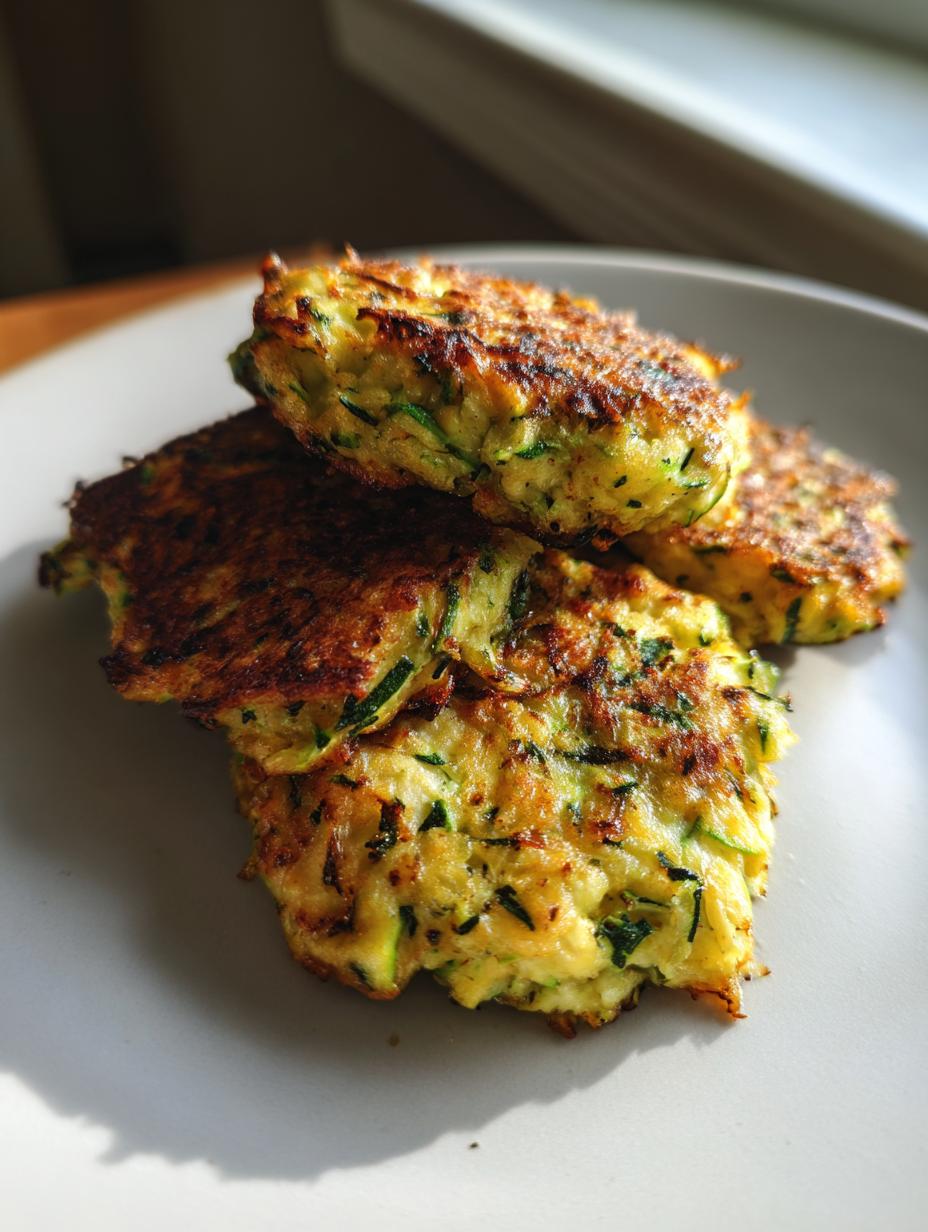
Here’s a pro tip for that golden finish: use a pastry brush to lightly paint the tops of each mound with a tiny bit more olive oil. This little bit of fat on the surface is what helps them brown up beautifully and get that satisfying crunch we are after. Flatten them just a bit with the back of the spoon—they won’t spread much once they hit the heat. Then, straight into that hot 400°F oven they go for about 20 to 25 minutes. Remember to flip them halfway through so both sides get that lovely golden color!
Tips for Success When Making Baked Zucchini Fritters
Honestly, baking these fritters is much more forgiving than frying, but there are still a few little things I’ve learned over the years that make them go from good to absolutely show-stopping. The biggest piece of advice I can give you is not to rush the heat. These need a nice, hot, dry environment to crisp up properly, especially since we aren’t using much oil.
If you’re tempted to overcrowd the baking sheet, don’t! I know it’s tempting when you’re making a big batch, but if the fritters are touching, they steam each other instead of baking. Use two sheets if you have to. Also, don’t be afraid to check the internal texture before you pull them out. They should feel firm to the touch.
Achieving Golden Brown Tops on Your Baked Zucchini Fritters
To guarantee that perfect golden-brown finish on both sides, the flip halfway through is essential, as I mentioned. But where you place the pan matters too. If your oven tends to have hot spots, try moving the pan from the middle rack to a slightly higher one for the last five minutes of baking. This directs more direct heat onto the surface.
If you pull them out at the 20-minute mark and they look pale but feel cooked through, just switch the oven setting to broil for 60 to 90 seconds. Keep your eye glued to the oven door during this time! Broiling happens fast, and you definitely don’t want to burn that hard-earned crispness. A quick blast under the broiler gives them that final, beautiful color boost.
Serving Suggestions for Your Baked Zucchini Fritters
Once these baked zucchini fritters cool just a touch—they are dangerously hot right out of the oven—it’s time to decide how to dress them up! Because they are already so flavorful and relatively light, you don’t need heavy sauces. My absolute favorite way to serve them is with a big dollop of plain Greek yogurt mixed with a tiny squeeze of fresh lemon juice and a pinch of salt.
That cool tang against the warm, savory fritter is just divine. If you want something a little richer, a simple tahini sauce works wonders. Just thin out some tahini paste with water until it drizzles nicely. If you’re serving these as a side dish for dinner, they are fantastic alongside grilled chicken or fish. They are so versatile, and honestly, my kids eat them plain because they love the texture so much!
Storing and Reheating Leftover Baked Zucchini Fritters
Don’t you hate when leftovers don’t taste as good the next day? With these baked zucchini fritters, we can keep that fresh-from-the-oven crispness alive! If you have any left—which is rare in my house, I’ll admit—the fridge is where they need to go. Make sure they cool completely before you try to store them, though. Storing warm food traps steam, and steam is the enemy of crispness, remember?
I find that placing them in an airtight container works well, but if you want to keep them extra crisp, layer them with paper towels between each layer. This helps wick away any residual moisture. They keep perfectly well for about three days, which is convenient for quick lunches! When it comes to reheating, we need the oven again to bring back that lovely texture.
Storage and Reheating Details for Baked Zucchini Fritters
| Storage Detail | Information |
|---|---|
| Storage Location | Airtight container in the refrigerator |
| Maximum Freshness | Up to 3 days |
| Reheating Temperature | 375°F |
| Reheating Time | Approximately 8 minutes |
Frequently Asked Questions About Baked Zucchini Fritters
I get so many questions about these little gems, mostly because people are skeptical that something baked can taste as good as something fried! I totally get it. But once you master the squeezing technique, you’ll see how easy it is to make a truly healthy version of this classic appetizer. You can see more tips and inspiration on my Medium page.
I’ve pulled together the most common things people ask me when they try this recipe for the first time. Hopefully, this clears up any last-minute worries before you jump into the kitchen! For visual ideas on presentation, check out my Pinterest boards.
Can I use a different type of flour in these Baked Zucchini Fritters?
Yes, absolutely! While I love the texture oat flour gives these healthy zucchini fritters, you can easily swap it out. If you don’t have oat flour, you can use standard all-purpose flour cup-for-cup. If you are trying to keep it gluten-free, almond flour works, but you might need to add an extra half-egg or a spoonful of binder since almond flour absorbs liquid differently. Just don’t skip the baking powder, no matter what flour you choose! If you are looking for other baked goods using alternative flours, check out my recipe for healthy blueberry oatmeal muffins.
Are these Baked Zucchini Fritters truly crispy without frying?
They really are! The crispiness comes from two non-negotiable steps: first, squeezing every drop of water out of that zucchini, and second, making sure you brush the tops lightly with olive oil before they go into that hot 400°F oven. The high heat combined with that little bit of fat on the surface mimics the effect of frying without all the mess. They come out perfectly golden and firm—I promise! For another crispy baked option, see my baked white beans.
Understanding the Nutrition in Your Baked Zucchini Fritters
I always get asked if these baked zucchini fritters are secretly loaded with oil because they taste so good, but the whole point was making them lighter! Since we are baking them instead of frying them, we cut down on a ton of unnecessary fat. It’s wonderful knowing you can enjoy a great appetizer or side dish without feeling guilty about it. If you are interested in other light side dishes, you might enjoy my simple healthy orzo weeknight meal.
Keep in mind that these numbers are just estimates. Since we are using fresh zucchini and the exact size of your veggies can vary, the final count might shift a little. But this gives you a great baseline for understanding what you’re eating when you whip up a batch of these healthy fritters!
Estimated Nutritional Breakdown for Baked Zucchini Fritters
| Nutrient (Per Fritter) | Estimate |
|---|---|
| Calories | 90 |
| Total Fat | 6g |
| Carbohydrates | 5g |
| Protein | 4g |

Super Good Baked Zucchini Fritters 9 Ways
- Total Time: 35 minutes
- Yield: 10 fritters 1x
- Diet: Vegetarian
Description
These baked zucchini fritters are crispy on the outside, soft inside, and made with simple ingredients. They offer a healthy, oven-baked alternative to the classic fried version.
Ingredients
- 2 medium zucchini (about 1 pound)
- 1 teaspoon salt (for draining moisture)
- 1 small onion, finely grated
- 2 garlic cloves, minced
- 2 large eggs
- ⅓ cup oat flour (or all-purpose flour)
- 2 tablespoons nutritional yeast or grated Parmesan
- ½ teaspoon baking powder
- ½ teaspoon black pepper
- 1 tablespoon olive oil
- 1 tablespoon chopped fresh dill or parsley (Optional Add-in)
- ½ teaspoon chili flakes (Optional Add-in)
Instructions
- Preheat oven to 400°F. Line a baking sheet with parchment paper and brush lightly with olive oil.
- Grate the zucchini and toss it with 1 teaspoon salt. Let it sit for 10 minutes. Use a clean towel or paper towels to squeeze out as much liquid as possible.
- In a large bowl, mix the drained zucchini, onion, garlic, eggs, flour, nutritional yeast, baking powder, black pepper, and any optional herbs. Stir until everything combines evenly.
- Scoop about 2 tablespoons of mixture per fritter onto the prepared baking sheet. Flatten each slightly with a spoon.
- Brush the tops lightly with olive oil for extra crispness.
- Bake for 20–25 minutes, flipping halfway through, until they are golden brown and crisp on both sides.
- Let the fritters cool slightly before you serve them.
Notes
- Serve with Greek yogurt, tahini sauce, or a simple lemon-garlic dip.
- Store leftovers in the fridge for up to 3 days.
- Reheat leftovers in the oven for 8 minutes at 375°F.
- Prep Time: 10 minutes
- Cook Time: 25 minutes
- Category: Appetizer/Side Dish
- Method: Baking
- Cuisine: American
Nutrition
- Serving Size: 1 fritter
- Calories: 90
- Sugar: N/A
- Sodium: N/A
- Fat: 6g
- Saturated Fat: N/A
- Unsaturated Fat: N/A
- Trans Fat: N/A
- Carbohydrates: 5g
- Fiber: N/A
- Protein: 4g
- Cholesterol: N/A
