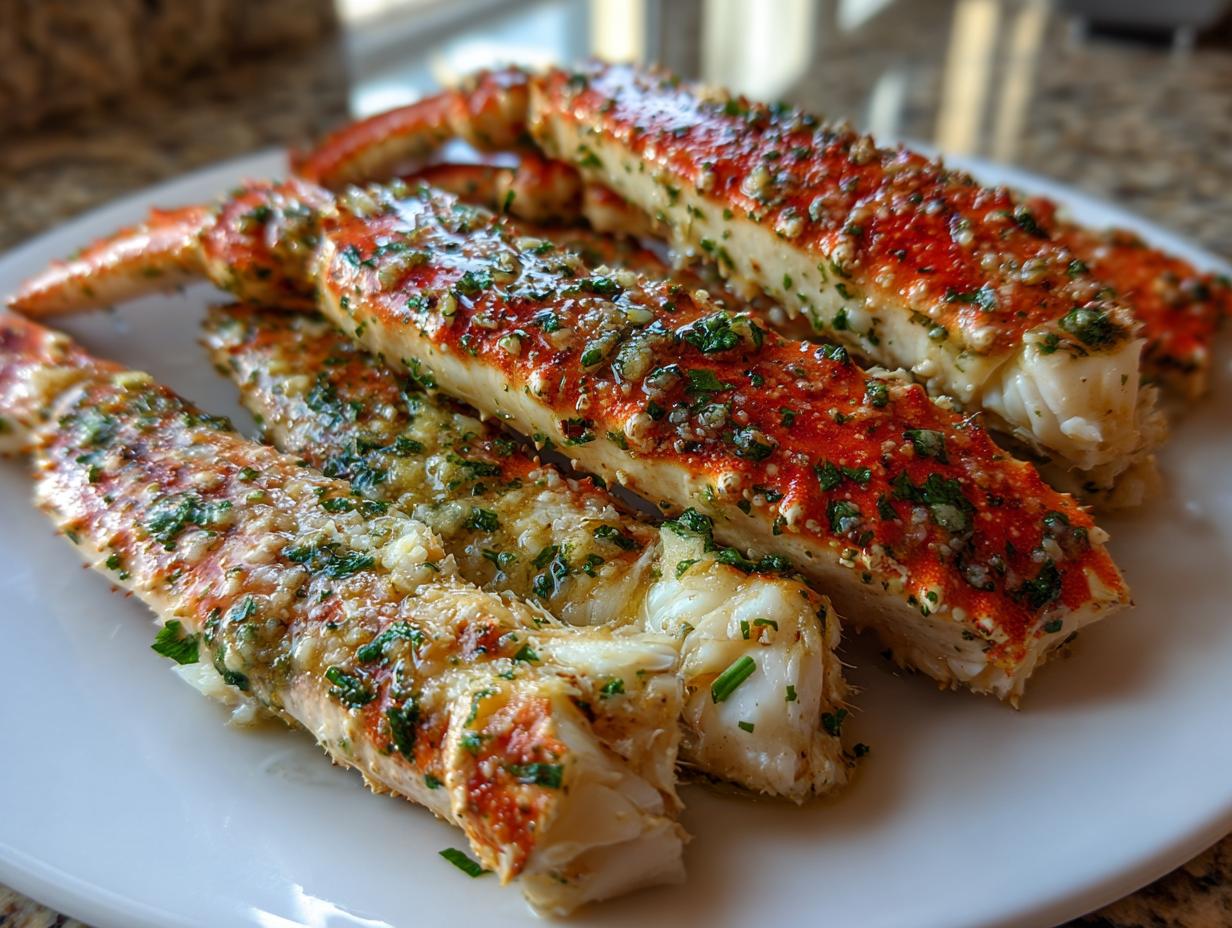
If you think amazing, sweet, tender crab legs are only for fancy seaside restaurants, you’ve got another thing coming! I’ve spent years messing around with steaming times and butter ratios, trying to nail that perfect bite you get when you’re sitting right on the ocean. And honestly, this garlic butter preparation is the magic trick.
Forget complicated techniques. This recipe is my go-to because it’s ridiculously simple—we’re talking under 30 minutes total—but the flavor payoff is huge. We use simple ingredients like fresh garlic and lemon to enhance the natural sweetness of the seafood, not cover it up. Trust me, once you taste these, you won’t go back to just plain steamed ones again. We’ve got three easy methods for cooking them, too, so no matter your kitchen setup, you’re winning tonight!
Essential Ingredients for Perfect Crab Legs
When you’re dealing with something as naturally delicious as seafood, the quality of your ingredients really shines through. You don’t need a huge shopping list, but every item matters, especially when cooking those beautiful crab legs. My philosophy is simple: use the best butter, the freshest aromatics, and don’t skimp on the lemon!
I always keep a bag of good quality frozen legs on hand because fresh isn’t always an option for me. The key is treating them right from the moment they leave the freezer. A few simple additions to melted butter completely transform them from good to absolutely incredible.
Selecting Your Crab Legs
You generally see King crab or Snow crab legs at the market, and both are fantastic, honestly. King crab legs are bigger, thicker, and have a richer meat, but Snow crab legs are sweeter and easier to handle when you’re serving a crowd. Either way, if you buy them frozen—which most of us do—you must thaw them safely.
The safest way to thaw is overnight in the fridge. If you’re in a rush, put them in a colander in the sink and run cool water over them for about 20 minutes until they are pliable. Never, ever use warm water or the microwave; it starts cooking the edges! Once thawed, pat them down really well with paper towels. Dry legs mean the butter sticks better!
Crafting the Flavorful Garlic Butter Sauce
This sauce is where the real flavor bomb happens. You need about a quarter cup of good unsalted butter—we want control over the saltiness, remember? Melt that down gently. Then, we hit it hard with fresh garlic. I mean really mince those cloves; you want that pungent punch!
Next up is the brightness: lemon zest and fresh lemon juice. The zest holds all the oils and fragrance, so don’t skip it! We finish the mixture with a tiny bit of smoked paprika. That paprika adds the slightest whisper of smoke that makes people ask, “Wait, did you grill these?” A little salt and pepper just pulls it all together. Stir it well and set it aside while you steam or bake!
Equipment Needed for Preparation
You don’t need a full commercial kitchen for this, thank goodness! Having the right few tools makes the process smooth sailing. For steaming, you absolutely need a large pot with a tight-fitting lid and a steamer basket that sits above the water line. If you plan to bake them, grab a sturdy baking sheet—no fancy rims needed.
Also, make sure you have a small saucepan for gently melting that glorious butter mixture, a good sharp knife for mincing the garlic, and plenty of paper towels. Seriously, paper towels are your best friend here!
Preparation Steps for Crab Legs
Before we even think about heat, we have to handle the thawing, like we talked about earlier. If you thawed them overnight in the fridge, that’s perfect. Take them out about 15 minutes before you start mixing the butter so they aren’t ice-cold!
The most important step after thawing is drying them off. Get those paper towels and pat every single piece until it feels relatively dry to the touch. If the shells are wet, the garlic butter just slides right off into the steam or the oven floor instead of clinging to the meat where it belongs. This attention to detail is what separates a good batch from a fantastic one!
How to Prepare Crab Legs Using Three Methods
Okay, now for the fun part—cooking them! I love that this recipe gives you options because sometimes you want that gentle steam, and sometimes you want a little char from the grill. No matter which route you take, make sure you’ve already brushed those legs generously with that fragrant garlic butter mixture we whipped up. That coating is your shield and your flavor booster!
Steaming Crab Legs to Perfection
Steaming is my favorite way to get the meat tender and sweet without drying it out at all. Grab your biggest pot—the one that fits everything comfortably. You only need about two inches of water in the bottom, nothing more, because we don’t want the water level touching the steamer basket!
Bring that water to a rolling, vigorous boil first. Once it’s boiling hard, gently place your butter-brushed crab legs into the basket, cover it tightly, and let them steam for about 6 to 8 minutes. Don’t lift the lid to check! After about 7 minutes, peek quickly; if the shells look bright red and the meat looks opaque, they are done. Brush them with any leftover butter right before serving.
Baking Crab Legs for Rich Flavor
If you want a slightly richer flavor that locks in all that garlic butter goodness, baking is the way to go. Preheat your oven to 375 degrees Fahrenheit. Lay the legs out in a single layer on a standard baking sheet—make sure they are well-coated with the butter!
These bake fairly quickly, usually 15 to 18 minutes total. The key here is technique: after about 8 minutes, use tongs to flip every single leg over so the butter gets right into the crevices on both sides. This ensures even heating. The shells will look slightly toasted when they are ready. These baked crab legs come out tasting almost oven-roasted!
Grilling Crab Legs for a Smoky Finish
For that special occasion vibe, hitting the grill adds an amazing smoky element that pairs unbelievably well with the lemon and garlic. Get your grill heated up to medium-high heat, aiming for about 400 degrees Fahrenheit. You want it hot enough to sear a little but not so hot that the butter burns instantly.
Place the buttered legs directly onto the grates. You’ll grill them for about 5 to 7 minutes on the first side until you see some nice char marks starting to appear. Flip them carefully—they can be slippery—and grill the other side for another 5 to 7 minutes. Watch them closely; the goal is a slight char, not incinerated crab!
Tips for Success with Your Crab Legs
I know how easy it is to get distracted when you have a big pot bubbling or an oven running, but with seafood, timing is everything! Overcooking turns sweet, tender crab meat into something disappointingly tough. We want that melt-in-your-mouth experience, not a rubbery chew, so pay attention to these little cues I’ve learned over the years.
Avoiding Overcooking
The biggest mistake people make is cooking the crab legs until they look dry. Remember, whether you steam or bake, the meat is already cooked when you buy it frozen; we are just reheating it gently! Look for the shell color to be a vibrant red, and the meat inside should look opaque, meaning it’s no longer translucent or grayish.
If you pull a piece of meat out and it flakes easily under the pressure of a fork, you’ve hit the sweet spot. If you have to really yank it out, it’s probably gone too far. Trust your nose, too—when they smell wonderfully garlicky and sweet, pull them off the heat immediately!
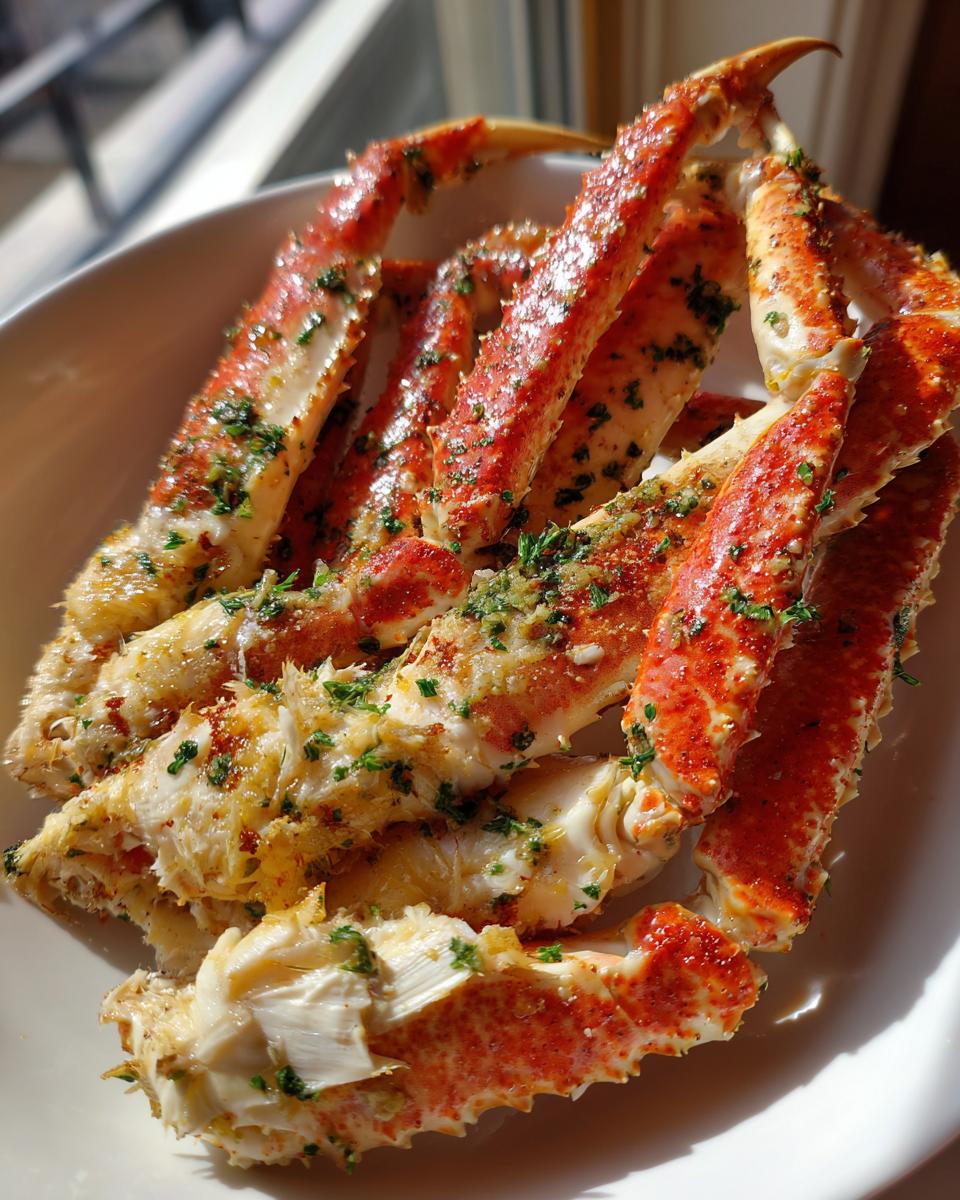
Serving Suggestions for Your Crab Legs
Once those beautiful, glistening garlic butter crab legs are piled high on the platter, you need the perfect company for them! You don’t want heavy, competing flavors; you want things that soak up all that leftover butter sauce. My absolute favorite pairing is a crusty, fresh baguette. Slice it thick and toast it lightly—that bread is the perfect vehicle for scooping up every last drop of garlic goodness from the bottom of your bowl.
For vegetables, keep it light and bright. I love serving mine with simple steamed asparagus tossed with just a tiny squeeze of lemon, or maybe a fresh, crisp green salad with a light vinaigrette. Avoid anything too creamy or rich. We want the focus to remain squarely on that sweet crab meat and that incredible garlic butter infusion!
Storing and Reheating Leftover Crab Legs
It’s rare that we have leftovers because everyone dives in, but when we do, I treat them like gold! You absolutely want to store cooked crab legs properly so they don’t get mushy or pick up any weird fridge smells. The goal when reheating is to gently warm them back up—no aggressive boiling or baking!
The key to success here is moisture. If you reheat them too fast, they dry out instantly. I always keep a little bowl of plain butter nearby for reheating because it helps keep the meat hydrated. Never just throw them back in a hot oven uncovered; that’s a recipe for tough seafood! You can find more tips on food preparation on my Medium profile.
Storage Guidelines for Cooked Crab Legs
The moment the meal is over, get those shells tucked away. Transfer any leftover crab legs into a shallow, airtight container. You can line the bottom of the container with a slightly damp paper towel before adding the legs—this extra humidity helps keep them from drying out in the cold air.
If you stick to these rules, your cooked crab legs should stay perfectly good in the refrigerator for about two to three days. Beyond that, the texture really starts to change, so I recommend freezing anything you won’t eat within that window. Here’s a quick rundown of what to expect:
| Storage Method | Recommended Duration | Best Reheating Tip |
|---|---|---|
| Refrigerator (Airtight) | 2-3 Days | Gentle steam or microwave briefly with a splash of water. |
| Freezer (Heavy-duty wrap) | Up to 3 Months | Thaw overnight in the fridge before reheating. |
Frequently Asked Questions About Crab Legs
I get so many emails asking about specific steps, especially when people are trying this for the first time. Don’t worry if you have questions! Cooking seafood can feel intimidating, but honestly, these garlic butter crab legs are so forgiving. Here are the most common things I hear from folks trying out this recipe. For more visual inspiration, check out my Pinterest boards.
What is the Safest Way to Thaw Frozen Crab Legs?
This is a big one for food safety, and you should never rush it! The absolute best and safest way to thaw your frozen crab legs is overnight in the refrigerator. Just make sure they are in a container or colander so any melted ice water doesn’t drip onto other foods. If you forget and need them faster, place them in a colander in the sink and run cool, clean tap water over them for about 20 minutes. Remember, never use warm water—that starts cooking the outside!
Can I Substitute the Fresh Parsley in the Garlic Butter?
Yes, absolutely, you can switch up the herbs! While I love the fresh, grassy flavor that parsley brings to balance the rich butter, it’s not the only option. If you don’t have parsley on hand, fresh dill is a wonderful substitute, especially if you love a slightly more savory flavor profile. Chives also work beautifully and add a very mild oniony lift.
Just try to stick to fresh herbs if you can; dried herbs are much less potent and won’t give you that bright pop of flavor we are looking for in this sauce. If you only have dried, cut the amount in half, but fresh is always worth the trip to the market! If you are looking for other quick seafood recipes, check out this one-pan Cajun shrimp idea.
Print
Amazing 3-Minute Crab Legs Flavor Secret
- Total Time: 25 minutes
- Yield: 4 servings 1x
- Diet: N/A
Description
These garlic butter crab legs are tender, sweet, and simple to prepare. You can steam or bake them for a rich, restaurant-quality seafood meal at home.
Ingredients
- 2 pounds crab legs (king or snow, thawed if frozen)
- ¼ cup unsalted butter, melted
- 2 garlic cloves, minced
- 1 teaspoon lemon zest
- 1 tablespoon lemon juice
- 1 tablespoon chopped parsley
- ¼ teaspoon smoked paprika
- ¼ teaspoon salt
- ¼ teaspoon black pepper
- Extra melted butter for dipping
- Lemon wedges
Instructions
- If using frozen crab legs, thaw them overnight in the refrigerator or under cool running water. Pat them dry with paper towels.
- Melt the butter in a small saucepan over medium heat. Stir in the garlic, lemon zest, lemon juice, parsley, paprika, salt, and pepper. Remove the mixture from the heat.
- To steam: Fill a large pot with 2 inches of water and place a steamer basket inside. Bring the water to a boil, then add the crab legs. Cover and steam for 6–8 minutes until heated through. Brush with garlic butter before serving.
- To bake (alternative): Preheat your oven to 375°F. Arrange the crab legs on a baking sheet and brush with garlic butter. Bake for 15–18 minutes, flipping them halfway through.
- To grill (optional): Preheat your grill to medium-high heat (400°F). Brush the crab legs with garlic butter and grill for 5–7 minutes per side until slightly charred.
- Transfer the crab legs to a platter. Drizzle with extra butter and serve with lemon wedges.
Notes
- Thawing frozen crab legs overnight in the refrigerator is the safest method.
- You can substitute the parsley with other fresh herbs like dill or chives.
- Prep Time: 10 minutes
- Cook Time: 15 minutes
- Category: Seafood
- Method: Steaming, Baking, Grilling
- Cuisine: American
Nutrition
- Serving Size: 1 serving
- Calories: 210
- Sugar: 0g
- Sodium: N/A
- Fat: 12g
- Saturated Fat: N/A
- Unsaturated Fat: N/A
- Trans Fat: N/A
- Carbohydrates: 0g
- Fiber: 0g
- Protein: 22g
- Cholesterol: N/A