

Oh my gosh, you are going to *love* this. Forget those soggy, sad takeout containers you end up with on a Tuesday night! Seriously, this High Protein Chicken Fried Rice Better Than Takeout is my secret weapon for busy weeks. I used to stress about what to make when the fridge looked sparse, but now I just reach for the pantry staples.
The whole process is shockingly fast—we’re talking less than 30 minutes total. That’s faster than delivery, honestly! I started tweaking my old recipe because I wanted something that actually kept me full through the afternoon slump, and adding that extra chicken really did the trick. It’s all about that high heat and getting the ingredients just right.
My goal here was simple: make a one-pan wonder that tastes exactly like the good stuff from that little restaurant downtown, but with way more satisfying protein. Trust me, once you nail the rice toasting step, you’ll never go back to just stirring everything together cold. Get ready for your new favorite dinner!
Essential Ingredients for High Protein Chicken Fried Rice Better Than Takeout
When you’re aiming for something truly High Protein Chicken Fried Rice Better Than Takeout, you can’t just throw everything in willy-nilly. Every ingredient has a job to do, especially when we’re trying to maximize flavor in one pan! The measurements are really important here, so pull out your measuring spoons, okay?
If you skip the prep work on these few items, the final dish won’t have that perfect texture we’re looking for. It’s all about setting yourself up for success before the heat goes on!
Protein and Base Components
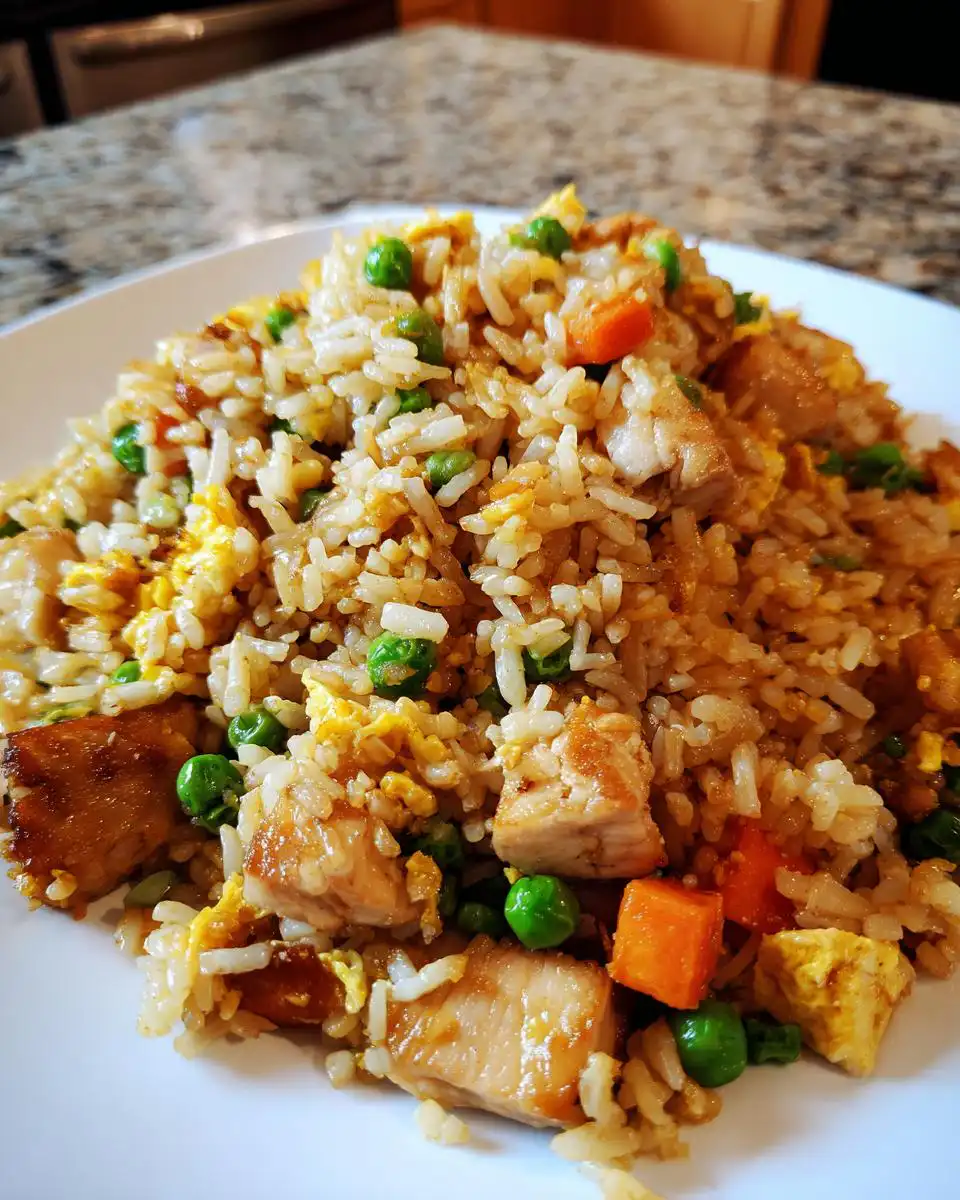
The star, of course, is the chicken. We need a full pound of boneless, skinless breast, cut up into nice, small cubes. Season it simply with just a bit of salt and pepper before it hits the pan—we don’t want to overpower the soy sauce later. Now, for the base: the rice! You absolutely must use 3 cups of rice that is already cooked and, this is key, completely cooled. Cold rice fries up beautifully and doesn’t turn mushy. Warm rice? Instant disaster, trust me.
Vegetables and Aromatics
We keep the veggies straightforward but flavorful. You’ll need one small yellow onion, diced up small so it melts into the background a bit. A medium carrot needs peeling and dicing too, giving us that little bit of sweetness and crunch. And don’t forget the frozen peas—no need to thaw those, they go straight in! Finally, we need three green onions thinly sliced, and a good three cloves of garlic that you must mince fine.
Flavor Builders
The oils are crucial for that authentic taste and preventing sticking. We use avocado oil because it handles the high heat we need, dividing it up across the steps. For the sauce, low-sodium soy sauce is what I stick to—we get enough salt from the seasoning, and low-sodium lets you control things better. The secret pop of flavor comes from toasted sesame oil. Add that right at the end for maximum aroma!
Equipment Needed for This One Pan Meal
Because we are making this the easy way—the one pan meal way—you don’t need a mountain of dishes! The absolute most important thing you need is a large skillet or, even better, a wok. You need that big surface area so the rice can actually toast instead of just steaming.
Make sure your skillet is big enough to hold everything comfortably when we toss it all back in later. You’ll also need a decent spatula for stirring that rice around at high heat, and of course, a cutting board and knife for all that chopping you just did. That’s it! Easy cleanup!
Step-by-Step Instructions for High Protein Chicken Fried Rice Better Than Takeout
Okay, this is where the magic happens! We’re moving fast now, so keep your heat high and your spatula moving. This whole process is designed to build layers of flavor quickly so you can have your amazing High Protein Chicken Fried Rice Better Than Takeout on the table in minutes.
Preparing the Rice Texture
First things first: we need that texture! Get your largest skillet or wok hot—we mean *high* heat. Add just one tablespoon of that avocado oil. Once it shimmers, toss in your cold, cooked rice. Don’t be shy! You need to stir this constantly for about 3 to 4 minutes. You’re listening for a slight crackling sound and you want the grains to look a little dry and toasted, not clumped together. Once it looks happy, scoop it all out into a bowl and set it aside. Don’t wipe out the pan!
Cooking the Chicken for Protein Content
Lower the heat just a tiny bit to medium-high for the chicken. Add the second tablespoon of oil and then your cubed, seasoned chicken. Give it a good stir every minute or so. It should take about 6 to 7 minutes to cook through completely. This is important for food safety, so make sure it looks opaque all the way through. I usually check one piece just to be sure it hits 165°F internally, just like the recipe says. Once it’s done, pull that protein out and put it in the bowl with the rice.
Sautéing Vegetables and Aromatics
Now for the third tablespoon of oil. This is for our veggies. Toss in the diced onion and carrot. Let them cook for maybe 2 or 3 minutes until they start to soften up a bit. Once they’ve softened, throw in the minced garlic, the frozen peas, and the thinly sliced green onions. Garlic burns fast, so you only cook this mixture for about 30 seconds until you can really smell that great fragrance. That’s your cue!
Combining and Finishing the High Protein Chicken Fried Rice Better Than Takeout
Time to bring it all home! Return the toasted rice and the cooked chicken back into the skillet with the veggies. Drizzle in your low-sodium soy sauce and that precious toasted sesame oil. Stir everything together really well so every grain gets coated in flavor. Now, here’s the classic trick: push all that rice mixture up the sides of the pan, creating a clear spot in the very center. Pour your lightly beaten eggs right into that empty space. Let them sit for just a moment, then gently scramble them right there in the middle. When the eggs are almost set, stir everything together one last time. Cook for another 2 or 3 minutes until everything is piping hot and combined. That’s it! You’ve made the best High Protein Chicken Fried Rice Better Than Takeout!

Expert Tips for High Protein Chicken Fried Rice Better Than Takeout Success
You want this to taste like the takeout spot, right? The biggest secret to achieving High Protein Chicken Fried Rice Better Than Takeout isn’t really a secret ingredient—it’s heat management! Never crowd your pan. If you try to cook the rice and the chicken all at once, the temperature drops, and you end up steaming your food instead of frying it. That’s how you get mushy rice.
Keep your heat on high whenever the rice or chicken is in there. If you start seeing smoke, that’s fine, but if you see your oil burning, pull the pan off the heat for 15 seconds, stir, and put it right back on. Also, remember what I said about the cold rice? That’s non-negotiable for the best texture. Cold rice separates beautifully; warm rice sticks together like glue. Follow those two rules—high heat and cold rice—and you’ll nail this flavor profile every single time! If you want more quick dinner ideas, check out my simple healthy orzo weeknight meal.
Variations on Your Quick Chicken Fried Rice
Now that you have the perfect base for your quick chicken fried rice, feel free to experiment a little bit! The structure of this recipe is so solid that it handles swaps really well. If you aren’t big on peas, swap them out for some frozen corn or even some chopped water chestnuts if you want extra crunch.
You can easily boost the veggie count by tossing in some finely chopped red bell pepper along with the carrots. For herbs, while the green onions are mandatory for that fresh bite, a tiny dash of fresh cilantro mixed in right at the end can give it a totally different, brighter flavor profile. Just remember, if you add wet veggies, make sure you cook them down a little longer so they don’t release too much water into the pan during the final mix!
Frequently Asked Questions About This Recipe
I get so many questions about this recipe because everyone wants that perfect texture! Here are the things I hear most often when people are trying to make their High Protein Chicken Fried Rice Better Than Takeout for the first time.
Can I use brown rice instead of white rice in this High Protein Chicken Fried Rice Better Than Takeout?
Yes, you absolutely can swap it out, but you have to adjust your expectations slightly. Brown rice is chewier and denser than the long-grain white rice we use here. Because of that, it won’t toast up quite as fluffy when you fry it. If you use brown rice for this High Protein Chicken Fried Rice Better Than Takeout, you might need to keep it on the high heat for an extra minute or two during that initial toasting phase to dry it out enough. It will still be delicious, just a different texture!
How far in advance can I cook the rice for meal prep?
For the best results in your meal prep containers, you should let the rice cool down completely before you even think about putting it into an airtight container. Ideally, you cook the rice the day before. If you try to use warm rice, the steam gets trapped in the container, and you end up with a sticky block when you reheat it later. Letting it cool on a sheet pan speeds this up! For more meal prep ideas, check out my high protein honey sesame chicken rice meal prep.
What is the best way to increase the protein further?
If you are really focused on maximizing that protein, you have a few great options! You can easily double the amount of chicken, of course. But for variety, try adding 1/2 cup of shelled edamame along with your frozen peas—they are little protein powerhouses. Or, if you want a meatless addition, press extra-firm tofu really well, cube it, and cook it right alongside the chicken in step two!
Storing and Reheating Your Leftover High Protein Chicken Fried Rice Better Than Takeout
One of the best things about making this High Protein Chicken Fried Rice Better Than Takeout is that it’s practically designed for leftovers! It tastes just as good the next day, maybe even better because the flavors have time to really marry together. You just need to follow two simple rules to keep it tasting fresh, not rubbery.
Don’t leave it sitting out too long, especially with the egg and chicken in there. Get it into the fridge as soon as you’re done eating! If you want to see more of my favorite recipes, follow along on Medium.
Proper Storage Guidelines
The note I put in the recipe is serious: cool those leftovers down quickly! Put the High Protein Chicken Fried Rice Better Than Takeout into small, airtight containers. Don’t pile it too high, as that can trap heat. You can safely keep this in the refrigerator for up to three days. If you try to push it past that, you risk losing that great texture we worked so hard for.
Reheating Methods
For reheating, you have two great options depending on how much time you have. The microwave is fastest: just pop a portion in, cover it with a damp paper towel (this adds a little steam back in), and heat in short 45-second bursts, stirring in between. If you want it *truly* like takeout, use a non-stick skillet over medium heat. Add a tiny splash of water or a drizzle of soy sauce, cover it for a minute to steam, then uncover and stir until heated through. That skillet method really brings back the crispness! You can also find more visual inspiration on Pinterest.
Print
Amazing High Protein Chicken Fried Rice Better Than Takeout
- Total Time: 30 minutes
- Yield: 4 servings
- Diet: N/A
Description
This high protein chicken fried rice is quick, flavorful, and perfect for weeknight dinners or meal prep using simple pantry ingredients. It cooks in one pan and tastes better than takeout.
Ingredients
- 1 pound boneless skinless chicken breast cut into small cubes
- ¾ teaspoon kosher salt
- ½ teaspoon black pepper
- 3 cups cooked and cooled long grain white rice
- 3 tablespoons avocado oil divided
- 1 small yellow onion diced
- 1 medium carrot peeled and diced
- ¾ cup frozen peas
- 3 green onions thinly sliced
- 3 cloves garlic minced
- 3 tablespoons low sodium soy sauce
- 1 ½ teaspoons toasted sesame oil
- 3 large eggs lightly beaten
Instructions
- Heat 1 tablespoon avocado oil in a large skillet or wok over high heat. Add the rice and cook for 3 to 4 minutes, stirring often, until lightly toasted. Transfer rice to a bowl.
- Reduce heat to medium high and add 1 tablespoon avocado oil. Add the chicken, season with salt and pepper, and cook for 6 to 7 minutes, stirring occasionally, until cooked through. Remove chicken from the skillet.
- Add remaining 1 tablespoon avocado oil to the skillet. Add onion and carrot and cook for 2 to 3 minutes until softened.
- Stir in garlic, peas, and green onions and cook for 30 seconds until fragrant.
- Return rice and chicken to the skillet. Add soy sauce and sesame oil and stir to combine.
- Push the rice mixture to the sides of the skillet. Pour eggs into the center and scramble gently.
- Stir everything together and cook for 2 to 3 minutes until eggs are set and evenly distributed.
- Cook until chicken reaches an internal temperature of 165°F, then remove from heat and serve hot.
Notes
- Cool leftovers quickly and refrigerate in airtight containers for up to 3 days.
- Prep Time: 10 minutes
- Cook Time: 20 minutes
- Category: Dinner
- Method: Skillet
- Cuisine: Asian


