I’ve baked bread my whole life, from fussy sourdough starters to quick skillet loaves, but nothing beats the sheer joy of pulling a perfect, rustic loaf out of the oven with almost zero effort. Seriously, this No Knead Honey Oatmeal Artisan Bread is my new obsession! It’s that perfect blend of rustic charm—thanks to the oats and seeds—with a wonderful, subtle sweetness from the honey that just sings.
I developed this recipe after years of trying to get that bakery-quality crust without having to stand over a mixer for twenty minutes. The magic here is the hydration level and the little bit of milk we sneak in, which keeps the crumb incredibly soft even though we skip the kneading entirely. It’s the bread I make when I want something impressive but honestly don’t have the energy for a big production.
Trust me, once you see that shaggy dough transform over a couple of hours, you’ll realize you’ve unlocked the easiest artisan bread secret ever. It’s so forgiving!
Essential Components for Your No Knead Honey Oatmeal Artisan Bread
Getting this No Knead Honey Oatmeal Artisan Bread right starts with having the right players in the game. Since we aren’t kneading, the ingredients really have to work together perfectly to develop the structure we want, especially with all those lovely grains thrown in. Don’t panic about the long ingredient list; most of it is just seeds and oats, which makes the bread so special!
I’ve listed everything here exactly as I use it. Pay close attention to the dry mix first—that’s where the structure comes from!
Dry Ingredients Overview
We need the right kind of flour for this no-knead method to work its magic. I always use bread flour because its high protein content helps build the gluten network we need without me having to lift a finger! You’ll need 3 and 1/4 cups of that bread flour, mixed with 1/2 cup of old-fashioned rolled oats. Don’t use instant oats; they turn to mush! Then we add the yeast, salt, and the texture builders: a third cup of raw sunflower seeds and one tablespoon of whole flax seeds. Make sure your yeast is fresh—that’s crucial when you’re not kneading it in!
Wet Ingredients Requirements
The wet side is all about warmth and sweetness. You need one cup of water that’s right around 110 degrees Fahrenheit—warm enough to wake up the yeast, but not so hot it kills it! Add that to 1/2 cup of regular milk, which gives the crumb a little extra tenderness, and a third cup of honey. I use raw honey because it has a deeper flavor, but any pure honey works. Finally, one tablespoon of olive oil brings just enough fat to keep things from getting too sticky later on.
Ingredient Notes and Substitutions
If you absolutely cannot find sunflower seeds, you can substitute them with pumpkin seeds or even chopped walnuts, but you might lose some of that signature rustic chewiness. As for the oats, stick to the rolled kind; quick oats break down too much. Also, if you only have regular liquid honey, that’s fine! If you happen to have crystallized honey, just warm it gently on the stove until it’s pourable before measuring. This bread relies on that honey for flavor complexity, so don’t skip it for plain sugar!
Step-by-Step Guide to Making No Knead Honey Oatmeal Artisan Bread
Okay, here is where the magic happens! This whole process for the No Knead Honey Oatmeal Artisan Bread is designed to be hands-off, but you still need to be present for the shaping and baking parts. Follow these steps exactly, especially regarding timing, and you’ll have the most beautiful, crusty loaf imaginable.
Mixing the Shaggy Dough
First things first: get your dry ingredients thoroughly mixed in that big bowl. You want the yeast evenly distributed among the flour, oats, and seeds. Whisk it all up until it looks uniform. In a separate bowl, combine your warm water, milk, honey, and olive oil. Remember, that water should be warm, like a nice bath, about 110 degrees. Now, pour all those lovely wet ingredients right into the dry mixture. Don’t use a mixer! Just use a sturdy wooden spoon or even a spatula. Stir it until everything is just combined. It won’t look like smooth dough; it will be messy, sticky, and very shaggy. That’s exactly what you want—don’t overmix it trying to make it smooth!
The Long Rest and First Rise
Once you have that shaggy mass, cover the bowl tightly—I use plastic wrap or a damp tea towel. Find a warm spot in your kitchen, away from any drafts. Now, walk away! Let it rest for a full two hours. This long, slow rise is what develops the flavor and the gluten structure without any kneading. You’ll know it’s ready when it has more than doubled in size and looks bubbly and inflated. It should look proud and ready to burst out of the bowl! If you are looking for other easy bread recipes, check out my miracle no-knead bread.
Shaping Your Rustic Loaf
This is the only time your hands really get involved, so make it count! Generously flour a smooth counter surface. Gently scrape the risen dough out onto the flour. Now, you’re going to fold it over itself about eight times. Just gently stretch the edges up and over the center, turning the dough slightly between each fold. Don’t press down hard; you want to keep those air bubbles inside. After those eight folds, gently tuck the edges underneath to form a nice, tight round ball. Place that shaped loaf onto a piece of parchment paper.
Final Proof and Dutch Oven Preparation
Cover your shaped loaf loosely again and let it sit for one last rest, which should be about 45 minutes. While that’s happening, this is your cue to get serious about the heat. Place your Dutch oven, lid and all, into a COLD oven. Then, turn the oven up to 425 degrees Fahrenheit. We let the pot heat up slowly *with* the oven. This slow preheating is key to getting that amazing artisan crust. It takes about 30 minutes for the pot to get screaming hot, so time this right! For more baking inspiration, see my posts on Medium.
Baking the No Knead Honey Oatmeal Artisan Bread
When the oven is fully heated, it’s time to transfer! Carefully pull out that hot Dutch oven. Using the parchment paper as a sling, gently lower your dough right into the hot pot. Sprinkle the top with the extra tablespoon of sunflower seeds for crunch. Put the lid on tight and bake it covered for 25 minutes. That trapped steam is what gives us that beautiful oven spring! After 25 minutes, carefully remove the lid. Let it bake uncovered for another 10 minutes until the crust is a deep, gorgeous golden brown. You want that color! Pull the finished No Knead Honey Oatmeal Artisan Bread out, and resist the urge to cut it immediately!
Expert Tips for Perfect No Knead Honey Oatmeal Artisan Bread
Even though this is the easiest bread ever, there are a couple of little secrets I’ve learned over the years that make the difference between good and absolutely incredible. If you follow these little pointers, your No Knead Honey Oatmeal Artisan Bread will look like it came straight from a professional bakery counter.
Achieving Optimal Crust Development
The Dutch oven is your best friend here, seriously! That trapped steam during the first 25 minutes is non-negotiable; it keeps the surface of the dough soft enough to expand fully before setting hard. If you skip the lid, you end up with a dense, flat loaf. Also, make sure your oven is fully preheated *before* you put the dough in. A cold start means the bread won’t spring up properly, and you’ll end up with a chewy, dense texture instead of that light, airy interior.
Cooling for the Best Crumb Structure
This is the hardest part, I know! But you absolutely must let your No Knead Honey Oatmeal Artisan Bread cool completely on a wire rack—I mean, until it’s barely warm. If you slice it when it’s hot, all that moisture trapped inside will steam out immediately, and the beautiful crumb structure you worked for will collapse into a gummy mess. Wait at least an hour, even if your kitchen smells amazing. Patience pays off with clean, perfect slices! You can find more baking tips on my Pinterest page.
Frequently Asked Questions About This Artisan Bread
I get so many questions about this recipe because people can’t believe how easy it is! Here are a few things I hear most often when people are trying this No Knead Honey Oatmeal Artisan Bread for the first time.
Can I Use Different Types of Oats in This Recipe?
I strongly recommend sticking to old-fashioned rolled oats. Quick oats are too fine and break down completely, which doesn’t give you that nice chewiness we are looking for in this rustic loaf. Steel-cut oats won’t soften enough during the short bake time, so stick to rolled!
What is the Best Temperature for the Water?
You need the water to be warm enough to activate the yeast without killing it. Aim for between 105 and 115 degrees Fahrenheit; 110°F is the sweet spot. If you don’t have a thermometer, it should feel comfortably warm to your wrist, not hot!
How Long Does This Rustic Loaf Stay Fresh?
Because of the honey and the moisture from the milk and oats, this bread stays surprisingly fresh! Stored properly, it’s great for about three days at room temperature. For longer storage, slicing and freezing is the way to go.
Storing and Reheating Your Artisan Loaf
Once you’ve managed to wait for your bread to cool completely, you need to store it correctly to keep that perfect crust intact. Don’t wrap it tightly right away, or the crust will go soft! Here’s my quick guide for keeping your lovely loaf fresh for days.
| Storage Duration | Method |
|---|---|
| 1–2 Days | Store cut-side down on a cutting board, loosely covered with a clean kitchen towel. |
| Up to 3 Months | Slice loaf, place slices in a freezer bag, and freeze. |
To reheat a slice from frozen, just pop it into a toaster oven for a few minutes until the edges are crisp again. It’s like baking it fresh all over!
Sharing Your Baking Experience
I really hope you love making this easy bread as much as I do! It’s such a satisfying process. Please leave a rating below and let me know how your first loaf of No Knead Honey Oatmeal Artisan Bread turned out. I love seeing everyone’s beautiful, crackly crusts!
Expert Tips for Perfect No Knead Honey Oatmeal Artisan Bread
Even though this is the easiest bread ever, there are a couple of little secrets I’ve learned over the years that make the difference between good and absolutely incredible. If you follow these little pointers, your No Knead Honey Oatmeal Artisan Bread will look like it came straight from a professional bakery counter.
Achieving Optimal Crust Development
The Dutch oven is your best friend here, seriously! That trapped steam during the first 25 minutes is non-negotiable; it keeps the surface of the dough soft enough to expand fully before setting hard. If you skip the lid, you end up with a dense, flat loaf. Also, make sure your oven is fully preheated *before* you put the dough in. A cold start means the bread won’t spring up properly, and you’ll end up with a chewy, dense texture instead of that light, airy interior.
Cooling for the Best Crumb Structure
This is the hardest part, I know! But you absolutely must let your No Knead Honey Oatmeal Artisan Bread cool completely on a wire rack—I mean, until it’s barely warm. If you slice it when it’s hot, all that moisture trapped inside will steam out immediately, and the beautiful crumb structure you worked for will collapse into a gummy mess. Wait at least an hour, even if your kitchen smells amazing. Patience pays off with clean, perfect slices!
Frequently Asked Questions About This Artisan Bread
I get so many questions about this recipe because people can’t believe how easy it is! Here are a few things I hear most often when people are trying this No Knead Honey Oatmeal Artisan Bread for the first time.
Can I Use Different Types of Oats in This Recipe?
I strongly recommend sticking to old-fashioned rolled oats. Quick oats are too fine and break down completely, which doesn’t give you that nice chewiness we are looking for in this rustic loaf. Steel-cut oats won’t soften enough during the short bake time, so stick to rolled!
What is the Best Temperature for the Water?
You need the water to be warm enough to activate the yeast without killing it. Aim for between 105 and 115 degrees Fahrenheit; 110°F is the sweet spot. If you don’t have a thermometer, it should feel comfortably warm to your wrist, not hot!
How Long Does This Rustic Loaf Stay Fresh?
Because of the honey and the moisture from the milk and oats, this bread stays surprisingly fresh! Stored properly, it’s great for about three days at room temperature. For longer storage, slicing and freezing is the way to go.
Storing and Reheating Your Artisan Loaf
Once you’ve managed to wait for your bread to cool completely, you need to store it correctly to keep that perfect crust intact. Don’t wrap it tightly right away, or the crust will go soft! Here’s my quick guide for keeping your lovely loaf fresh for days.
| Storage Duration | Method |
|---|---|
| 1–2 Days | Store cut-side down on a cutting board, loosely covered with a clean kitchen towel. |
| Up to 3 Months | Slice loaf, place slices in a freezer bag, and freeze. |
To reheat a slice from frozen, just pop it into a toaster oven for a few minutes until the edges are crisp again. It’s like baking it fresh all over!
Sharing Your Baking Experience
I really hope you love making this easy bread as much as I do! It’s such a satisfying process. Please leave a rating below and let me know how your first loaf of No Knead Honey Oatmeal Artisan Bread turned out. I love seeing everyone’s beautiful, crackly crusts!
Print
Amazing 1 No Knead Honey Oatmeal Artisan Bread
- Total Time: 3 hours 35 minutes
- Yield: 1 loaf about 12 slices
Description
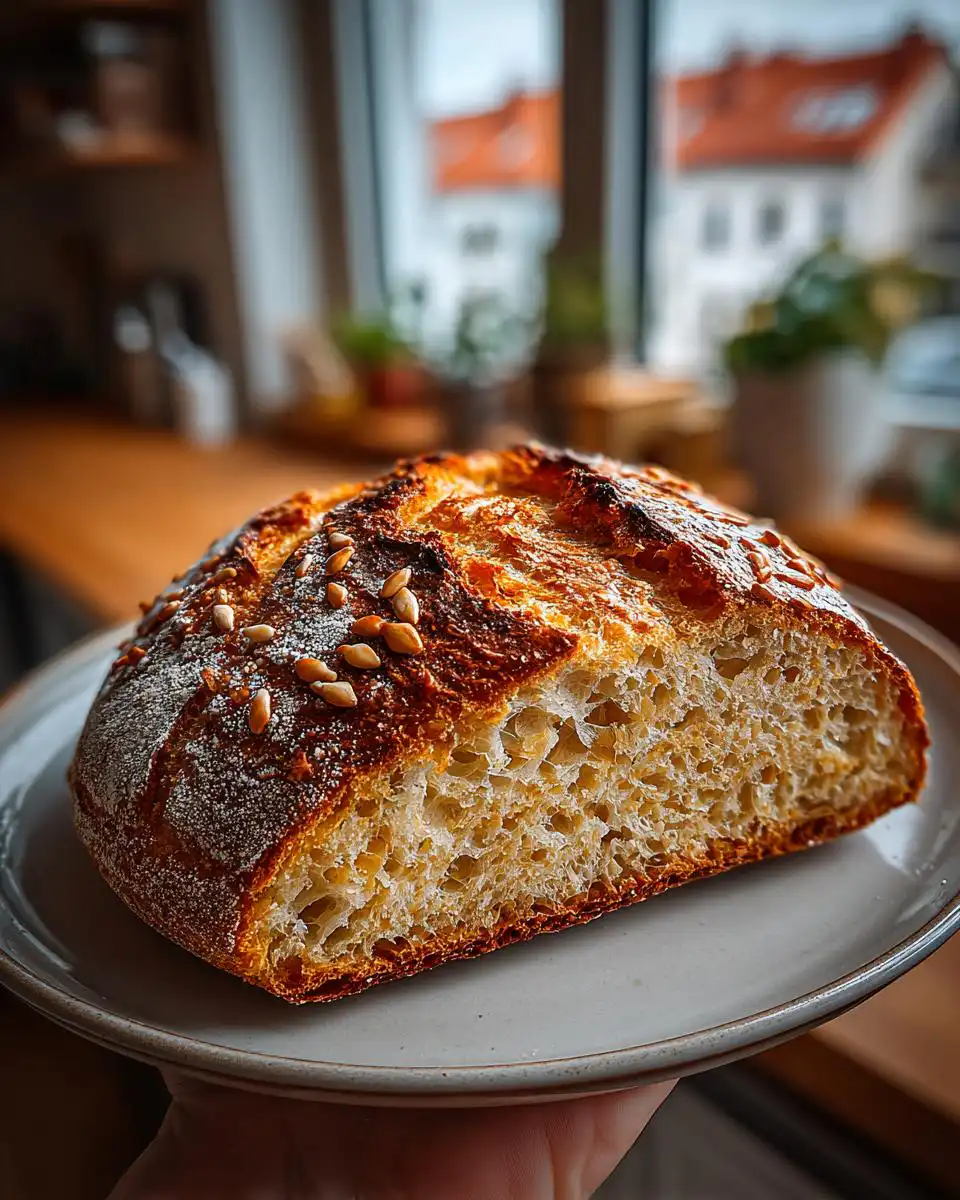
This honey oatmeal artisan bread is soft inside with a golden crust, lightly sweetened, and easy to make with a simple no knead method. It is perfect for any baker wanting a rustic loaf with minimal effort.
Ingredients
- 3¼ cups bread flour
- ½ cup old fashioned rolled oats
- 2¼ teaspoons instant yeast
- ⅓ cup raw sunflower seeds
- 1 tablespoon whole flax seeds
- 1 teaspoon salt
- 1 cup warm water (about 110°F)
- ½ cup milk
- ⅓ cup honey
- 1 tablespoon olive oil
- 1 tablespoon sunflower seeds (for topping)
- Extra flour (for shaping)
Instructions
- Whisk together flour, oats, yeast, sunflower seeds, flax seeds, and salt in a large bowl.
- Stir together warm water, milk, honey, and olive oil in a separate bowl.
- Pour wet ingredients into dry ingredients and stir until a shaggy dough forms.
- Cover the bowl and let the dough rise at room temperature for 2 hours until doubled.
- Turn the dough out onto a well floured surface, fold it over itself 8 times, and shape into a round loaf.
- Place the dough on parchment paper, cover, and let rest for 45 minutes.
- Place a Dutch oven with lid in a cold oven and preheat to 425°F.
- Carefully transfer the dough with parchment into the hot Dutch oven, sprinkle with sunflower seeds, and cover.
- Bake for 25 minutes covered, then uncover and bake for 10 minutes until deeply golden.
- Cool completely before slicing.
Notes
- Allowing the bread to cool fully helps set the crumb for clean slices.
- Prep Time: 3 hours
- Cook Time: 35 minutes