
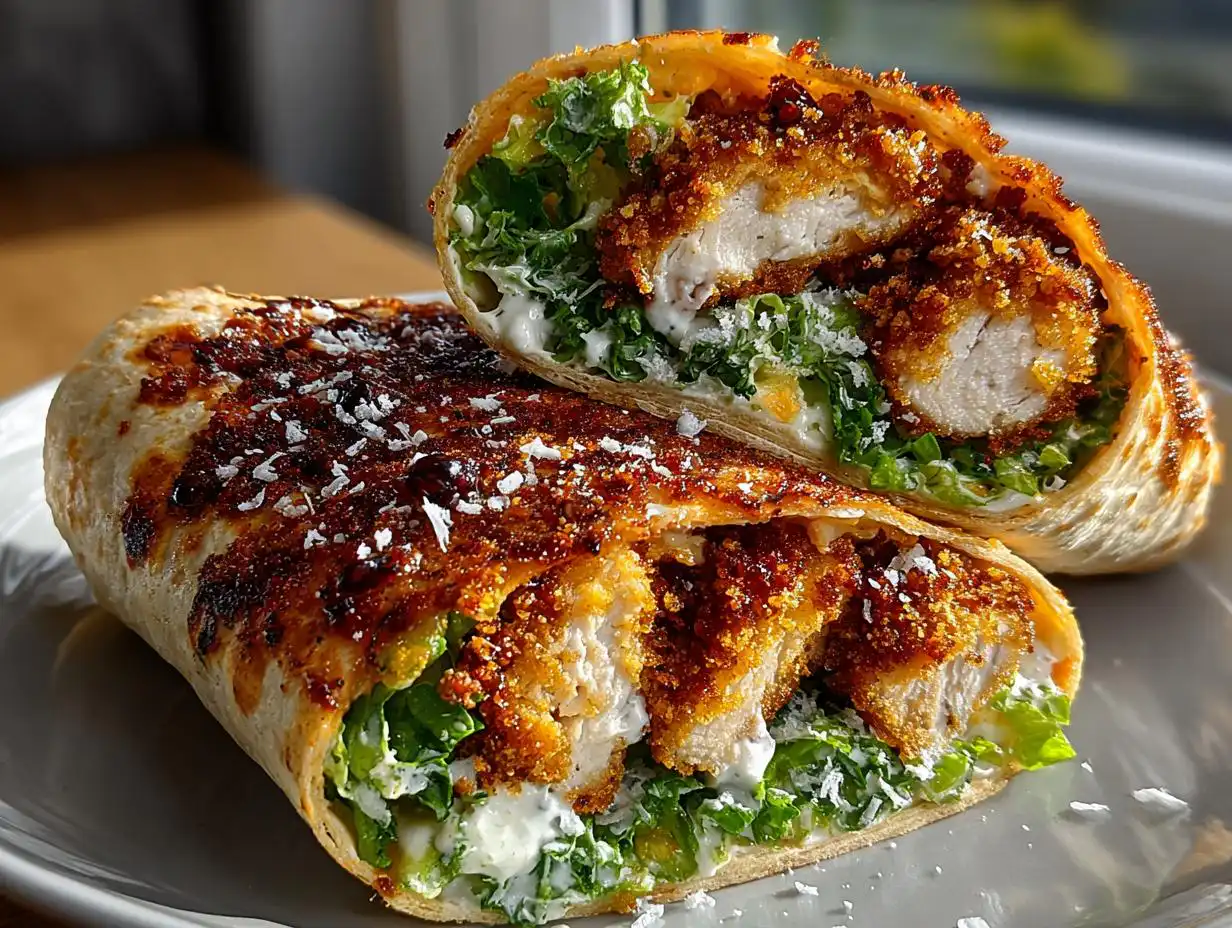
Listen, if you are tired of sad, floppy lunch wraps, you have come to the right place! We are talking serious crunch here. This Chicken Caesar Wrap Recipe Crispy and Filling is my absolute go-to when I need something that tastes like a restaurant meal but takes less than an hour to pull together. I’ve tried every shortcut out there, and let me tell you, skipping the breading step is a huge mistake.
The secret isn’t just the lettuce; it’s all about that chicken. We’re going to pan-fry it briefly so it stays juicy inside but has a crust that shatters when you bite into it. My first few attempts were disasters—soggy chicken, dressing everywhere. Oops! But I finally nailed the technique, and now, every time I make these, my family acts like I’ve brought home takeout from that fancy bistro downtown.
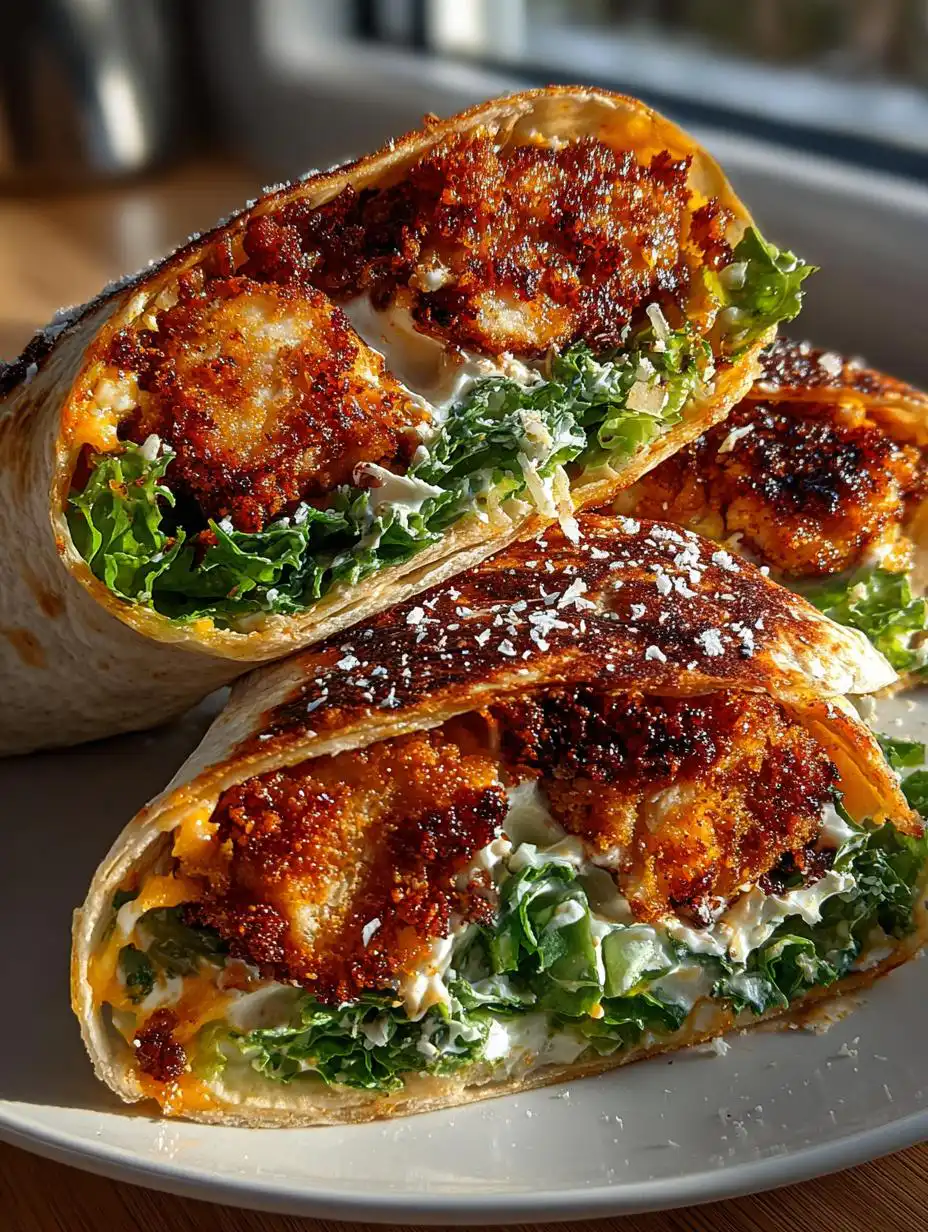
This wrap is packed with protein, which keeps you full until dinner, and the combination of sharp Parmesan and tangy Caesar dressing is just unbeatable. Trust me on this one; once you master the breading station, you’ll never look back!
Essential Components for Your Chicken Caesar Wrap Recipe Crispy and Filling
Okay, for this recipe to work its magic—especially getting that perfect crunch—you have to follow the ingredient list pretty closely. It’s all about setting up your dredging station correctly. Don’t eyeball the coatings; precision here makes all the difference between a crispy wrap and a soggy mess!
Ingredients for the Crispy Chicken Caesar Wrap Recipe Crispy and Filling
Here are the building blocks for the best Chicken Caesar Wrap Recipe Crispy and Filling you’ll ever make. Make sure your chicken is pounded thin, and your lettuce is chopped fine!
| Component | Item | Notes |
|---|---|---|
| Crispy Chicken | 1\u00bd lbs chicken cutlets | Sliced thin |
| Breading | Flour, Eggs, Panko, Parmesan | Set up three separate bowls |
| Assembly | Romaine, Croutons, Shredded Parmesan, Caesar Dressing, Wraps | Use large, burrito-sized wraps |
Equipment Needed for Success
You don’t need a ton of fancy gear, but having the right setup makes the process smooth. Grab your skillet and make sure you have parchment paper ready for resting the cooked chicken—that’s important!
- Large, heavy-bottomed skillet for frying
- Three shallow bowls for the dredging process
- Parchment paper or paper towels for draining oil
- A large bowl for tossing the salad mixture
- A sturdy cutting board for pounding the chicken
Step-by-Step Instructions for the Chicken Caesar Wrap Recipe Crispy and Filling
Now for the fun part! Follow these steps exactly, and I promise you’ll have the crunchiest, most satisfying Chicken Caesar Wrap Recipe Crispy and Filling ready for lunch. We have to be methodical when we bread the chicken, but the assembly moves super fast!
Preparing the Chicken Cutlets
First things first, we need thin chicken. Take those chicken breasts and slice them horizontally into cutlets, aiming for pieces about half an inch thick. Then, place them between two sheets of parchment paper. Grab a meat mallet—or even a heavy rolling pin if you don’t have one—and pound them gently but firmly until they are all about a quarter of an inch thick. This pounding is crucial! It guarantees the chicken cooks quickly and evenly in the pan, so you get crispy coating without dry meat underneath.
Setting Up the Breading Station
This is where the magic happens! You need three separate, shallow bowls lined up in order. In Bowl One, mix your flour with the salt and pepper. Bowl Two is just for the whisked eggs—your sticky glue. Bowl Three is the crunch zone: combine the panko breadcrumbs with that finely grated Parmesan cheese. This cheese mixed into the panko is what gives the crust its amazing flavor and extra crispiness. Now, dredge each pounded cutlet: first in the flour (shake off the excess!), then dip completely in the egg wash, and finally, press it hard into the panko/Parmesan mix until it’s totally coated. Don’t be shy with the pressing!
Achieving Crispy Perfection During Frying
Heat about a quarter-inch of neutral oil in your big skillet over medium-high heat. You want it hot enough that the breading sizzles immediately when it hits the oil, but not so hot that it burns before the chicken cooks through. Cook the chicken in batches—do not crowd the pan, or the oil temperature drops, and you get soggy chicken! Fry each side for about four to five minutes until it’s that perfect golden brown color. Once done, immediately transfer them to a plate lined with paper towels to rest and drain for just three minutes. Use a meat thermometer to make sure the center hits 165°F—safety first!
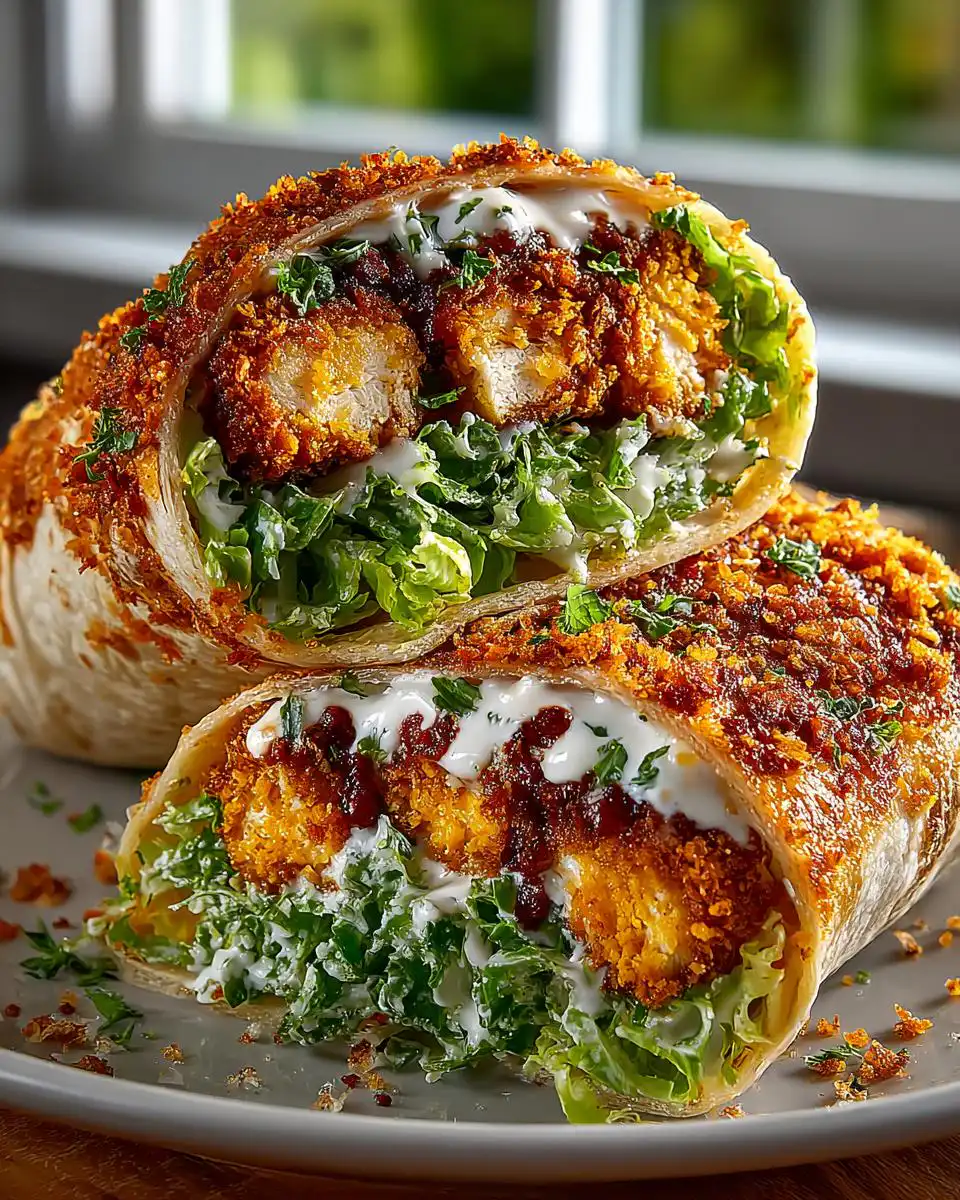
Assembling the Ultimate Chicken Caesar Wrap Recipe Crispy and Filling
While the chicken rests, get your salad ready. In a big bowl, toss your finely chopped romaine, croutons, the shredded Parmesan for topping, and the Caesar dressing until everything is lightly coated. Don’t over-dress it! Gently fold in your sliced, cooked chicken pieces. Now, here’s a pro tip from the notes section: warm your large burrito-sized wraps briefly—just 10 seconds in the microwave or a dry pan—so they become pliable and don’t tear when you roll them. Spoon a generous amount of the chicken-salad mixture into the center of each warm wrap, roll it up tightly like an envelope, slice it in half on the diagonal, and serve them right away!
Tips for Guaranteed Success with Your Chicken Caesar Wrap Recipe Crispy and Filling
I’ve learned through trial and error that the difference between a truly amazing wrap and one that falls apart halfway through eating comes down to controlling moisture. If you want that fantastic crunch in your Chicken Caesar Wrap Recipe Crispy and Filling to last, you have to think ahead about the wet ingredients. A little attention to detail here makes all the difference between a lunch that sings and a lunch that sags.
Preventing Soggy Wraps
The biggest enemy of a good Caesar wrap is excess moisture! When you toss the romaine, croutons, and dressing, be conservative with that Caesar dressing. You want the leaves lightly coated, not drowning. If the salad is too wet, it steams the tortilla from the inside out. Also, try adding the croutons right before you assemble the wraps, not when you first toss the salad. Croutons get soft fast, and we want them to stay crisp!
Ensuring Fully Cooked Chicken
Because we are aiming for thin cutlets, the chicken cooks fast, but we absolutely cannot cut corners on safety. Always, always, always pull out that instant-read thermometer. The USDA guideline is 165°F, and you must confirm that the thickest part of the chicken registers that temperature. If you’re worried about the outside burning before the inside is done, just turn the heat down to medium for the last minute or two of cooking. That little bit of low heat ensures safety without compromising that beautiful panko crust we worked so hard to achieve for this Chicken Caesar Wrap Recipe Crispy and Filling.
Ingredient Notes and Substitutions for Your Homemade Caesar Wrap
Let’s talk about that coating again because it’s the star! The panko breadcrumbs are non-negotiable if you want that light, airy crunch—regular breadcrumbs just don’t crisp up the same way. Mixing the finely grated Parmesan right into the panko is genius because it melts slightly during frying, creating tiny, savory flavor pockets that stick to the chicken. It’s what separates a good wrap from your new favorite wrap!
If you absolutely cannot find panko, use crushed saltine crackers as a last resort, but you’ll lose some of that signature texture. For the dressing, if you want to make your own, just ensure it’s thick; runny dressing equals a sad, wet wrap. And please, don’t try to substitute the Romaine lettuce; its crunch is essential for balancing the creamy dressing!
Serving Suggestions for Your Chicken Caesar Wrap Recipe Crispy and Filling
Since this Chicken Caesar Wrap Recipe Crispy and Filling is already pretty rich with crispy chicken and creamy dressing, I like to keep the sides light and fresh. You don’t want a heavy side dish competing with that amazing crunch!
My favorite pairing is a simple bowl of chilled tomato soup—it’s creamy but acidic enough to cut through the richness. Another great option is a side of crisp, thinly sliced cucumber spears sprinkled with a little lemon juice and salt. If you need something crunchy that isn’t bread-based, try some celery sticks. They just feel right next to a hearty wrap like this! For more ideas on light sides, check out our cucumber snack chips.
Storing and Reheating Leftover Chicken Caesar Wrap Recipe Crispy and Filling
I hate to tell you this, but the beauty of this wrap is that it really needs to be eaten immediately. Once that creamy dressing hits the crispy chicken and the tortilla, things start to go downhill fast. If you have leftovers from your amazing Chicken Caesar Wrap Recipe Crispy and Filling, you absolutely must separate the components for the best chance of success the next day.
Never store the fully assembled wrap. Instead, store the cooked chicken, the lettuce/dressing mix, and the tortillas separately. The chicken should be kept in an airtight container in the fridge for up to three days, and the tortillas should be wrapped tightly in plastic to prevent drying out.
| Component | Storage Time | Reheating Note |
|---|---|---|
| Cooked Chicken | 3 Days | Reheat briefly in a dry pan or air fryer to restore some crispness. |
| Salad Mix (Dressing) | 1 Day (Max) | Toss again before serving; dressing may make lettuce wilt overnight. |
| Wraps | 3 Days | Warm before rolling/serving. |
If you want to reheat the chicken, I find the air fryer is your best friend—it brings back a little bit of that fried texture better than a microwave ever could. Then, you just mix it with fresh lettuce and a bit more dressing! If you are looking for other quick dinner ideas, you might enjoy our simple healthy orzo weeknight meal.
Frequently Asked Questions About Your Chicken Caesar Wrap Recipe Crispy and Filling
I get so many questions after people try this recipe for the first time! It’s usually about how to keep things crispy or if they can switch up the cooking method. Here are the most common things I hear about making the perfect Chicken Caesar Wrap Recipe Crispy and Filling.
Can I bake the chicken instead of frying it for this Chicken Caesar Wrap Recipe Crispy and Filling?
Yes, you totally can bake it if you want a lighter option for your Chicken Caesar Wrap Recipe Crispy and Filling! The trick is to use the same three-step breading process, but you need to bake it hotter to get that crunch. Preheat your oven to 425°F. Place the breaded cutlets on a wire rack set over a baking sheet—this allows air to circulate underneath so the bottom doesn’t get soggy. Bake for about 15 to 20 minutes, flipping halfway through, until they hit that 165°F internal temperature. It won’t be quite as rich as the fried version, but it’s still delicious!
How far ahead can I prepare the components for this wrap?
Like I mentioned before, this wrap hates being assembled ahead of time! However, you can prep the components separately. The chicken can be cooked, cooled completely, and stored in the fridge for up to three days. You can chop your romaine lettuce and keep it dry in an airtight container for a day. The dressing and the chicken should always be stored separately from the lettuce, and you should only mix everything together right before you wrap it up!
Q. Do I really need Parmesan in the breading *and* in the salad mix?
Oh yes, you do! The Parmesan mixed with the panko creates a textured crust that fries up beautifully and adds a salty depth to the chicken itself. The shredded Parmesan in the salad mix melts just slightly with the dressing, giving that classic Caesar flavor throughout the greens. Don’t skip either one!
Q. What kind of oil is best for frying the chicken?
I stick to neutral oils because we don’t want to overpower the Caesar flavor. Vegetable oil or canola oil works perfectly because they have high smoke points, meaning they can handle the medium-high heat needed to get that crust golden brown quickly without burning.
Share Your Experience Making This Chicken Caesar Wrap Recipe Crispy and Filling
I really hope you give this recipe a try! Seriously, making the Chicken Caesar Wrap Recipe Crispy and Filling is so rewarding when you bite into that first crunch. I’m dying to know what you think! You can see more of our favorite recipes on our Pinterest page.
Did you stick to the frying method, or did you try baking the chicken? Let me know in the comments below how it turned out! Rate it five stars if you loved the crunch, and tell me about any tweaks you made to your own homemade Caesar wrap. For more behind-the-scenes thoughts, check out our Medium profile.
Print
3 Amazing Chicken Caesar Wrap Recipe Crispy
- Total Time: 40 minutes
- Yield: 4 wraps
- Diet: N/A
Description
This chicken caesar wrap recipe is crispy, creamy, and packed with protein. Make an easy homemade wrap with breaded chicken and classic caesar flavor.
Ingredients
- Crispy Chicken:
- 1½ pounds boneless skinless chicken breasts sliced into cutlets
- 1 cup all purpose flour
- ½ teaspoon salt
- ½ teaspoon black pepper
- 2 large eggs
- 2 cups panko breadcrumbs
- 1 cup finely grated parmesan cheese
- ¼ cup neutral oil
- Wrap Assembly:
- 1 large head romaine lettuce finely chopped
- 1 cup croutons
- 1 cup shredded parmesan cheese
- ½ cup caesar dressing
- 4 large burrito size wraps
Instructions
- Place the chicken cutlets between sheets of parchment and pound to about ¼ inch thickness.
- Set up three shallow bowls. In the first, mix flour, salt, and pepper. In the second, whisk the eggs. In the third, combine panko and grated parmesan.
- Dredge each chicken piece in the flour, then dip in egg, then coat thoroughly in the breadcrumb mixture.
- Heat the oil in a large skillet over medium high heat.
- Cook the chicken in batches for 4 to 5 minutes per side until golden and cooked through.
- Transfer chicken to a paper towel lined plate and rest for 3 minutes.
- Slice the chicken into bite sized pieces and confirm the internal temperature reaches 165°F.
- In a large bowl, toss romaine, croutons, shredded parmesan, and caesar dressing until coated.
- Add the chicken to the salad and toss gently.
- Spoon the mixture into wraps, roll tightly, slice in half, and serve.
Notes
- Warm the wraps briefly so they roll without tearing.
- Prep Time: 20 minutes
- Cook Time: 20 minutes
- Category: Lunch/Dinner
- Method: Pan-Frying
- Cuisine: American


