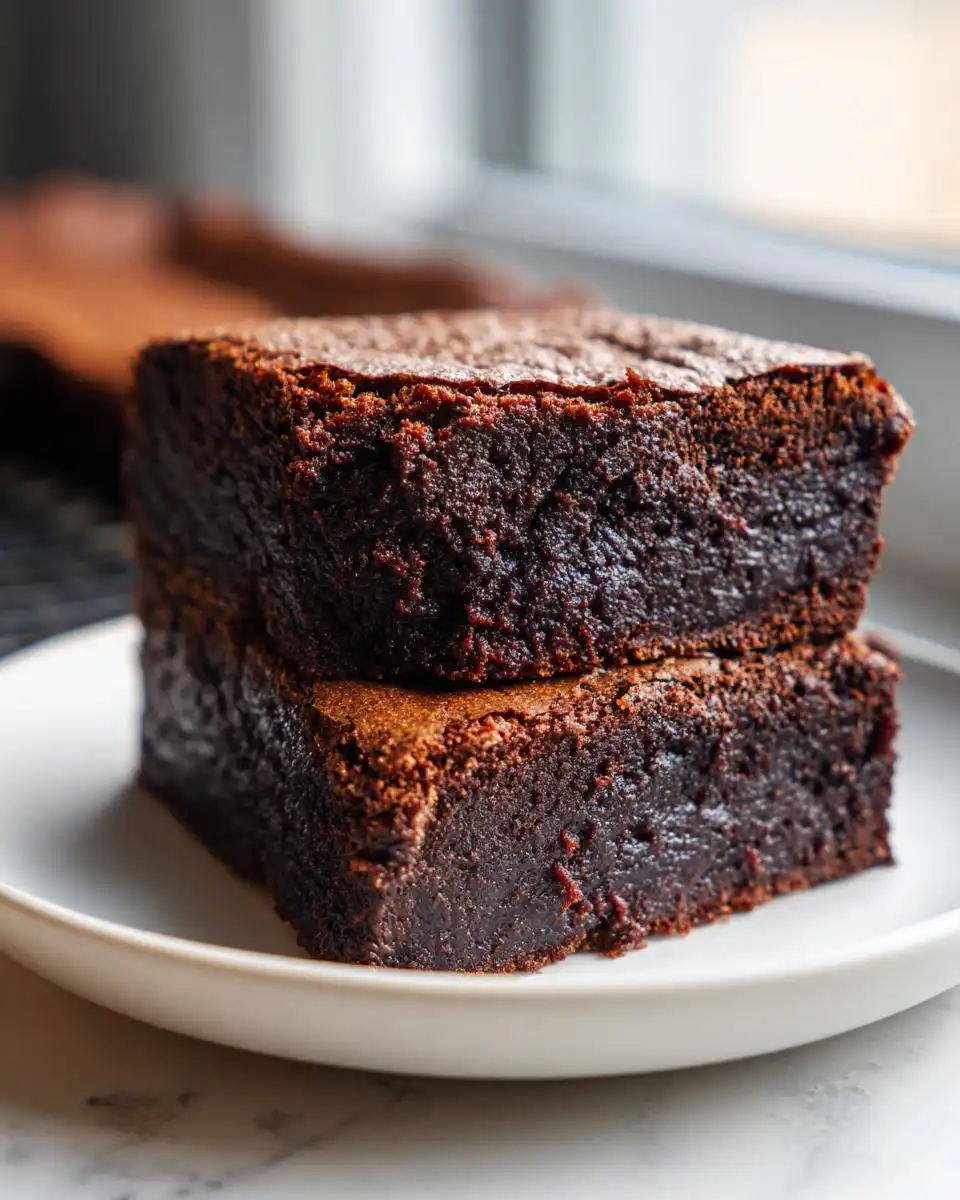
Listen, I know the gluten-free world can be tricky. I’ve made enough crumbly, sad GF desserts over the years to write a whole book about what *not* to do! But I finally cracked the code on the absolute best chocolate experience, and I’m so excited to share my **Gluten-Free Brownies Easy Fudgy Chocolate Recipe** with you. Seriously, these are the ones that fool everyone.
Forget the stand mixer and forget washing a million bowls. This recipe is pure magic because it’s a true one-bowl wonder. You melt the butter, dump everything in, stir it up, and boom—you have the richest, deepest, fudgiest chocolate batter you’ve ever seen. I’ve tweaked this formula countless times over the last few years, specifically focusing on keeping the texture dense and moist, not cakey.
If you’ve been searching for a simple, reliable recipe that delivers that perfect crackly top and gooey center every single time, you’ve found it. Trust me, once you try this method, you won’t look back. It’s my go-to for bake sales and emergency chocolate cravings alike!
Why You Need This Gluten-Free Brownies Easy Fudgy Chocolate Recipe
I wouldn’t bother sharing a recipe unless it truly changed the game for me, especially in the gluten-free department. These brownies are different. They are proof that you don’t need gluten or complicated steps to get that amazing, melt-in-your-mouth texture we all crave.
- Ten minutes is all it takes to get these into the oven. Seriously fast!
- No mixer required—just a whisk and a spatula. Cleanup is a breeze.
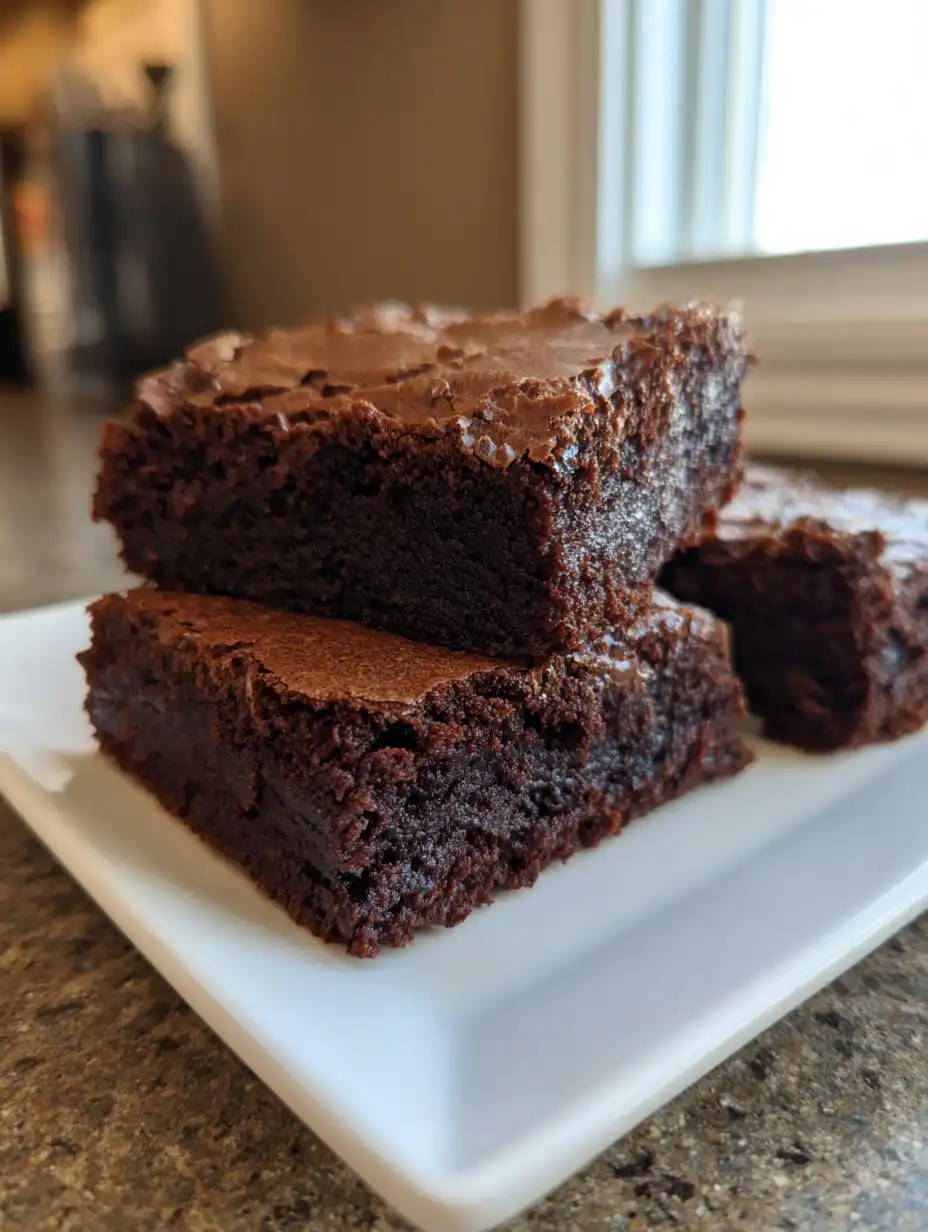
- They are intensely chocolatey with that deep, rich flavor you usually only find in bakery versions.
- The texture is pure fudge; they never come out dry or crumbly, which is the GF struggle!
Quick Preparation for Gluten-Free Brownies Easy Fudgy Chocolate Recipe
Prep time is only ten minutes. Think about that! You melt the butter, whisk the sugars, then add the rest. That’s it. We are skipping all the creaming and waiting around. The goal here is quick satisfaction. It’s the easiest way to get amazing chocolate brownies on the table tonight. You can see more of my baking tips on my Medium profile.
Achieving the Perfect Fudgy Texture
The fudginess comes down to two things: the sugar ratio and the eggs. We use both brown and white sugar, which helps keep things moist while giving us that classic shiny top. Plus, we don’t overmix the flour. Overmixing GF flour makes things gummy or tough, but stopping right when it’s combined locks in the moisture for that perfect, dense bite.
Equipment Needed for Your Gluten-Free Brownies Easy Fudgy Chocolate Recipe
You don’t need a fancy setup for these rich chocolate treats. Just grab your favorite large mixing bowl—the one you trust not to spill when you whisk! A sturdy whisk is key for getting that sugar mixture glossy before the eggs go in. You’ll also need a spatula for folding in the dry ingredients gently toward the end.
Honestly, that’s almost it! The simplicity of the equipment matches the simplicity of the recipe itself, which is exactly how I like my weeknight baking to go. For more quick baking ideas, check out my one-bowl yogurt cake.
Pan Preparation Details
The pan size is important here; we are using an 8 by 8 inch square pan. Don’t try to squeeze this batter into a 9 by 9 inch, or they’ll bake way too thin and turn crispy. Crucially, you must line it with parchment paper. I always let the paper hang over two opposing sides like little handles. This little ‘sling’ is your best friend later when you need to lift the whole chilled slab out in one piece!
Assembling Your Gluten-Free Brownies Easy Fudgy Chocolate Recipe Ingredients
Gathering your ingredients for the **Gluten-Free Brownies Easy Fudgy Chocolate Recipe** is super straightforward since we aren’t dealing with a million separate bowls. Everything goes into one place, which is why I love this recipe so much for busy days. Make sure your butter is melted but not scorching hot—just slightly warm to the touch. Also, please take your eggs out a little early so they aren’t ice cold when they hit that warm butter mixture.
We are using very simple pantry staples here, but the ratios are what count to keep these fudgy brownies perfectly balanced. I’ve tested this combination repeatedly to ensure we get that deep chocolate hit without any weird aftertaste or overly dry texture that sometimes plagues gluten-free baking. You can find more of my favorite dessert recipes on Pinterest.
Essential Dry Components for Gluten-Free Brownies Easy Fudgy Chocolate Recipe
For the dry stuff, we keep it classic but specific. You absolutely must use a good quality gluten-free all-purpose flour blend that *already includes xanthan gum*. If your blend doesn’t have it, you’ll need to add about a teaspoon separately, because that gum is what holds the structure together in the absence of wheat flour. Then, use a good, dark cocoa powder—this is where that intense chocolate color comes from!
We only need a tiny bit of baking soda to give them a little lift—too much and they turn cakey, which is what we are trying to avoid! And of course, a half teaspoon of salt to make all that chocolate flavor really pop.
Wet Ingredients and Sugar Balance
The wet side starts with that slightly cooled, melted butter. For sugar, we are using a mix: half a cup of regular granulated sugar for that shiny crackly top, and a full half cup of packed brown sugar. That brown sugar is crucial because the molasses content adds moisture and a depth of flavor white sugar just can’t touch. Finally, those two large eggs, room temperature if you please, bring everything together before the dry stuff comes in. If you are looking for another easy bake, try my moist Greek yogurt banana bread.
Step-by-Step Guide to Bake Your Gluten-Free Brownies Easy Fudgy Chocolate Recipe
Now for the fun part! Following the **Gluten-Free Brownies Easy Fudgy Chocolate Recipe** is so simple, you’ll be amazed at the results from such little effort. Remember, we are aiming for fudgy perfection, so pay attention to those visual cues I mention along the way. It’s all about the texture development!
Initial Mixing and Batter Development
First things first, get your oven heated up to 350°F right away. While it’s warming, take care of that 8 by 8 inch pan. Line it well with parchment paper, making sure those little handles stick up over the sides—I can’t stress that enough for easy lifting later! Give the pan a tiny spritz of cooking spray just so the paper stays put.
Grab your biggest bowl. Whisk together that melted butter—remember, slightly cooled, not hot—with both the white and brown sugars. You need to whisk this until it looks glossy and smooth. It should look a little richer than when you started. This step is actually important for setting up that signature shiny top!
Now, add your two room-temperature eggs, but do it one at a time. Whisk thoroughly after each egg goes in. You’ll notice the batter starts to thicken up nicely here. It’s getting that structure ready for the chocolate!
Folding in Dry Ingredients for Gluten-Free Brownies Easy Fudgy Chocolate Recipe
Time for the dry components: the gluten-free flour blend, cocoa powder, baking soda, and salt. Dump them all right on top of that beautiful wet mixture. Here is the most important instruction for fudgy brownies: Stir until *just* combined. I mean it! You are looking for the moment when you can no longer see streaks of dry flour. Stop right there!
If you keep mixing past that point, you’ll activate the xanthan gum too much, and your brownies will get tough or cakey instead of gooey. Use a rubber spatula for this part and fold gently, scraping the bottom and sides of the bowl to make sure everything is incorporated evenly. Don’t overwork this batter!
Spread the batter evenly into your prepared pan. It’s going to be thick—that’s normal for these rich chocolate brownies. Smooth the top gently with your spatula so it bakes evenly across the surface.
Baking Times and Testing Doneness
Slide that pan into the preheated oven. The bake time is usually between 28 and 32 minutes. Keep an eye on them starting around the 25-minute mark. You want the edges to look set and slightly pulling away from the parchment paper handles.
For testing doneness, forget the clean toothpick test you use for cake. We want moist crumbs clinging to the toothpick when you pull it out of the center. If the toothpick comes out completely clean, you’ve gone too far and they might be dry. If it comes out gooey with wet batter, they need a few more minutes. Moist crumbs means they are perfect right now. Pull them out immediately when you see those moist crumbs!
Tips for Success Making Fudgy Gluten-Free Brownies
You’ve baked them perfectly, but don’t rush the last step! The cooling process is almost as important as the mixing when you are dealing with these rich, fudgy brownies. If you try to slice them hot, they will just smear into a chocolate mess on your counter, and nobody wants that. Patience pays off big time here.
I know it’s hard, especially when the chocolate smell is filling your kitchen, but you have to let them chill out. The structure of gluten-free baked goods needs time to set up properly after they come out of that heat. That gooey center solidifies into pure fudge only as it cools down completely. For more baking tips, check out my better than box mix brownies.
The Importance of Complete Cooling
This is non-negotiable, folks. You need to let these brownies cool completely, right there in the pan, before you even think about slicing. I usually pop them in the fridge for about an hour after they come to room temperature on the counter. This firming up process is what gives you those beautiful, clean edges and that dense, satisfyingly fudgy interior.
If you slice them warm, the texture will be soft and sticky, and the whole slab might just collapse when you lift it out using those parchment handles. Wait until they are totally cool to the touch—that’s when the magic sets into a sliceable square!
Storing and Reheating Your Gluten-Free Brownies Easy Fudgy Chocolate Recipe
Once you’ve managed to wait for them to cool completely—which is the hardest part of the **Gluten-Free Brownies Easy Fudgy Chocolate Recipe**—storing them is easy. Since these brownies are so moist, they actually stay fantastic at room temperature for several days. Just make sure they are in an airtight container, though! If you stack them, put a little square of parchment paper between the layers so the tops don’t stick to the bottoms.
They are so fudgy, I actually prefer them slightly cool, but if you crave that fresh-out-of-the-oven warmth, reheating is simple. Don’t microwave the whole pan, obviously! Just take one square and zap it for about 10 to 15 seconds. It perfectly melts that center again without drying out the edges. They are almost always better the next day, in my opinion! If you want to try another easy dessert, check out my recipe for cottage cheese brownies.
Frequently Asked Questions About This Gluten-Free Brownies Easy Fudgy Chocolate Recipe
I get so many questions about this recipe because people are always surprised how easy it is to get such rich results! Here are a few things I hear most often when people are making their first batch of these amazing chocolate brownies.
Can I substitute the gluten-free flour blend?
You can substitute the blend, but you have to be careful! The recipe calls for a gluten-free AP flour that already has xanthan gum included. If your blend doesn’t have it, you absolutely must add about a teaspoon of xanthan gum yourself. That gum is what gives these fudgy brownies the structure they need since we aren’t using regular flour. Without it, they will definitely crumble apart!
How long do these fudgy brownies stay fresh?
Because of the high fat and sugar content, these stay surprisingly fresh! If you keep them stored in an airtight container at room temperature, they are fantastic for about four days. Honestly, they are generally even fudgier on day two! If you need them to last longer, you can freeze them for up to three months, wrapped tightly.
Why are these called one bowl brownies?
They are called one bowl brownies because the method is so simple! You melt the butter, mix your wet ingredients, and then dump the dry ingredients right into that same bowl. We aren’t using a separate bowl for the dry ingredients at all, which cuts down massively on cleanup time. It really is that easy!
Estimated Nutritional Information
I always try to keep track of what I’m eating, but let’s be real—when you’re eating a fudgy brownie, you aren’t really counting calories! These numbers are just estimates based on the ingredients I used, so please take them with a grain of salt (or sugar!).
This is a rich dessert, so a single square is quite satisfying. I always feel better knowing roughly what’s in my favorite treats, even if I end up eating two!
| Nutrient | Amount Per Serving |
|---|---|
| Calories | 280 |
| Total Fat | 12 g |
| Carbohydrates | 38 g |
| Protein | 3 g |
Disclaimer: Nutritional values are estimates based on ingredient averages and serving size of one brownie. Actual values may vary based on specific product brands used.
Print
Secret 1 bowl Gluten-Free Brownies Easy Fudgy Chocolate Recipe
- Total Time: 40 minutes
- Yield: 9 brownies
Description
These easy gluten-free brownies are rich, fudgy, and deeply chocolatey. Make them in one bowl with simple ingredients and no mixer needed.
Ingredients
- ½ cup unsalted butter melted and slightly cooled
- ¾ cup granulated sugar
- ½ cup packed brown sugar
- 2 large eggs at room temperature
- ¾ cup gluten-free all-purpose flour with xanthan gum
- ½ cup cocoa powder
- ½ teaspoon baking soda
- ½ teaspoon salt
Instructions
- Preheat the oven to 350°F. Line an 8 by 8 inch baking pan with parchment paper and lightly grease it.
- In a large bowl, whisk together the melted butter, granulated sugar, and brown sugar until smooth and glossy.
- Add the eggs one at a time, whisking well after each addition until the batter thickens slightly.
- Add the gluten-free flour, cocoa powder, baking soda, and salt. Stir until just combined and no dry pockets remain.
- Spread the batter evenly into the prepared pan and smooth the top.
- Bake for 28 to 32 minutes until the edges are set and a toothpick inserted into the center comes out with moist crumbs.
- Remove from the oven and allow the brownies to cool completely in the pan before slicing.
Notes
- Cooling fully helps the brownies set and creates clean slices with a fudgy interior.
- Prep Time: 10 minutes
- Cook Time: 30 minutes