I have tried so many cookie recipes over the years, but nothing beats the nostalgia of a true Peanut Butter Blossom. Making Classic Gluten Free Peanut Butter Blossoms that taste exactly like the ones you remember from childhood takes a little know-how, especially when we skip the wheat flour. Trust me, I’ve developed this recipe through trial and error.
The secret isn’t just about swapping the flour; it’s about getting the right balance of fat and sugar so these cookies stay wonderfully soft and chewy, not crumbly. Gluten-free cookies can sometimes turn out dry or gritty, but not these beauties! I spent months testing different gluten-free flour blends to make sure these hold their shape perfectly before they get that iconic chocolate top.
We need the peanut butter and the butter to be perfectly softened—not melted, just totally ready to blend. That creaming step is where the magic starts, building the structure we need for a cookie that won’t fall apart when you try to press in that chocolate kiss. Follow my steps exactly, and you’ll have the best gluten-free batch you’ve ever tasted, guaranteed. You can see more of my baking adventures on Medium.
Gathering What You Need for Classic Gluten Free Peanut Butter Blossoms
Before we even think about turning on the oven, we need to make sure our pantry is set up for success. Making amazing Classic Gluten Free Peanut Butter Blossoms means having all the right players ready to go. Don’t try to substitute the peanut butter type or skip softening the butter; these cookies depend on getting the initial texture just right!
We’re keeping this list simple, using ingredients you probably have on hand, except for that specialized gluten-free flour blend. Let’s look at exactly what you need so we can move straight into mixing!
Essential Ingredients for Classic Gluten Free Peanut Butter Blossoms
This list is short, but the details matter a lot when you’re baking gluten-free. For these Classic Gluten Free Peanut Butter Blossoms to turn out perfectly soft and chewy, pay close attention to the temperature and type of ingredients. I always lay everything out on the counter about 30 minutes before I start mixing.
- Creamy peanut butter – make sure it’s the standard processed kind, not natural oil-separated style.
- Unsalted butter – this needs to be completely softened, ready to mash easily with a fork.
- Granulated sugar – we use this in the dough and then reserve a bit more for rolling.
- Packed brown sugar – the darker the better for that chewy texture!
- One large egg – make sure this is at room temperature so it blends smoothly.
- Molasses – just a tiny teaspoon adds that depth of flavor we love.
- Gluten free all-purpose flour with xanthan gum – this is crucial; don’t use a blend without it!
- Baking soda and baking powder – for a little lift.
- Chocolate kisses – about two dozen, unwrapped and ready to go!
Required Equipment
You don’t need a fancy stand mixer, but having the right baking surfaces makes clean-up a breeze. For these cookies, I always grab my electric hand mixer because creaming the peanut butter and butter takes a bit of elbow grease!
- Large mixing bowls for wet and dry ingredients.
- Electric mixer (handheld or stand mixer).
- Baking sheets (at least two).
- Parchment paper to line the sheets.
- A small scoop or tablespoon measure for consistent sizing.
Step-by-Step Guide to Your Classic Gluten Free Peanut Butter Blossoms
Okay, now that we have everything laid out, it’s time to bake! This process moves pretty fast once you get going, so make sure your oven is preheating to 375 degrees Fahrenheit right now. We line our baking sheets with parchment paper too—it saves the bottoms from sticking, which is always a worry with gluten-free dough.
We are aiming for the best Classic Gluten Free Peanut Butter Blossoms possible, and that starts with a proper creaming process. Don’t rush this part!
Preparing the Dough Base
Grab your biggest bowl. We need to beat the softened butter and the creamy peanut butter together first. Beat them until they look smooth, maybe two minutes with an electric mixer. Then, slowly add both the white sugar and the packed brown sugar. Keep mixing until this mixture looks light, fluffy, and pale yellow. It should look like it has air whipped into it—that’s structure building right there!
Once the sugars are incorporated, drop in your room-temperature egg and the teaspoon of molasses. Mix this just until everything is combined and smooth. You shouldn’t see any streaks of egg white hanging around. Stop the mixer and scrape down the sides of the bowl so everything gets incorporated evenly.
Mixing Dry Components and Forming the Dough
In a separate, smaller bowl, whisk together your gluten-free flour blend, the baking soda, and the baking powder. Whisking them separately ensures the leavening agents are distributed evenly throughout the flour, which is extra important when you don’t have gluten to help hold things together.
Now, slowly add the dry ingredients into your wet mixture. You want to mix this on low speed, or even just by hand with a sturdy spoon, until a soft dough just forms. Stop mixing as soon as you don’t see dry streaks of flour anymore. Overmixing gluten-free dough can make it tough or crumbly, so be gentle! If you are looking for other easy baking ideas, check out my no-bake peanut butter balls.
Shaping, Rolling, and Baking
Time for the sugar coating! Scoop out dough balls that are about one tablespoon each. I like using a small cookie scoop to keep them uniform. Roll each ball gently between your palms until it’s nice and round.
Pour that reserved 1/4 cup of granulated sugar onto a small plate. Roll each dough ball thoroughly in the sugar until it’s completely coated. Place these sugared balls about two inches apart on your prepared baking sheets. They spread a little, so give them space!
Bake these for 10 to 12 minutes. You’re looking for the edges to look set and just barely golden brown. They shouldn’t look totally done in the center; that’s key for softness later.
Finishing with the Chocolate Center
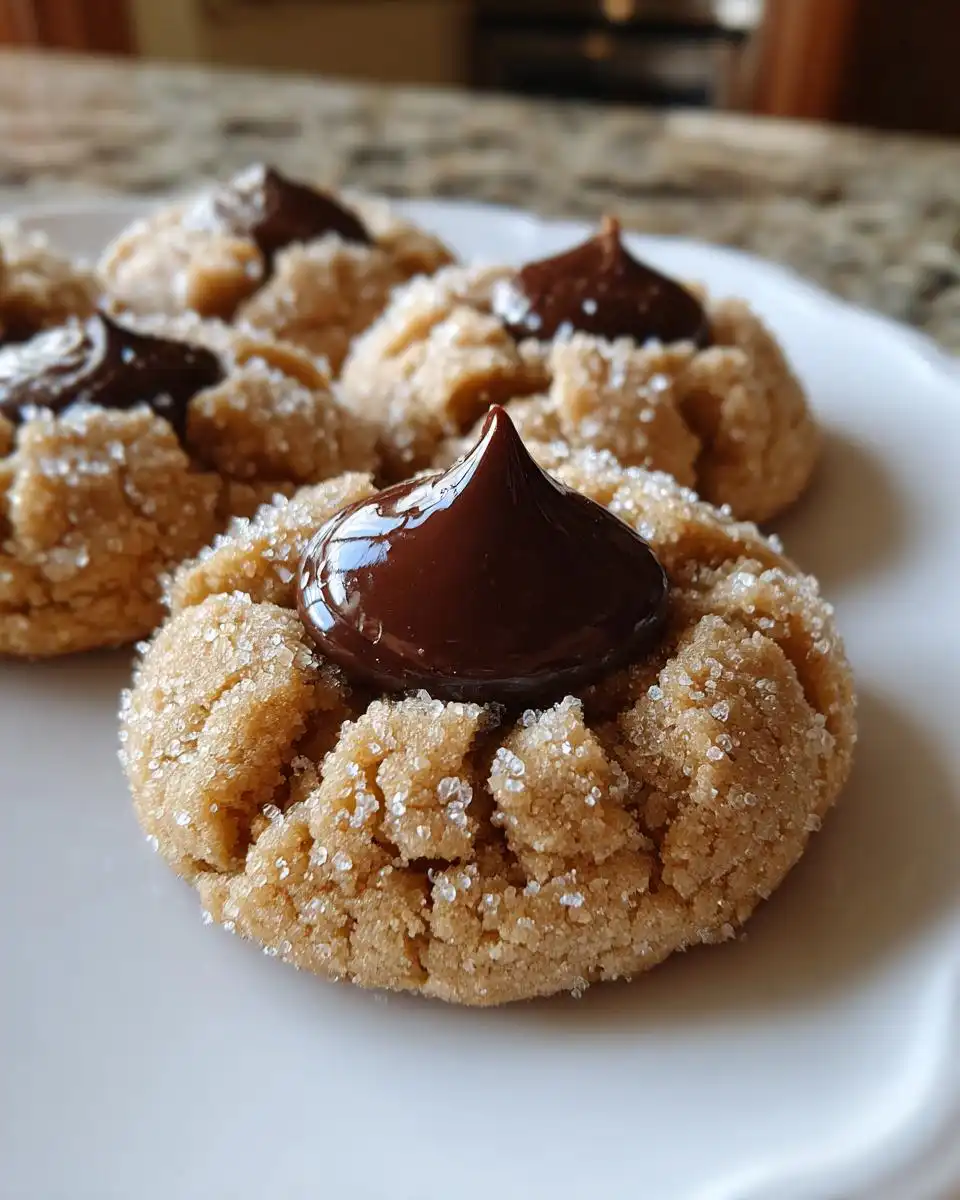
This is the moment of truth! As soon as you pull the trays out of the oven—and I mean *immediately*—grab your unwrapped chocolate kisses. Gently press one kiss right into the center of each warm cookie. You need to press down just enough so the chocolate sinks slightly into the warm cookie top.
Don’t move them yet! Let the cookies cool completely right there on the baking sheet. As they cool down, the chocolate will set perfectly into that beautiful blossom shape. If you try to move them too soon, the cookie might crumble, or the chocolate might slide off. Patience here is what makes Classic Gluten Free Peanut Butter Blossoms look professional! For more sweet inspiration, follow my Pinterest boards.
Tips for Success with Gluten Free Peanut Butter Blossoms
Baking gluten-free always has a few extra quirks, but once you nail these tips, your Classic Gluten Free Peanut Butter Blossoms will be perfect every time. The number one mistake people make is using the wrong flour blend. You absolutely must use a gluten-free all-purpose blend that already contains xanthan gum.
If your blend doesn’t have it, you need to add about half a teaspoon per cup of flour, otherwise, these cookies will just crumble into dust the second you pick them up! Another common pitfall is overbaking. Since we want chewiness, pulling them out when the edges are just set is vital. They will continue to cook slightly on the hot pan.
Also, make sure that peanut butter is creamy, not crunchy. Crunchy bits mess with the dough structure, and we need that smooth base to hold up to the rolling and pressing. Finally, if your dough seems too soft to roll after mixing, don’t panic! Just pop the whole bowl into the fridge for about 15 minutes. Chilling makes rolling those little balls so much easier and keeps your Classic Gluten Free Peanut Butter Blossoms from spreading too thin in the oven. If you are interested in other gluten-free baking, check out my recipe for fudge brownies.
Storing and Keeping Your Classic Gluten Free Peanut Butter Blossoms Fresh
These cookies are so good you’ll want to make a double batch, but don’t worry about leftovers! The good news is that because of the peanut butter and the sugar content, Classic Gluten Free Peanut Butter Blossoms actually keep really well. The chocolate kiss helps seal in some of that moisture, too.
For the best texture, you should store them in an airtight container at room temperature. If you try to keep them in the fridge, they can sometimes dry out faster, which is the last thing we want for a chewy cookie! They stay wonderfully fresh for about four days this way. If you need to keep them longer, the freezer is your friend!
Storage and Reheating Table
| Storage Method | Duration | Reheating Instructions |
|---|---|---|
| Airtight Container (Room Temp) | Up to 4 days | None needed, eat at room temp. |
| Freezer (Airtight Container) | Up to 2 months | Thaw on counter for 30 minutes. |
Common Questions About These Cookies
I know when I first started baking gluten-free, I had a million questions pop up right when I was about to mix! It’s better to ask now than end up with a tray of sad, crumbly cookies. These are the things that trip up most bakers when they try to make Classic Gluten Free Peanut Butter Blossoms for the first time.
We want that perfect crinkle top and that soft center, so let’s clear up any confusion about ingredients or timing.
Can I use a different type of peanut butter?
This is a big one! I say stick to creamy peanut butter for this recipe. Crunchy peanut butter adds little pockets of fat and texture that aren’t accounted for in the flour ratios. If you only have crunchy, you can use it, but the dough might feel a little more crumbly when you roll it. Also, please avoid those natural peanut butters where the oil separates on top. We need that emulsified, uniform texture for the best peanut butter cookies. For more cookie variations, see my soft peanut butter cookies.
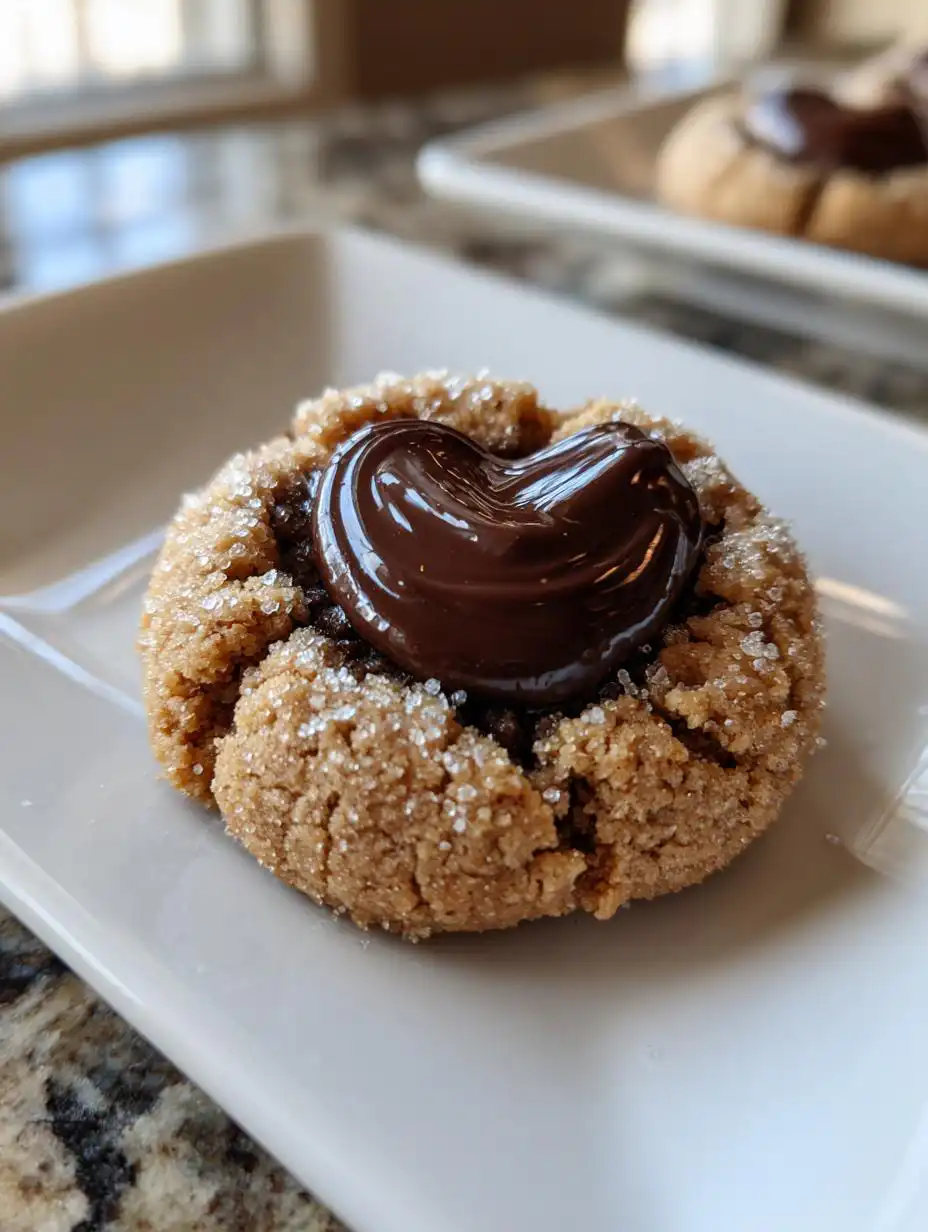
Why is the chocolate sinking too much?
If your chocolate kiss sinks all the way to the bottom or melts into a puddle, you waited too long! The key to getting that perfect little crater is pressing the chocolate in immediately—within 30 seconds—of taking the hot cookies out of the oven. The residual heat softens the bottom of the chocolate just enough to adhere, but the cookie itself is still structurally sound enough to hold the top shape. If you let them cool for five minutes, the cookie hardens, and the chocolate just sits on top looking sad.
What is the best gluten free flour blend to use?
I tested about seven different brands, and honestly, the best result comes from a 1:1 gluten-free all-purpose blend that *already includes* xanthan gum. If your blend doesn’t have it, you should add about 1/2 teaspoon for every cup of flour you use. Xanthan gum acts like the gluten, giving your chocolate kiss cookies structure so they don’t spread too much or break apart. Don’t try this with straight almond flour or coconut flour; you need that multi-grain blend!
Understanding the Nutrition Profile
When we talk about making Classic Gluten Free Peanut Butter Blossoms, we aren’t exactly aiming for health food, right? These are treats! I want to be super clear that these numbers are just estimates based on the main ingredients used. Don’t use this for strict dietary tracking, but it gives you a good idea of what you’re enjoying in one perfect cookie.
Based on my calculations for one serving size (one cookie), here is what you can generally expect:
- Calories: Around 115
- Fat: About 6 grams
- Carbohydrates: Around 13 grams
- Protein: Roughly 2 grams

Perfect 11 Classic Gluten Free Peanut Butter Blossoms
- Total Time: 27 minutes
- Yield: 24 cookies
- Diet: Gluten Free
Description
These gluten free peanut butter blossoms are soft, chewy, and topped with chocolate. A classic peanut butter cookie made easy with simple pantry ingredients.
Ingredients
- 1/2 cup creamy peanut butter
- 1/2 cup unsalted butter softened
- 1/2 cup granulated sugar
- 1/2 cup packed brown sugar
- 1 large egg room temperature
- 1 teaspoon molasses
- 1 1/4 cups gluten free all-purpose flour with xanthan gum
- 3/4 teaspoon baking soda
- 1/2 teaspoon baking powder
- 1/4 cup granulated sugar for rolling
- 24 chocolate kisses unwrapped
Instructions
- Preheat the oven to 375°F and line two baking sheets with parchment paper.
- In a large bowl, beat the peanut butter, butter, granulated sugar, and brown sugar until creamy and well combined.
- Mix in the egg and molasses until smooth.
- In a separate bowl, whisk together the gluten free flour, baking soda, and baking powder.
- Add the dry ingredients to the wet ingredients and mix until a soft dough forms.
- Scoop 1 tablespoon portions of dough and roll into balls.
- Roll each dough ball in the granulated sugar and place 2 inches apart on the prepared baking sheets.
- Bake for 10 to 12 minutes until the edges are set and lightly golden.
- Immediately press a chocolate kiss into the center of each cookie.
- Let the cookies cool completely on the baking sheet before serving.
Notes
- Press the chocolate gently into the cookies while they are hot so it sets neatly as the cookies cool.
- Prep Time: 15 minutes
- Cook Time: 12 minutes
- Category: Dessert
- Method: Baking
- Cuisine: American