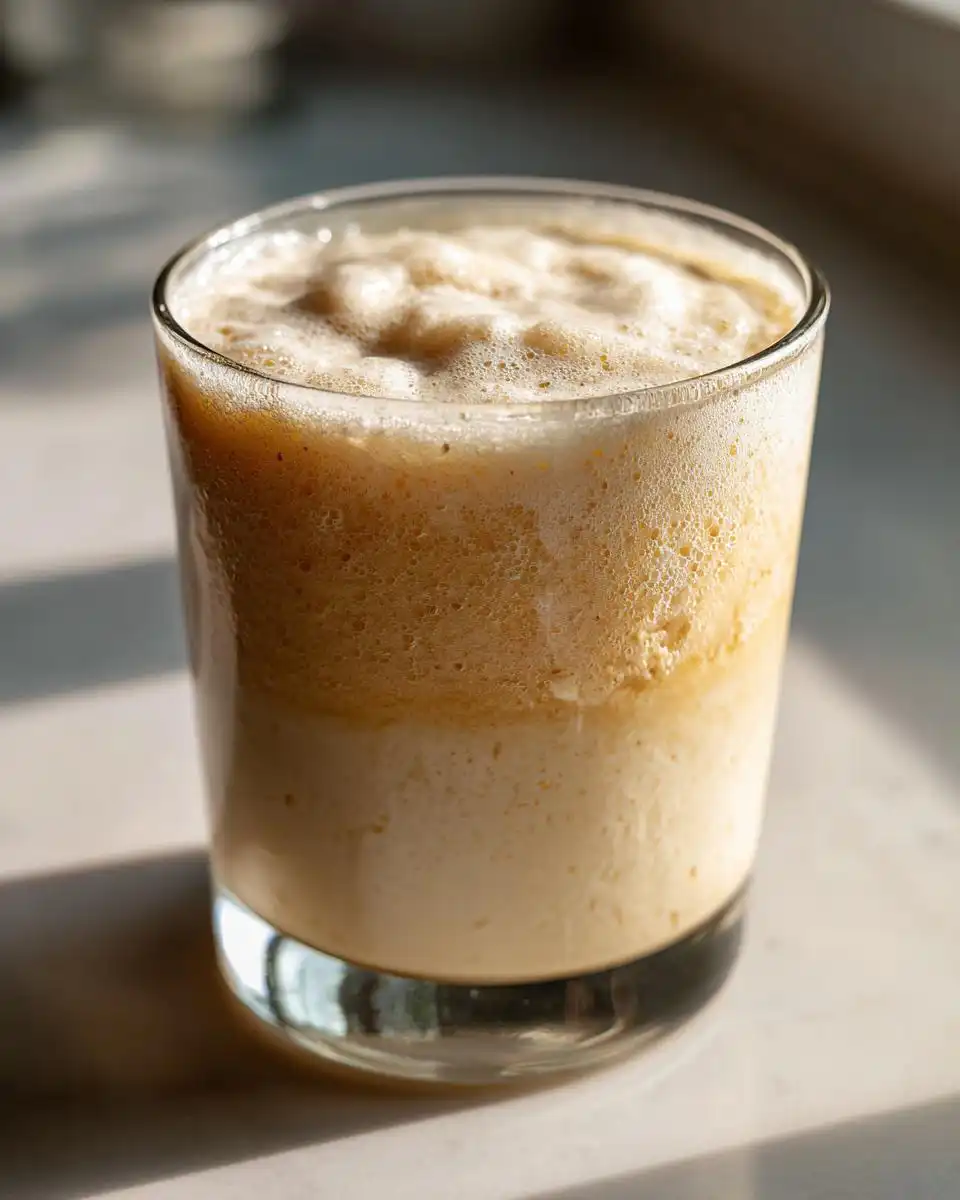
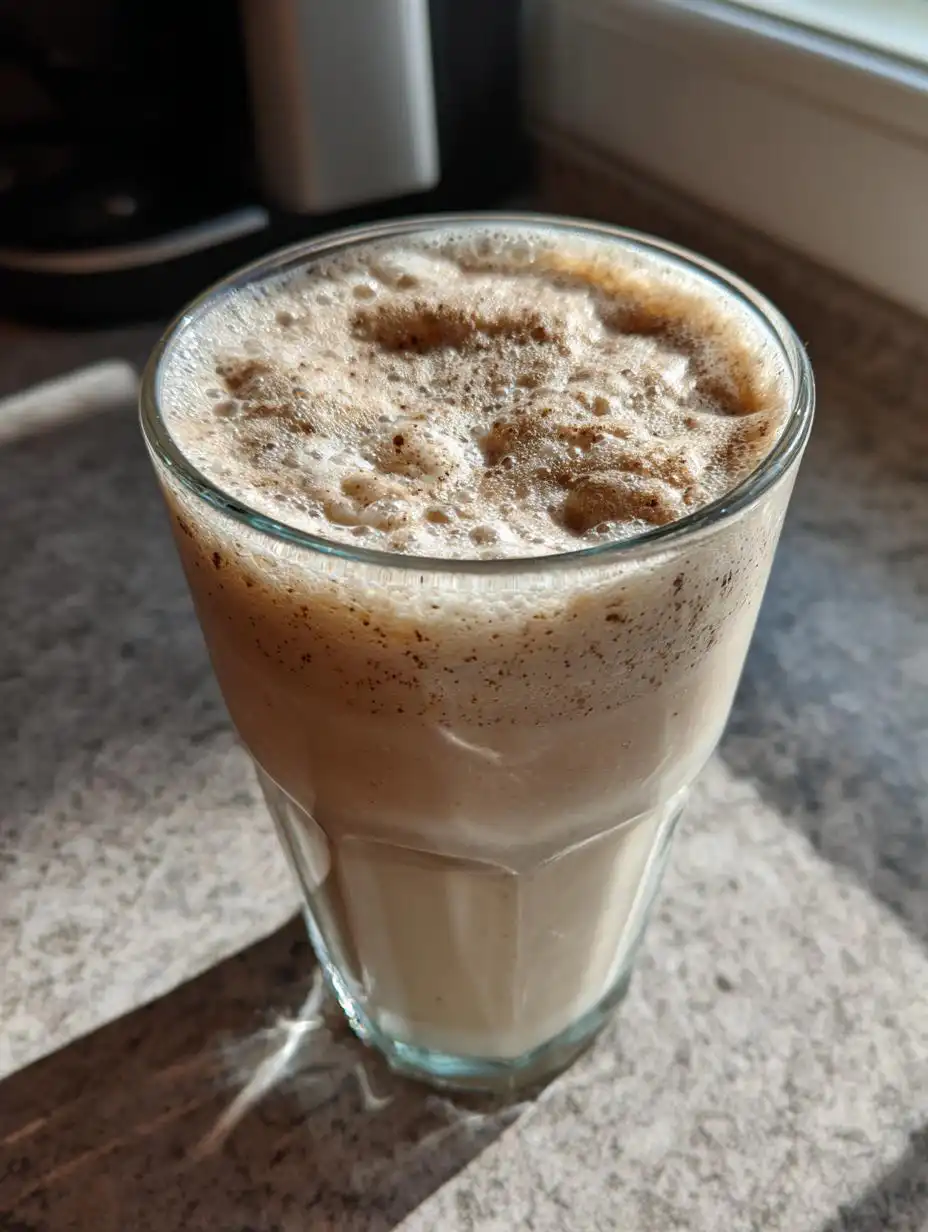
I have tried countless times to recreate that perfect, icy, creamy coffee shop experience at home, especially when I’m trying to keep the sugar count down. And I finally cracked the code! Forget those watery, disappointing attempts—this recipe for the Sugar Free Vanilla Bean Frappuccino at Home is the real deal. It’s unbelievably smooth, tastes like you just paid eight dollars for it, but without any of the guilt.
The best part? It’s reliable. I mean, seriously reliable. You’re looking at five minutes, tops, from fridge to glass. This isn’t some fussy recipe that requires weird temperatures or resting times. We are using simple ingredients blended perfectly to give you that cafe-style texture every single time. Trust me, once you master this technique, you won’t be waiting in line for those drive-thru drinks anymore!
Gather Your Components for Sugar Free Vanilla Bean Frappuccino at Home
Listen, the secret to making this Sugar Free Vanilla Bean Frappuccino at Home taste like it came from a fancy shop is absolutely down to the quality of what you put in the blender. Because we aren’t using sugar to build body, we have to rely on the fat and the real vanilla to do the heavy lifting on flavor. Don’t skimp here—especially on that vanilla!
It’s a short list, which is great, but every item needs to be right. You want that rich, creamy mouthfeel that keeps you coming back for more. Here’s what you need to have ready before you even touch the blender button.
| Component | Amount |
|---|---|
| Unsweetened Almond Milk | 2 cups |
| Heavy Cream | 1 cup |
| Vanilla Source | Seeds from 1 bean OR 1 tsp extract |
| Sweetener | 1/2 tsp liquid stevia (or to taste) |
| Ice | 2 cups |
Essential Ingredients Explained
If you can get your hands on a real vanilla bean, please do it! Scrape those tiny black seeds right into the blender—that’s where the real flavor payoff is. If not, a good quality vanilla extract works just fine, but the visual appeal of the seeds is lovely. We use liquid stevia because it dissolves instantly without any grittiness, which is crucial for a smooth drink. And that xanthan gum? It’s optional, but if you want that super-thick, almost scoopable texture you get at the cafe, just a tiny pinch makes a huge difference in preventing separation.
Equipment Needed for Your Sugar Free Vanilla Bean Frappuccino at Home
You absolutely need a good blender for this job. Since we are pulverizing ice quickly to get that smooth consistency, a weak machine might leave you with chunky ice shards, and nobody wants that in their perfect Sugar Free Vanilla Bean Frappuccino at Home. Make sure your blender pitcher is ready to go, and have your serving glasses chilled if you’re feeling fancy!
Step-by-Step Directions for a Creamy Sugar Free Vanilla Bean Frappuccino at Home
Okay, this is where the magic happens quickly! Remember, we are making a Sugar Free Vanilla Bean Frappuccino at Home, and speed is key to keeping that icy texture intact. Don’t let anything sit around once you start blending liquids. I always have my ice measured out and ready to go before I even turn the machine on.
Initial Blending Phase
First things first, we need to get those creamy, flavorful elements combined perfectly. Pour your two cups of unsweetened almond milk and the full cup of heavy cream right into the base of your high-speed blender pitcher. Next, add your vanilla—whether that’s scraping in all those beautiful seeds from the bean or pouring in your teaspoon of extract. Follow that up with your liquid sweetener. If you are using stevia, start with the recommended half teaspoon. If you’re using a different zero-sugar substitute, start with a little less than you think you need; we can always add more later!
Now, if you decided to use the xanthan gum for that extra thick body, sprinkle it in now over the liquids. Secure the lid tightly—this is important because we are going to blend this mixture for a quick burst before the ice goes in. Blend everything on medium-high for just about 10 to 15 seconds. You just want these liquids fully incorporated and the sweetener dissolved. Stop the machine. We want this base smooth before we start crushing ice.
Achieving Icy Perfection
Now is the time for the cold stuff! Add your two full cups of ice right on top of that creamy base mixture. Make sure the lid is secure again—this part can get dramatic if you don’t seal it well! Start the blender on a low speed to initially break up the ice cubes, maybe for 5 seconds, and then immediately crank it up to high speed. You need to blend this for a solid 45 to 60 seconds until you can see the texture change completely.
What you are looking for is that thick, smooth, and completely icy consistency. You shouldn’t see individual ice chunks anymore; it should look like soft-serve ice cream that’s just beginning to melt. If your blender has a tamper, use it to push the mixture down toward the blades during this stage to ensure everything gets incorporated evenly. If you stop too early, it will be watery. If you blend too long, it might melt too much!
Final Taste Check and Serving
Once you hit that perfect texture, turn the machine off. Before pouring, you absolutely must taste it! This is your chance to customize. Dip a clean spoon in and give it a quick try. Does it need more sweetness? If so, add a few more drops of liquid stevia or your preferred sweetener and pulse the blender just once or twice to integrate it. Do not blend for long! We don’t want to melt what we just built.
When you are happy with the sweetness level and the consistency is exactly right for your perfect Sugar Free Vanilla Bean Frappuccino at Home, pour it immediately into your serving glasses. Because this drink relies on the ice structure, serve it right away for the best experience. Enjoy that cafe-quality treat!
Tips for Making the Best Sugar Free Vanilla Bean Frappuccino at Home
Making this Sugar Free Vanilla Bean Frappuccino at Home is simple, but knowing a few tricks can take it from good to absolutely incredible. Since we’re dealing with ice and zero sugar, texture management is really the main challenge. Don’t sweat it if your first attempt isn’t perfect—that’s why we test things out!
My biggest piece of advice is always to respect the power of the blender and the temperature of your ingredients. When you nail the balance between the liquids and the ice, that’s when you get that amazing, thick texture that makes you forget you’re drinking something low-carb. If you are looking for other low-carb ideas, check out my low-carb ground beef bowl recipe!
Adjusting Thickness and Consistency
If you end up with a drink that’s too thin, don’t panic! It’s usually because the ice melted too fast or you didn’t use enough heavy cream relative to the milk. You have two easy fixes. The first is to just toss in another half cup of ice and blend it hard until it thickens up again. But if you’re still short on body, try reducing the almond milk slightly next time—maybe use 1.75 cups instead of 2 full cups. That little bit of fat from the cream really helps hold the structure.
Conversely, if it’s too thick and the blender is just spinning without grabbing the ice, stop the machine, scrape down the sides, and add just a tablespoon or two of extra almond milk. Pulse quickly, and you should be good to go. It’s all about small adjustments!
Ingredient Substitutions for Your Sugar Free Vanilla Bean Frappuccino
We are committed to keeping this a Sugar Free Vanilla Bean Frappuccino, but you can certainly swap out the bases. If you can’t use almond milk, unsweetened coconut milk works beautifully and adds a little extra richness, though it might increase the fat content slightly. Soy milk is another option, but I find it doesn’t blend quite as smoothly as the nut milks.
When it comes to sweeteners, if liquid stevia isn’t your jam, you can absolutely use liquid monk fruit drops instead. Just remember that different sweeteners have different intensities, so always start slow and taste-test before you serve a whole batch. The goal is sweet enough for you, without that bitter aftertaste that some sugar substitutes can leave behind! For more sweet inspiration, see my healthy chocolate dessert ideas.
Storing and Keeping Your Sugar Free Vanilla Bean Frappuccino Fresh
Now, let’s be honest, this Sugar Free Vanilla Bean Frappuccino at Home is truly best enjoyed the second it comes out of the blender. It’s designed to be consumed at peak icy perfection. However, sometimes life happens and you have leftovers! Don’t just pour that beautiful creamy mix down the sink. It’s too good, and it still tastes amazing even if the texture changes.
If you have any leftover, the key is to store it in an airtight container in the coldest part of your fridge. Be prepared that it will lose all its icy texture and turn into a delicious, thick, chilled vanilla cream drink. It won’t be a frappuccino anymore, but it’s still fantastic for sipping later. Don’t even think about freezing leftovers unless you plan on scraping them out with a spoon later!
If you want to revive it as close to the original texture as possible, you’ll need to re-blend it. Take the chilled mixture, pour it back into the blender, and add about a half cup of fresh ice cubes. Blend it hard until it’s thick again. It might take a little more blending time than the initial batch because the liquids are colder now.
Here’s a quick guide for handling those leftovers:
| Method | Resulting Texture | Reheating/Re-serving Tip |
|---|---|---|
| Refrigerate (Airtight) | Thick, chilled liquid | Stir well before drinking. |
| Re-Blend | Closest to original icy texture | Add 1/2 cup fresh ice before blending. |
Frequently Asked Questions About Your Sugar Free Vanilla Bean Frappuccino at Home
I know you probably have a few questions swirling around before you hit the blend button on this recipe. It’s new territory for some people when you take out the sugar, but I promise this Sugar Free Vanilla Bean Frappuccino at Home is foolproof if you follow the liquid-to-ice ratio. Here are some things folks ask me all the time about getting this perfect!
Can I make this Sugar Free Vanilla Bean Frappuccino without heavy cream?
That’s a great question about keeping things low fat! You certainly can skip the heavy cream, but you need to be prepared for a texture change. Heavy cream is what gives this drink its richness and body since we aren’t using sugar. If you skip it, use a little less almond milk—maybe 2.5 cups total liquid instead of 3. You can substitute the cream with an extra half cup of a thicker milk, like canned, full-fat coconut milk (the thick white part, not the watery stuff below it). It will still be delicious and sugar-free, but it won’t have that exact velvety mouthfeel of the original.
How long does it take to make a Sugar Free Vanilla Bean Frappuccino at Home?
The best news about this recipe is the speed! It is lightning fast. The total time listed is only 5 minutes, and that’s accurate if you have everything ready to go. The actual blending time is super short—you blend the liquids for about 15 seconds, then blend the ice for about 45 to 60 seconds. Seriously, you can make this Sugar Free Vanilla Bean Frappuccino at Home faster than you can put on your shoes to drive to the coffee shop! For more quick recipes, check out my 5-minute sourdough breakfast toast.
What is the best way to sweeten this blended drink?
I swear by liquid stevia because it dissolves completely without heating, which is essential for a cold blended drink. But if stevia gives you an aftertaste, you have other great options! Liquid monk fruit drops are fantastic and work exactly the same way, measuring out cup-for-cup similar to stevia. You could also use a sugar-free syrup, like Torani or DaVinci, if you have one around. Just remember that syrups are usually thinner than stevia drops, so you might need to add a bit more if you go that route.
Sharing Your Sugar Free Vanilla Bean Frappuccino Creation
Well, that’s it! You’ve made the creamiest, dreamiest Sugar Free Vanilla Bean Frappuccino at Home imaginable. Now that you’ve tasted the difference fresh ingredients make, I really want to know what you think! Did you try the vanilla bean seeds? Did the xanthan gum work for you? Head down to the comments below, give this recipe a rating, and tell me how you enjoyed your new favorite low-sugar treat! You can also find more recipe inspiration on my Medium profile or follow along on Pinterest.
Print
Amazing Sugar Free Vanilla Bean Frappuccino at Home 5 min
- Total Time: 5 minutes
- Yield: 4 servings
- Diet: Low Carb
Description
This sugar free vanilla bean frappuccino is creamy, icy, and refreshing with real vanilla flavor and no added sugar, ready in minutes. It is a smooth, cafe style blended drink.
Ingredients
- 2 cups unsweetened almond milk
- 1 cup heavy cream
- Seeds from 1 vanilla bean or 1 teaspoon vanilla extract
- 1/2 teaspoon liquid stevia or preferred no sugar sweetener
- 2 cups ice
- 1/4 teaspoon xanthan gum optional for thickness
Instructions
- Add almond milk, heavy cream, vanilla, sweetener, and xanthan gum if using to a high speed blender.
- Blend for 10 to 15 seconds until smooth and fully combined.
- Add the ice to the blender.
- Blend on high for about 45 to 60 seconds until thick, smooth, and icy.
- Taste and adjust sweetness if needed.
- Pour into glasses and serve immediately.
Notes
- For a thicker texture, reduce the almond milk slightly or add more ice before blending.
- Prep Time: 5 minutes
- Cook Time: 0 minutes
- Category: Beverage
- Method: Blending
- Cuisine: American