
When I tell people I can get melt-in-your-mouth, smoky, Texas-style pot roast on the table in just over an hour, they look at me like I’m pulling their leg. But seriously, ditch the all-day oven method! That big, beautiful chuck roast just drinks up all that flavor when the Instant Pot does the heavy lifting.
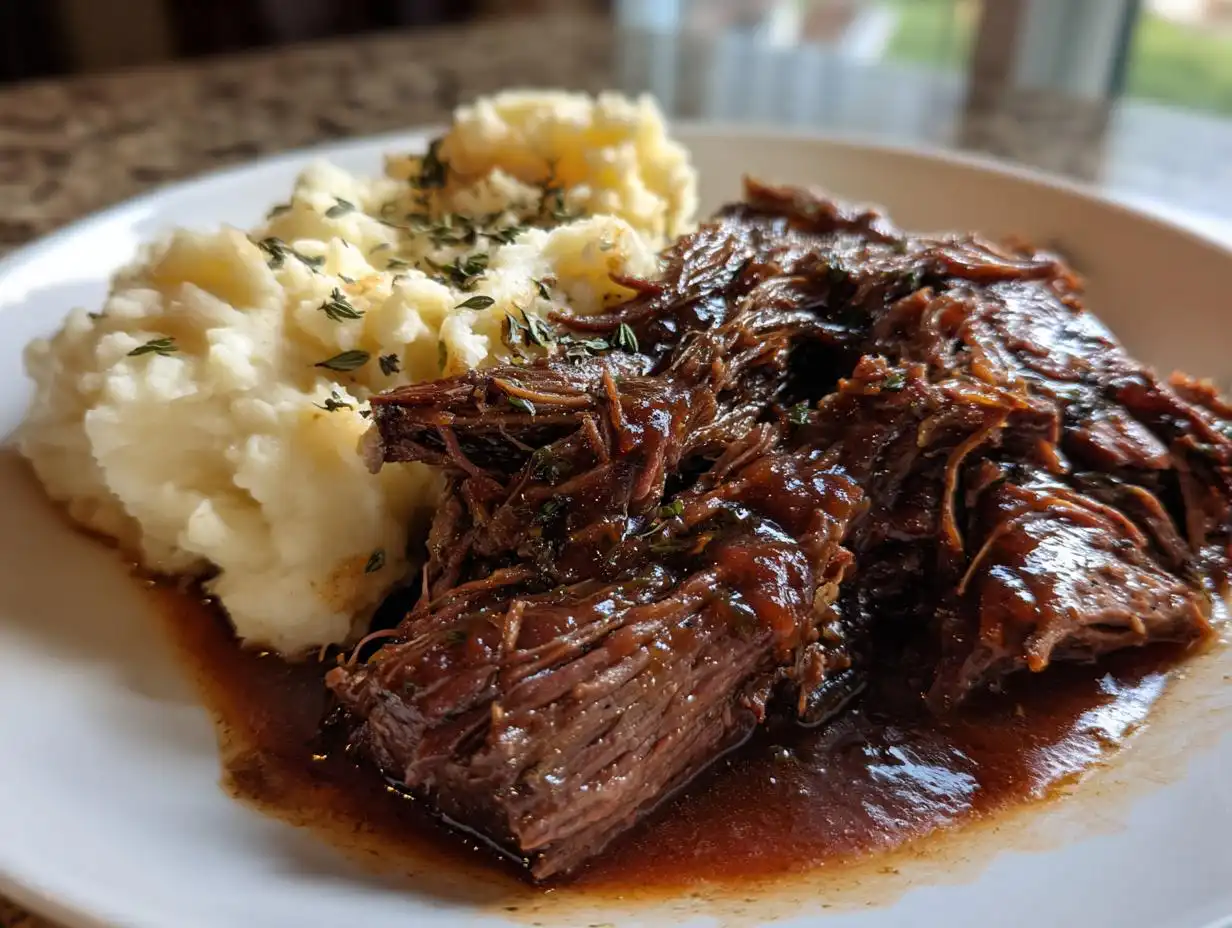
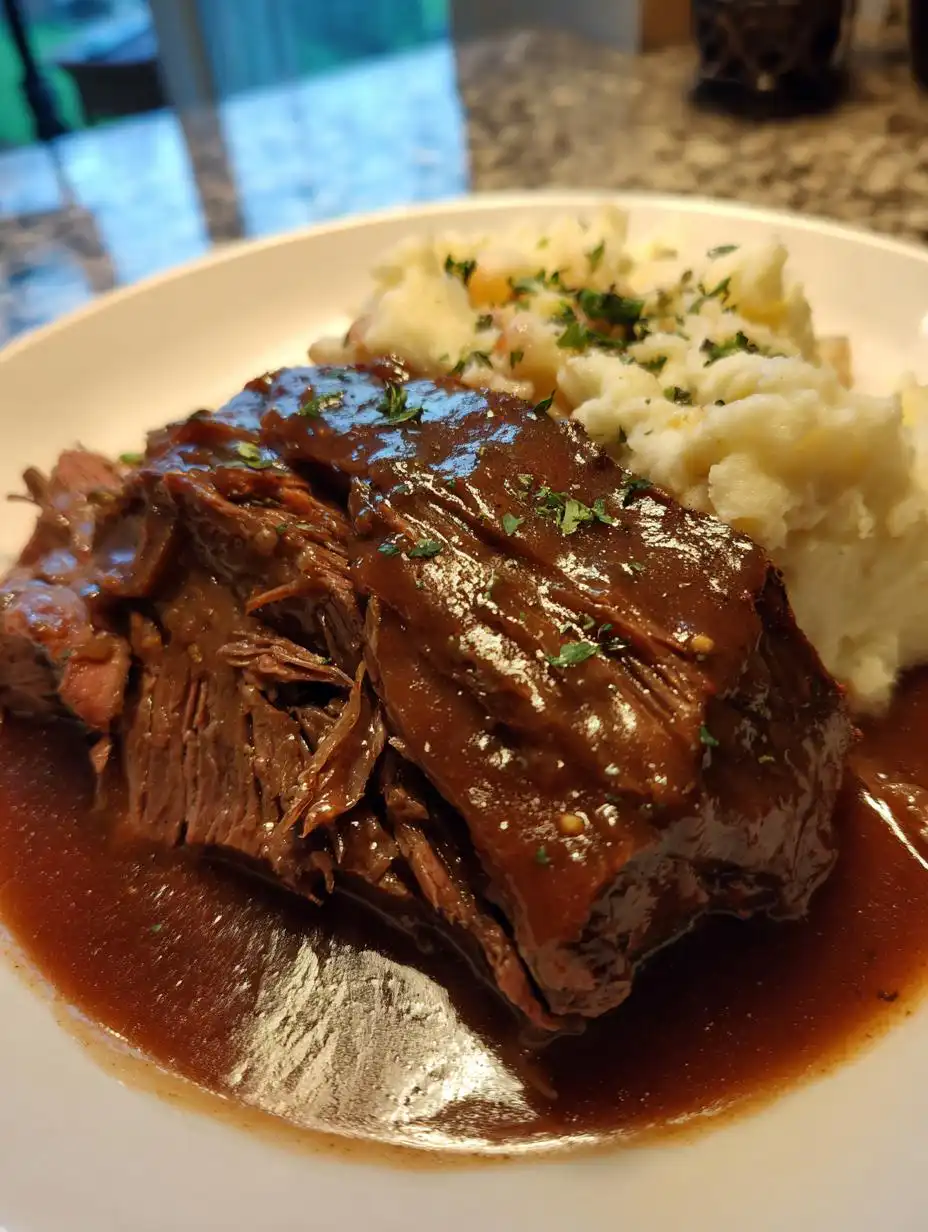
My favorite part about this recipe is that rich, tangy BBQ gravy that forms naturally in the pot. It’s nothing like those thin, sad gravies you sometimes get. This is deep, savory, and perfect over a pile of creamy mashed potatoes. I’ve made hundreds of things in my pressure cooker, but nothing beats the sheer ease and payoff of this Instant Pot Texas-Style Pot Roast. It feels like cheating, honestly, how tender and flavorful this beef gets so fast. You’re going to love how simple it is!

Gathering Your Ingredients for Instant Pot Texas-Style Pot Roast
You don’t need a hundred fancy things for this recipe, but the quality of what you do use really matters. Since we’re cooking under pressure, we want every ingredient to pack a flavor punch. Don’t skimp on the beef, and trust me on the combination of sauces—that’s where the real Texas magic happens in your Instant Pot Texas-Style Pot Roast.
It’s all about setting a solid foundation so that when that pressure builds up, you get the best beef possible. If you are looking for other great comfort food recipes, check out these copycat rolls!
Meat and Seasoning Requirements
First things first, you absolutely need a good, solid 3-pound beef chuck roast. That marbling is what keeps the meat juicy when pressure cooking. Don’t even think about using leaner cuts; they’ll just dry out on you. Once you pat that beef dry—and I mean really dry—you’re going to season it aggressively on all sides with salt, pepper, and a little garlic powder. This initial crust builds so much flavor later on.
Liquids and Flavor Builders for the BBQ Gravy
This is the secret sauce department! We need two cups of low-sodium beef broth—I always use low-sodium so I can control the saltiness later. You’ll also mix in your tomato sauce, your favorite BBQ sauce (go bold!), and some Worcestershire sauce for that deep umami background. Don’t forget those two beef bouillon cubes; they really boost the gravy flavor without adding extra liquid.
Fresh Produce and Herbs
We’re loading this up with veggies that break down beautifully into the gravy. Grab one onion, three celery stalks, and an orange bell pepper—diced up nicely. The garlic has to be fresh, too! Mince those three cloves right before you use them. For herbs, dried thyme and rosemary are perfect. And save some fresh parsley for a little pop of green right at the end.
Essential Equipment for Making Your Instant Pot Texas-Style Pot Roast
Before you even think about turning on the machine, get your tools ready. Because this recipe involves searing and then pressure cooking, having the right gear makes everything so much smoother. You definitely need your Instant Pot, of course, preferably the 6-quart size. You’ll also want a sturdy cutting board and a good, long spoon or tongs for handling that big piece of beef.
A small bowl for mixing your seasonings is handy, too. Trust me, having everything measured and ready to go means you won’t be scrambling while the oil is hot and ready for searing! For more cooking tips and tricks, see this resource.
Step-by-Step Instructions for Instant Pot Texas-Style Pot Roast
Okay, this is where the magic really happens! Don’t rush through these steps, especially the searing. It makes all the difference in the final flavor of your Instant Pot Texas-Style Pot Roast. We are moving fast, but we are moving smart.
Preparing and Searing the Beef Chuck Roast
First, grab those paper towels and pat your beef chuck roast until it’s as dry as you can get it. Moisture is the enemy of a good sear, and we need that crust! Once dry, rub it down generously with your salt, pepper, and garlic powder mix. Set your Instant Pot to Sauté mode. Once it’s hot, add the olive oil. Carefully place the roast in the pot—be ready for a little splatter! Sear it for about three to four minutes on each side until you have a nice, deep brown crust all over. When it looks perfectly browned, switch the Sauté mode off immediately.
Building the Pressure Cooking Base
Now for the important part: deglazing! Pour in about half a cup of that beef broth. Take a wooden spoon and scrape up every single brown bit stuck to the bottom of the inner pot. Those brown bits are pure flavor, so don’t leave any behind! Next, arrange your diced onions, bell pepper, and celery around the roast. Then, spoon that tomato sauce, BBQ sauce, and Worcestershire sauce right over the top. Finish by crumbling those two bouillon cubes in there and sprinkling over the dried thyme and rosemary. Don’t stir it all up; we want the roast nestled right in the middle of the flavor bath.
Pressure Cooking and Safe Release Timing
Secure that lid tightly and make sure your valve is set to the Sealing position—we don’t want any steam escaping early! Set your Instant Pot to cook on High Pressure for exactly 65 minutes. This long cook time is what breaks down the tough fibers in the chuck roast. When the timer goes off, resist the urge to rush it! You must let the pressure release naturally for a full 20 minutes. This Natural Release (NR) is crucial for keeping that beef tender. After 20 minutes, carefully switch the valve to Venting to release any tiny bit of leftover steam.
Finishing and Serving Your Tender Instant Pot Texas-Style Pot Roast
Once the pin drops, open that lid—wow, what a smell! Carefully pull the roast out onto a cutting board. You can slice it if you like a cleaner look, but I always use two forks and shred mine right there. The meat should fall apart easily. Spoon that rich BBQ gravy right over your shredded beef. Serve it up immediately with your favorite sides, and sprinkle a little fresh parsley on top for color. That’s it—the best Instant Pot Texas-Style Pot Roast you’ll ever make!
Tips for Achieving Perfect Instant Pot Texas-Style Pot Roast Results
Even though the Instant Pot does most of the work, a few small rules make the difference between an okay roast and the best Instant Pot Texas-Style Pot Roast you’ve ever had. Honestly, it’s all about setting up the flavor layers correctly before you even lock the lid.
Follow these tricks, and you’ll get that fork-tender texture every single time. Don’t skip the searing, and please, respect the natural release time! Follow us on Pinterest for more great recipes!
Achieving Deep Beef Flavor Through Searing
Searing isn’t just about color; it’s about building flavor foundations through the Maillard reaction. When you get that chuck roast truly brown on all sides in the hot oil, you are creating hundreds of tiny flavor compounds on the surface. If you crowd the pot or don’t let the oil get hot enough, you’ll end up steaming the meat instead of searing it, and the final gravy will taste flat.
Make sure you sear in batches if you need to—don’t let the pot temperature drop too much! Those dark, crusty bits you scrape up later are what make the BBQ gravy rich and complex.
Understanding Pressure Release Methods
This is where people mess up pot roast in the pressure cooker! When the 65 minutes are up, you have two choices: Quick Release (QR) or Natural Release (NR). QR blasts the steam out immediately, which causes the meat fibers to seize up quickly, often resulting in tougher, less tender meat.
For a roast, we need the 20-minute Natural Release. This slow cooling process lets the internal temperature drop gradually, allowing the juices that were forced to the center of the meat during cooking to redistribute back throughout the roast. That’s the secret to getting that incredible, juicy shred every time. Don’t rush it!
Storage and Reheating Instructions for Leftover Pot Roast
If you are lucky enough to have any of this amazing roast left over—which I doubt, because it disappears fast—proper storage is key to keeping that BBQ gravy delicious. The flavor actually gets deeper overnight, which is fantastic for lunch the next day! Make sure to store the shredded beef and the gravy together in the same airtight container. This keeps the meat from drying out while it’s chilling in the fridge.
If you need to keep it longer, this freezes beautifully. Just make sure you cool it completely before sealing it up tight. Never put hot food straight into the fridge, or you’ll warm up everything else in there!
Here’s a quick guide for keeping your leftovers perfect:
| Guideline | Details |
|---|---|
| Refrigeration Time | Up to 4 days in an airtight container. |
| Freezing Options | Freezes well for up to 3 months. Thaw overnight in the fridge first. |
| Reheating Method | Reheat gently on the stovetop or in the microwave, adding a splash more broth if needed for moisture. |
Answering Common Questions About Your Pressure Cooker Roast
It’s totally normal to have questions when you switch from the oven to the Instant Pot, especially with something as classic as a pot roast. I get asked all the time about substitutions, but sticking close to the recipe is usually best when you’re aiming for that perfect Instant Pot Texas-Style Pot Roast texture. Don’t stress if something seems slightly off; we can usually fix it! If you prefer a slow cooker version of pot roast, check out this link.
Let’s tackle the most common things folks worry about when making this pressure cooker roast.
Can I use a different cut of beef for this Instant Pot Texas-Style Pot Roast?
I strongly recommend sticking with the chuck roast. Chuck has the best marbling, which means it has the fat pockets needed to break down into that luscious, shreddable texture during the high-pressure cooking time. If you use something lean like a round roast, it might cook fine time-wise, but it will end up dry and stringy instead of wonderfully tender. Chuck is the king of the pot roast world for a reason!
How do I thicken the BBQ gravy if it seems too thin?
If, after the natural release, your liquid looks a bit too thin for your liking, don’t panic and reach for flour right away! The easiest fix is to switch your Instant Pot back to Sauté mode. Let it come to a simmer and just let it cook, stirring occasionally, until enough steam evaporates and the sauce reduces down to your preferred thickness. It concentrates the flavor too, which is a bonus!
What is the safest internal temperature for this beef roast?
For safety reasons, USDA guidelines say that beef needs to reach at least 145 degrees Fahrenheit internally before you serve it. Since we are shredding this meat, it will naturally go way past that temperature during the long cook time, which is great because it means the connective tissues have fully broken down. But always remember that 145°F is the minimum safety checkpoint for beef.
Sharing Your Delicious Instant Pot Texas-Style Pot Roast Success
Seriously, I can’t wait to hear how this turned out for you! Making an Instant Pot Texas-Style Pot Roast this good should be celebrated. Once you’ve dug into that tender beef and soaked up every drop of that BBQ gravy, please come back and let me know. Drop a comment below, give the recipe a star rating, and tell me what you served it with!
Print
Amazing 65-Min Instant Pot Texas-Style Pot Roast
- Total Time: 1 hour 15 minutes
- Yield: 6 servings
Description
Make a juicy Texas-style pot roast in your Instant Pot! Tender beef chuck with BBQ gravy, herbs, and veggies, ready quickly for a flavorful dinner.
Ingredients
- 3 pounds beef chuck roast
- 2 cups low-sodium beef broth
- 1 teaspoon salt
- 1 teaspoon black pepper
- ½ teaspoon garlic powder
- 1 tablespoon olive oil
- 1 medium onion, diced
- 1 orange bell pepper, diced
- 3 celery stalks, chopped
- 3 garlic cloves, minced
- ½ cup tomato sauce
- ½ cup BBQ sauce
- 2 tablespoons Worcestershire sauce
- 2 beef bouillon cubes
- ½ teaspoon dried thyme
- ½ teaspoon dried rosemary
- Mashed potatoes or steamed vegetables for serving
- Fresh parsley for garnish
Instructions
- Pat the beef dry with paper towels. Season all sides with salt, pepper, and garlic powder.
- Set the Instant Pot to Sauté mode. Add olive oil. Sear the roast on both sides for 3–4 minutes each until browned. Turn off sauté mode.
- Pour beef broth into the pot to deglaze, scraping up any browned bits from the bottom.
- Add onions, bell pepper, celery, and garlic around the roast.
- Pour in tomato sauce, BBQ sauce, and Worcestershire sauce over the ingredients.
- Add bouillon cubes, thyme, and rosemary.
- Secure the lid and set the valve to Sealing. Cook on High Pressure for 65 minutes.
- Allow the pressure to release naturally for 20 minutes. Switch the valve to Venting to release any remaining pressure.
- Remove the roast from the pot. Shred or slice the meat.
- Serve the roast with the cooking liquid spooned over the top. Garnish with parsley.
Notes
- Beef internal temperature should reach at least 145°F and rest for 3 minutes before serving, per USDA safety guidelines.
- Prep Time: 10 minutes
- Cook Time: 1 hour 5 minutes


