I love making little treats that look totally fancy but are secretly ridiculously easy. If you need something elegant for a party platter or just a perfect little bite after dinner, these Chocolate Covered Mint Leaves are my go-to! Seriously, they feel like something you’d buy at a fancy chocolatier, but you whip them up in about fifteen minutes. My trick? You have to start with the freshest mint you can find, otherwise, you lose that bright, cooling pop against the rich chocolate.
I’ve made a lot of chocolate-dipped things over the years—strawberries, pretzels, you name it—and I learned the hard way that the secret to a smooth, professional-looking coat is the right fat mixed into your chocolate. My first few tries were always bumpy and matte. Now, I never skip the tiny bit of coconut oil. It makes the chocolate flow like silk right off the leaf. Trust me, this little step elevates these simple Chocolate Covered Mint Leaves from a fun snack to a stunning dessert!
Essential Components for Perfect Chocolate Covered Mint Leaves
When you’re dealing with just three ingredients, quality really matters, doesn’t it? You can’t hide anything here. We need the chocolate to be rich, the mint to be vibrant, and the method to be smooth. Getting these components right is how we guarantee perfect Chocolate Covered Mint Leaves every single time. It’s all about respecting what you put in.
Selecting Your Mint Leaves
Go out to your garden, or hit the freshest part of the produce section. The leaves need to be flawless—no brown spots, no tears. The most crucial step, and I cannot stress this enough, is drying them. I mean *bone dry*. Use paper towels, pat them gently, then let them air dry on a clean cloth for a few minutes. Any drop of water will cause your chocolate coating to seize up and refuse to stick. We need zero moisture!
The Best Chocolate for Chocolate Covered Mint Leaves
Skip the standard semi-sweet chips, please! For these Chocolate Covered Mint Leaves, I insist on dark chocolate between 70% and 85% cacao. That higher percentage gives you that satisfying snap and cuts through the sweetness of the mint so nicely. Also, we always add a tiny bit of coconut oil to the chocolate when melting. That oil is the secret weapon; it lowers the viscosity slightly so the chocolate coats thinly and evenly, avoiding that thick, gloppy look.
Equipment Needed for Your Chocolate Covered Mint Leaves Recipe
You don’t need a chocolate tempering machine for this, thankfully! Keep it simple. You’ll want a microwave-safe bowl for melting the chocolate. Grab a small tray—any size that fits in your fridge—and line it completely with parchment paper. That paper is non-negotiable; it stops sticking! Finally, you need something to dip with, like a small fork or even just your fingers if you’re brave, but a fork works best for neatness.
Step-by-Step Guide to Making Chocolate Covered Mint Leaves
Okay, now for the fun part! This process moves really fast once you start dipping, so make sure you have your tray ready and your mint leaves sitting right next to your melted chocolate station. We’re aiming for speed and precision here to get those gorgeous, professional-looking Chocolate Covered Mint Leaves that everyone raves about.
Preparing the Mint for Coating
This seems obvious, but trust me, this step determines your success or failure. Go through your mint leaves and pick out about twenty of the best ones—nice and flat, no tears. Wash them gently under cool running water. Don’t scrub them hard, just a gentle rinse. Then comes the drying part, which you can’t rush.
I lay mine out on a thick layer of paper towels. I gently press down with another towel on top to soak up the surface moisture. But that’s not enough! You need to let them sit out for at least ten minutes after patting them down. If you dip a wet leaf, the water turns the chocolate into a gritty mess, and it won’t stick at all. Seriously, take the time to ensure those leaves are completely dry.
Melting the Chocolate Coating for Chocolate Covered Mint Leaves
We are using the microwave because, honestly, who has time to temper chocolate for a quick treat? Combine your dark chocolate chips and that teaspoon of coconut oil in your microwave-safe bowl. The oil is key for that silky texture we talked about earlier.
Pop the bowl into the microwave, but don’t just blast it for a minute. Chocolate burns easily! Heat it for 20 seconds, take it out, and stir it vigorously, even if it still looks mostly solid. Put it back in for another 20 seconds. Repeat this process—20 seconds on, stir well—until the mixture is almost entirely smooth. You might have one or two tiny lumps left, but the residual heat will melt those out as you stir during the next step. You want a smooth, liquid bath ready for our Chocolate Covered Mint Leaves.
Dipping and Setting the Chocolate Covered Mint Leaves
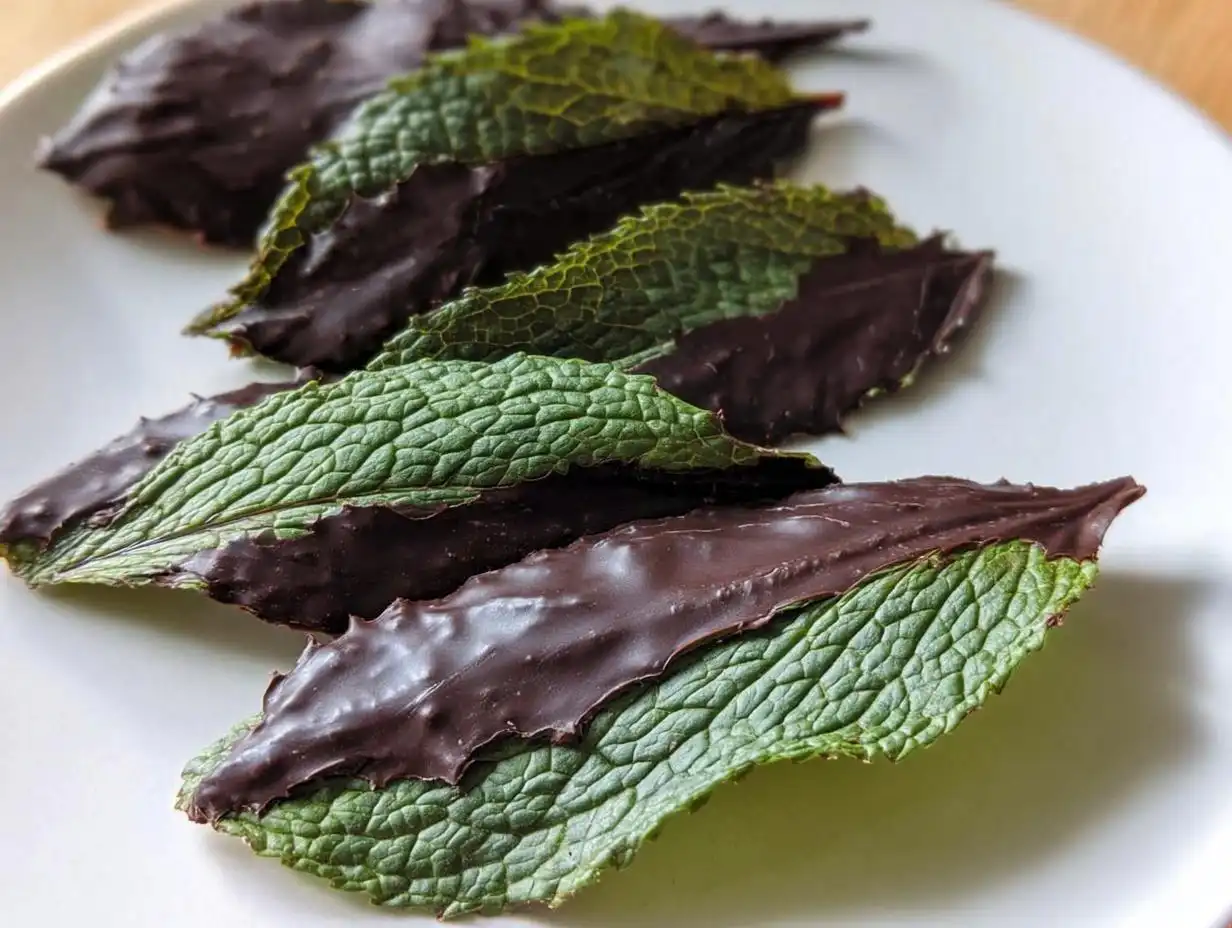
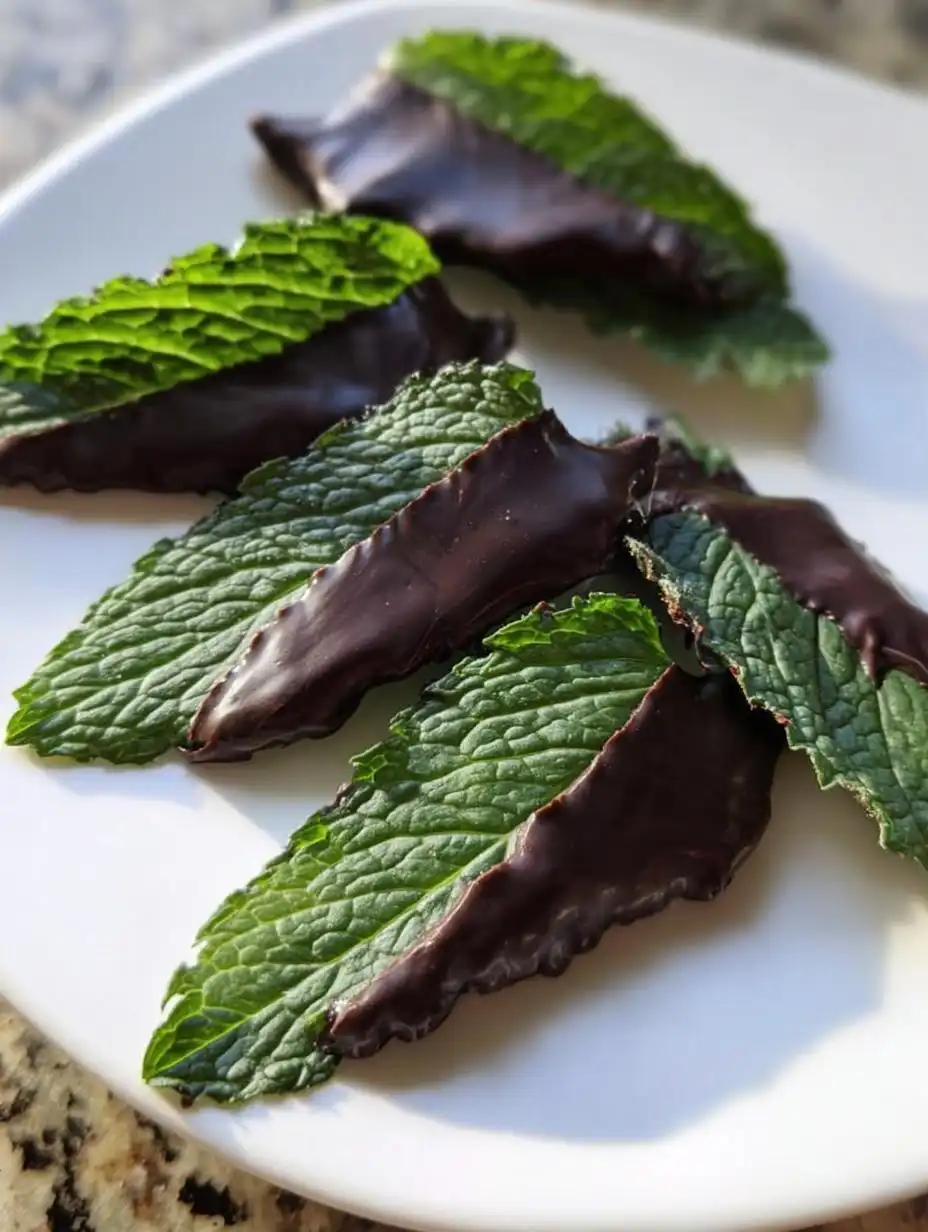
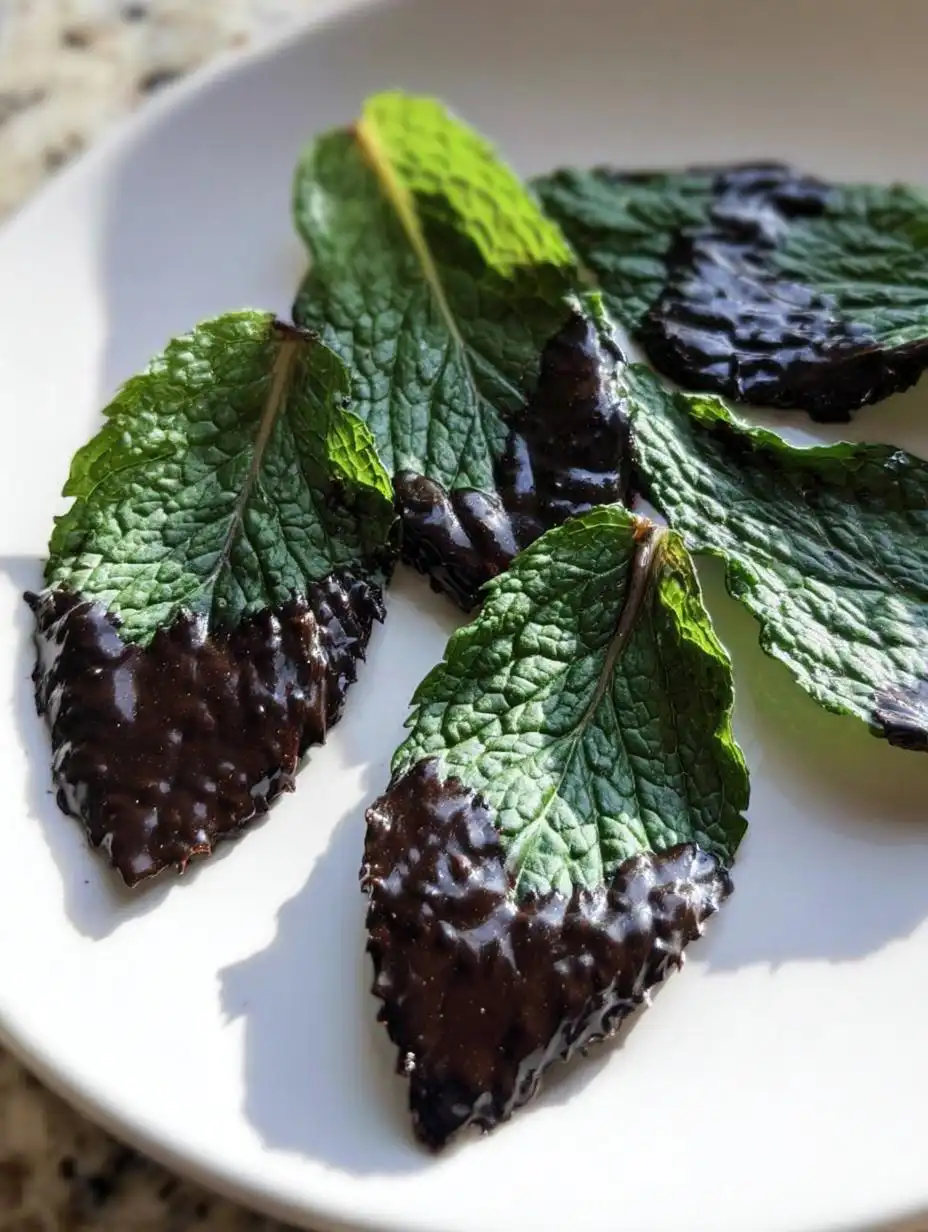
Grab one dried mint leaf by the stem end—or use a small fork if you prefer to keep your fingers clean. Dip the leaf into the melted chocolate. You can choose to coat the entire leaf, or, my personal favorite, just dip one side, leaving a little green border visible. That contrast looks so sharp!
As you pull the leaf out, gently let any excess chocolate drip back into the bowl. You don’t want big pools of chocolate forming on the edges. Immediately place the coated leaf onto your parchment-lined tray. Work quickly because the chocolate starts setting up fast, especially if your kitchen isn’t too warm. Once all twenty leaves are dipped and placed, they need to chill immediately. Slide that tray right into the refrigerator for about 15 minutes. They are done when the chocolate coating is firm to the touch and snaps slightly when you move it. Don’t leave them in there for hours, though, or the mint can start to wilt!
Tips for Achieving Professional Chocolate Covered Mint Leaves
If you’ve ever dipped something in chocolate and ended up with thick, bumpy blobs instead of elegant shapes, I’ve got a few tricks to save your next batch of Chocolate Covered Mint Leaves. The biggest failure I see is rushing the chocolate melting. If you overheat it even slightly, it gets thick and dull, and it won’t coat smoothly. Stick to those short 20-second bursts and stir, stir, stir!
Another common issue is chocolate bloom—that streaky, whitish coating that sometimes appears later. This usually happens if your chocolate gets too hot or cools too fast in a very cold environment. Since we are using coconut oil, it helps prevent some of that, but slow cooling is best. After chilling them for 15 minutes, let them sit on the counter for about five minutes before sealing them up. This lets the chocolate stabilize perfectly. If your leaves are sticking to the parchment, it means you had too much chocolate pooling on the bottom; try wiping the excess off the leaf right before you set it down. A little care ensures your Chocolate Covered Mint Leaves look bakery-perfect!
Common Questions About Chocolate Covered Mint Leaves
I get so many questions once people see how easy these are to make! People always want to know about tweaking the ingredients, but honestly, the ingredient list is so short that we should stick close to the original plan for the best results. If you follow the steps for making these Chocolate Covered Mint Leaves, most of your questions disappear!
How long can I store my Chocolate Covered Mint Leaves?
These are definitely best eaten the day you make them, especially because the mint is so fresh and bright then. If you have leftovers, store them in a single layer in an airtight container in the refrigerator. You should be good for about three days. Don’t leave them out on the counter; the chocolate might soften, and the mint will definitely lose its crispness. If they start looking a little dull, just give them a quick rinse and pat dry before serving again—but honestly, they disappear fast!
Can I use milk chocolate instead of dark chocolate for these mint leaves?
You absolutely *can*, but you are changing the flavor profile completely! The reason I insist on dark chocolate (70% or higher) is that the bitterness balances the coolness of the mint perfectly. Milk chocolate is much sweeter, and your Chocolate Covered Mint Leaves will taste overwhelmingly sugary, losing that refreshing punch. If you try it, I recommend using a higher quality milk chocolate and maybe skipping the coconut oil since milk chocolate is naturally softer to melt anyway. But stick with dark chocolate for the classic taste!
Nutritional Estimate for Chocolate Covered Mint Leaves
I always feel a little guilty about how few calories these little gems have, which means I can make more! Based on our ingredient ratios, these Chocolate Covered Mint Leaves clock in quite low. For one leaf, you’re looking at about 35 calories total. The fat content is minimal, around 2 grams, and we’re seeing about 3 grams of carbohydrates per piece. Protein is negligible, basically zero.
Now, remember this is just an estimate since the size of your mint leaves and the exact percentage of cacao in your chocolate can change things slightly. But for a naturally refreshing, gluten-free treat, these Chocolate Covered Mint Leaves are a winner!
Sharing and Enjoying Your Homemade Chocolate Covered Mint Leaves
Once these beauties are set, it’s time for the best part: showing them off! For an elegant finish, arrange your Chocolate Covered Mint Leaves on a simple white platter, letting that pop of green against the dark chocolate shine. They look stunning nestled next to a bowl of fresh raspberries or alongside tiny coffee cups after a rich meal. They pair wonderfully with a strong espresso or maybe even a crisp glass of Prosecco. If you want to see more of my quick dessert ideas, check out my Pinterest!
Because they taste so fresh, I love serving these slightly chilled. Don’t let them get warm! Once you serve them, tell me what you think! Did you dip one side or both? Which chocolate percentage worked best for your taste? Drop a comment below and let me know how your batch of Chocolate Covered Mint Leaves turned out! You can also read more about my kitchen experiments on Medium.
Print
Divine Chocolate Covered Mint Leaves in 15 Min
- Total Time: 25 minutes
- Yield: 20 chocolate leaves
Description
These chocolate covered mint leaves are a fresh, elegant, and easy-to-make dessert. They combine cooling mint with rich dark chocolate for a naturally refreshing bite-sized treat.
Ingredients
- ½ cup dark chocolate chips or chopped dark chocolate (70–85% cacao)
- 1 teaspoon coconut oil
- 20 fresh mint leaves (washed and completely dried)
Instructions
- Wash mint leaves gently and pat completely dry. Moisture prevents chocolate from sticking.
- Combine dark chocolate and coconut oil in a microwave-safe bowl. Heat in 20-second intervals, stirring between each, until smooth and fully melted.
- Dip each mint leaf into the melted chocolate, coating one side or both as you prefer.
- Lay coated leaves on a parchment-lined tray.
- Place the tray in the refrigerator for about 15 minutes, or until the chocolate is firm.
- Enjoy immediately or store in an airtight container in the fridge.
Notes
- Best served the same day for maximum freshness.
- Store for up to 3 days in the refrigerator.
- Prep Time: 10 minutes
- Cook Time: 0 minutes