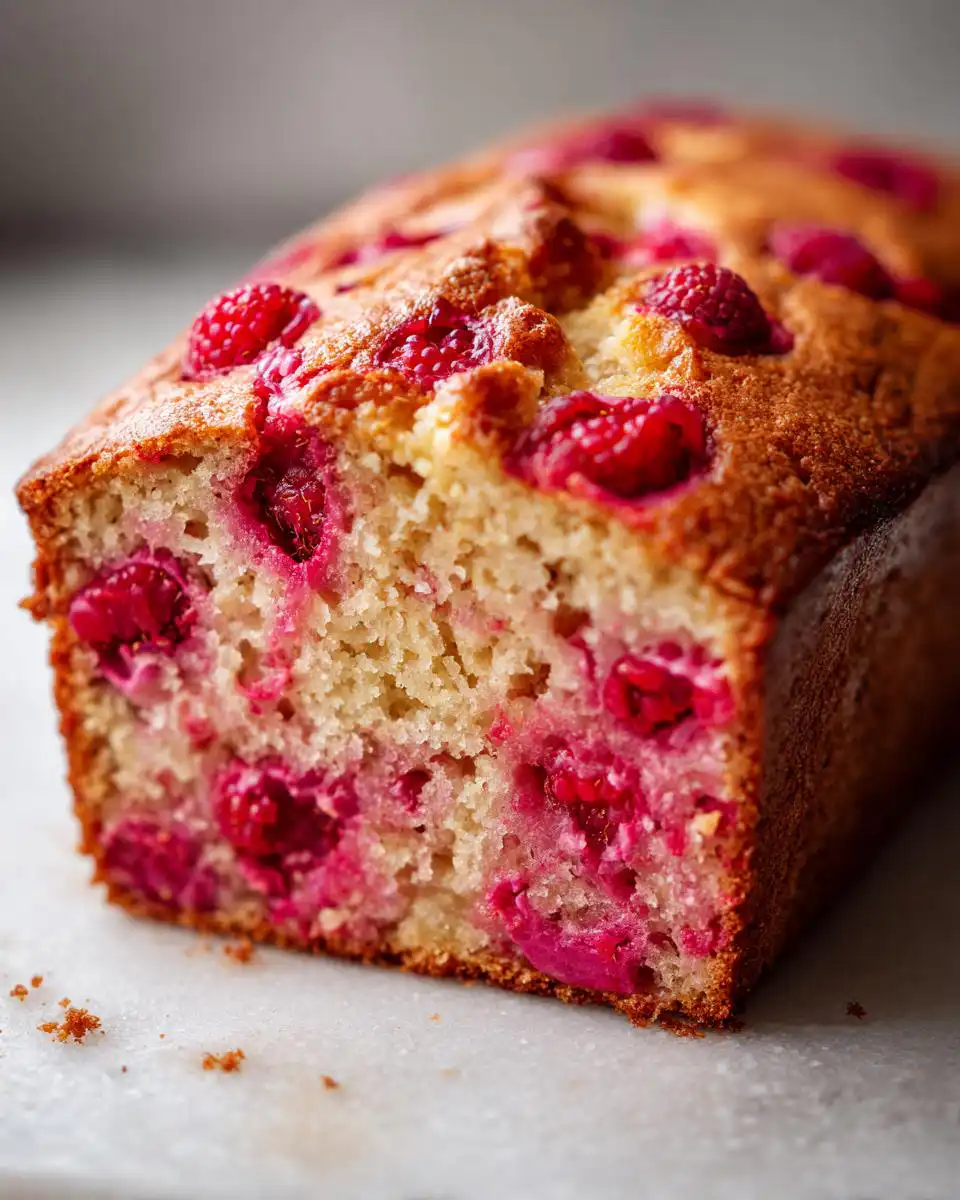
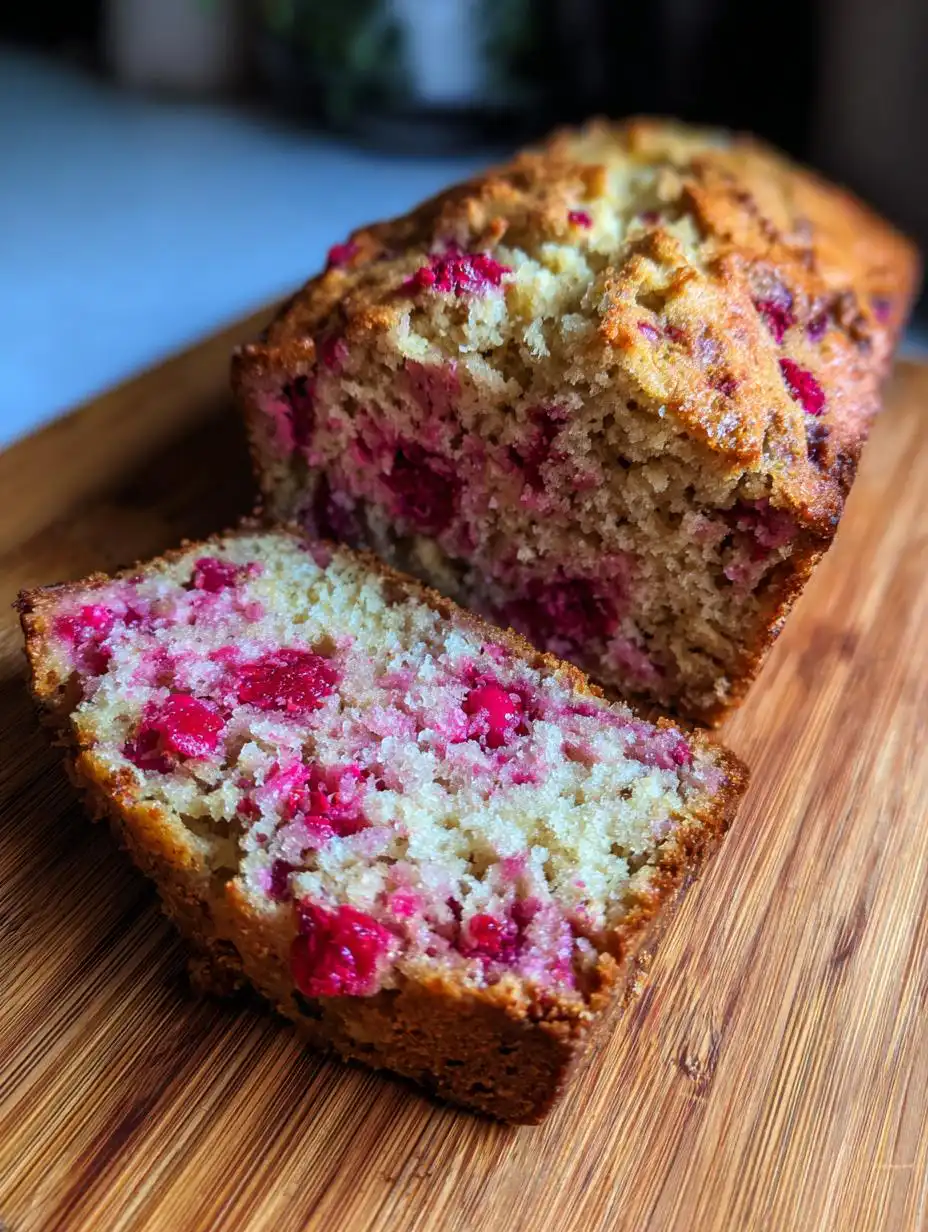
I am absolutely obsessed with this recipe, and once you try it, you’ll understand why. Seriously, forget every dry, crumbly loaf you’ve ever made! This pear and raspberry bread is next level tender. The secret weapon, the thing that makes this quick bread stay moist for days, is the plain Greek yogurt. I know, it sounds simple, but it gives the crumb this incredible, soft texture that’s just impossible to achieve with milk or sour cream.
My first time making this, I was worried about the raspberries bleeding into the batter, but they hold their shape beautifully, creating little pockets of tartness against the sweet, warm cinnamon and soft chunks of pear. I always use an unpeeled Bartlett pear because I love that little bit of texture it adds. Trust me when I say this is the perfect breakfast treat or afternoon tea companion. It’s fast, it’s foolproof, and it tastes like you spent all morning fussing over it!
Gather Your Ingredients for Pear and Raspberry Bread
Before we even think about turning on the oven, we need to make sure the pantry is stocked. Getting your ingredients measured out first—what we call *mise en place*—is half the battle won, especially with quick breads. Don’t substitute anything too drastically here, especially the yogurt; it’s key to that amazing texture we talked about! We need just a few things, broken down into the dry stuff and the wet, fruity stuff.
Dry Components for Pear and Raspberry Bread
We are keeping this super simple on the dry side, which speeds things up immensely. You absolutely need:
- 2 cups self-rising flour. Yes, self-rising! Don’t try to swap in all-purpose flour and add baking powder unless you’re ready for a science experiment.
- 1 cup granulated sugar. That’s what gives us the perfect edge of sweetness.
- \u00bc teaspoon ground cinnamon. Just a whisper to warm things up.
Wet Components and Fruit Additions
This is where the magic moisture comes from! Have these ready to whisk together in a separate bowl:
- \u00be cup plain Greek yogurt. Make sure it’s plain, full-fat is great but any plain works.
- \u00bd cup canola oil. Oil keeps things moist better than butter in this specific recipe.
- 2 large eggs.
- 1 teaspoon vanilla extract.
- 1 medium pear, cored and diced (unpeeled). Keep the skin on—it adds nice color and texture!
- 1 cup raspberries, roughly chopped. If they are frozen, toss them in straight from the freezer, don’t thaw them first!
Essential Equipment for Your Pear and Raspberry Bread
You don’t need a fancy stand mixer for this! We’re keeping it easy. You’ll want two good mixing bowls—one medium and one large—so you can keep the wet and dry ingredients separate until the very last moment. A sturdy whisk for the wet stuff and a rubber spatula for folding are essential tools here. And of course, make sure you have that 8\u00bdx4\u00bd-inch loaf pan ready to go, whether you grease it or line it with paper!
Step-by-Step Instructions for Perfect Pear and Raspberry Bread
Alright, let’s get this fantastic pear and raspberry bread into the oven! The process moves fast once you have your ingredients ready, so make sure your bowls are clean and ready to go. Remember, quick breads hate being fussed over, so speed and gentleness are your best friends here.
Preparing the Pan and Oven
First things first: we need heat! Preheat your oven up to 350\u00b0F right now. While that’s warming up, grab that 8\u00bdx4\u00bd-inch loaf pan. You can grease it really well, but I highly recommend lining it with parchment paper. Just cut a sling so the ends hang over the sides—it makes lifting the whole loaf out later so much easier, trust me!
Mixing Dry and Wet Bases for Pear and Raspberry Bread
Grab your big mixing bowl and whisk together the flour, sugar, and cinnamon really well. We want those dry components totally married before we introduce anything wet. In your second bowl, use that whisk again to combine the Greek yogurt, canola oil, eggs, and vanilla until the mixture looks smooth and happy. Now, the most crucial part: pour the wet stuff right into the dry. Stir it gently with a spatula until you see just a few streaks of flour left. Stop mixing! If you overmix, you’ll activate too much gluten, and your bread will turn tough instead of tender.
Folding in the Fruit and Baking
This is the fun part! Gently fold in those diced pears and the chopped raspberries. If you pulled those raspberries straight from the freezer, that’s perfect—folding them in frozen helps them keep their shape better and prevents the batter from getting too watery too fast. Spoon that lovely batter into your prepared pan and smooth the top. You can arrange a few thin pear slices on top for a fancy look if you want, but it’s totally optional. Pop it into the preheated oven and let it bake for about 50 to 55 minutes. You know it’s done when the top is golden brown and a toothpick stuck right in the center comes out clean, maybe with a few moist crumbs clinging to it—but no wet batter!
Cooling Your Pear and Raspberry Bread Correctly
Don’t rush this cooling step, or you’ll end up with a cracked mess! Let the loaf hang out in the pan for exactly 10 minutes. This gives it time to set up structurally. After those ten minutes, carefully use those parchment paper slings to lift the bread out and move it straight onto a wire rack. It needs to cool completely on that rack before you even think about slicing it. If you cut it while it’s hot, the steam escapes too fast, and you lose that amazing tender crumb we worked so hard to achieve!
Tips for Success with Your Pear and Raspberry Bread
Making a great quick bread is all about managing moisture, and I’ve learned a couple of tricks over the years to make this pear and raspberry bread absolutely foolproof. First, about the pears: make sure they are firm, not mushy. If your pear is too soft, it will just disappear into mush instead of holding those lovely little chunks of fruit we want in every bite.
Second, remember I said not to overmix? That’s the number one rule for any bread using self-rising flour. Mix only until the flour streaks disappear. If you see any resistance when folding the fruit in, that’s a good sign you’ve mixed enough! A final tip: if you want that gorgeous crunchy top like some bakery loaves, sprinkle a little coarse sugar or some chopped almonds over the batter right before it heads into the oven. It adds such a great textural contrast to the soft interior.
Variations on This Pear and Raspberry Bread Recipe
If you want to switch things up next time—and you absolutely should, because this recipe is so flexible—there are a couple of easy swaps you can try. If you aren’t feeling the cinnamon, try swapping it out for half a teaspoon of ground cardamom; it pairs wonderfully with pears! You can also swap the vanilla extract for almond extract for a richer, nuttier flavor profile that complements the raspberries beautifully.
For a little extra zing, try adding the zest of one small lemon to the wet ingredients. It brightens everything up without changing the fundamental structure of this yogurt bread. Just remember to keep the yogurt and the fruit ratios the same!
Serving Suggestions for Your Quick Bread
This bread is honestly perfect just sliced plain, still slightly warm, but if you want to dress it up for company, I have a couple of favorite moves. Since it’s already so moist from the yogurt, you don’t need heavy frosting or anything. A thin swipe of salted butter is heavenly for breakfast.
For tea time, try spreading a little bit of high-quality honey over a slice—the sweetness really plays up the cinnamon. If you want something richer, a thin layer of mascarpone cheese or even a light lemon curd makes this quick bread feel like a real dessert! You can find more sweet ideas on my blog.
Storing and Reheating Your Leftover Pear and Raspberry Bread
Since this is such a moist quick bread thanks to the yogurt, it keeps really well! You don’t want to store the whole loaf wrapped tightly on the counter, though, because that can trap moisture and make the outside a little gummy. For the best results, let the bread cool completely before you wrap it. If you plan to eat it within two or three days, room temperature storage is fine. If you need it to last longer, the fridge is your friend.
Storage and Reheating Quick Reference Table
Here’s a quick guide so you always know the best way to keep those slices fresh!
| Storage Location | Duration | Reheating Method |
|---|---|---|
| Countertop | Up to 3 days | Room temp or light toast |
| Refrigerator | Up to 1 week | 30 seconds in microwave |
| Freezer | Up to 3 months | Thaw on counter, then warm briefly |
Frequently Asked Questions About Pear and Raspberry Bread
I get so many questions about this recipe because everyone wants that perfect tender crumb! It’s my favorite quick bread to troubleshoot because I know how disappointing a dry loaf can be. Here are the things folks ask me most often about making this delicious yogurt bread.
Can I substitute the Greek Yogurt in this Pear and Raspberry Bread?
You can, but you risk losing that signature moistness! Greek yogurt is thick and high in fat, which keeps the bread soft. If you use regular plain yogurt, you might want to strain it a bit first to remove excess water, or the batter might get too loose. Sour cream would be a decent substitute in a pinch, but it might make the final texture slightly denser than what the Greek yogurt achieves.
What is the best way to dice the pear for this bread?
I always tell people to aim for about a half-inch dice, maybe slightly smaller. You want distinct chunks of pear that hold up during baking, not mush. Remember I said I leave the skin on? Make sure you core it well, but the skin adds just a touch of color and structure. If the pieces are too big, they can weigh down the batter and cause sinking in the middle.
Can I use fresh instead of frozen raspberries?
Absolutely! Fresh raspberries are wonderful, but you need to handle them differently than the frozen ones. If you use fresh, gently fold them in right at the very end, just like the frozen ones. The main difference is that fresh berries release a *little* more juice as they bake, so your bread might set up just a hair slower. If you notice your batter seems runnier with fresh berries, don’t panic—it will still bake up beautifully! Check out my Pinterest for more baking inspiration.
Estimated Nutritional Data for Pear and Raspberry Bread
Now, I always tell people not to stress too much about the numbers when baking something this heavenly, but I know some of you are curious! Remember, these figures are just estimates based on standard ingredient measurements. This is a fantastic treat, but it’s definitely a rich one!
| Nutrient | Amount (per slice) |
|---|---|
| Calories | 230 |
| Total Fat | 10g |
| Carbohydrates | 32g |
| Protein | 4g |
Enjoy every bite! We’re basing this on 10 slices, so feel free to adjust if you cut bigger pieces! If you are looking for other bread recipes, check out my other posts.
Print
Amazing pear and raspberry bread in 50 minutes
- Total Time: 1 hour 5 minutes
- Yield: 10 slices
- Diet: Vegetarian
Description
Soft pear and raspberry bread with a tender crumb thanks to Greek yogurt. It features juicy fruit and warm cinnamon, ideal for breakfast or tea time.
Ingredients
- 2 cups self-rising flour
- 1 cup granulated sugar
- ¼ teaspoon ground cinnamon
- ¾ cup plain Greek yogurt
- ½ cup canola oil
- 2 large eggs
- 1 teaspoon vanilla extract
- 1 medium pear, cored and diced (unpeeled)
- 1 cup raspberries, roughly chopped
Instructions
- Preheat oven to 350°F. Grease or line an 8½x4½-inch loaf pan with parchment paper.
- In a large mixing bowl, whisk together flour, sugar, and cinnamon.
- In a separate bowl, whisk yogurt, oil, eggs, and vanilla until smooth.
- Pour wet ingredients into the dry ingredients and stir gently until just combined. Do not overmix.
- Fold in diced pear and raspberries. If using frozen raspberries, fold in straight from the freezer.
- Spoon batter into the prepared pan and smooth the top. Optional: arrange thin pear slices on top for decoration.
- Bake for 50 to 55 minutes, or until golden and a toothpick inserted in the center comes out clean.
- Cool in the pan for 10 minutes, then transfer to a wire rack to cool completely before slicing.
Notes
- For extra crunch, sprinkle coarse sugar or chopped almonds on top before baking.
- Prep Time: 15 minutes
- Cook Time: 50 minutes
- Category: Quick Bread
- Method: Baking
- Cuisine: American