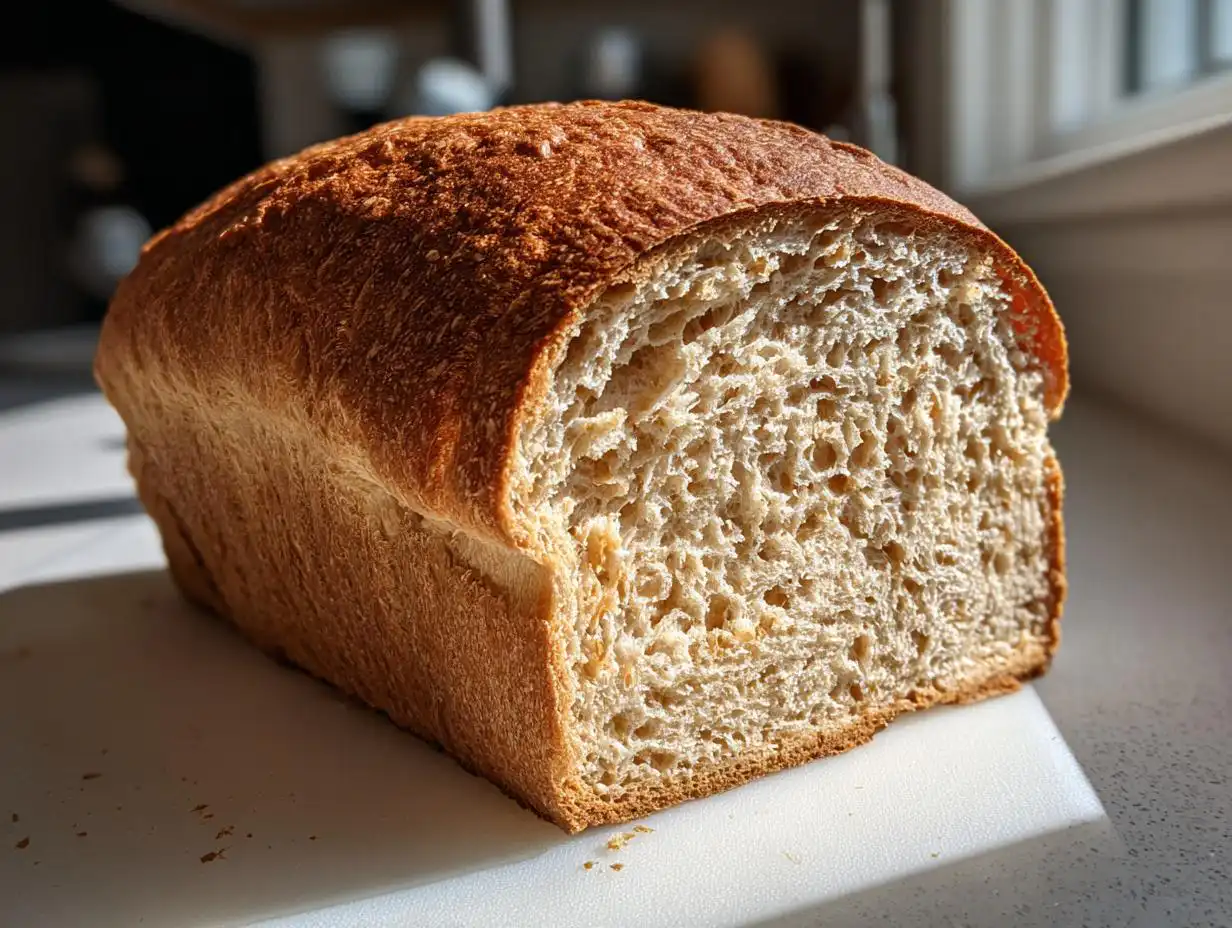
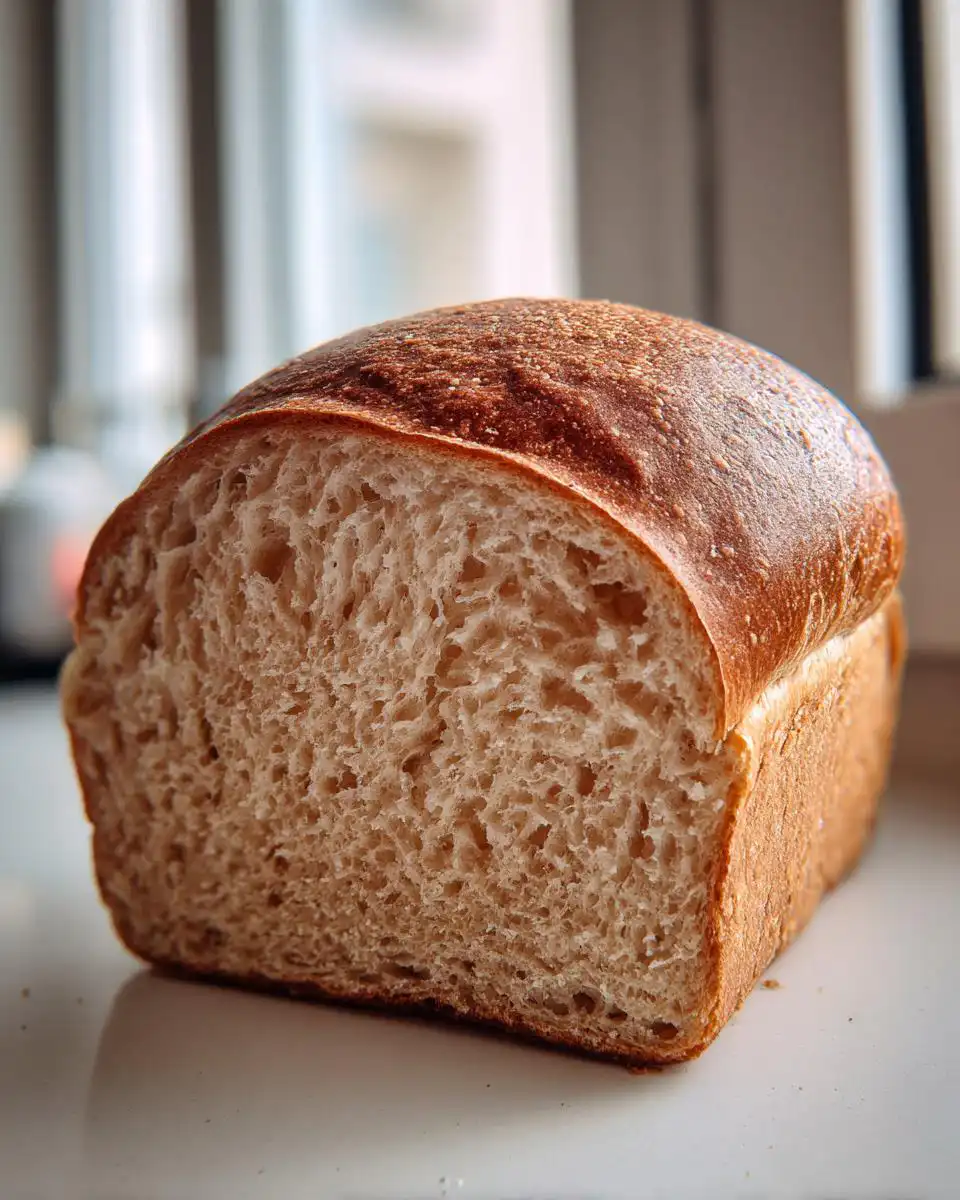
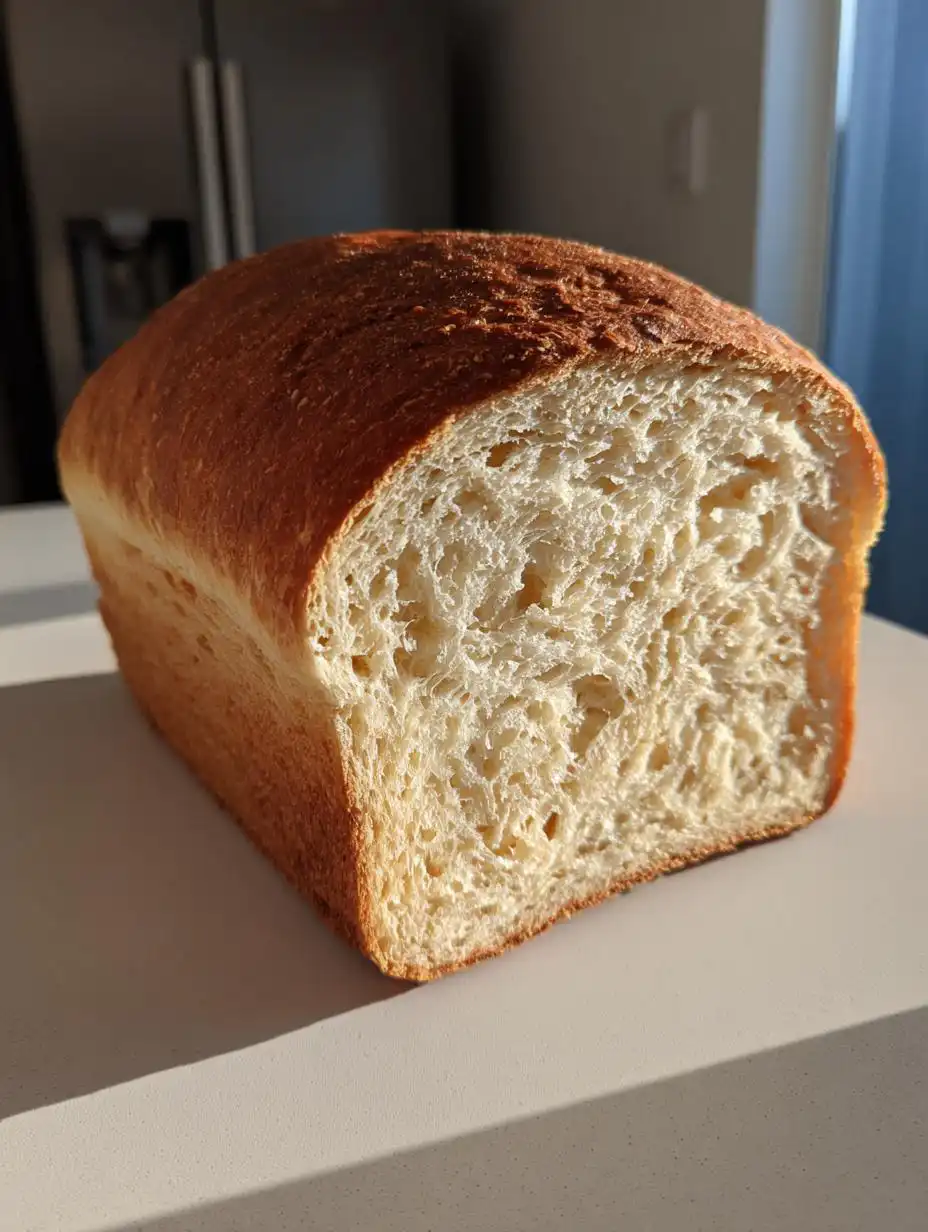
When I first started baking with yeast, I was terrified of dense bricks masquerading as bread. Seriously, my first few attempts were rock hard! But I finally cracked the code for the soft honey wheat bread you see here, and now it’s my absolute favorite thing to pull out of the oven. The secret isn’t just the honey—though that golden sweetness is key—it’s about balancing that hearty whole wheat flour with enough soft white flour to keep things tender.
This recipe is foolproof, I promise. It gives you that gorgeous, wholesome flavor you crave in a bread that’s still delightfully fluffy and perfect for thick, gooey sandwiches. I’ve made this loaf so many times for school lunches and weekend breakfasts, and it always comes out beautifully structured yet incredibly soft. Trust me, once you smell this baking, you’ll never go back to the store-bought stuff!
Gathering Your Ingredients for honey wheat bread
Okay, before we get our hands messy, let’s make sure the counter is set up right. Good bread starts with good measuring; you can’t just eyeball things when yeast is involved! We need a mix of flours to get that perfect texture we talked about. Don’t worry if you don’t have everything handy; I’ll put all the precise amounts in a simple table format right below here so you can check your pantry easily.
Essential Components for Soft honey wheat bread
The star here is that blend of whole wheat and all-purpose flour. We need exactly one and a half cups of the whole wheat for that nutty flavor. And don’t forget the honey—that’s crucial for keeping this honey wheat bread soft and not crumbly. Make sure your water is warm, not scorching hot, when you start fooling around with the yeast!
Equipment Needed for Success
You won’t need any fancy mixers for this recipe, which is great news! Grab a large mixing bowl, a sturdy whisk or spoon for initial mixing, and definitely a 9×5-inch loaf pan that’s ready to go. You’ll also need measuring cups and spoons, a damp cloth for covering the dough, and a wire rack for cooling. That’s it!
Step-by-Step Guide to Making honey wheat bread
Activating the Yeast and Mixing Wet Ingredients
First things first, we need to wake up that yeast! Get your large bowl ready and pour in one cup of warm water. This is super important: the water needs to be about 110 degrees Fahrenheit. If it’s too cold, the yeast just sleeps, and if it’s too hot, you kill it dead! Sprinkle your two and a quarter teaspoons of active dry yeast right over the top. Give it a gentle stir and then just let it sit there for about five minutes. You’ll know it’s working when it looks foamy and bubbly on top—that’s happy yeast!
Once it’s foamy, we add the flavor builders. Stir in your quarter cup of honey, two tablespoons of vegetable oil, and the teaspoon of salt. Mix that around until it looks uniform. We want everything incorporated before we start adding the heavy stuff, so make sure that salt dissolves nicely.
Developing the Dough for Tender honey wheat bread
Now for the flours! Start by dumping in your one and a half cups of whole wheat flour, followed by just one cup of your all-purpose flour. Mix this vigorously. It’s going to look really shaggy and sticky at first; that’s totally normal. We are aiming for a *sticky* mass right now, not a smooth ball. Keep mixing until that sticky dough starts pulling itself away from the sides of the bowl a bit. This means the liquid is mostly absorbed.
Next, start adding the remaining all-purpose flour, maybe a quarter cup at a time. You might not need all of it, or you might need just a tiny bit more, depending on how humid it is today! Keep mixing until the dough is just cohesive enough that you can handle it without it sticking horribly to your hands. This careful layering of flour is what ensures we get that lovely soft texture in our final honey wheat bread.
Kneading and First Rise Techniques
Turn that dough out onto a surface you’ve lightly dusted with flour. Now, get ready to work those arms! You need to knead this dough for a solid 10 to 12 minutes. Push it away from you with the heel of your hand, fold it over, give it a quarter turn, and repeat. You’re looking for it to become smooth and elastic—it shouldn’t feel sticky anymore, but resilient. It’s done when you can gently poke it and it springs back slowly. If you’re looking for other great baking projects, check out my guide on focaccia bread.
Lightly oil a clean bowl—any bowl will do—and put your dough ball inside, turning it over once so it gets a little coating of oil. Cover that bowl with a damp cloth, which keeps the surface from getting that awful crusty skin. Find the warmest, draft-free spot in your kitchen. Let it rest for about 45 minutes, or until it has clearly doubled in size. Don’t peek too often; let it do its thing!
Shaping, Second Proofing, and Oven Preparation
Once it’s doubled, gently punch the dough down to release all those gasses—it’s very satisfying! Turn it out and gently shape it into a smooth log or oval, making sure you seal the bottom seam tightly. Place it right into your greased 9×5-inch loaf pan. Cover it up again and let it have its second rest in that warm spot. This rise is crucial for height! Wait about 30 minutes, or until the dough is crowning about one full inch above the rim of the pan.
While it’s having that second rise, get your oven preheating to 375 degrees Fahrenheit. You want it fully heated before the dough is perfectly proofed so it hits that heat immediately!
Baking and Cooling Your Fresh honey wheat bread
Carefully slide that beautiful loaf into the preheated oven. Bake it for 25 to 30 minutes. Keep an eye on it; you want it to be golden brown all over. When you think it’s done, carefully take it out (use oven mitts!) and give the bottom a little tap. If it sounds hollow, you’ve nailed it! If it sounds dull, pop it back in for another five minutes.
This next part is torture but necessary: let the fresh honey wheat bread cool in the pan for exactly 10 minutes. This lets the structure set up. After 10 minutes, gently turn it out onto a wire cooling rack. It must cool completely before you slice it, or it will look gummy inside. Patience pays off for the softest loaf! For more baking inspiration, see my posts on banana bread or focaccia.
Tips for Achieving Expertly Soft honey wheat bread
Making bread that’s soft is all about managing moisture and temperature. You’ve got the right ingredients, but a few small tweaks can take this loaf from good to absolutely incredible. I’ve learned these tricks the hard way—usually by cutting into a loaf that looked perfect but was secretly a little dry! Keep these pointers in mind, and your honey wheat bread will be tender for days. You can find more tips and tricks like this on my Medium profile.
Controlling Moisture for the Best Texture
The vegetable oil in the recipe is your first line of defense against dryness. Fat coats the flour particles and stops them from forming too much tough gluten, keeping the crumb light. Don’t skip it! Now, for my favorite trick: the optional butter brush. As soon as the loaf comes out of the oven, grab a pastry brush and lightly paint the top crust with melted butter. It soaks in immediately, adding richness and keeping the crust soft instead of letting it dry out hard.
Adjusting Flour Content When Baking
I mentioned this briefly, but it bears repeating: flour is like a sponge, and humidity in your kitchen plays a huge role in how much it absorbs. On a rainy or humid day, you’ll need less of that final addition of all-purpose flour because the air is already adding moisture. On a very dry day, you might need a tablespoon or two more. The goal is that point where the dough pulls away from the bowl but still feels slightly tacky—not firm! This little adjustment makes all the difference in the final texture of your honey wheat bread.
Storing and Reheating Your Homemade honey wheat bread
This bread is so good, you’ll want to make sure it stays fresh for days! Because it’s so soft, it can dry out faster than a standard crusty loaf if you just leave it on the counter in a plastic bag. I usually wrap mine tightly in plastic wrap first to keep the moisture locked in, and then I place that wrapped loaf into a zip-top bag. That double layer works wonders! If you want to see more of my favorite recipes, check out my Pinterest boards.
If you know you won’t eat the whole thing within two days, I highly recommend slicing it first before freezing. That way, you can just pull out two slices whenever you need them for toast. Reheating frozen slices is super easy—just pop them straight into the toaster or warm them briefly in a low oven. Here’s a quick guide for keeping your loaf perfect:
| Storage Method | Duration | Tip |
|---|---|---|
| Room Temperature (Wrapped) | Up to 3 Days | Keep away from heat sources. |
| Freezer (Sliced & Bagged) | Up to 3 Months | Thaw on the counter or toast directly. |
Common Questions About Baking honey wheat bread
It happens to everyone—baking bread can sometimes feel like a science experiment gone slightly wrong! Don’t fret if you run into a snag. Most issues with yeast bread are easy to fix once you know what caused them. Here are a few things folks always ask me when they try making their first batch of this delicious, wholesome loaf.
Can I Substitute the Sweetener in this honey wheat bread Recipe?
Honey is what gives this bread its signature soft crumb and slight tang, so I really encourage using it! If you absolutely must substitute, maple syrup is the closest in flavor and texture, but you might need just a touch less since maple syrup is thinner than honey. Brown sugar works in a pinch, but if you use it, you might lose a little bit of that amazing tenderness. Just make sure whatever you use, you measure it carefully because sweetness matters when you’re working with yeast!
Why Did My Loaf Not Rise Properly?
This usually boils down to two things: old yeast or bad water temperature. If your yeast didn’t foam up in Step 1, that yeast was either too old or you accidentally shocked it with water that was too hot. Always check the expiration date on your yeast packet! If the water was lukewarm or cold, the yeast just didn’t wake up enough to create the carbon dioxide needed for a good rise. Remember, that 110-degree mark is your sweet spot for activating those little guys so your honey wheat bread gets nice and tall!
Another common issue is the draft. If your kitchen is chilly, the dough might rise very slowly or stop altogether. Try placing the covered bowl in your oven with *just the light on*—that creates a perfect warm little cave for rising.
Nutritional Estimates for Slices of honey wheat bread
I know a lot of us count macros or just like to know what we’re eating, especially when baking with wholesome ingredients. Since everyone’s measurements vary slightly when they knead and shape their loaf, these numbers are just a good starting point. Think of them as a general guideline rather than a strict guarantee!
I’ve gathered the main stats from the recipe proportions below. Remember, the exact amounts of fat and sugar can shift depending on how much flour you incorporate during that final kneading stage.
| Nutrient | Amount Per Slice |
|---|---|
| Calories | 165 |
| Fat | 3g |
| Carbohydrates | 29g |
| Protein | 5g |
This is just an estimate, of course! But it gives you a nice idea of how hearty and balanced each slice of this homemade bread is. If you are interested in other healthy baked goods, check out my recipe for blueberry oatmeal muffins.
Share Your Results with Our Community
Now it’s your turn! I absolutely love hearing when one of my go-to recipes works its magic in someone else’s kitchen. Did you use the butter brush trick? Did your dough feel perfect when you kneaded it? Head down to the comments below, give this recipe a star rating, and tell me all about your experience making this soft honey wheat bread. I read every single comment, and I can’t wait to see your beautiful golden loaves!
Print
Amazing soft honey wheat bread in 12 simple steps
- Total Time: 1 hour 50 minutes
- Yield: 1 loaf (about 12 slices)
- Diet: N/A
Description
Make this soft honey wheat bread with wholesome flavor and a touch of sweetness. Perfect for sandwiches or toast, it’s simple and tender every time.
Ingredients
- 1 cup warm water (110°F)
- 2 ¼ teaspoons active dry yeast
- ¼ cup honey
- 2 tablespoons vegetable oil
- 1 teaspoon salt
- 1 ½ cups whole wheat flour
- 2 cups all-purpose flour, plus extra for kneading
Instructions
- Stir warm water and yeast together in a large bowl. Let sit for 5 minutes until foamy.
- Add honey, vegetable oil, and salt. Stir until combined.
- Mix in the whole wheat flour and 1 cup of all-purpose flour until a sticky dough forms.
- Gradually add the remaining all-purpose flour, mixing until the dough begins to pull away from the sides of the bowl.
- Turn dough onto a lightly floured surface. Knead for 10 to 12 minutes until smooth and elastic.
- Lightly oil a clean bowl and place the dough inside, turning once to coat. Cover with a damp cloth and let rise in a warm spot for 45 minutes or until doubled in size.
- Punch down the dough and shape into a loaf. Place in a greased 9×5-inch loaf pan.
- Cover and let rise again until the dough crowns about 1 inch above the rim, about 30 minutes.
- Preheat oven to 375°F. Bake for 25 to 30 minutes until golden brown and the loaf sounds hollow when tapped.
- Cool in the pan for 10 minutes, then remove to a wire rack to cool completely before slicing.
Notes
- For extra softness, brush the warm loaf lightly with melted butter after baking.
- Prep Time: 20 minutes
- Cook Time: 30 minutes
- Category: Bread
- Method: Baking
- Cuisine: American