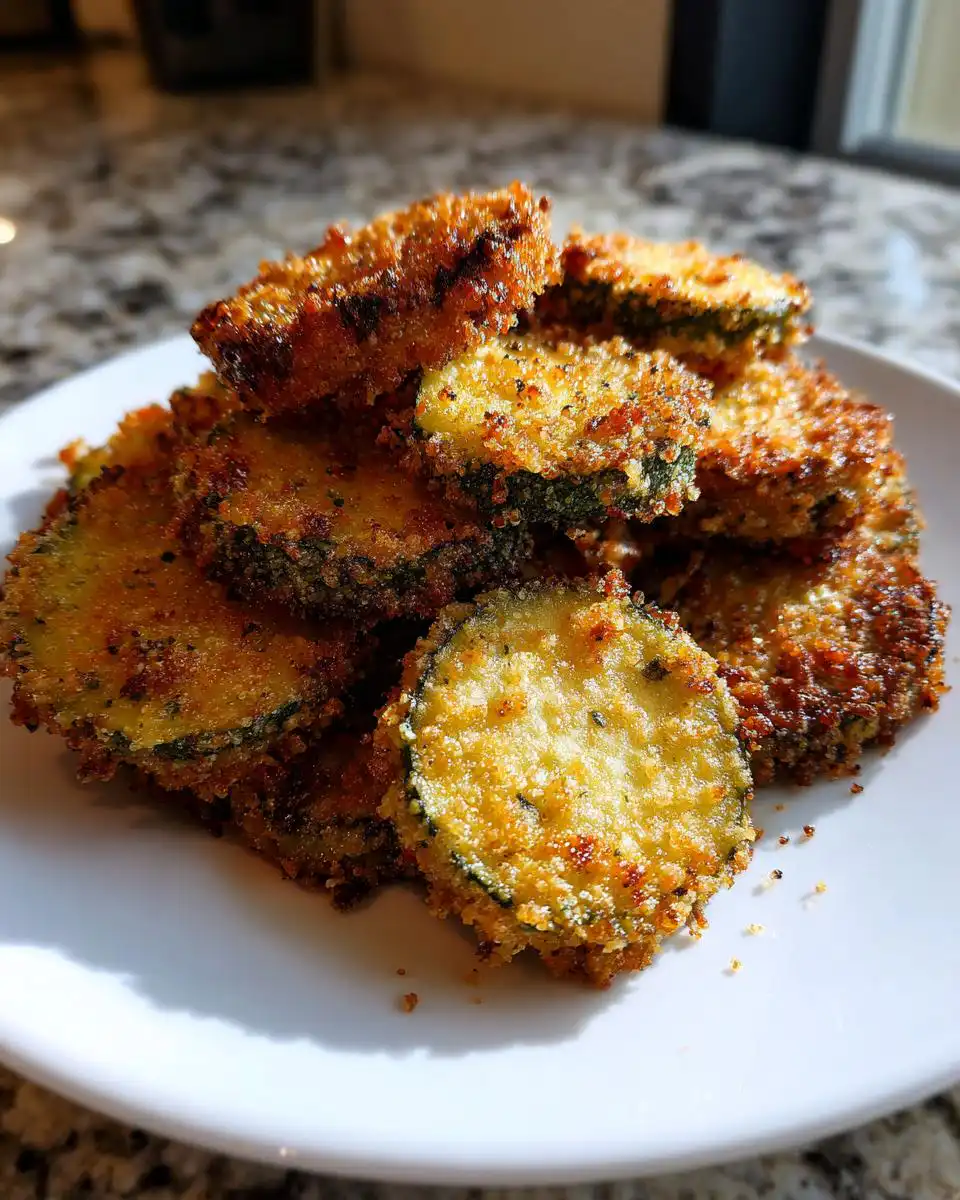
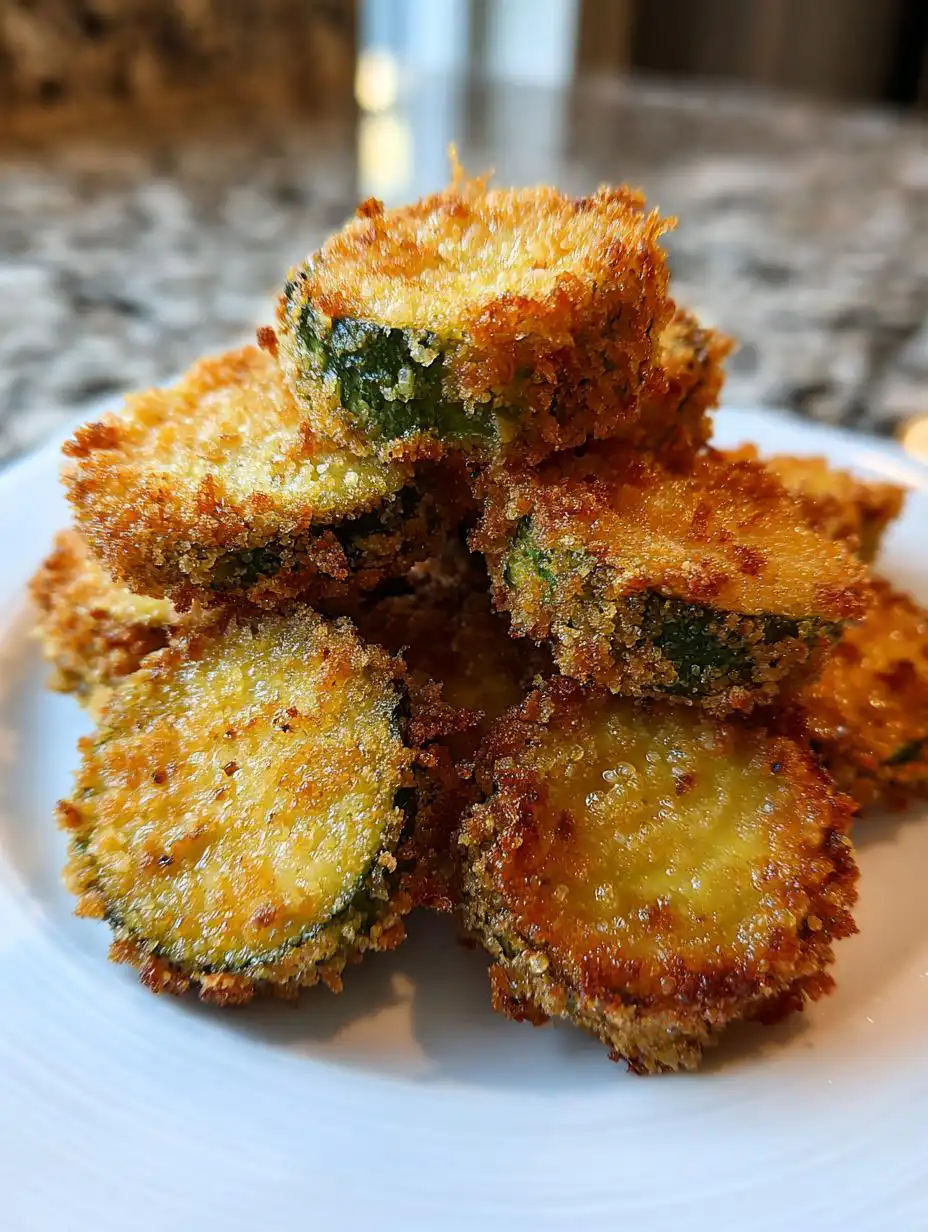
Listen, if you think fried pickles are only for greasy diners, you haven’t lived! I’ve spent way too many weekends experimenting with my air fryer, trying to get that perfect satisfying crunch without submerging things in oil. And trust me, I cracked the code. These air fryer pickles are genuinely the crispiest snack you will ever make in under 25 minutes. Forget soggy bottoms and uneven cooking! This method is foolproof.
The secret to getting the crunch that rivals deep-frying isn’t just the Panko, though that’s a huge part of it. It’s all about preparation and temperature control. I’ve gone through batches that looked great but tasted chewy, so I learned a few things along the way about moisture management. You want that tangy dill center to stay cool while the outside turns golden and shatteringly crisp. Once you nail this technique, you’ll be making these for every single game day or unexpected guest. Seriously, get ready for rave reviews!
Essential Ingredients for Perfect Air Fryer Pickles
You can’t make amazing air fryer pickles out of thin air, right? The ingredients are fairly simple, but the way you organize them is what makes the difference between a crust that falls off and a crust that stays put. We need three distinct areas for dredging, and getting these components just right is non-negotiable for that ultimate crunch.
Make sure you have everything measured out before you even touch the first pickle slice. This whole process moves fast once you get going!
Dry Components for the Coating
This is the first layer of defense! We start with plain all-purpose flour, and I mix in just a half teaspoon of salt right there. That salt helps draw out any remaining surface moisture and seasons the crust nicely. Don’t skip seasoning the flour!
Now for the star of the show: the Panko breadcrumbs. You absolutely must use Panko here, not the fine stuff. Panko creates those magnificent jagged edges that get super crispy when the air fryer hits them. I use about a cup and a half, which is usually enough for about two batches of pickles.
Wet Binder Mixture Details
This is where the magic glue comes from. You need two large eggs, whisked up, but here’s my little trick: I swap out some of the liquid for pickle juice! I use about two tablespoons of the juice from the jar—it adds a little tang right into the binder itself. Whisk that vigorously with garlic powder and paprika.
If you like a little kick, this is the time to add that tiny pinch of cayenne pepper. It really just adds warmth, not serious heat, and it balances the tang of the dill perfectly. If you are serving these to kids or people who hate spice, just leave it out. No pressure!
Equipment Needed for Your Air Fryer Pickles
You don’t need a whole lot of fancy gear to make these, which is another reason I love them for a quick snack. Really, the air fryer is doing most of the heavy lifting here. But having the right setup for dredging makes the cleanup so much easier, trust me.
Here is the short list of tools I always pull out when making these:
- The Air Fryer: Obviously! Make sure your basket is clean and ready to go. Preheating is a must, so get that thing warming up while you set up your dredging station.
- Three Shallow Bowls: These are crucial for the dredging process. I usually grab three small glass pie plates or wide, shallow bowls. You need one for flour, one for the egg wash, and one for the Panko.
- Paper Towels: Seriously, grab the whole roll. You’re going to feel like you’re wiping down a swamp, but this step is vital. We need those pickles bone dry.
- A Pastry Brush or Oil Sprayer: You need a light, even coating of olive oil spray. Don’t just dump oil in there—we are air frying, not deep-frying! A light mist ensures the Panko browns evenly without getting greasy.
- Tongs: For safely moving the coated pickles into the hot air fryer basket without messing up your perfectly breaded coating.
That’s it! Simple tools for a spectacular result. Having everything ready before you start dipping means you won’t end up with sticky fingers and flour everywhere.
Step-by-Step Instructions for Air Fryer Pickles
Okay, here we go! This is where the magic happens, and honestly, if you follow these steps exactly, you’ll have the best batch of air fryer pickles you’ve ever tasted. Remember, organization is your best friend here. Get your ingredients ready before you start dipping, or you’ll end up with a sticky mess!
First things first: Preheat your air fryer to 400°F and just let it run for about three minutes. That initial blast of heat is important for setting that crust right away. While that’s heating up, you tackle the most important prep step.
Preparing the Pickles and Dredging Station
Take those dill pickle chips right out of the jar, drain them well, and then get serious about drying them. I mean it—use a mountain of paper towels, press down hard, and blot until they feel almost dry to the touch. Any moisture left behind will turn into a soggy spot under that beautiful Panko crust. It’s worth the extra minute, trust me on this!
Next, set up your dredging station in a line. Bowl one gets your flour mixed with salt. Bowl two gets your whisked eggs, pickle juice, garlic powder, paprika, and that optional cayenne. Bowl three is just waiting, filled entirely with your Panko breadcrumbs. Keep them in that order: Dry, Wet, Dry.
The Three-Step Coating Process
Now we coat them one by one. Pick up a pickle chip and dip it completely into the flour mixture. Shake off the excess—we only want a light dusting of flour. Next, dunk it into the egg wash, making sure it’s fully coated. Let the extra drip off for just a second.
Finally, move it straight into the Panko. This is key: press the crumbs onto the pickle gently but firmly. You want the Panko to really adhere. If you just lightly toss it, the crumbs will fall off during cooking. Once it’s coated, set the breaded pickle aside on a clean plate while you finish the rest.
Air Frying for Maximum Crispness
Lightly spray the bottom of your air fryer basket with olive oil spray. Don’t spray too much, just enough to give the Panko something to grab onto. Lay your coated pickles down in a single layer. If they are touching or overlapping, they won’t crisp up—you have to cook these air fryer pickles in batches!
Air fry them at 400°F for about 6 to 7 minutes. You’ll start to smell that amazing savory aroma! Carefully open the basket, flip every single pickle chip over, and give the tops another very light spritz of oil. Pop them back in for another 5 to 6 minutes until they are perfectly golden brown and look super crunchy. Serve them immediately with your favorite cool dipping sauce!
Why You Will Love Making Air Fryer Pickles
I know you came here for the recipe, but I just have to tell you why these have become my go-to appetizer. Honestly, they tick every single box for a perfect party snack. They are fast, they use minimal oil, and the texture is just unbeatable. You won’t believe they came out of an appliance!
- Lightning Fast: Total time is under 25 minutes from start to finish. Perfect for last-minute cravings!
- Incredible Texture: That shattering, crispy Panko crust against the cool, tangy dill is the best combination ever.
- Less Mess: Since we aren’t dealing with a huge vat of hot oil, cleanup is a total breeze compared to traditional frying.
- Crowd Pleaser: Seriously, I have never brought these somewhere and had leftovers. People always ask for the trick! Check out more quick snack ideas here.
Expert Tips for Perfect Air Fryer Pickles
I’ve made enough batches of these to know exactly where things can go wrong. If your air fryer pickles aren’t reaching their full crunchy potential, nine times out of ten, it comes down to two things: moisture management or crowded space. Pay attention to these tips, and you’ll never have a soggy pickle again!
Achieving the Crispiest Crust
I can’t stress this enough: you have to dry those pickles until you think they are dry, and then dry them for another minute! Moisture is the enemy of crispiness. When you pat them down with paper towels, you are physically removing the liquid clinging to the surface. If you skip this, that moisture turns into steam when it hits the hot air fryer, and steam prevents the coating from setting hard. It just steams the breading instead of crisping it. So, press hard, use multiple layers of paper towels, and make sure they aren’t dripping at all before they hit the flour.
Batch Cooking Strategy
This is the second biggest mistake people make when using an air fryer. You might think you can just cram them all in there to save time, but if you overcrowd the basket, you are basically steaming your food again! The air needs to circulate completely around every single piece of breading to cook it evenly and dry it out.
If you stack them, the ones underneath will be pale and soft, while the ones on top might burn a little. I always aim for a single layer where every pickle has its own personal space. If you have a smaller air fryer, you might have to run two or even three small batches. It takes an extra five minutes, but it guarantees that every piece of your air fryer pickles achieves that perfect, golden-brown crunch we are looking for. It is absolutely worth the extra wait time! You can see more of my favorite recipes on my Pinterest board.
Serving Suggestions for Air Fryer Pickles
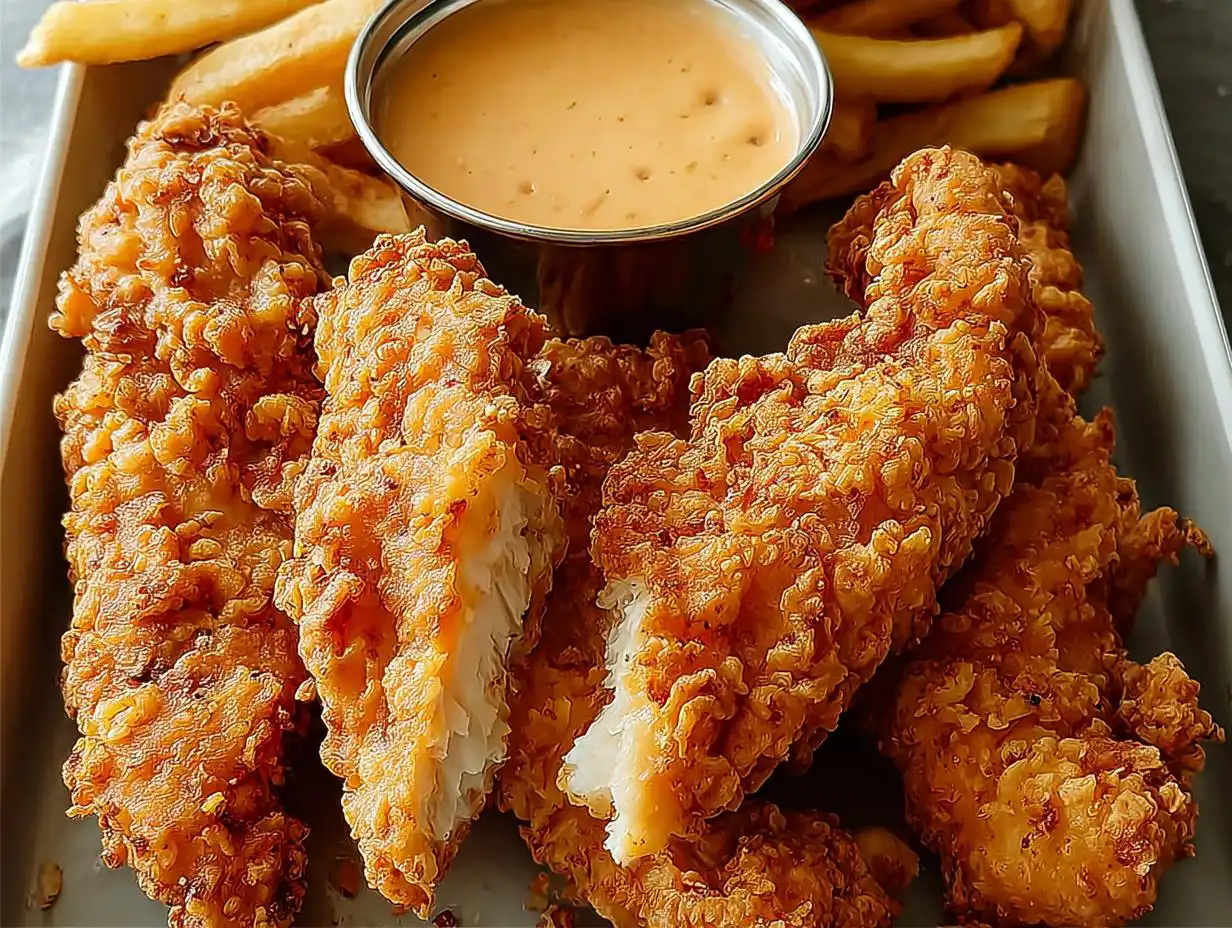
Once you pull those golden, crispy beauties out of the basket, you need something cool and creamy to balance that intense dill flavor. These are such a satisfying appetizer, and they really shine when paired with the right sauce. I always make sure I have at least two options ready because everyone grabs a different one!
When I serve my air fryer pickles, I like to put the dipping sauces out in small ramekins so people can easily grab a pickle and dip without making a mess on the platter. It just looks nicer that way, too!
Recommended Dipping Sauces
The recipe calls for ranch or chipotle, and those two are classics for a reason. Ranch is cool, herbaceous, and just cuts through the saltiness perfectly. But if you want a little smoky heat, the chipotle is the way to go.
- Classic Ranch: You can use store-bought, of course, but making a quick homemade ranch with buttermilk, mayo, and fresh herbs is worth the five minutes it takes. It’s so much fresher! Try my healthy ranch dressing recipe for a lighter option.
- Smoky Chipotle Mayo: This is my favorite pairing. Just mix mayonnaise with a little adobo sauce from a can of chipotles in adobo, a squeeze of lime juice, and a tiny pinch of cumin. It gives you that smoky, spicy element that makes these appetizers addictive.
- Honey Mustard: If you have some on hand, the sweetness of honey mustard is a surprisingly great match for the tartness in the pickle itself.
Honestly, you can serve these air fryer pickles with almost anything savory, but sticking to a creamy dip really enhances that crunch factor!
Storing and Reheating Your Air Fryer Pickles
Look, these are definitely best eaten the second they come out of the air fryer. That initial crispness is unmatched, and I’m not going to lie to you—leftovers are never going to be exactly the same. But if you have any of these delicious air fryer pickles left over, don’t just toss them! We can bring back a lot of that crunch with a little patience.
The key to success here is understanding that moisture is going to attack that breading slowly over time, even in the fridge. So, storage needs to be tight!
Best Practices for Storage
If you have any leftover pickles, your first move should be putting them in an airtight container. I mean *truly* airtight. Glass containers with snap lids work the best for me because plastic containers sometimes trap condensation, and condensation is the enemy of crispness.
Make sure the pickles are completely cool before you put them in the container. If you seal up warm pickles, you are trapping heat and steam, which will just make them soggy faster. I usually let them sit on the counter for about 20 minutes after cooking before sealing them up and putting them in the fridge. They should keep okay for about three days this way, but honestly, they are best on day one or two.
Reheating Instructions to Restore Crispness
Do not, under any circumstances, try to reheat these in the microwave. That is a guaranteed way to turn them into soft, floppy sadness. We are reheating them to bring back the crunch, and the air fryer is the only tool for the job.
Pull your air fryer pickles out of the fridge about 15 minutes before you want to eat them so they can warm up slightly toward room temperature—this helps them heat through faster and more evenly. Preheat your air fryer again to 380°F. This is slightly lower than the initial cooking temperature, which helps dry them out without burning the already cooked coating.
Place the cold pickles in a single layer in the basket—don’t overlap them! Cook them for just 3 to 4 minutes. Check them after 3 minutes. You are just looking to heat them through and dry out that exterior again. They should crisp right back up! Give them a quick dip in ranch, and nobody will ever know they weren’t made fresh five minutes ago.
Frequently Asked Questions About Air Fryer Pickles
I get so many questions about these little guys because everyone wants that perfect, crunchy game-day snack! Here are the few things I hear most often when people are making their first batch of air fryer pickles.
Can I Use Different Types of Pickles?
You absolutely can! The recipe calls for chips because they cook the fastest and most evenly, but spears work great too. If you use spears, you might need to add a minute or two to the cooking time since they are thicker. The most important thing, whether you use chips or spears, is draining them thoroughly. Any extra liquid means you won’t get those glorious crispy pickles we are aiming for!
How to Make These Air Fryer Pickles Vegan?
That’s a great question! The eggs are just there to be the binder, so we can easily swap them out. Instead of the two eggs, you can use a flax egg mixture (one tablespoon of ground flaxseed whisked with three tablespoons of water, let it sit for five minutes to gel). Or, for a simpler approach, just use a thick, plain, unsweetened plant-based yogurt or even a thin layer of Dijon mustard as your wet binder. Just make sure it’s thick enough to hold the Panko!
Why Are My Air Fryer Pickles Soggy?
If they come out soggy, it almost always comes down to one of two things we talked about. First, you didn’t pat the pickles dry enough—you have to get rid of that surface moisture! Second, you crammed too many pickles into the basket. If they are touching, the hot air can’t circulate, and they steam instead of crisping up. Always cook in a single layer, even if it means running two batches!
Estimated Nutritional Data for Air Fryer Pickles
Now, I always tell people not to worry too much about the exact numbers when you are making a fun, crispy appetizer like this, but I know some of you like to keep track! Since we are using the air fryer instead of deep frying, we save a ton of fat, which is a huge win for a game-day snack. Keep in mind, this data is just an estimate based on the ingredients listed, assuming average pickle sizes and standard oil spray usage.
Here is the breakdown for a serving size of 6 pickles:
| Nutrient | Amount (Per Serving) |
|---|---|
| Calories | 180 |
| Fat | 8g |
| Carbohydrates | 18g |
| Protein | 6g |
| Sodium | N/A (Varies greatly by pickle brand) |
See? Much better than a deep-fried version! Enjoy them guilt-free!
Print
Air fryer pickles: 1 secret for supreme crunch
- Total Time: 22 minutes
- Yield: 4 servings
- Diet: Vegetarian
Description
Ultra-crispy air fryer pickles with a tangy dill pickle center. This recipe makes a perfect game-day snack or party appetizer ready fast.
Ingredients
- 24 dill pickle chips, drained and patted dry
- 1/2 cup all-purpose flour
- 1/2 teaspoon salt
- 2 large eggs
- 2 tablespoons pickle juice
- 1/2 teaspoon garlic powder
- 1/4 teaspoon paprika
- 1/8 teaspoon cayenne pepper (optional)
- 1 1/2 cups panko breadcrumbs
- Olive oil spray
- Ranch or chipotle dipping sauce (for serving)
Instructions
- Preheat your air fryer to 400°F and let it preheat for 3 minutes.
- Pat the pickle slices completely dry using paper towels to remove extra moisture.
- Set up your dredging station: Mix flour and salt in one bowl. Whisk eggs, pickle juice, garlic powder, paprika, and cayenne in a second bowl. Place panko breadcrumbs in a third bowl.
- Coat each pickle slice: Dip it in the flour, shake off any extra. Next, dip it in the egg mixture. Finally, coat it in the panko, pressing gently so the crumbs stick.
- Lightly spray the air fryer basket with olive oil. Arrange the coated pickles in a single layer inside the basket.
- Air fry for 6–7 minutes. Flip the pickles, spray them lightly again with oil, and cook for another 5–6 minutes until they look golden brown and crisp.
- Serve immediately with your choice of dipping sauce.
Notes
- Drying the pickles well is key to a crispy crust.
- Do not overcrowd the air fryer basket; cook in batches if needed.
- Prep Time: 10 minutes
- Cook Time: 12 minutes
- Category: Appetizer
- Method: Air Frying
- Cuisine: American