When I tell people I can whip up the ultimate homemade Parmesan garlic flatbread from scratch in about 30 minutes total, they usually don’t believe me! But seriously, this recipe is my weeknight hero. Forget those dry, store-bought crackers; this is the real deal—golden, wonderfully crisp on the edges, and just soft enough on the inside to really soak up whatever sauce or soup you put next to it.
I’ve tried a million dough recipes over the years, and honestly, this one is foolproof. It’s the first bread recipe I ever mastered without accidentally turning it into a giant, dense frisbee. Because the yeast is so forgiving and the resting time is short, you get that amazing homemade bread flavor without waiting hours for it to rise.
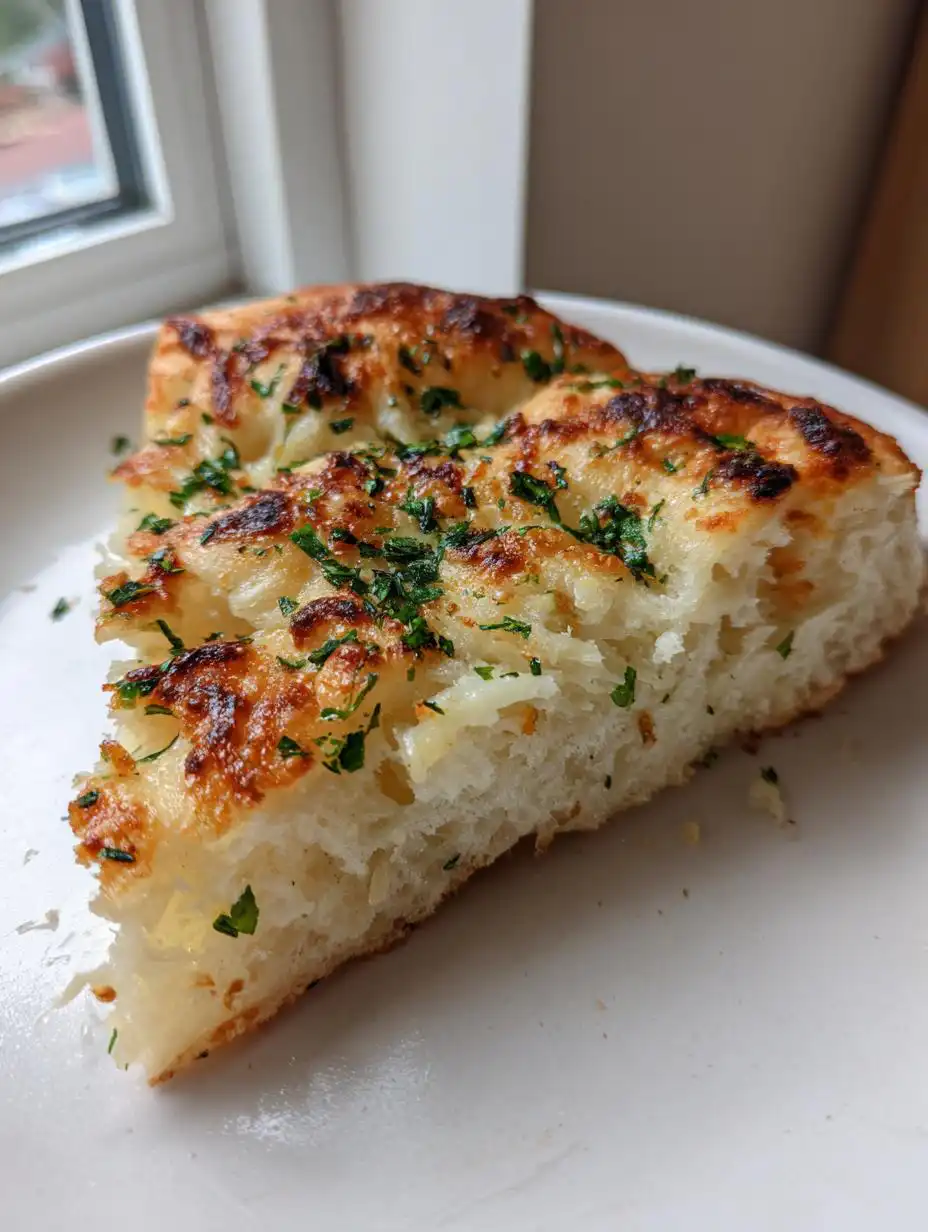
The magic here is the combination of that quick dough and the rich topping. We’re talking melted butter, sharp garlic, and piles of salty Parmesan cheese baked until it sizzles. If you’re looking for an easy appetizer that always gets rave reviews, you’ve found it. Trust me, you’ll be making this Parmesan garlic flatbread every single week!
Gathering Ingredients for Your Parmesan Garlic Flatbread
Okay, the beauty of this Parmesan garlic flatbread is that you probably have most of this stuff hanging out in your pantry already. Seriously, no crazy trips to specialty stores needed for this easy flatbread! But before we even think about mixing, we need to make sure we have everything measured out perfectly.
I always lay everything out on the counter first—I call it my mise en place, even though I’m definitely not a fancy chef! It keeps me organized, especially when that dough needs to rest and I’m rushing to get the butter mixed.
Essential Ingredients List for Parmesan Garlic Flatbread
Here is exactly what you need to gather up to make this absolute showstopper of a Parmesan garlic flatbread. Getting the right amounts of that yeast and warm water is important for a good rise!
| Ingredient | Amount | Notes |
|---|---|---|
| All-purpose flour | 2 cups | For the dough |
| Salt | 1 teaspoon | |
| Sugar | 2 teaspoons | Feeds the yeast |
| Instant yeast | 1 teaspoon | No need to proof separately |
| Warm water | 3/4 cup | Must be warm, not hot! |
| Olive oil | 2 tablespoons | For the dough |
| Melted butter | 3 tablespoons | For the topping |
| Garlic cloves | 3 | Minced very finely |
| Shredded parmesan cheese | 1 cup | Divided for topping |
| Chopped parsley | 1 tablespoon | Fresh is best here |
Preparing the Dough for Perfect Parmesan Garlic Flatbread
Alright, now we get into the good stuff—making the dough! This is where you can relax a little because this recipe is incredibly forgiving. It’s designed to be an easy flatbread that doesn’t demand hours of attention. We are aiming for a dough that feels soft and pliable, not stiff or sticky.
This process is quick, but don’t rush the kneading part; that’s what gives us that wonderful interior texture we are aiming for in our Parmesan garlic flatbread.
Activating the Yeast and Mixing the Dough
First things first: wake up your yeast! Grab a large bowl, pour in your 3/4 cup of warm water—and I mean warm, like a nice bath, not scalding hot—and stir in those 2 teaspoons of sugar. Sprinkle the instant yeast right over the top. You should see little bubbles start to form within about five minutes. If nothing happens, your water was too cold or too hot, so toss it and try again!
Once it’s foamy, toss in the 2 tablespoons of olive oil, the flour, and the salt. Start mixing this up. I usually use a wooden spoon until it just starts to come together into a shaggy ball. Don’t worry if it looks messy. Once it looks like a cohesive blob, turn it out onto a lightly floured counter. Now, knead it! You need to work it for about five full minutes until it smooths out. It should feel soft, almost pillowy, when you’re done.
Resting and Preheating for Optimal Parmesan Garlic Flatbread Results
This is my favorite part because it requires zero effort from me! Once the dough is smooth, just tuck it into a lightly oiled bowl, cover it with a clean kitchen towel, and let it chill out for 15 minutes. It won’t double in size like traditional bread dough, but this short rest lets the gluten relax, which makes rolling it out so much easier later.
While that dough is resting, get your oven cranked up to 410 degrees Fahrenheit. You want that oven ripping hot when the flatbread goes in so you get that immediate puff and crisping action. If the oven isn’t ready when the dough is done resting, the dough waits for the oven, not the other way around! Getting the timing right ensures your Parmesan garlic flatbread comes out perfect.
Crafting the Signature Garlic Butter
While the dough is resting and the oven is getting nice and hot, we move onto the flavor powerhouse of this entire appetizer: the garlic butter. Honestly, if you messed up the dough (which I doubt you did!), this topping could probably save the whole thing!
This aromatic blend is what makes this bread so irresistible. It smells heavenly while it’s baking, filling the whole house with that savory, warm scent that screams comfort food.
Mixing the Butter and Garlic
Grab a small bowl—don’t use a giant one, you don’t want to waste any flavor clinging to the sides! Measure out your 3 tablespoons of melted butter. It needs to be fully melted so it brushes on easily. Then, take those 3 garlic cloves and mince them as finely as you possibly can. I mean mush them down! Toss the minced garlic right into the melted butter and give it a quick stir. That’s it! Set this aside until it’s time to coat the dough.
Assembling and Baking Your Parmesan Garlic Flatbread
Okay, the dough has rested, the oven is hot, and your garlic butter is waiting patiently. Now we bring it all together to create this incredible Parmesan garlic flatbread! This is where the magic really happens, turning simple flour and butter into something crispy and cheesy in minutes. Don’t overthink the rolling; we aren’t making pizza crust here!
The key to success in this stage, especially if you are using a standard baking sheet, is making sure your parchment paper is ready to go. I always use parchment because, during the last few minutes of baking, the melted cheese tends to bubble up and weld itself right to the pan. Using parchment means you can easily lift the whole thing off the hot pan without tearing the delicate, crispy bottom.

Rolling the Dough and Applying the Garlic Butter
Take your rested dough ball and place it right onto your parchment-lined baking sheet. Dust your hands lightly with flour and start pressing the dough outwards. You want to gently stretch it into a rough 10-by-14-inch rectangle. It doesn’t have to be perfect—rustic edges are part of the charm of homemade bread! If the dough snaps back on you, just let it sit for two minutes before trying to stretch it further.
Once it’s the right size, take your small bowl of garlic butter we made earlier and brush it evenly all over the surface of the dough. Be generous! Then, grab about half of your cup of shredded Parmesan and sprinkle it right over that buttery layer. This first layer of cheese melts into the dough while baking, making the base flavorful.
Achieving Golden Perfection: Baking the Base
Slide that sheet right into your preheated 410-degree oven. Set your timer for 15 minutes, but keep an eye on it after the 12-minute mark. We are looking for two things here: we want the edges to look deeply golden brown, and we want the whole thing to look nicely puffed up. If you see big air bubbles forming, you can gently poke them with a knife tip to let the steam escape, keeping the bread from getting too hollow.
The Final Touch: Finishing the Parmesan Garlic Flatbread
When those 15 minutes are up, pull the whole sheet out. Wow, the smell in your kitchen right now is amazing, isn’t it? This is the moment for the final flavor bomb! Immediately sprinkle the *remaining* half of your Parmesan cheese right over the hot surface. The residual heat will soften and melt this last layer slightly, but it won’t burn like the first layer did.
Finally, scatter that tablespoon of fresh, chopped parsley over the top for color and freshness. Let it cool on the pan for just a minute or two—be careful, it’s hot!—then slice it up into squares or strips and serve it right away while it’s still crackling warm!
Why This Homemade Parmesan Garlic Flatbread is a Winner
I know there are a million recipes out there promising quick bread, but I promise you, this Parmesan garlic flatbread delivers every single time. It’s the perfect marriage of convenience and incredible flavor. You get that satisfying crunch without having to manage a sticky, complicated dough that takes hours to proof. It’s the easiest homemade bread you’ll ever make, hands down!
The reason I keep coming back to this recipe, even when I’m exhausted after work, is because it satisfies that deep craving for something savory and warm right away. It’s cheap, it’s fast, and it tastes like you spent way more time in the kitchen than you actually did.
Flavor and Texture Highlights
Let’s talk about what makes this bread truly special when you bite into it. It’s all about the contrast! Here are the main things you’ll love:
- It’s genuinely quick! The whole process, from mixing the yeast to pulling it out of the oven, is only about 30 minutes total.
- The edges get wonderfully crispy and golden brown from that first layer of baked cheese.
- The inside is surprisingly soft—it’s not dense like a cracker, but airy enough to gently tear apart.
- That sharp Parmesan flavor combined with the roasted garlic butter is addictive. It’s the perfect appetizer for dipping or serving alongside pasta. If you need a soup pairing, try this 30-minute chicken noodle soup!
Storing and Reheating Your Leftover Parmesan Garlic Flatbread
If you manage to have any leftovers of this fantastic Parmesan garlic flatbread—which is a miracle in itself—you’ll want to store it correctly so it doesn’t turn into a sad, chewy disk. The key is keeping the air out! If I know I won’t finish it the same day, I wrap the cooled pieces tightly in plastic wrap and then tuck that into a zip-top bag. It keeps beautifully on the counter for a day, but for longer storage, the freezer is your friend.
Reheating is crucial to bring back that lovely crunch. Microwaving is a big no-no unless you enjoy eating soft cardboard! You want to use dry heat to crisp it back up. Here’s my quick guide for reviving those leftovers:
| Storage Method | Temperature/Time | Reheating Method |
|---|---|---|
| Countertop (Airtight) | Up to 1 day | Quick toast in a dry skillet over medium heat for 1-2 minutes per side. |
| Refrigerator | Up to 4 days | Bake at 350°F for 5-7 minutes until warmed through and edges crisp. |
| Freezer | Up to 2 months | Wrap tightly. Reheat directly from frozen at 375°F for 10-12 minutes. |
Answering Common Questions About This Recipe
I always get so many questions once people try this recipe for the first time. It’s so simple, but there are always little details that trip people up, especially if this is your first time making homemade bread without a machine. Don’t worry, I’ve got the answers to the things I hear most often about making this easy flatbread!
It’s important to remember that even though it’s fast, baking requires a tiny bit of precision, but nothing you can’t handle. Let’s clear up a few things so your next batch is absolutely perfect!
Can I use different cheese besides Parmesan?
You absolutely can play around with the cheese, but you need to know what you’re trading off. Parmesan is sharp and salty, and it melts beautifully without getting greasy. If you use mozzarella, it will get super gooey and stretchy, which is great if you plan on making little flatbread pizzas! If you use Pecorino Romano, it will be sharper and saltier. I always suggest keeping at least half of the topping as Parmesan, though, because that’s where the signature flavor lives.
How thick should the dough be rolled for the best texture?
This is key for that crispy-on-the-outside, soft-on-the-inside texture! You want to roll it out until it’s about an eighth of an inch thick, maybe a little thinner if your oven runs hot. If you roll it too thick—say, half an inch—it’s going to bake up more like a soft dinner roll than a flatbread, and you won’t get that satisfying snap when you break off a piece. Aim thin, but don’t panic if it’s a little uneven!
What is the best dip to serve with this bread?
Oh, this is the fun part! Since this flatbread is so rich with garlic and cheese, you want something bright to cut through the richness. My absolute favorite is a simple bowl of warmed marinara sauce for dipping—it tastes just like a fancy garlic knot! If you’re serving it with soup, a creamy tomato soup is divine. But if you want something really easy, a little side of good quality pesto mixed with a spoonful of Greek yogurt makes a fantastic, zesty dip.
Sharing Your Delicious Parmesan Garlic Flatbread Experience
Now that you’ve pulled that incredible, golden-brown Parmesan garlic flatbread out of the oven, I want to hear all about it! Seriously, I live for the feedback. Did the edges get perfectly crisp? Did your family devour it before you could even cut it into pieces?
Don’t be shy! Drop a comment below and tell me how it went, or give the recipe a quick rating. Happy baking, friends! You can also check out more quick recipes on our Medium page.
Print
30 Minute Ultimate Parmesan garlic flatbread
- Total Time: 30 minutes
- Yield: 6 servings
- Diet: Vegetarian
Description
Buttery parmesan garlic flatbread that’s golden, crisp, and ready in 30 minutes. Perfect for dipping, serving with soup, or making flatbread pizzas.
Ingredients
- 2 cups all-purpose flour
- 1 teaspoon salt
- 2 teaspoons sugar
- 1 teaspoon instant yeast
- 3/4 cup warm water
- 2 tablespoons olive oil
- 3 tablespoons melted butter
- 3 garlic cloves, minced
- 1 cup shredded parmesan cheese
- 1 tablespoon chopped parsley
Instructions
- In a large bowl, combine warm water, sugar, and yeast. Let sit for 5 minutes until foamy.
- Add flour, salt, and olive oil. Mix until a soft dough forms. Knead on a floured surface for 5 minutes until smooth.
- Cover and let the dough rest for 15 minutes while preheating the oven to 410°F.
- In a small bowl, mix melted butter with minced garlic.
- Roll dough into a 10×14-inch rectangle and place on a parchment-lined baking sheet.
- Brush the garlic butter evenly over the dough. Sprinkle half of the parmesan cheese on top.
- Bake for 15 minutes, until golden and puffed.
- Remove from oven, sprinkle remaining parmesan and chopped parsley. Slice and serve warm.
Notes
- This is an easy, foolproof recipe for homemade bread lovers.
- The flatbread is soft on the inside and crispy on the edges.
- It is a perfect side dish or appetizer for any meal.
- Prep Time: 15 minutes
- Cook Time: 15 minutes
- Category: Appetizer
- Method: Baking
- Cuisine: American