Forget everything you think you know about store-bought flatbreads! Making truly perfect homemade tortillas right in your own kitchen is surprisingly fast—we’re talking ready in under an hour, total. I used to think they were intimidating, always ending up either too tough or tearing when I tried to fold them for tacos. The secret, I finally learned, isn’t in some fancy ingredient, but in how you treat the dough.
The absolute best part about these? That amazing, slightly chewy texture! It’s all about getting that gluten relaxed just right before you roll them thin. Once you nail that soft, pliable consistency, you’ll never go back to the plastic-wrapped packs again. Trust me, the smell when they hit the hot skillet is pure happiness. Get ready to change your Taco Tuesday forever!
Essential Ingredients for Your Homemade Tortillas
You won’t believe how simple the list is for these incredible homemade tortillas. Seriously, you probably have everything sitting in your pantry right now! There’s no lard, no complicated mixes, just the bare essentials needed to create something amazing. Because the ingredient list is so short, every component really matters, so make sure you have fresh flour and salt on hand.
We are relying on simple chemistry here, not fancy additives. This recipe proves that the best results often come from the most basic pantry staples.
Ingredient Breakdown and Clarity
We need three dry ingredients, oil, and water, but the water temperature is crucial! You want it warm, around 100 degrees Fahrenheit. If it’s too cold, the dough won’t come together right, and if it’s scalding hot, it can kill the baking powder’s reaction. We use a full teaspoon of baking powder, which gives the tortillas just a little bit of lift so they puff beautifully on the heat. Don’t skimp on the salt either; it really brings out the flavor of the flour!
Equipment Needed to Make Homemade Tortillas
You don’t need a specialized machine to create fantastic homemade tortillas! In fact, the equipment list is delightfully short. Having these few simple tools ready before you start mixing means the whole process flows smoothly. We want to be prepared so we don’t end up with sticky messes or undercooked dough.
You’ll need a big mixing bowl, measuring cups and spoons, and something to roll the dough out with. That’s really it for the prep work!
Why a Cast-Iron Pan Works Best
Now for the cooking part—this is where you can really upgrade your results. While any heavy-bottomed skillet will work, I absolutely insist you grab your cast-iron pan if you have one. Cast iron holds heat incredibly well and distributes it evenly across the entire surface. This consistency is what gives you those beautiful, dark brown spots on your tortillas, which adds so much flavor. It basically mimics a professional griddle, giving you that perfect char without burning the rest of the dough.
Step-by-Step Instructions for Homemade Tortillas
Okay, this is the fun part! Once you get the hang of these steps, making homemade tortillas will feel like second nature. Just take it slow at first, especially when you’re getting used to how the dough feels. We’re aiming for pliable, not sticky, and definitely not shaggy. Follow these instructions exactly, and you’ll have a stack of warm, perfect rounds in no time.
Preparing the Dough for Your Homemade Tortillas
First things first: get your dry ingredients ready. Grab that big bowl and whisk together the three cups of flour, the salt, and the baking powder. You want this really well combined, so the leavening agent is evenly distributed. Next, pour in your 1/4 cup of light oil—I prefer avocado oil because it’s neutral, but olive oil works great too. You can see more tips on healthy cooking methods over on my Medium profile! Rub that oil into the flour mixture until it looks like coarse crumbs. It should feel a little sandy.
This is where the magic starts. Slowly pour in that warm water—remember, about 100 degrees. Don’t dump it all in at once! Stir it with a wooden spoon or your hand until everything just barely comes together into a shaggy ball. If you see dry flour pockets, add water just a teaspoon at a time until there are no dry bits left. It needs to look cohesive, but don’t over-mix it yet!
Kneading and Resting Time for Homemade Tortillas
Turn that shaggy mess out onto a lightly floured counter. Now, we knead! This is important for developing the structure, but we don’t want to go crazy. Knead it firmly but gently for about three to four minutes. You’ll feel it transform from lumpy to smooth and elastic under your hands. When it’s ready, it should feel soft and springy, not tight or tough.
This next step is non-negotiable, so don’t skip it! Cover that smooth dough ball with a clean kitchen towel or put it back in the bowl and cover it tightly. Let it rest for a full 10 minutes. This rest allows the gluten we just built up to relax. If you try to roll it immediately, it will fight you every step of the way and keep snapping back. Ten minutes is just enough time for me to clean up my mixing bowl!
Rolling and Cooking Your Soft Tortillas
After resting, divide the dough into 12 equal pieces. Roll each piece into a smooth ball, flatten it slightly with your palm, and then get rolling! Use a little flour on your surface and your rolling pin. You want to work quickly and evenly to get an 8-inch circle. Aim for thin—you should be able to almost see your hand through it, but not quite transparent. Keep the unused balls covered so they don’t dry out while you work.
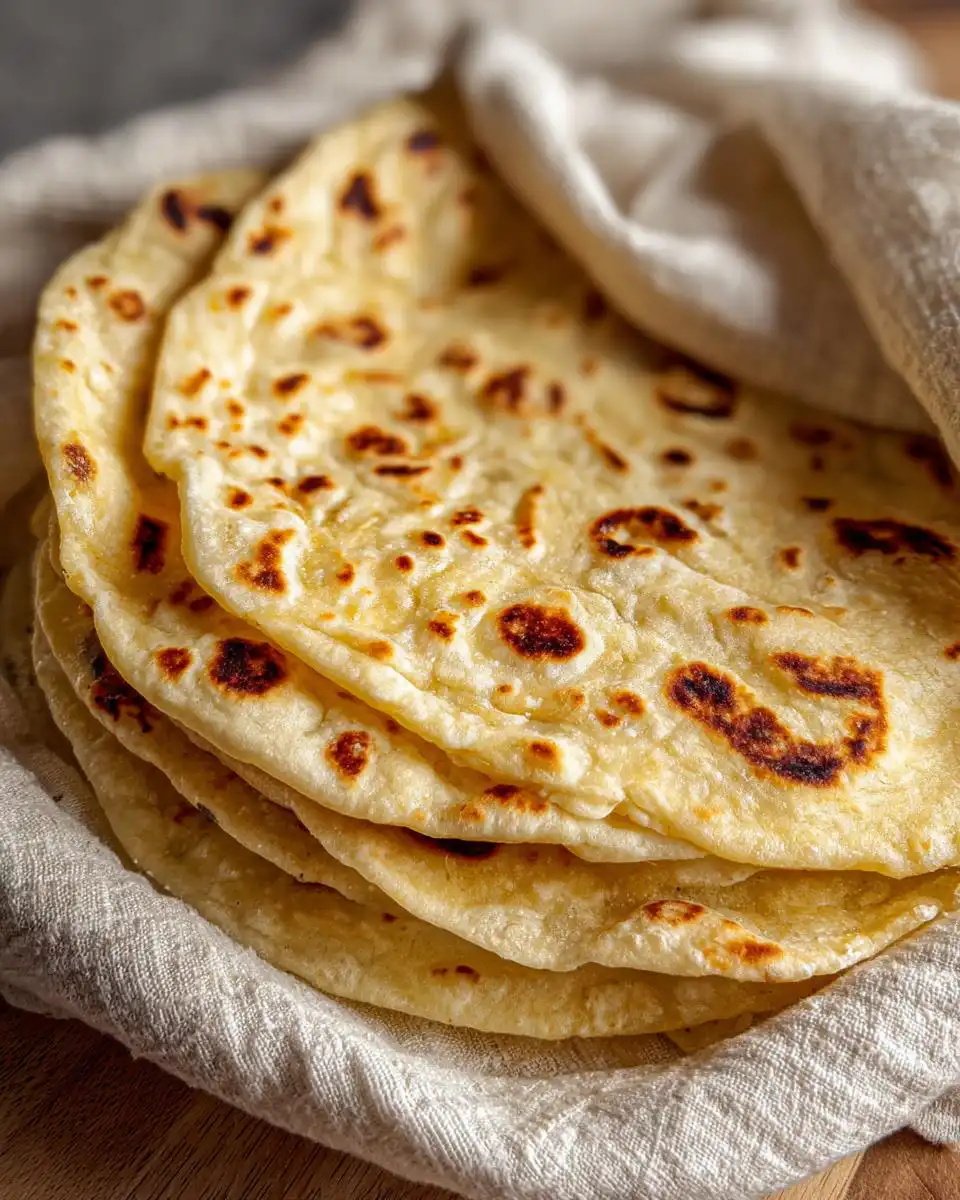
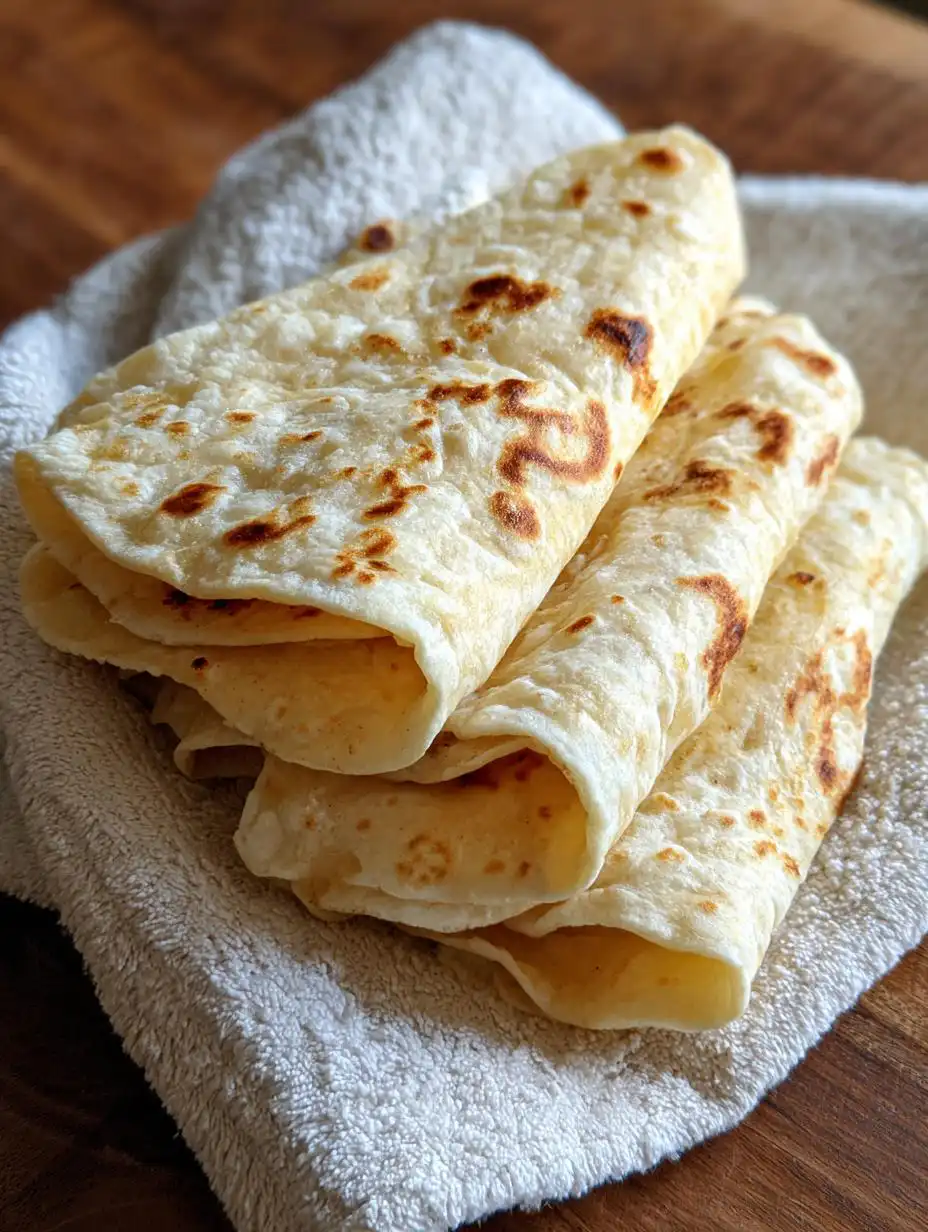
Heat up your dry skillet or cast iron over medium heat. It needs to be hot, but not smoking! Lay one rolled-out piece onto the pan. Cook the first side for about one minute. You should see big bubbles start to puff up—that’s exactly what you want! Flip it over and cook the second side for just 30 seconds more until those beautiful golden-brown spots appear. Stack your finished soft tortillas immediately inside a clean kitchen towel to trap the steam. That steam keeps them super pliable and ready for dipping!
Tips for Success When Making Homemade Tortillas
Making these homemade tortillas is truly easy once you know a couple of Grandma’s little tricks. Don’t stress if the first one or two don’t come out perfectly—that’s normal! Most of the issues people run into are all about dough consistency, which is easy to fix if you know how. Remember, we are shooting for soft and bendable, not cracker-crisp.
The most common issue is dough that feels too stiff or too sticky. My advice is always to trust your hands over the measurement cup when it comes to water. The humidity changes things, so you have to feel it out as you go. A little patience here makes all the difference between a good tortilla and an absolutely fantastic one. For more recipe inspiration, check out my Pinterest boards!
Troubleshooting Dough Consistency
If your dough feels too dry when you go to knead it—meaning it’s cracking around the edges and resisting coming together—don’t panic! Just add water, one tablespoon at a time. Add the water, knead it in for about 30 seconds, and check the texture again. It will absorb it surprisingly fast! On the flip side, if your dough feels overly sticky and is clinging to your hands like glue, you need a little flour. Dust your hands and the counter lightly, and knead in just a teaspoon of flour at a time until it stops sticking excessively. Remember what the recipe notes say: small, gradual adjustments are the key to perfect homemade tortillas!
Storing and Reheating Your Homemade Tortillas
The real test of a great recipe is how well the leftovers hold up, right? Luckily, these homemade tortillas are fantastic the next day, provided you store them correctly. The goal is to keep that fluffy, steamy softness locked in so they don’t dry out into something you have to use for chips! Storing them properly ensures you get that fresh-off-the-skillet texture even hours later.
Optimal Storage Methods
As soon as they come off the pan, stack those warm tortillas up inside a clean kitchen towel, and then immediately tuck that towel into a zip-top bag or an airtight plastic container. Once they cool completely, they need to stay sealed airtight. In the refrigerator, they’ll keep well for about four days. If you made a huge batch, freezing is your best friend! Wrap stacks of five or six tortillas tightly in plastic wrap, then slip them into a freezer bag. They are good in the freezer for up to two months.
Reheating for Maximum Softness
When you’re ready to eat, you need to bring that moisture back! Microwaving is fast—just stack 4 or 5 tortillas between two slightly damp paper towels and microwave them for about 20 to 30 seconds until they are warm and pliable again. But honestly, the skillet method is superior. Heat a dry pan over medium heat, and warm each tortilla for just 10 seconds per side until they start to gently steam. That dry heat really wakes up the texture of your homemade tortillas!
Frequently Asked Questions About Homemade Tortillas
I get asked these questions all the time, especially when people are trying to master their first batch of homemade tortillas. Don’t worry if you have questions; baking is all about experimenting! Here are the most common things people wonder about when they are making these from scratch.
Can I use a different type of flour for these Homemade Tortillas?
This recipe is specifically balanced for all-purpose white flour. If you try to substitute it with 100% whole wheat flour, you’ll likely end up with a much tougher, drier tortilla because whole wheat absorbs liquid differently. If you must use whole wheat, I suggest substituting only half of the white flour with whole wheat to keep some tenderness. For gluten-free options, you’ll need a completely different recipe, as the structure here relies heavily on gluten development!
How long do these soft tortillas stay fresh?
The goal is to eat them the day you make them, of course! But if you’re storing them properly—wrapped tightly in a towel inside an airtight container—your soft tortillas will stay wonderfully fresh in the refrigerator for about four days. If you need longer, wrapping them well and freezing them is the way to go, and they’ll be perfect for up to two months.
Understanding the Nutritional Profile of Homemade Tortillas
I know some of you are tracking macros, so I wanted to give you a quick snapshot of what you’re eating when you enjoy these fabulous flour tortillas. Since we aren’t adding any animal fats like lard, these are surprisingly light! It’s great knowing exactly what goes into what you feed your family. These estimates are based on the recipe yield of 12 tortillas, so adjust if you make smaller or larger ones!
Estimated Nutritional Data Table
| Nutrient | Amount Per Serving (1 tortilla) |
|---|---|
| Calories | 120 |
| Fat | 3g |
| Carbohydrates | 18g |
| Protein | 3g |
Sharing Your Homemade Tortillas Results
I absolutely love seeing your stacks of fresh rounds! When you make these homemade tortillas, please snap a picture of your beautiful results, whether they’re piled high for dinner or just cooling on the rack. I always read every comment and love hearing what you served them with—tacos, quesadillas, or just dipping them in salsa!
Print
Amazing Homemade Tortillas in Under 1 Hour
- Total Time: 40 minutes
- Yield: 12 tortillas
- Diet: Vegetarian
Description
Soft, flexible homemade tortillas made with simple pantry ingredients. Quick to make, perfectly chewy, and much better than store-bought.
Ingredients
- 3 cups all-purpose flour
- 1 teaspoon salt
- 1 teaspoon baking powder
- 1/4 cup light olive oil or avocado oil
- 1 cup warm water (about 100°F)
Instructions
- Combine dry ingredients: In a large bowl, whisk together flour, salt, and baking powder.
- Add oil: Pour in the oil and mix with your hands or a spoon until the mixture looks crumbly.
- Add water: Slowly stir in the warm water until a soft dough forms.
- Knead: Transfer to a floured surface and knead for 3 to 4 minutes, until smooth and elastic.
- Rest the dough: Cover the dough with a clean towel and let it rest for 10 minutes to relax the gluten.
- Shape: Divide the dough into 12 equal pieces. Roll each into a ball, then flatten slightly.
- Roll out: On a lightly floured surface, roll each ball into a thin, 8-inch circle. Keep unused dough covered to prevent drying.
- Cook: Heat a dry skillet or cast-iron pan over medium heat. Cook each tortilla for 1 minute on the first side until bubbles form, then flip and cook for another 30 seconds until golden spots appear.
- Keep warm: Stack tortillas in a towel to keep them soft until ready to serve.
Notes
- Using a cast-iron pan provides the best results for browning.
- If the dough seems too dry, add water one tablespoon at a time.
- Prep Time: 20 minutes
- Cook Time: 20 minutes
- Category: Baking
- Method: Skillet Cooking
- Cuisine: Mexican