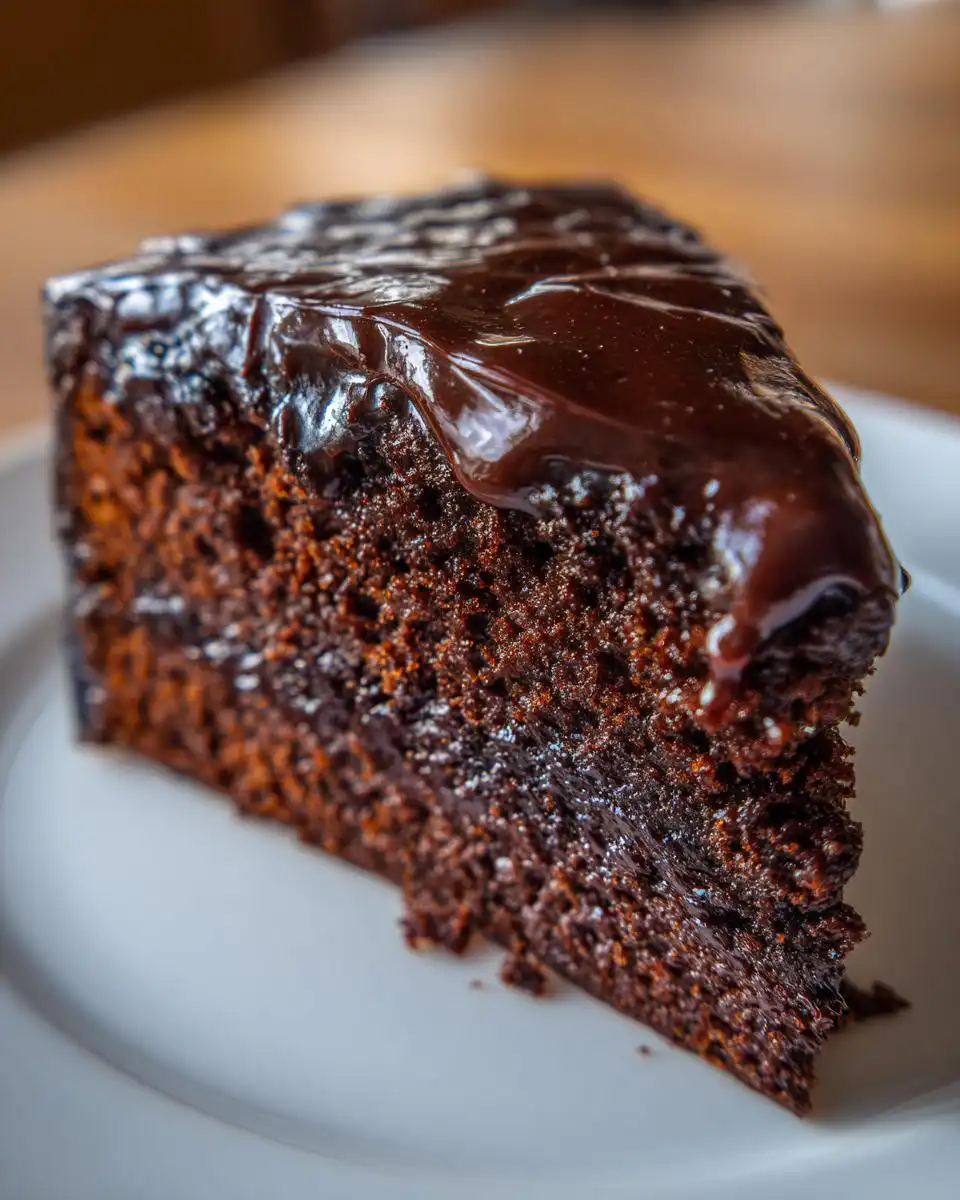
Oh, you are in for such a treat! If you think you know chocolate cake, get ready to meet the king—my absolute favorite, the black magic chocolate cake. Seriously, this isn’t just *a* chocolate cake; it’s the one that makes people stop talking when they take the first bite. I’ve been making this recipe for years, tweaking it until it was exactly right.
What makes it so unbelievably moist and deep in flavor? It’s the secret weapon combo of buttermilk and strong, cooled coffee. Trust me, you won’t taste the coffee, but it wakes up that cocoa powder like nothing else. When I bake this, my kitchen smells incredible—that dark, rich aroma just fills every corner. It’s a simple recipe, but there’s a real technique to getting that perfect, velvety crumb. I’m going to walk you through every little secret I’ve learned!
Essential Components for Your black magic chocolate cake
Baking is chemistry, right? Well, maybe not entirely, but when you’re making something as spectacular as this black magic chocolate cake, you absolutely have to respect the measurements. I used to think “a little extra cocoa” wouldn’t hurt, but oops! That leads to dry cake, and we are aiming for moist heaven here. So, pull out your measuring cups and let’s look at what we need. Don’t skip the quality chocolate for the ganache—it makes a huge difference!
This recipe relies on a perfect balance between the dry structure builders and the wet moisture providers. It all comes together beautifully, but only if every component is there and measured correctly. Here’s the rundown of what you’ll be gathering:
Dry Ingredients for the black magic chocolate cake
We start by making sure our structure is sound. The flour gives us body, of course, but the real magic is in the leavening. You need both baking soda and baking powder working together here to get that perfect lift in such a rich batter. And don’t be shy with the cocoa powder; that’s where all that dark, intense flavor comes from. Whisking these together first is key—it distributes everything evenly so you don’t end up with pockets of baking soda later on!
Wet Ingredients and Flavor Depth
This is where the richness comes from! The buttermilk is essential; its acidity reacts beautifully with the soda, creating tender crumb. The oil keeps things moist for days, which is great for leftovers. But the star? The cooled, strong brewed coffee. It deepens the chocolate flavor so intensely that people will ask you what your secret is. Just make sure it’s cooled down before it hits those eggs!
Silky Smooth Chocolate Ganache Ingredients
For the topping, we only need three things, but they have to be good quality. Heavy cream is non-negotiable for that luxurious texture. We use semisweet chocolate chips because they melt beautifully and provide the perfect bittersweet counterpoint to the sweet cake layers. And finally, that little bit of unsalted butter stirred in right at the end? That’s my little trick for making the ganache extra glossy and spreadable. Don’t skip it!
Equipment Needed to Create Your black magic chocolate cake
You don’t need a million fancy gadgets for this recipe, which is one of the reasons I love it so much! Mostly, it’s about having the right vessels to mix everything without making a huge mess. Please make sure your mixing bowls are large enough, because when we start adding wet ingredients, things can get splashy!
Here are the basics you’ll want on hand:
- Two 9-inch round cake pans (or one 9×13 pan if you prefer a sheet cake style).
- One large mixing bowl for the dry ingredients.
- A second large bowl for mixing everything together.
- A whisk for the initial dry mix, and an electric mixer (handheld or stand mixer) for the wet stage.
- A wire cooling rack—this is vital so the bottoms don’t get soggy!
- A small saucepan for heating the cream for the ganache.
Step-by-Step Instructions for the black magic chocolate cake
Okay, deep breaths! This is where the magic really happens. Don’t rush the mixing, but don’t overthink it either. We’re going to tackle this in four clear stages: prep, mixing, baking, and topping. Follow these steps exactly, and you’ll have the most stunningly rich black magic chocolate cake you’ve ever seen.
Preparing the Cake Batter
First things first: get that oven hot! Preheat it to 350\u00b0F. While it’s warming up, take a minute to properly grease and flour your two 9-inch round pans. I always use parchment circles in the bottom too, just for good measure—I learned that lesson the hard way once!
In your biggest bowl, grab your whisk and combine all the dry stuff: flour, cocoa powder, sugar, baking soda, baking powder, and salt. Whisk it around for about 30 seconds until it looks like one uniform brown powder. Now, switch to your electric mixer. Add the eggs, the buttermilk, the oil, the vanilla, and that cooled coffee. Turn the mixer on medium speed and beat everything for exactly two minutes. Don’t stop early! Two minutes lets the soda and acid do their work. Now, here’s the thing you need to remember: the batter will look incredibly thin, almost soupy. Seriously, don’t panic! That’s exactly what it should look like for this recipe. If it looks thick, something went wrong!
Baking and Cooling the black magic chocolate cake Layers
Once that thin batter is mixed, divide it evenly between your two prepared pans. Smooth the tops gently with a spatula. Pop them into that preheated oven and let them bake for 30 to 35 minutes. You’ll know they are done when a toothpick inserted right into the center comes out clean—no wet batter clinging to it. Once they pass the test, pull them out. Let them sit in those pans on a wire rack for 10 minutes. This resting period is important because it lets the cake firm up just enough before you try to move them. After 10 minutes, gently flip them out onto the rack to cool completely. They must be totally cool before we try to put the ganache on, or we’ll have a chocolate puddle!
Crafting the Glossy Chocolate Ganache
While the cakes are cooling, we make the topping. This is so easy it feels like cheating. Take your heavy cream in a small saucepan and heat it up until you see steam rising, but stop before it actually starts boiling—tiny bubbles around the edge are fine. Immediately pour that hot cream right over your chocolate chips and the tablespoon of butter sitting in a heat-safe bowl. Don’t touch it for three full minutes! Let the heat melt everything down. After three minutes, grab a whisk and start stirring gently from the center outwards. Keep going until it’s completely smooth, glossy, and looks like liquid velvet. That butter really helps give it shine!
Assembling Your Final black magic chocolate cake
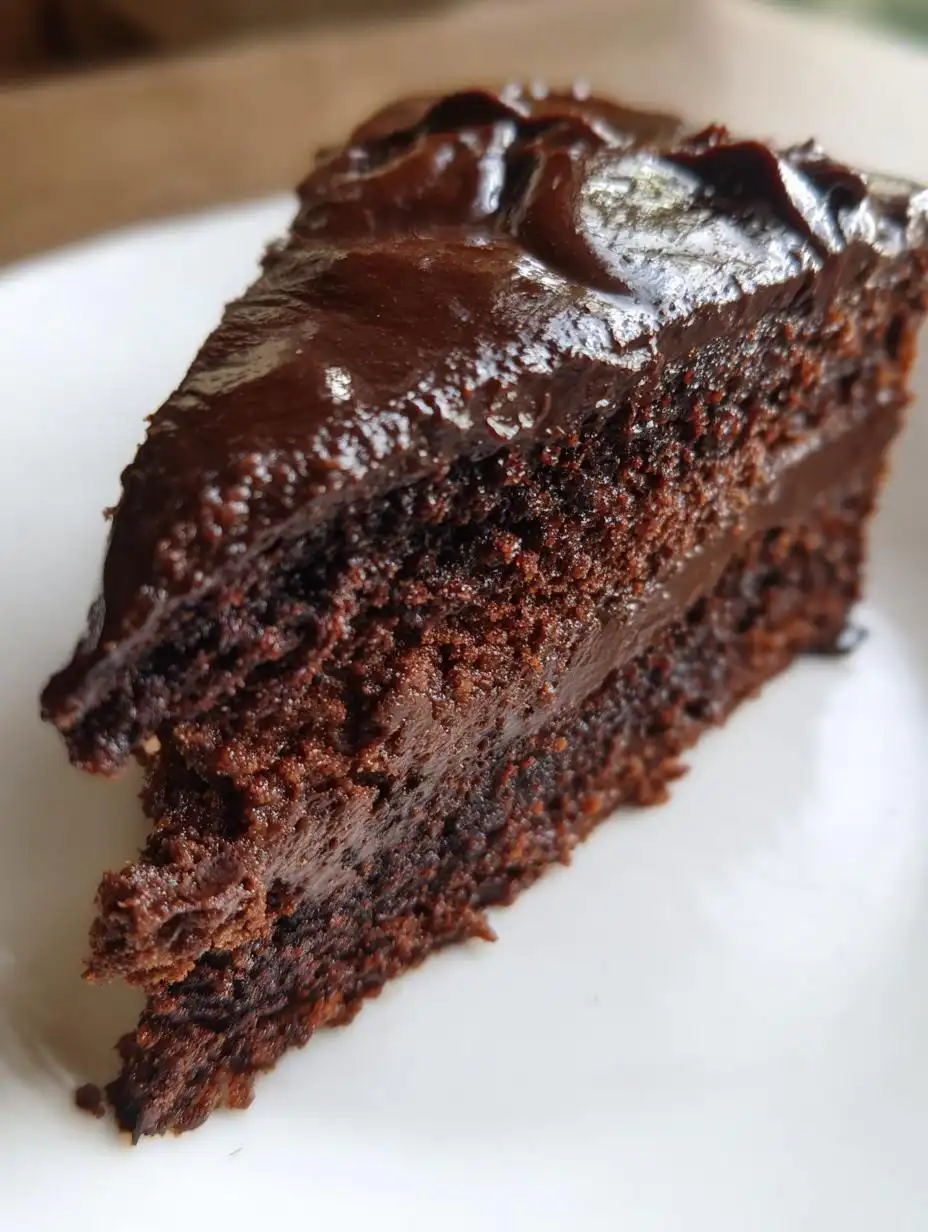
Once those cake layers are stone cold—and I mean completely cool, or the ganache will slide right off—it’s time to stack. Place one layer on your serving plate. Pour about half of that gorgeous ganache on top and spread it gently to the edges. Place the second layer on top. Then, pour the remaining ganache over the top layer, letting it drip down the sides naturally. Don’t fuss too much with smoothing it perfectly; the rustic look is part of the charm of this rich cake. Then, you just let it sit on the counter for a little while so that ganache can set up before you slice into it.
Tips for Perfect black magic chocolate cake Results
Even with a straightforward recipe like this, a few little tips can take your cake next level. Remember, I’ve made this enough times now that I can practically do it in my sleep! These little adjustments ensure you get that fantastic texture every single time.
Why Strong Coffee Matters in This black magic chocolate cake
I know some people balk at using coffee, but please, don’t try to substitute it with weak drip coffee or just water! The coffee isn’t there to make it taste like a mocha; it’s there to act as a flavor enhancer for the cocoa. It deepens the chocolate notes, making the cake taste darker and richer than if you just used water. It’s non-negotiable for achieving that true black magic chocolate cake depth.
Handling the Thin Batter Consistency
If you’re nervous because the batter is so thin, I want you to stop worrying right now! This is the texture that guarantees a moist crumb. If you try to ‘fix’ it by adding more flour, you’ll end up with a dense, dry brick. Trust the recipe and trust the science working in that bowl—the liquid ratio is perfect for the leavening agents to create that light, airy structure during baking, even though it looks like soup going in!
Storing and Serving Your Rich Chocolate Dessert
This rich cake is actually even better the next day once the flavors have settled in, but you do need to store it properly, especially with that luxurious ganache topping. Because we used heavy cream in the ganache, refrigeration is the safest bet if you plan on keeping it for more than a day. Don’t worry, though; a quick warm-up before serving brings back that fresh-from-the-oven tenderness.
Storage Guidelines for Leftover black magic chocolate cake
Keep your leftover slices in an airtight container. If you stack them, put a small square of parchment paper between the layers so the ganache doesn’t stick! It should stay perfectly fine in the refrigerator for up to four days. If you leave it out on the counter, the ganache might get a little too soft, especially if your kitchen is warm.
Reheating Slices of the Cake
If you prefer your chocolate cake warm, don’t microwave the whole thing! Just take your individual slice out of the fridge about 30 minutes before you plan to eat it to let it come toward room temperature. For a slightly warmed slice, pop it in the microwave for just 10 to 15 seconds on a low setting. That little burst of warmth makes the cake extra soft and the ganache slightly gooey again. Perfect!
| Storage Method | Duration | Serving Tip |
|---|---|---|
| Airtight Container (Room Temp) | Up to 12 hours | Serve as is, slightly softened. |
| Airtight Container (Refrigerated) | Up to 4 days | Allow 30 minutes to warm slightly before eating. |
Understanding the Nutrition Profile
I always tell people that baking for joy is more important than counting every little thing, but it’s good to have an idea of what you’re diving into with this incredibly rich cake. Since this recipe uses oil and heavy cream, it definitely leans toward the decadent side—and honestly, it should! This is a celebratory cake, not an everyday snack.
Please remember that these numbers are just estimates based on the ingredients I listed. If you swap out oil for applesauce or use darker chocolate chips, the numbers will shift around a bit. But for a standard serving of this amazing black magic chocolate cake, here’s what you’re looking at:
| Nutrient | Amount |
|---|---|
| Calories | 410 |
| Fat | 22g |
| Carbohydrates | 52g |
| Protein | 5g |
Common Questions About This Recipe
I always get asked the same things when people try this recipe for the first time, especially since the batter looks so unusual! It’s smart to ask questions before you start mixing, so let’s tackle a few of the big ones right here. Getting these details right ensures you end up with that perfect, rich cake everyone raves about.
Can I make this black magic chocolate cake without coffee?
You absolutely *can*, but I have to warn you: your cake won’t have that signature deep flavor. The coffee is essential because it chemically enhances the cocoa, making the chocolate taste more intense and dark. If you must skip it, use the exact same amount of warm water, but expect the flavor to be a little flatter. It will still be a great chocolate cake, but it won’t be the “black magic” version!
What is the best way to store leftover chocolate ganache?
If you have extra chocolate ganache after frosting, it stores beautifully! Put it in a small, airtight container—even a tiny glass jar works great. It will firm up quite a bit in the fridge, but don’t worry. Just take it out about 30 minutes before you need to use it again, and it will soften right back up to a perfect, spreadable consistency. You can keep it for about a week this way.
Can I use a different type of oil?
Yes, you certainly can! The recipe calls for a neutral oil like canola or vegetable oil because they don’t impart any flavor, letting the cocoa shine. If you have coconut oil, you can use that, but make sure it’s melted first. Some folks even use melted avocado oil with great results. Just avoid strongly flavored oils like olive oil, as that will definitely clash with the chocolate!
Share Your Experience with This Cake
I truly hope you loved making this black magic chocolate cake as much as I love sharing it with you! Now that you’ve tasted the magic, I really want to hear what you think. Did you add anything extra? Did your family devour it in minutes? Please leave a rating down below and tell me all about your experience in the comments. Happy baking! Check out more baking tips here.
Print
Amazing! black magic chocolate cake in 3 steps
- Total Time: 50 minutes
- Yield: 12 servings
Description
Deeply rich and moist black magic chocolate cake made with coffee and buttermilk, topped with silky chocolate ganache for the ultimate dessert.
Ingredients
- 1 ¼ cups all-purpose flour
- ¾ cup unsweetened cocoa powder
- 2 cups sugar
- 2 teaspoons baking soda
- 1 teaspoon baking powder
- ½ teaspoon salt
- 2 large eggs
- 1 cup buttermilk
- ½ cup neutral oil (canola or vegetable)
- 1 cup strong brewed coffee, cooled
- 1 teaspoon vanilla extract
- 1 cup heavy cream
- 8 ounces semisweet chocolate chips
- 1 tablespoon unsalted butter
Instructions
- Preheat oven to 350°F. Grease and flour two 9-inch round cake pans or line with parchment paper.
- In a large bowl, whisk together flour, cocoa powder, sugar, baking soda, baking powder, and salt.
- Add eggs, buttermilk, oil, coffee, and vanilla. Beat on medium speed for 2 minutes until smooth. Batter will be thin.
- Divide batter evenly between pans and smooth the tops.
- Bake 30–35 minutes, or until a toothpick inserted in the center comes out clean.
- Cool cakes in pans for 10 minutes, then transfer to a wire rack to cool completely.
- For ganache, heat cream in a small saucepan until steaming but not boiling. Remove from heat and pour over chocolate chips and butter.
- Let sit 3 minutes, then whisk until smooth and glossy.
- Spread ganache over cooled cakes, stacking if desired, and let set before slicing.
Notes
- The batter will be thin; this is normal for this recipe.
- Use strong brewed coffee for the best chocolate flavor depth.
- Prep Time: 15 minutes
- Cook Time: 35 minutes