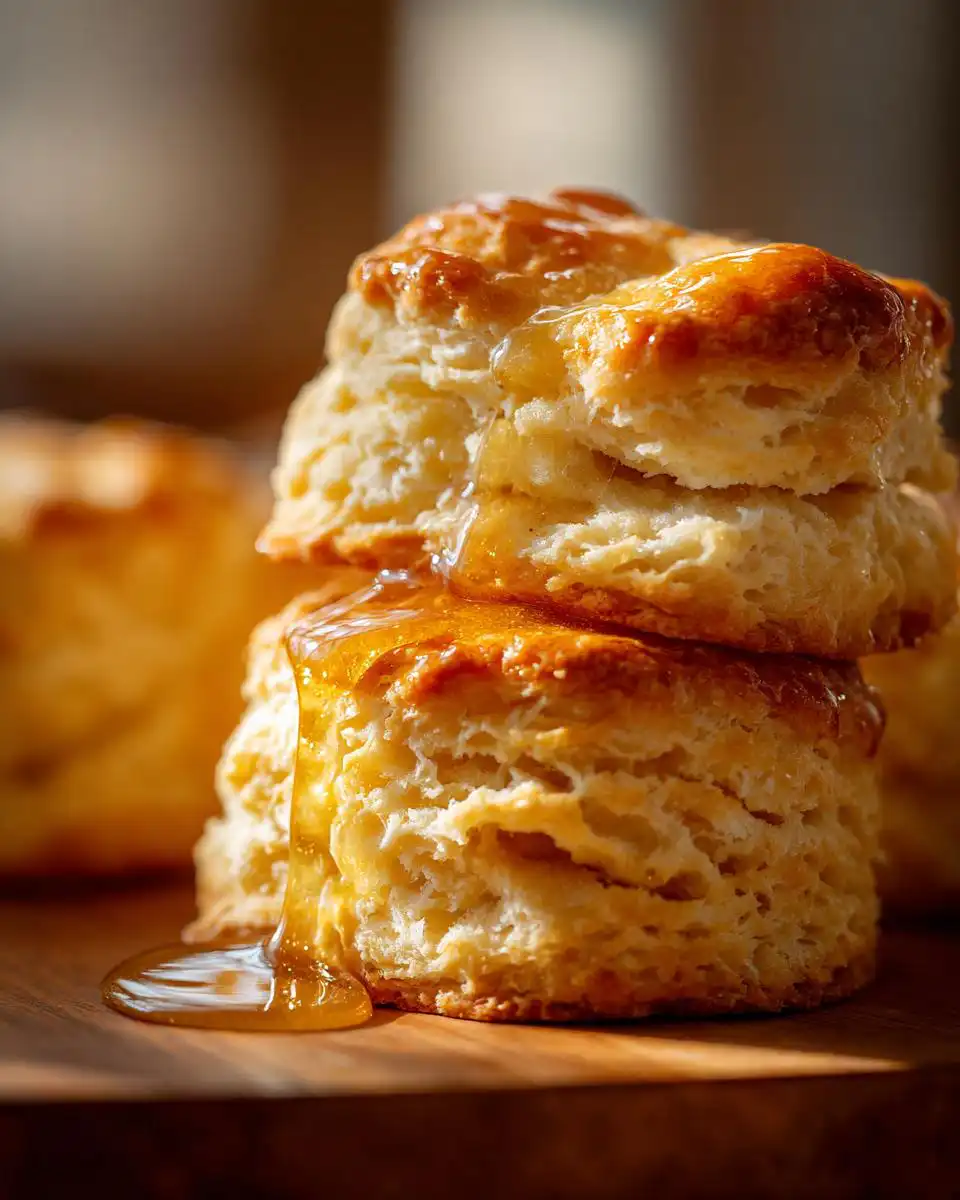
I am telling you right now, these are the best buttermilk biscuits you will ever make. Forget those dry, crumbly things you get from a can; we are talking about layers that actually separate when you pull them apart! The secret is honestly in getting that butter cold and treating the dough gently. After years of practice—and yes, some truly sad, flat biscuits—I finally nailed the technique for a soft, buttery center every single time.
But the real kicker? That quick honey glaze brushed on right when they come out of the oven. It melts right into the cracks, making them slightly sweet and unbelievably tender. Mastering these flaky buttermilk biscuits took me through several ruined mornings, but now that I know the rhythm, it’s fast—seriously, 35 minutes total! You’ve got this, trust me.
Essential Ingredients for Perfect Buttermilk Biscuits
When you’re aiming for that perfect, towering rise and those beautiful, visible layers in your buttermilk biscuits, the ingredients themselves are non-negotiable. It’s not about fancy flours here; it’s about temperature control. I learned the hard way that room-temperature butter creates a disaster—it just melts right into the flour and you end up with dense hockey pucks instead of fluffy clouds.
You need simplicity, but you need *cold* simplicity. Keep everything chilled until the absolute last second. This foundation is what separates a good biscuit from a truly legendary one! You can see more of my kitchen tips on my Medium page.
Ingredient List and Preparation Notes
Here is exactly what you need. Make sure your butter is cubed and placed back in the freezer for 10 minutes before you start mixing. That’s my little trick!
| Item | Amount | Notes |
|---|---|---|
| All-Purpose Flour | 2½ cups | Make sure it’s spooned and leveled, not scooped! |
| Baking Powder | 2 tablespoons | This is your main lift agent. |
| Fine Salt | 1 teaspoon | Don’t skip this, it enhances the butter flavor. |
| Unsalted Butter | ½ cup | Must be cubed and COLD! |
| Honey | 1 tablespoon (in dough) | Adds just a hint of background sweetness. |
| Cold Buttermilk | 1 cup + 3 Tbsp | The star liquid ingredient. Keep it icy! |
Why Cold Ingredients Matter for Buttermilk Biscuits
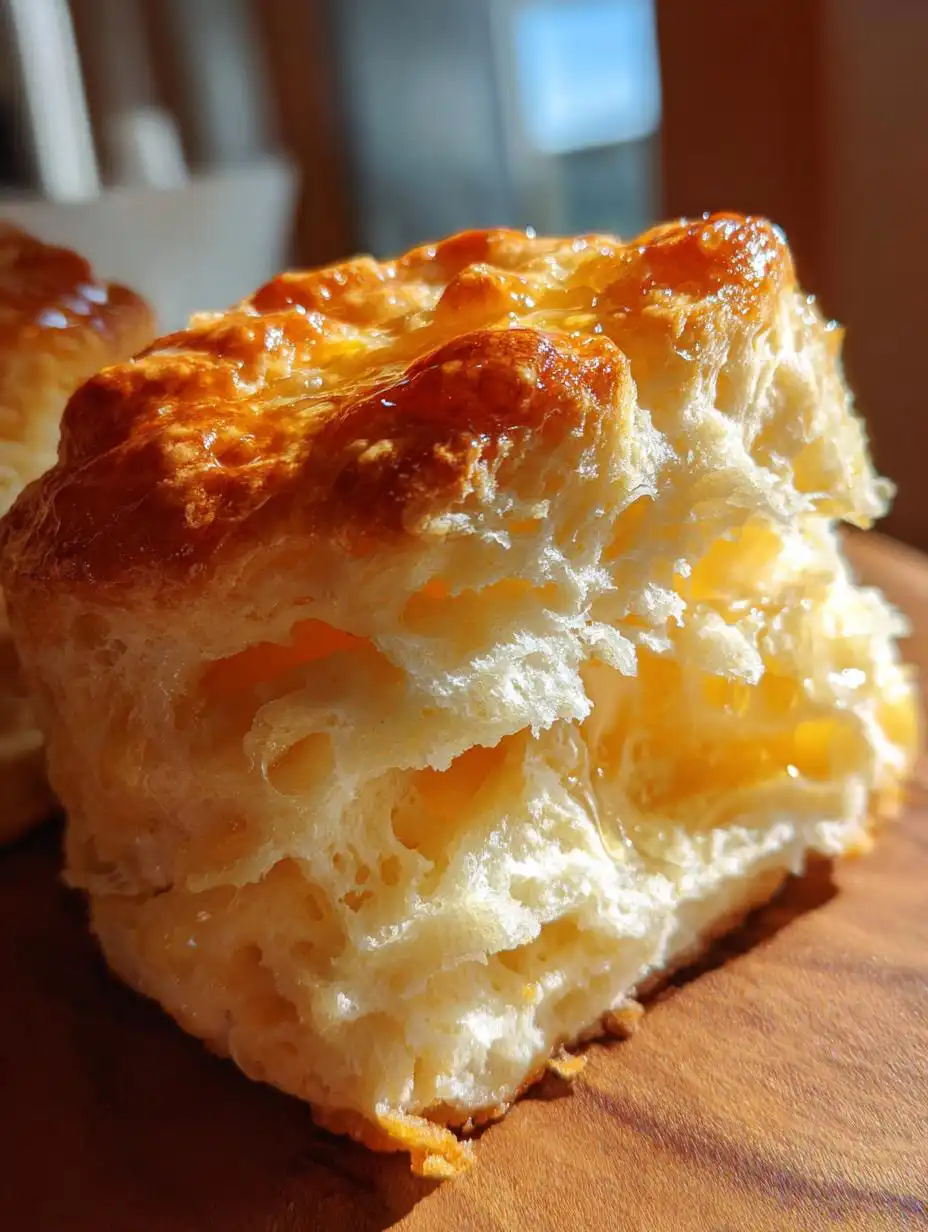
This is where the magic of flaky buttermilk biscuits happens. When you cut that super-cold butter into the flour, you are creating little pockets of fat that stay separate. When the biscuits hit the hot oven, the water inside those cold butter pieces turns instantly to steam.
That steam has nowhere to go but up, pushing the layers of dough apart. If your butter is warm or melted, it just incorporates into the flour like oil, and you end up with a dense, heavy biscuit. We want steam pockets, people! That steam is what guarantees those tall, flaky layers.
Equipment Needed for Making Buttermilk Biscuits
You don’t need a fancy stand mixer for this recipe, which is one reason I love making them on busy mornings. You’ll primarily need a large mixing bowl for bringing everything together. A pastry cutter or even just two forks works perfectly for cutting in the butter.
The most important tool, though, is your biscuit cutter. You need a sharp 3-inch round cutter. Don’t use a knife to cut them! And always use a heavy cast iron skillet if you have one; it holds heat beautifully for a perfect bottom crust.
Step-by-Step Instructions to Bake Flaky Buttermilk Biscuits
Okay, gather your chilled ingredients, because now we move fast! Speed is your friend as soon as the butter is introduced. We are aiming for that perfect golden exterior and that unbelievably soft interior that defines a great batch of buttermilk biscuits.
Mixing the Dough Without Overworking
First things first, get your oven preheated to 425 degrees Fahrenheit. I like to use my cast iron skillet and just lightly grease it—it gives the bottoms such a nice, sturdy crust. If you don’t have cast iron, just line a baking sheet with parchment paper, that works too.
In your big bowl, whisk together the flour, baking powder, and salt. Whisking is important because it acts like a gentle sifting, making sure that leavening agent is evenly distributed. Now, throw in your cubed, icy cold butter. I prefer using a pastry cutter for this part. You want to work quickly, pressing the butter into the flour until the mixture looks like coarse meal with some pea-sized chunks of butter still visible. If you stop seeing those distinct butter pieces, you’ve gone too far!
Next, make a little well in the center of your flour-butter mix. Pour in that cold buttermilk and the tablespoon of honey. Grab a spatula—no hands yet! Gently stir everything together until it just barely comes together into a shaggy, messy dough. Seriously, stop stirring when it looks like a mess. If you mix it until it’s smooth, you’ve already lost the fight for flakiness.
Building Flaky Layers in Your Buttermilk Biscuits
Now we turn that shaggy mess onto your floured counter. Don’t knead it! We are building layers here, not bread dough. Gently pat the dough out into a rough 10-inch rectangle. This is the first fold.
Take the left side of that rectangle and fold it over toward the middle. Then, take the right side and fold it over that first fold, like you’re closing a letter. Rotate the dough 90 degrees. Pat it back out into another rectangle, about an inch thick. You repeat this whole folding process two more times. That’s three sets of folds total. This triple-folding technique is the absolute secret to those high, separated layers in truly amazing buttermilk biscuits. It traps air and creates those beautiful separation lines.
Cutting and Arranging for Optimal Rise
Once you finish the final fold and pat, shape the dough into a final rectangle about one inch thick. Now for the cutting. Grab your 3-inch round cutter. This is crucial: press the cutter straight down into the dough and pull it straight back up. Do not twist the cutter! Twisting seals the edges shut, and that seals in the steam, preventing your biscuits from rising high.
Arrange your 8 cut biscuits close together in your prepared skillet or on your baking sheet. They should be touching slightly. When they bake touching, they help push each other upwards, giving you even taller sides.
Baking Time and Achieving Golden Color
Get them into that 425°F oven and let them bake for about 15 minutes. You’ll see them puff up beautifully. If, after 15 minutes, the tops look golden brown and done, pull them out! But if you want that deep, restaurant-style golden top—and I always do—then carefully turn your oven up to 450°F and let them bake for just 3 to 5 minutes more. Watch them closely during this high-heat finish so they don’t burn!
Tips for Success When Making Buttermilk Biscuits
Baking is chemistry, and when it comes to these delicate buttermilk biscuits, the chemistry is all about temperature and minimizing gluten development. If you find your biscuits aren’t reaching impressive heights, I bet you did one of two things: you used warm butter, or you mixed the dough too much.
The moment you add the liquid, switch to a gentle touch. Overmixing activates the gluten in the flour, which makes the dough tough and chewy instead of short and tender. Remember, shaggy dough is happy dough. Don’t be tempted to smooth it out! For more baking inspiration, check out my Pinterest boards.
Troubleshooting Common Texture Issues
If your dough feels sticky when you turn it out, don’t panic and dump in a bunch of extra flour—that will just make the final biscuit dry. Instead, lightly dust your hands and the counter, and work quickly. If your final product is flat, it’s almost always because you twisted the cutter when portioning them out. That twisting motion seals the edges, locking the steam inside and stopping the lift. Press straight down, every time!
Serving Suggestions for Your Homemade Buttermilk Biscuits
These biscuits are fantastic straight out of the oven when they are still steaming hot. The honey glaze sets up just enough to give you a slight sweetness that complements so many toppings. My family loves them served with just a smear of good quality salted butter, letting the honey in the glaze do most of the heavy lifting.
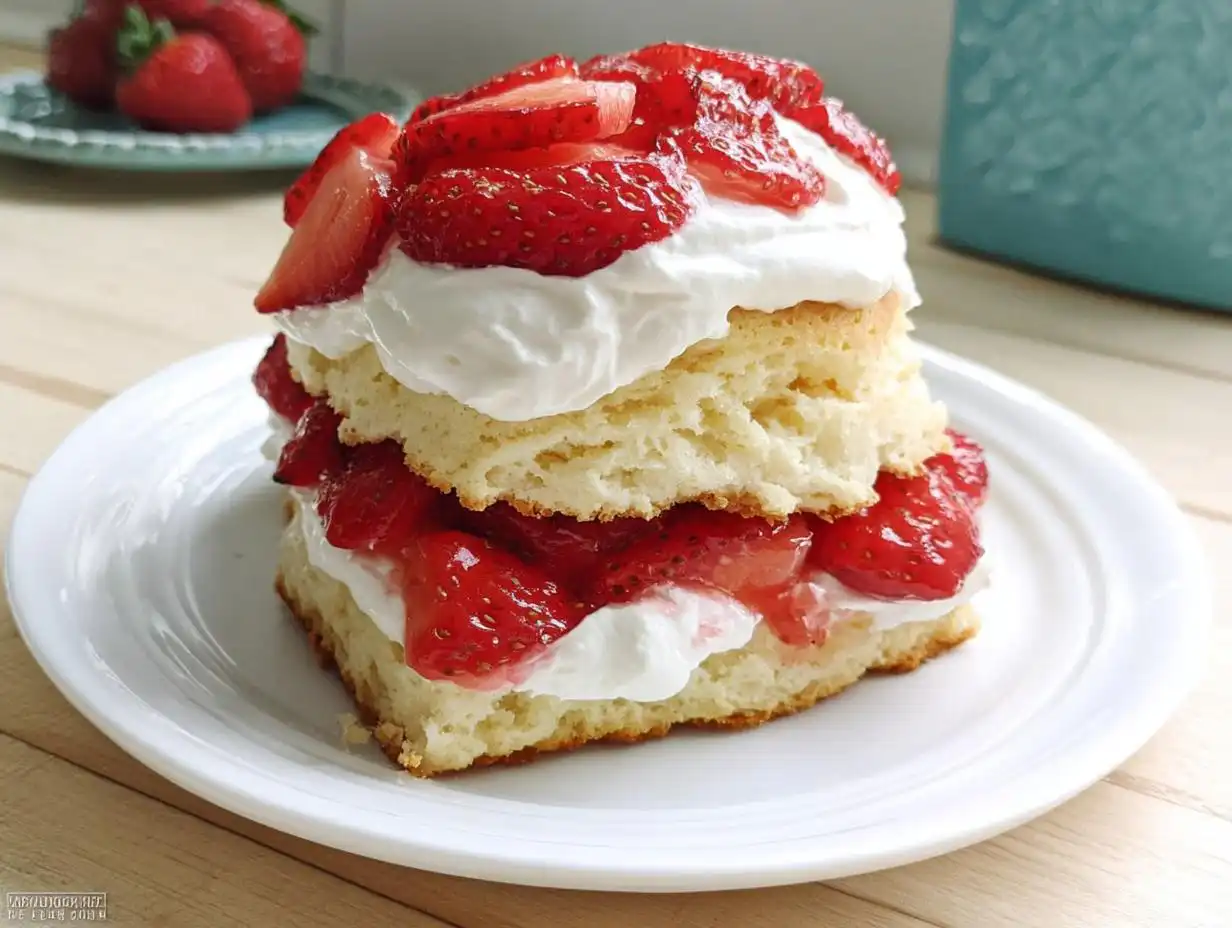
If you’re making them for breakfast, they are the perfect vehicle for thick sausage gravy—the soft interior soaks up the creaminess beautifully. For a sweet treat, try breaking them open and filling them with homemade strawberry jam or apple butter. Honestly, they are so good plain that you don’t need much else! If you enjoy sweet breakfast items, you might like my recipe for strawberry bread.
Storing and Reheating Your Buttermilk Biscuits
Because these buttermilk biscuits rely so heavily on that quick steam reaction, they are definitely best eaten the day they are baked. However, they store surprisingly well if you need to make them ahead of time. The key to reheating is bringing back that fresh-baked flakiness.
If you’re keeping them on the counter, store them in an airtight container, but only for a short time. For longer storage, the fridge or freezer is your best bet. When you reheat them, I highly recommend wrapping them loosely in foil and popping them into a moderate oven (about 350°F) for about 8 minutes. This traps the moisture while warming them through, reviving that tender center.
Storage Table
| Location | Approximate Shelf Life | Best Reheating Method |
|---|---|---|
| Room Temperature | 1 Day | Microwave (for immediate, soft eating) |
| Refrigerator | Up to 3 Days | Oven/Toaster Oven (wrapped in foil) |
| Freezer | Up to 2 Months | Oven (thaw slightly first if possible) |
Frequently Asked Questions About Buttermilk Biscuits
I get so many questions about these, and honestly, it’s because people want their buttermilk biscuits to be absolutely perfect. Here are the most common things folks ask me when they are trying this recipe for the first time!
Can I Substitute the Buttermilk in These Buttermilk Biscuits
Yes, you absolutely can, if you’re in a pinch! Buttermilk is acidic, and that acidity reacts with the baking powder to help lift the dough, so you need an acid substitute. My favorite swap is regular milk mixed with a teaspoon of white vinegar or lemon juice. Let that mixture sit for about five minutes until it looks slightly curdled—that’s your homemade buttermilk substitute. It works nearly as well!
How to Get Extra Tall Biscuits
Tall biscuits are all about technique, not ingredients! Make sure your butter is rock-solid cold, and when you fold the dough, don’t press all the air out during the folding process. More importantly, when you use that cutter, press straight down and lift straight up. If you twist, you are essentially gluing the layers together, and they can’t lift. Also, make sure they are touching when they go into the pan!
Why Did My Buttermilk Biscuits Turn Out Tough
If your buttermilk biscuits are tough, it means you overworked the dough after you added the liquid. Once the buttermilk hits the flour, you only mix until the dry bits disappear. If you keep stirring until the dough is perfectly smooth, you’ve developed too much gluten, which leads to a chewy texture instead of a tender, flaky one. Remember: shaggy dough is your goal! For more baking tips, check out my other recipes.
Share Your Flaky Buttermilk Biscuits Experience
I truly hope these instructions help you achieve biscuit perfection! There is nothing better than a warm, flaky stack right out of the oven. If you try this recipe, please let me know how they turned out in the comments below. I love hearing about your successful batches of buttermilk biscuits!
Tips for Success When Making Buttermilk Biscuits
Baking is chemistry, and when it comes to these delicate buttermilk biscuits, the chemistry is all about temperature and minimizing gluten development. If you find your biscuits aren’t reaching impressive heights, I bet you did one of two things: you used warm butter, or you mixed the dough too much.
The moment you add the liquid, switch to a gentle touch. Overmixing activates the gluten in the flour, which makes the dough tough and chewy instead of short and tender. Remember, shaggy dough is happy dough. Don’t be tempted to smooth it out!
Troubleshooting Common Texture Issues
If your dough feels sticky when you turn it out, don’t panic and dump in a bunch of extra flour—that will just make the final biscuit dry. Instead, lightly dust your hands and the counter, and work quickly. If your final product is flat, it’s almost always because you twisted the cutter when portioning them out. That twisting motion seals the edges, locking the steam inside and stopping the lift. Press straight down, every time!
Serving Suggestions for Your Homemade Buttermilk Biscuits
These biscuits are fantastic straight out of the oven when they are still steaming hot. The honey glaze sets up just enough to give you a slight sweetness that complements so many toppings. My family loves them served with just a smear of good quality salted butter, letting the honey in the glaze do most of the heavy lifting.
If you’re making them for breakfast, they are the perfect vehicle for thick sausage gravy—the soft interior soaks up the creaminess beautifully. For a sweet treat, try breaking them open and filling them with homemade strawberry jam or apple butter. Honestly, they are so good plain that you don’t need much else! If you are looking for other great breakfast ideas, check out my recipe for yogurt pancakes.
Storing and Reheating Your Buttermilk Biscuits
Because these buttermilk biscuits rely so heavily on that quick steam reaction, they are definitely best eaten the day they are baked. However, they store surprisingly well if you need to make them ahead of time. The key to reheating is bringing back that fresh-baked flakiness.
If you’re keeping them on the counter, store them in an airtight container, but only for a short time. For longer storage, the fridge or freezer is your best bet. When you reheat them, I highly recommend wrapping them loosely in foil and popping them into a moderate oven (about 350°F) for about 8 minutes. This traps the moisture while warming them through, reviving that tender center.
Storage Table
| Location | Approximate Shelf Life | Best Reheating Method |
|---|---|---|
| Room Temperature | 1 Day | Microwave (for immediate, soft eating) |
| Refrigerator | Up to 3 Days | Oven/Toaster Oven (wrapped in foil) |
| Freezer | Up to 2 Months | Oven (thaw slightly first if possible) |
Frequently Asked Questions About Buttermilk Biscuits
I get so many questions about these, and honestly, it’s because people want their buttermilk biscuits to be absolutely perfect. Here are the most common things folks ask me when they are trying this recipe for the first time!
Can I Substitute the Buttermilk in These Buttermilk Biscuits
Yes, you absolutely can, if you’re in a pinch! Buttermilk is acidic, and that acidity reacts with the baking powder to help lift the dough, so you need an acid substitute. My favorite swap is regular milk mixed with a teaspoon of white vinegar or lemon juice. Let that mixture sit for about five minutes until it looks slightly curdled—that’s your homemade buttermilk substitute. It works nearly as well!
How to Get Extra Tall Biscuits
Tall biscuits are all about technique, not ingredients! Make sure your butter is rock-solid cold, and when you fold the dough, don’t press all the air out during the folding process. More importantly, when you use that cutter, press straight down and lift straight up. If you twist, you are essentially gluing the layers together, and they can’t lift. Also, make sure they are touching when they go into the pan!
Why Did My Buttermilk Biscuits Turn Out Tough
If your buttermilk biscuits are tough, it means you overworked the dough after you added the liquid. Once the buttermilk hits the flour, you only mix until the dry bits disappear. If you keep stirring until the dough is perfectly smooth, you’ve developed too much gluten, which leads to a chewy texture instead of a tender, flaky one. Remember: shaggy dough is your goal!
Share Your Flaky Buttermilk Biscuits Experience
Well, that’s it! We’ve gone from cold butter to golden, glazed perfection. I really hope you give this recipe a try this weekend. When you do, please come back and leave me a star rating and a comment telling me how tall your flaky buttermilk biscuits rose! I absolutely love seeing your successes in the kitchen.
Print
Amazing 8-Layer Buttermilk Biscuits Secret
- Total Time: 35 minutes
- Yield: 8 biscuits
Description
Bake golden, flaky buttermilk biscuits with a soft, buttery center and sweet honey glaze. A simple, 35-minute recipe for tender, layered biscuits.
Ingredients
- 2½ cups all-purpose flour
- 2 tablespoons baking powder
- 1 teaspoon fine salt
- ½ cup cold unsalted butter, cubed
- 1 tablespoon honey
- 1 cup plus 3 tablespoons cold buttermilk
- 2 tablespoons melted butter (for topping)
- 2 teaspoons honey (for topping)
Instructions
- Preheat oven to 425°F. Lightly grease a cast iron skillet or line a baking sheet with parchment paper.
- In a large bowl, whisk flour, baking powder, and salt.
- Cut cold butter into the flour using a pastry cutter or fork until coarse crumbs form.
- Add honey and cold buttermilk to the center. Gently stir with a spatula until a shaggy dough forms. Do not overmix.
- Turn dough onto a lightly floured surface. Pat into a 10-inch rectangle. Fold the left side into the center, then the right. Rotate, pat out again, and repeat twice to build flaky layers.
- Shape into a 1-inch-thick rectangle. Cut out 8 biscuits using a 3-inch cutter, pressing straight down without twisting.
- Arrange biscuits close together in the prepared skillet.
- Bake for 15 minutes or until golden brown on top. For extra color, bake 3–5 minutes more at 450°F.
- Whisk melted butter and honey, then brush over warm biscuits before serving.
Notes
- Do not overmix the dough.
- Cut biscuits straight down without twisting to keep layers high.
- For extra browning, finish baking at 450°F for a few extra minutes.
- Prep Time: 15 minutes
- Cook Time: 20 minutes