

Oh my goodness, I am so excited you’re here! If you’ve ever dreamed of a cake that tastes like a warm hug on a chilly evening, stop searching right now. This Irish apple cake recipe is the one that changed everything for me. Forget dry, crumbly apple desserts—this one is unbelievably tender because of the way we treat the butter, and it smells just heavenly when it’s baking.
I’ve spent years perfecting this, testing every little variation to make sure it lives up to the standards my auntie set years ago. I’m not just sharing a recipe; I’m sharing the absolute best, time-tested method for achieving that perfect buttery crumb that melts in your mouth. Trust me, once you master cutting in that cold butter just right, you’ll feel like a baking wizard.
When you’re following along, remember that baking is all about experience, so don’t panic if your first attempt isn’t perfect! Pay attention to the textures I describe—that’s how you learn the rhythm of the dough. We’re aiming for comfort, tradition, and pure apple goodness here, and I know you’re going to nail it! 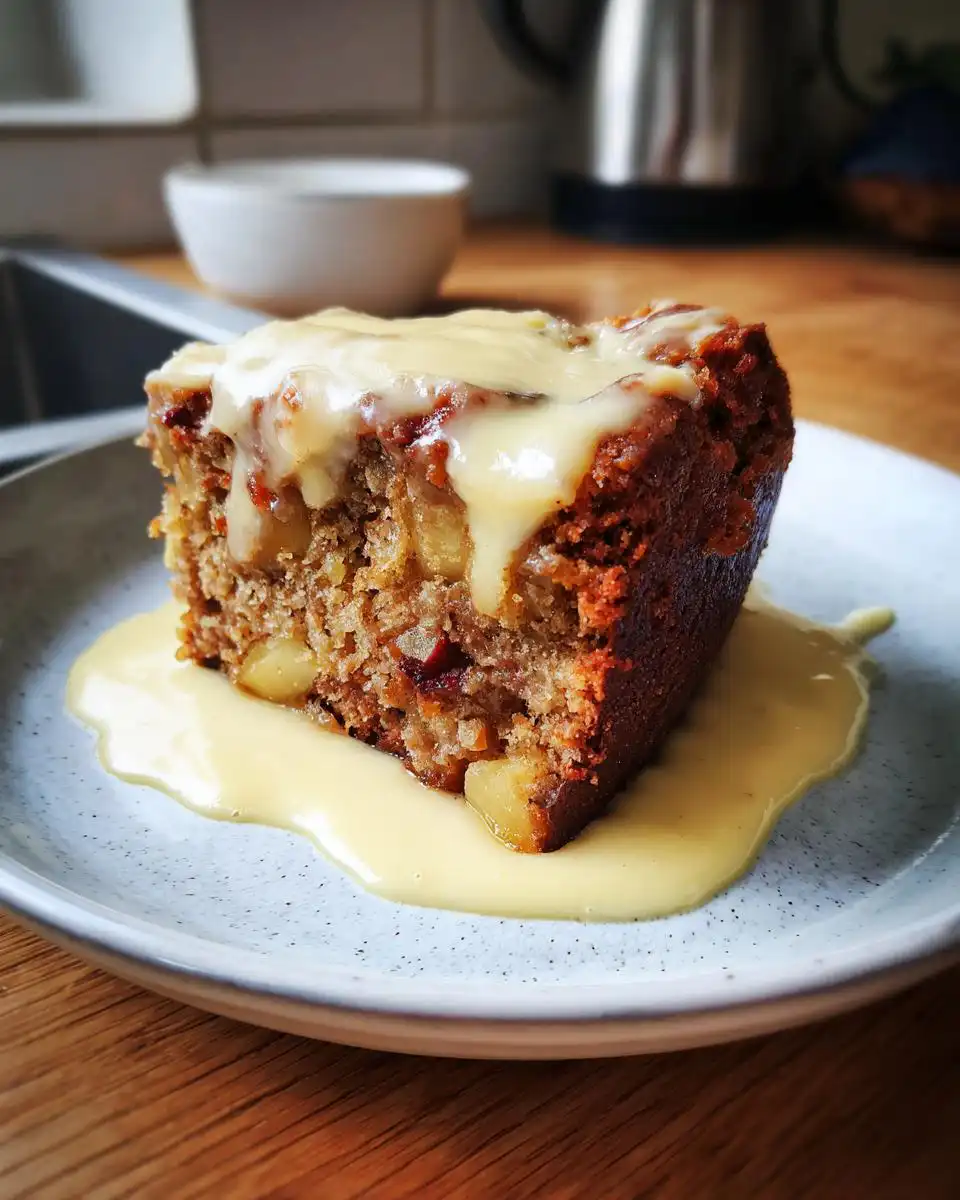
Gathering Your Ingredients for Irish Apple Cake
Okay, listen up! The quality of your ingredients is non-negotiable for this Irish apple cake. We aren’t using fancy extracts or weird powders here; we are relying on good, honest staples to create that incredible texture. The goal is tender, buttery, and bursting with tart apple flavor. Get everything measured out before you even think about turning on the oven—it makes the whole process smoother!
Seriously, the success of this cake hinges on how you handle the butter. Make sure it’s straight out of the fridge and cubed up small. That cold butter hitting the dry flour is what creates those little pockets of steam that lift the cake just right. Don’t skip the buttermilk either; it reacts beautifully with the baking soda! You can find more baking inspiration on our Pinterest.
| Ingredient | Amount | Prep Note |
|---|---|---|
| All-Purpose Flour | 2 cups | Sifted or whisked well |
| Baking Powder/Soda | 1\u00bd tsp / \u00bd tsp | Measured precisely |
| Salt | \u00bd teaspoon | Don’t omit this! |
| Cinnamon | 1 teaspoon | Ground |
| Cold Unsalted Butter | \u00bd cup | Cubed, very cold |
| Granulated Sugar | \u00bd cup | For the cake batter |
| Large Eggs | 2 | Room temperature is best |
| Buttermilk | \u00bd cup | Essential for tenderness |
| Vanilla Extract | 1 teaspoon | For the cake |
| Tart Apples | 3 medium | Peeled and thinly sliced |
Essential Apple Cake Components
For the dry stuff, we’re sticking to the basics: flour, leavening, salt, and cinnamon. The cinnamon is crucial for that warm, comforting aroma. Now, about the apples—this is where many people go wrong! You need something tart, like a Granny Smith or a crisp Honeycrisp. Sweet apples turn mushy and make the cake cloyingly sweet. The tartness cuts through the richness of the butter perfectly. Remember, the butter must be cold for the crumbling stage; if it gets warm, you’re basically making shortbread instead of cake batter!
Crafting the Velvety Custard Sauce
We can’t serve this beauty naked, right? The custard sauce is the elegant finish! It’s super simple but requires a little patience. You need milk, sugar, egg yolks, and cornstarch. The cornstarch is our secret weapon here—it’s the thickening agent that keeps the sauce smooth and prevents those dreaded scrambled bits. We heat the milk gently, temper the yolks so they don’t cook too fast, and stir constantly until it coats the back of a spoon. That’s how you get that beautiful, velvety drape over your warm apple cake!
Equipment You Need for This Irish Apple Cake
You don’t need a thousand specialized gadgets for this recipe, thankfully! Keep it simple. The most important thing is getting that cold butter cut into the flour correctly, so you’ll definitely want a good pastry cutter. If you don’t have one, your fingers work fine, but they warm up fast, so work quickly!
For baking, you absolutely must have an 8-inch round cake pan. Make sure you have parchment paper ready to line the bottom, which is a lifesaver later. We need a couple of sturdy mixing bowls—one for the dry ingredients and one for whisking the eggs and buttermilk. Honestly, a good silicone spatula for folding in those apples is also a must-have to keep everything light!
Step-by-Step Instructions for Perfect Irish Apple Cake
Now we get to the fun part! Don’t let the steps intimidate you; they are very straightforward, but timing is everything. We’re building layers of flavor and texture here. Remember, this is a thick batter, not a runny one, so don’t be tempted to add extra milk! We want that dense, buttery structure that makes this Irish apple cake so famous.
Preparing the Dry Mix and Cutting in Butter
First things first: get your oven set to 350°F right away. While it warms up, grab that 8-inch round pan, grease it well, and press that parchment paper right into the bottom. This ensures a clean release later, trust me! Now, in your big bowl, whisk together the flour, baking powder, baking soda, salt, and cinnamon. Whisking really helps distribute the leavening agents evenly, which is key for a good rise.
Next, the butter. It must be cold and cubed small. Add those cold butter pieces to your dry mix. This is where the pastry cutter comes in handy. You need to work the butter into the flour until the mixture looks like coarse crumbs, maybe with some pea-sized pieces still visible. If you use your fingers, rub them quickly! If the butter melts, the cake will be tough, not tender. Once you have those coarse crumbs, stir in the sugar. We’re done with the dry work for now!
Mixing Wet Ingredients and Combining the Batter
Switch bowls! In a separate, smaller bowl, whisk your two eggs until they are nice and blended. Then, pour in the buttermilk and the vanilla extract. Give that a quick whisk, too.
Here is where you need to be gentle. Pour the wet mixture into the dry crumb mixture. Use a spatula or wooden spoon and mix *just until* everything comes together. I mean it—stop mixing the second you don’t see any more dry streaks of flour. If you overmix at this stage, you develop gluten, and your tender cake turns into a hockey puck! The batter will be quite thick; that’s normal.
Finally, gently fold in all those thinly sliced tart apples. Use a light hand! You want them suspended in the batter, not beaten down into a paste. Spread this thick batter evenly into your prepared pan and smooth the top a little with your spatula.
Baking and Cooling the Irish Apple Cake
Slide that pan into your preheated 350°F oven. It needs about 40 to 45 minutes. Keep an eye on it starting around the 38-minute mark. You’re looking for a beautiful golden-brown top. The ultimate test, as always, is the toothpick test: insert one right into the center. If it comes out clean, or maybe with just a few moist crumbs clinging to it, you’re done! If it’s wet batter, give it another five minutes.
Let the Irish apple cake cool in the pan on a wire rack for about 10 or 15 minutes. If you try to flip it out piping hot, it might break. Once it’s slightly cooled, invert it onto the rack, peel off that parchment paper, and let it cool a bit more before serving with that wonderful custard! 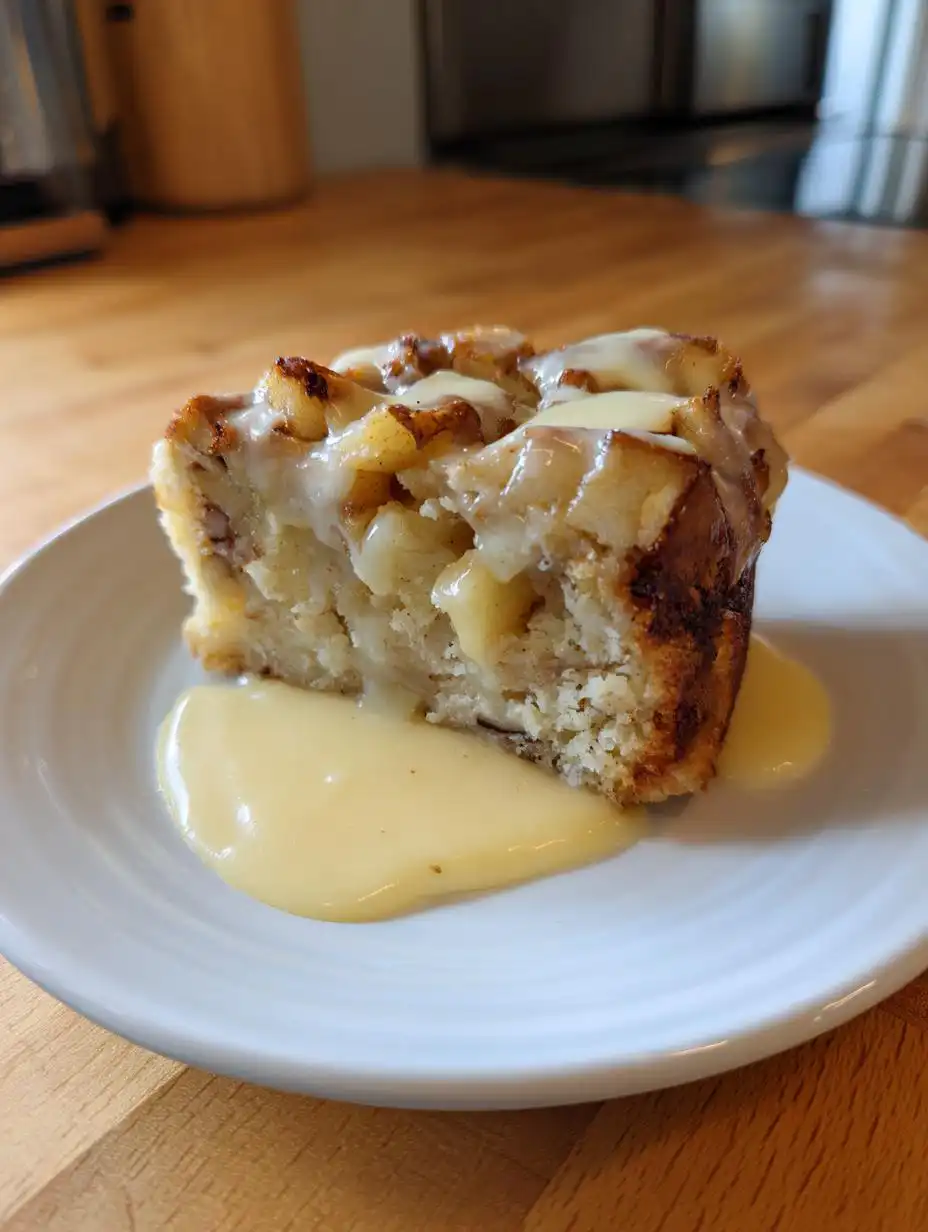
Making the Simple Custard Sauce
While the cake is cooling, let’s make the sauce. Pour your milk into a saucepan and heat it over medium heat until it’s steaming around the edges—don’t let it boil! While that’s happening, whisk your sugar, egg yolks, and cornstarch together in a separate bowl until pale. This is called tempering, and it’s crucial! If you want to see how we make other creamy sauces, check out our chocolate cream pie secret.
Slowly, slowly, ladle about a cup of the hot milk into your yolk mixture while whisking constantly. This warms the yolks up gently so they don’t scramble when they hit the main pot. Once incorporated, pour that tempered yolk mixture back into the saucepan with the rest of the milk. Now, turn the heat down low and stir constantly with a wooden spoon or whisk. You must stir until the sauce thickens enough to coat the back of your spoon. As soon as it does, take it off the heat immediately and stir in that vanilla. Keep stirring for a minute even off the heat, just to be sure it stays perfectly smooth!
Tips for Success with Your Irish Apple Cake
I want everyone who tries this to have the most tender, flavorful cake possible! It’s all about a few small details that make a huge difference between a good apple cake and an absolutely incredible one. Keep these little expert nuggets in mind when you’re mixing up your next batch of Irish apple cake.
- Make sure your butter is truly cold when you cut it into the flour. Remember, we are creating flaky layers, not a paste!
- Don’t be afraid of that thick batter! Resist the urge to thin it out with extra liquid, or you’ll lose that signature dense, buttery crumb.
- Always preheat your oven completely. If you put the cake into a lukewarm oven, the leavening agents start working too slowly, leading to a flatter result.
- Serve it warm! The flavor and texture are 100 times better when the cake is slightly heated, especially with that creamy custard poured right over the top.
Choosing the Right Apples for Best Results
Seriously, don’t use Red Delicious here; they just dissolve into sweet mush! The magic of this Irish apple cake comes from the contrast between the rich, buttery batter and the slight sharpness of the apple. I always reach for Granny Smith because they hold their shape beautifully during baking and provide that necessary tang. If you use a sweeter apple, the whole dessert ends up tasting flat and heavy. A mix of tart and firm apples is always my favorite way to go! For another great fruit recipe, check out our strawberry crunch cookies.
Avoiding Common Baking Mistakes
The biggest crime you can commit against this cake is overmixing the wet and dry ingredients. Once the liquid hits the flour, you stop stirring as soon as you can’t see white powder anymore. Overmixing develops gluten, and gluten means tough cake—the opposite of what we want! Another common slip up is opening the oven door too early. Keep it shut until at least the 35-minute mark, or the sudden temperature drop can cause your beautiful cake to sink right in the middle.
Storing and Serving Your Homemade Irish Apple Cake
This cake is honestly best served the day it’s made, warm with that luscious custard sauce, but leftovers are a fact of life, even in my kitchen! The good news is that this Irish apple cake keeps wonderfully, though the texture changes slightly as it sits. Since it’s quite buttery, it holds up better than a lot of lighter sponge cakes.
When you serve it, the warmth really brings out the cinnamon and the apples. If you’re eating it the next day, you absolutely must reheat a slice—it brings back that fresh-from-the-oven tenderness. Don’t forget the custard, even if it’s just a little drizzle! Read more about our kitchen philosophy here.
| Storage Method | Location | Approximate Freshness |
|---|---|---|
| Airtight Container | Countertop (Room Temp) | Up to 2 days |
| Sealed Container | Refrigerator | Up to 5 days |
| Airtight Container | Freezer | Up to 2 months |
Storing Leftover Irish Apple Cake
If you know you’ll eat the cake within two days, keeping it on the counter is fine, just make sure it’s covered tightly so it doesn’t dry out. If you need it to last longer, the fridge is the safest bet, especially if the weather is warm. Pop it into a sealed container before refrigerating. Remember, cold dulls the flavor a little, so reheating is your friend!
If you’re feeling ambitious and made a double batch, this cake freezes beautifully. Wrap individual slices tightly in plastic wrap first, then place them in a heavy-duty freezer bag. That double wrap prevents freezer burn, which is a tragedy for a cake this tender!
Reheating for the Best Experience
To get that perfect warm experience again, you have two main options. For a single slice, the microwave is fastest—just about 15 to 20 seconds on medium power should do the trick to soften it up. If you’re reheating a larger piece or the whole cake, the oven is better for texture. Wrap the slice loosely in foil and heat it at 300°F for about 10 minutes. That gentle heat warms it through without drying out the edges. And don’t forget that custard sauce—warm cake and cold custard is just the perfect contrast!
Frequently Asked Questions About Irish Apple Cake
I get so many questions about tweaking this recipe, which is great! It shows how much everyone loves a good, comforting apple dessert. This recipe is pretty classic, but I know people like to customize things. Here are the top three things I always get asked about when people are baking their first batch of this traditional dessert.
Can I make this cake without buttermilk?
Oh yes, absolutely! If you don’t have buttermilk on hand, don’t stress out and run to the store. You can make a perfect substitute right in your measuring cup. Just take one tablespoon of white vinegar or lemon juice and add it to a cup of regular milk—any kind works, but whole milk is best. Let it sit on the counter for about five minutes until it looks slightly curdled. That’s your homemade buttermilk substitute, and it works just as well to react with the baking soda in this apple cake!
How long does this traditional dessert stay fresh?
Because this cake has a good amount of butter and apples, it stays relatively moist for a while. If you keep it covered well on the counter, it’s fantastic for two full days—the flavor often deepens overnight! If you need it to last longer, pop it in the fridge, where it will easily last up to five days. Remember what I said about reheating, though; make sure you warm up those slices to bring back that soft, buttery texture.
Can I add nuts or dried fruit to the Irish apple cake?
You certainly can, but you have to treat them right so they don’t sink to the bottom of your cake! If you are adding walnuts or pecans, toss them lightly in about a tablespoon of the flour mixture before folding them in with the apples. This coats them just enough so they stay suspended. For dried fruit, like raisins or dried cranberries, I highly recommend soaking them in warm water or maybe a little splash of Irish whiskey for about 15 minutes first. Drain them really well, pat them dry, and then add them with the apples. This keeps them plump and stops them from stealing moisture from your beautiful cake batter! For more baking tips, see our cream cheese chocolate chip cookies recipe.
Understanding the Nutrition in This Irish Apple Cake
Now, I’m not a nutritionist—I’m a baker! When I’m making this comforting Irish apple cake, I’m focused on butter, sugar, and apples, which means we aren’t exactly counting calories here, right? What I can tell you is that this is a rich, satisfying dessert that tastes like tradition. Because of the fresh apples and the butter content, the numbers can shift depending on exactly how big your slices are and what kind of apples you choose.
So, please take these numbers as a guideline rather than gospel. The real nutrition in this cake comes from the sheer joy it brings when you serve it warm with that homemade custard sauce!
| Nutrient | Estimate Per Serving |
|---|---|
| Calories | 310 |
| Fat | 12g |
| Carbohydrates | 45g |
| Protein | 5g |
Please note that exact nutritional values can vary based on specific ingredient brands and serving size. This table provides an estimate based on the recipe yields and standard measurements.
Print
Divine Irish apple cake: 1 amazing recipe
- Total Time: 1 hour 5 minutes
- Yield: 8 servings
Description
This Irish apple cake is tender, buttery, and filled with tart apples. A classic comfort dessert served warm with creamy custard or whipped cream.
Ingredients
- Apple Cake:
- 2 cups all-purpose flour
- 1½ teaspoons baking powder
- ½ teaspoon baking soda
- ½ teaspoon salt
- 1 teaspoon ground cinnamon
- ½ cup cold unsalted butter, cubed
- ½ cup granulated sugar
- 2 large eggs
- ½ cup buttermilk
- 1 teaspoon vanilla extract
- 3 medium tart apples (Granny Smith or Honeycrisp), peeled and thinly sliced
- Custard Sauce:
- 1½ cups whole milk
- 2 tablespoons granulated sugar
- 2 egg yolks
- 1 teaspoon cornstarch
- ½ teaspoon vanilla extract
Instructions
- Preheat oven to 350°F. Grease and line an 8-inch round cake pan with parchment paper.
- In a large bowl, whisk flour, baking powder, baking soda, salt, and cinnamon.
- Cut in butter using a pastry cutter or fingers until the mixture resembles coarse crumbs.
- Stir in sugar.
- In a separate bowl, whisk eggs, buttermilk, and vanilla. Pour into the dry ingredients and mix until just combined.
- Fold in sliced apples. The batter will be thick.
- Spread mixture evenly into the prepared pan and smooth the top.
- Bake 40 to 45 minutes, until golden and a toothpick inserted in the center comes out clean. Cool slightly before serving.
- For custard sauce, heat milk in a saucepan until steaming but not boiling.
- In a small bowl, whisk sugar, egg yolks, and cornstarch. Slowly whisk in hot milk, then return mixture to the pan.
- Cook over low heat, stirring constantly, until thickened enough to coat a spoon. Remove from heat and stir in vanilla.
- Serve warm apple cake with the custard poured over or alongside.
Notes
- Serve warm apple cake with the custard poured over or alongside.
- Prep Time: 20 minutes
- Cook Time: 45 minutes


