Listen, if you need a show-stopping dessert that requires zero oven time and tastes like pure, decadent magic, you’ve come to the right place. Seriously, forget complicated baking! We are talking about the Peanut Butter Chocolate Lasagna, and trust me when I say this recipe has been my secret weapon for every potluck, birthday, and impromptu Sunday gathering for years now.
I’ve made my fair share of no-bake desserts—I’ve seen them collapse, I’ve seen them weep—but this one? It holds its structure beautifully. The layers are distinct, the flavors are intense, and that Oreo crust just sings! It’s rich, it’s cool, and it’s so easy to assemble while chatting with your guests.
The combination of salty peanut butter, sweet chocolate pudding, and that fluffy topping is just unbeatable. You just won’t believe how fast it comes together. Grab your 9×13 pan; we’re about to make dessert history.
Gathering What You Need for Peanut Butter Chocolate Lasagna
Okay, since this is a no-bake recipe, the quality of your ingredients really shines through, so let’s make sure we grab the best stuff! We aren’t hiding anything in the oven, so every layer matters in this amazing Peanut Butter Chocolate Lasagna.
Don’t skimp on the good peanut butter—you want that creamy kind that pours nicely! Also, having the cream cheese and milk ready at the right temperature is going to make mixing these layers so much easier. Let’s make sure we have everything laid out before we start crushing cookies.
Precise Ingredients for Your Peanut Butter Chocolate Lasagna
You’ll want to check your pantry for these items first. Remember, we need that cream cheese nice and soft so it beats up smooth! Also, make sure those Oreo cookies are the full sandwich kind, not the thins.
- 36 Oreo sandwich cookies—we need about 3 cups of fine crumbs total.
- A little over half a stick of unsalted butter, melted until it’s totally liquid.
- 8 ounces of cream cheese, and this is important: make sure it’s softened!
- One full cup of creamy peanut butter—no chunky stuff here!
- One cup of powdered sugar—no substitutes for this, trust me.
- One quarter cup of whole milk for the peanut butter layer.
- One and a half cups of whipped topping for folding into that creamy layer.
- Two small boxes of instant chocolate pudding—that’s the 3.4 ounce size.
- Two and three-quarters cups of whole milk for whipping up the pudding.
- One and a half cups of whipped topping reserved for the very top layer.
- About a quarter cup of mini peanut butter cups or any chopped chocolate candies you love for the garnish.
- A couple of tablespoons of peanut butter chips or chocolate chips for sprinkling.
- If you’re feeling fancy, grab some chocolate syrup for drizzling!
Essential Equipment List
You don’t need fancy mixers or springform pans for this one, which is the beauty of it! We just need a good dish and some sturdy bowls.
- A standard 9×13-inch baking dish is crucial for getting those perfect layers.
- A food processor or a very sturdy rolling pin and a sealed bag for crushing those Oreos.
- A large mixing bowl for your peanut butter filling.
- Medium bowls for mixing the pudding separately.
- A rubber spatula—you’ll need this for gently folding and spreading the layers gently.
- Measuring cups and spoons, naturally!
Building the Layers of Peanut Butter Chocolate Lasagna
This is where the fun starts! Remember, we are building this gorgeous dessert in stages, and timing those chills correctly is the difference between a clean slice and a beautiful mess. Don’t rush this part, but also, don’t let things sit around getting warm!
Creating the Crunchy Oreo Crust Foundation
First things first, we need those crumbs! If you’re using a food processor, pulse those Oreos until they look like dark brown sand. If you’re using the rolling pin method—which I sometimes prefer because it’s a great stress reliever—make sure you get them fine! Once you have about three cups of crumbs, pour in that melted butter and stir it all together. You want every little crumb coated; it should look like wet dirt.
Now, press this mixture firmly into your 9×13 dish. I mean really press it! Use the bottom of a measuring cup to get it nice and compact. This foundation holds everything up, so pack it down tight! Once it’s packed, pop the dish into the freezer while you tackle the next layer. Ten minutes is usually enough to firm it up.
Mixing the Creamy Peanut Butter Filling
While the crust is chilling, let’s mix the star layer. In your big bowl, beat that softened cream cheese until it’s totally smooth—no lumps allowed! Add in your peanut butter and milk, beating until they are just combined. Then, slowly stream in the powdered sugar. Once that’s mixed, take your 1 ½ cups of whipped topping and gently fold it in with your spatula. Don’t use the electric mixer for this part; we want to keep the air in that topping!
Spread this creamy goodness evenly over that chilled crust. It might look soft, but it needs to firm up a bit before the pudding goes on. Back into the freezer it goes for just about 10 minutes. This quick freeze stops the pudding from sinking into the peanut butter layer!
Preparing and Layering the Rich Chocolate Pudding
Now for the chocolate! Whisk both boxes of instant pudding mix together with two and three-quarters cups of milk. Keep whisking constantly for about two minutes, just like the box says. It thickens up fast! You don’t want it gloppy, just thick enough to hold its shape slightly. If it sits too long, it gets too stiff, so work quickly here.
Pull the dish out of the freezer and gently spread that chocolate pudding right over the peanut butter layer. Be gentle! If you slather it on too hard, you’ll dig into the peanut butter layer underneath. Just glide it across the top evenly.
Final Assembly and Setting Time for Peanut Butter Chocolate Lasagna
This is the most important step for a perfect slice of Peanut Butter Chocolate Lasagna: the chill time! Cover the dish tightly with plastic wrap—make sure the wrap isn’t touching the pudding layer—and stick it in the refrigerator. You absolutely have to let it chill for a minimum of two hours. Three or four hours is even better! If you try to cut it sooner, the layers will slide and everything will blend into a chocolate-peanut butter soup, which tastes fine, but it won’t look like lasagna!
Topping and Presentation Tips
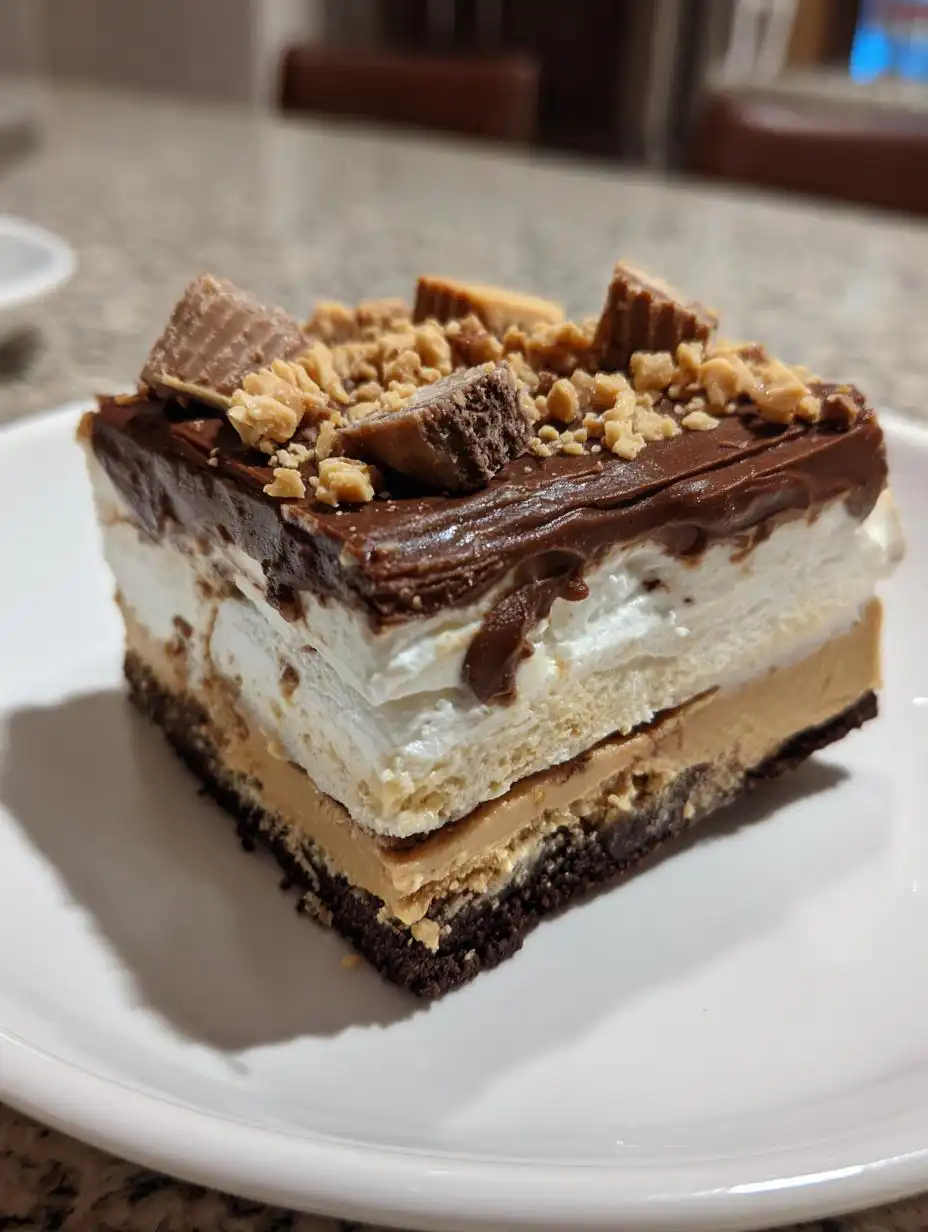
Once it’s rock solid and chilled through, it’s time for the grand finale. Take the remaining 1 ½ cups of whipped topping and spread it lightly over the entire chilled surface. This is your canvas! Sprinkle those mini peanut butter cups and chips all over the top. If you want that extra decadent look, drizzle a little chocolate syrup in zig-zags across the top. Slice it into generous squares, and stand back to admire your no-bake masterpiece!
Tips for Success with Your No-Bake Peanut Butter Chocolate Lasagna
I’ve learned a few things the hard way over the years of making this dessert so many times. Honestly, most of the issues people run into are just simple temperature mistakes or rushing the chilling process. If you follow these little tricks, your lasagna will be structurally sound and utterly delicious every single time.
The secret to a smooth, beautiful filling isn’t just the recipe; it’s the preparation right before you mix. Don’t let your cream cheese sit out for just five minutes; it needs to be genuinely soft so it whips up without fighting you. A hard block of cream cheese will leave you with little white chunks in your peanut butter layer, and nobody wants that!
Ingredient Temperature and Texture Management
When it comes to the cream cheese, it needs to be room temperature—soft enough that your finger leaves an easy dent. If it’s cold, it fights the peanut butter and sugar, creating lumps that never smooth out, no matter how long you beat it.
For the pudding layer, the milk temperature matters too. You need cold milk—like, straight-from-the-fridge cold—when you whisk in the instant pudding mix. If the milk is even slightly warm, the pudding will set too quickly and become grainy before you even get a chance to spread it evenly across the peanut butter layer. We want that perfect, silky texture!
Achieving Defined, Clean Layers
The key to those pretty stripes you see in the photos is taking your time between the layers. After you spread the peanut butter mixture, you absolutely must pop it in the freezer for that short 10-minute blast I mentioned. This just firms up the fat content so the next liquid layer doesn’t bleed into it.
When you spread the chocolate pudding, use a very light hand. Don’t use the back of a spoon to press it down; use a rubber spatula and gently guide the pudding across the surface. Think of it like smoothing frosting on a delicate cake. If you press too hard, you ruin the layer underneath, and it all gets messy!
Storing and Serving Peanut Butter Chocolate Lasagna
This dessert is always better the next day, honestly! When you inevitably have leftovers—if you manage to save any—storage is super simple. Since this is a no-bake item full of dairy, keeping it cold is the most important rule to follow to keep it safe and delicious.
You want to cover the dish tightly. If you’ve already cut squares, the best way to store individual slices is to place them in an airtight container. This stops the whipped topping from absorbing any weird smells from the fridge!
Best Practices for Storing Leftovers
Always cover the entire pan immediately after serving the first cuts. If you’re storing the whole pan, plastic wrap pressed close to the surface is great, followed by a layer of aluminum foil for extra protection. We want to keep that moisture locked in!
When it comes to how long it lasts, because of the pudding and whipped topping, you should aim to eat it within four days. Any longer than that, and the crust starts getting a little too soft for my liking.
Storage and Reheating Facts
| Storage Method | Recommended Duration | Serving Temperature |
|---|---|---|
| Refrigerated (Covered) | Up to 4 Days | Chilled |
| Frozen (Airtight Container) | Up to 1 Month | Thaw Overnight in Fridge |
And remember, since this is a no-bake dessert, we never reheat it! If you freeze slices, just let them thaw slowly in the refrigerator overnight. That way, the layers stay perfectly firm.
Frequently Asked Questions About Peanut Butter Chocolate Lasagna
I get so many questions about this recipe, especially since it’s a no-bake dessert! People usually want to know if they can swap ingredients or if they can make it before a party. It’s such a popular dish that everyone wants to get the layers just right!
Don’t worry; I’ve answered the most common things people ask me about making the perfect Peanut Butter Chocolate Lasagna right here. Hopefully, this helps you plan your next gathering! You can also check out my thoughts on other recipes.
Can I make Peanut Butter Chocolate Lasagna Ahead of Time?
Yes, you absolutely can make this ahead! In fact, I highly recommend it. The longer it chills, the better the layers meld together and firm up. You can assemble the entire thing—crust, peanut butter, and pudding—the day before you plan to serve it.
However, I always wait to put on that final layer of whipped topping and the sprinkles until just before serving. Whipped topping can sometimes weep or get a little deflated if it sits covered in the fridge for more than 12 hours. So, assemble fully, chill, and then top it off about 30 minutes before you bring it to the table!
Substitutions for the Oreo Crust in Peanut Butter Chocolate Lasagna
If you can’t find Oreos, or maybe you need a different flavor profile, you have a couple of great options that work just as well structurally! The key is using a dark cookie with some fat content.
You can use chocolate graham crackers, which will give you a slightly less intense chocolate flavor but still provide that great crunch. If you want something a little sweeter, vanilla wafers work surprisingly well, though the color will be much lighter. Just make sure you still use the melted butter and crush them finely; we need that compact base for our Peanut Butter Chocolate Lasagna!
How Long Must the Lasagna Chill?
This is the big one! I cannot stress this enough: you must chill this for a minimum of two hours, but honestly, four hours is the sweet spot. If you cut it after only an hour, the pudding layer will be too soft, and when you try to scoop a piece out, the peanut butter layer will push up and ruin your beautiful definition.
The chilling allows the instant pudding to fully hydrate and set up firmly, and it lets the fats in the peanut butter layer solidify. Patience equals perfect, clean slices! For more visual inspiration, see my Pinterest boards.
Understanding the Nutrition in Peanut Butter Chocolate Lasagna
Now, let’s talk fuel! This is definitely an indulgent dessert—we’ve got cookies, peanut butter, and pudding, after all—so it’s not exactly a light snack. But knowing what you’re digging into helps you serve the right size portion, which is usually just a small square of this rich treat!
Since this recipe isn’t baked, we don’t have any complicated chemical reactions changing the nutritional value, so the numbers are fairly straightforward based on the ingredients list. I always figure a small slice is plenty satisfying!
Estimated Nutritional Breakdown Per Serving
Here’s a quick look at what you’re getting in one serving, based on 12 slices. Remember, these are just estimates, but they give you a good idea of the richness!
| Nutrient | Amount Per Slice |
|---|---|
| Calories | 470 |
| Fat | 28g |
| Carbohydrates | 48g |
| Protein | 11g |
See? Plenty of energy packed into one piece! It’s a real treat, and that’s perfectly okay sometimes. If you are looking for lighter options, check out my no-bake peanut butter oat cups.
Share Your Peanut Butter Chocolate Lasagna Creations
I absolutely love seeing how you all bring this recipe to life! Did you change up the topping? Did you use dark chocolate pudding? I really want to know how your Peanut Butter Chocolate Lasagna turned out! If you are interested in other no-bake treats, perhaps you’d enjoy my recipe for easy chocolate peanut butter fudge.
Drop a comment below and tell me your favorite layer or if you made any brilliant tweaks. Happy layering, everyone!
Print
Amazing Peanut Butter Chocolate Lasagna: 4 Hour Chill
- Total Time: 2 hours 25 minutes
- Yield: 12 servings
- Diet: Vegetarian
Description
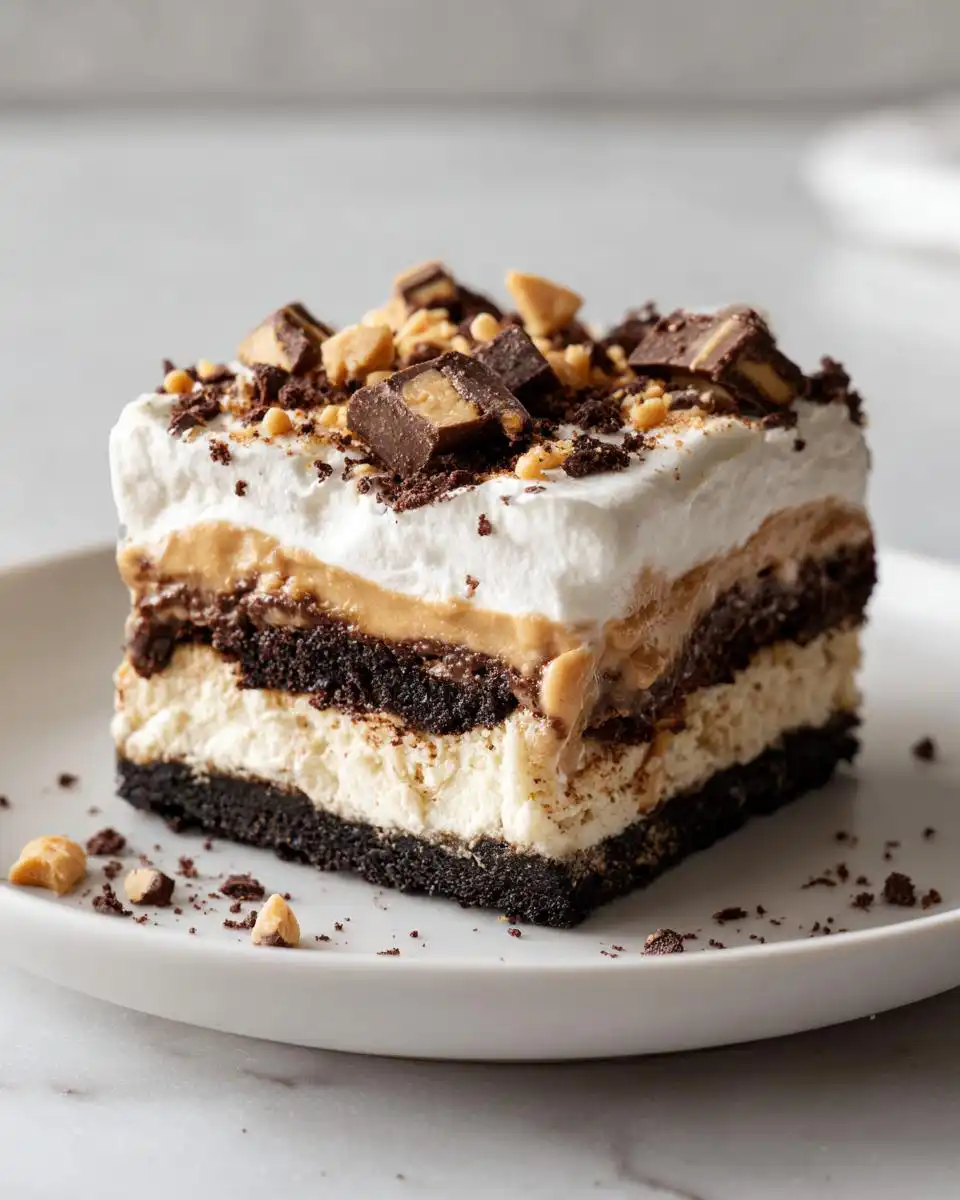
This no-bake Peanut Butter Chocolate Lasagna layers a crunchy Oreo crust, creamy peanut butter filling, rich chocolate pudding, and fluffy whipped topping for the perfect dessert. It is a crowd-pleasing, easy-to-assemble dessert perfect for gatherings. Rich chocolate pudding, creamy peanut butter layer, and a crunchy cookie crust make this irresistible and satisfying.
Ingredients
- 36 Oreo sandwich cookies (about 3 cups cookie crumbs)
- ⅓ cup unsalted butter, melted
- 8 oz cream cheese, softened
- 1 cup creamy peanut butter
- 1 cup powdered sugar
- ¼ cup whole milk
- 1½ cups whipped topping
- 2 (3.4 oz) boxes instant chocolate pudding
- 2⅝ cups whole milk
- 1½ cups whipped topping (for topping)
- ¼ cup mini peanut butter cups or chopped chocolate candies
- 2 Tbsp peanut butter chips or chocolate chips
- Optional: chocolate syrup drizzle
Instructions
- Crush Oreo cookies into fine crumbs using a food processor or by placing cookies in a sealed bag and crushing with a rolling pin.
- Stir cookie crumbs with melted butter until evenly coated.
- Press crumb mixture firmly into the bottom of a 9×13-inch dish to form a compact layer. Freeze while preparing the filling.
- In a large bowl, beat cream cheese, peanut butter, and milk until smooth. Gradually add powdered sugar and beat until combined. Gently fold in 1½ cups whipped topping.
- Spread the peanut butter mixture evenly over the chilled crust and return dish to the freezer briefly to set (about 10 minutes).
- Whisk both pudding mixes with 2⅝ cups milk until thickened (about 2 minutes). Spread pudding over the peanut butter layer.
- Cover and refrigerate for at least 2 hours to allow layers to set.
- Before serving, spread remaining whipped topping on top. Sprinkle with mini candies and chips and drizzle with chocolate syrup if desired.
- Cut into squares and enjoy chilled.
Notes
- For the Oreo crust, you need about 3 cups of fine cookie crumbs.
- The peanut butter layer sets faster if you return the dish to the freezer for about 10 minutes after spreading.
- Chill time is crucial for the layers to set properly.
- Prep Time: 25 minutes
- Cook Time: 0 minutes
- Category: Dessert
- Method: No-Bake
- Cuisine: American