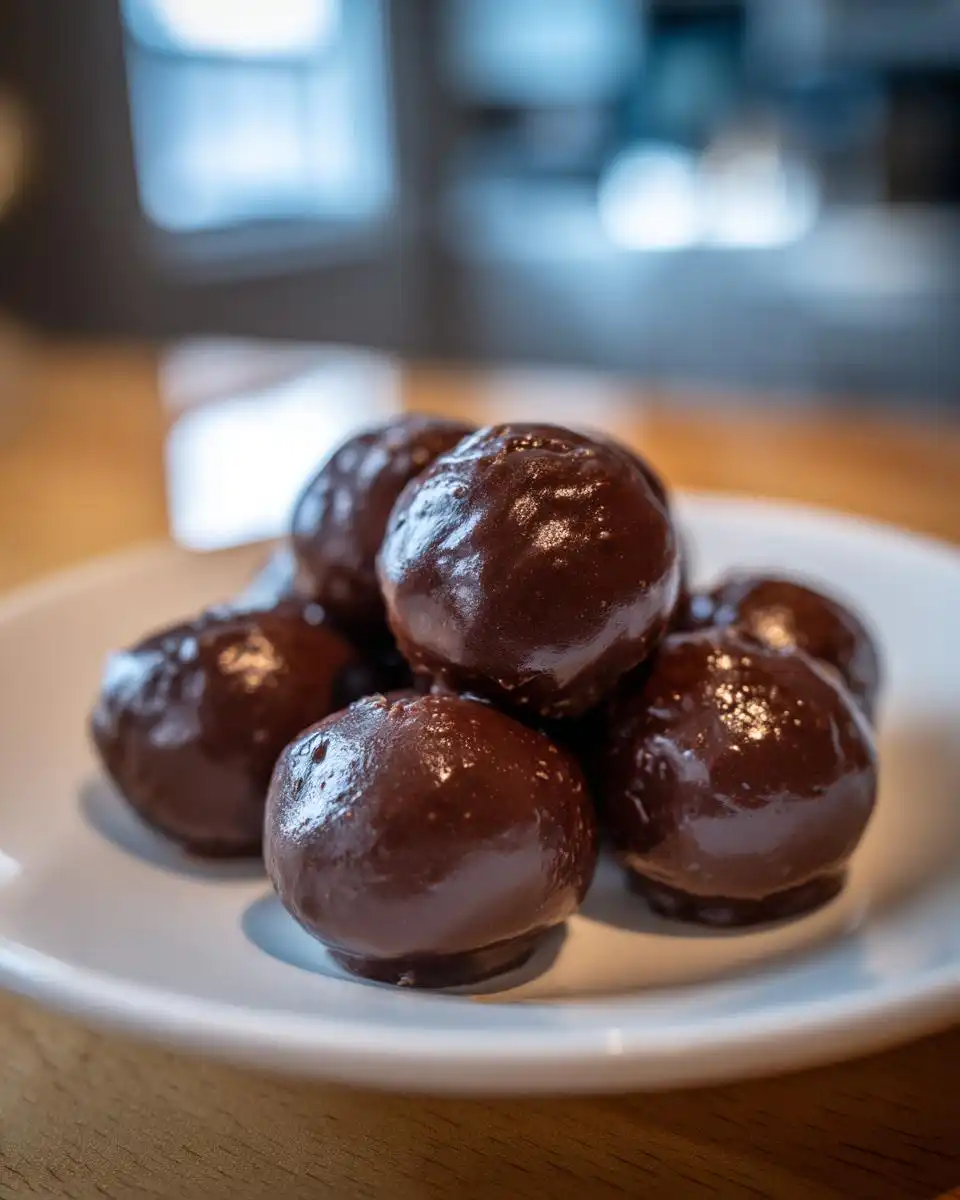
Oh my gosh, if you need a recipe that screams “instant gratification” without ever turning on your oven, you have landed in the right spot! I’m talking about the legendary, melt-in-your-mouth, absolute show-stopper: the **Peanut Butter Chocolate Balls**. Seriously, these things are my secret weapon for holiday cookie platters, last-minute potlucks, or just when that 3 PM craving hits hard.
I’ve been making these no-bake treats since I was tall enough to reach the stand mixer. They rely on just a handful of pantry staples, but the magic happens when you get the texture just right. We aren’t dealing with fussy baking times here; we are dealing with chilling times, which is much more manageable, trust me. My version is rich, perfectly balanced between salty peanut butter and sweet chocolate, and they always disappear first.
What sets mine apart? Well, I learned early on that you can’t rush the chilling process. That two-hour rest in the fridge is non-negotiable if you want that firm, dippable core. This guide is going to walk you through every little trick I’ve picked up over the years to make sure your **Peanut Butter Chocolate Balls** come out perfectly round, perfectly coated, and perfectly delicious every single time.
Why You Will Love These Peanut Butter Chocolate Balls
Honestly, these are the easiest candies you will ever make, and they pack such a huge flavor punch for how little effort they take. I keep coming back to this recipe year after year because it just works, no matter how hectic life gets. If you’re on the fence, let me convince you why these need to be in your repertoire!
- They are truly no-bake! You only need about 15 minutes of active time before everything goes into the fridge. Forget preheating the oven—we are keeping things cool and fast.
- The flavor combination is classic perfection. That salty, slightly tangy peanut butter filling against the smooth, rich chocolate coating? It’s addictive, I’m warning you now.
- They are total crowd-pleasers. Whether I’m taking them to a big family gathering or just setting them out for movie night, everyone goes straight for the **Peanut Butter Chocolate Balls**. They never last long!
- They freeze like a dream, which means you can make a huge batch ahead of time. I usually double the recipe just so I have some stashed away for emergencies.
Quick Prep Time and Simple Ingredients for Peanut Butter Chocolate Balls
Listen, my favorite thing about this recipe is the active time commitment—it’s practically zero! You spend maybe fifteen minutes stirring things together, and then the refrigerator does all the heavy lifting. That’s why I call them my go-to dessert when I realize I forgot to make something for a party.
And the ingredients? You probably have most of this right now. Creamy peanut butter, butter, powdered sugar, and chocolate wafers. That’s it! No weird extracts or obscure items you have to run out for. When you’re whipping up a batch of these **Peanut Butter Chocolate Balls**, you’re grabbing things straight from your pantry. It’s baking simplicity at its very best, and I love that I don’t need to worry about sifting or precise measurements for leavening agents.
Essential Ingredients for Your Peanut Butter Chocolate Balls
When we talk about the foundation of these amazing treats, we’re talking about four core components. Don’t try to get fancy here; the beauty of this recipe is its simplicity, so using good quality foundational ingredients really makes a difference. I always keep these things stocked up just in case I get a sudden craving!
Here is what you’ll need to gather before you start mixing. Remember, we aren’t baking, so we are focusing on texture and smoothness above all else!
| Ingredient | Quantity | Preparation Note |
|---|---|---|
| Creamy Peanut Butter | 1 cup | Must be the no-stir kind for the right consistency! |
| Unsalted Butter | 6 tablespoons | Must be fully softened to room temperature. |
| Powdered Sugar | 2 cups | Sifted, if you want absolute smoothness, but I often skip it. |
| Chocolate Wafers (or Bark) | 16 oz (1 lb) | For dipping and coating. |
Ingredient Clarity and Preparation Notes for Peanut Butter Chocolate Balls
Okay, let’s talk specifics because this is where people sometimes run into trouble when making their **Peanut Butter Chocolate Balls**. The texture of the filling is everything; if it’s too soft, you’ll be fighting it in the freezer, and if it’s too hard, it won’t taste creamy when you eat it.
First, the peanut butter. You absolutely need the smooth, no-stir variety. If you use the natural, oily kind that separates, your filling is going to be greasy and runny, and it won’t hold its shape when you try to roll it. Trust me on this one; I learned that the hard way during a summer batch years ago—it was a disaster!
Second, the butter. It has to be truly softened. If you try to mix cold butter in, you’ll end up with little hard flecks of butter suspended in your peanut butter mixture, and that ruins the smooth mouthfeel we are aiming for. I usually take mine out an hour before I plan to start mixing. If you forget, you can microwave a stick of butter for just 10 seconds, but be careful not to melt it!
Finally, the chocolate coating. I prefer melting wafers because they are formulated to set up nicely without needing to add extra oil. If you use bittersweet chocolate bars, you might need to stir in a teaspoon of coconut oil or vegetable shortening to help thin it out so you can get a nice, thin coating on your balls.
Equipment Needed for Making Peanut Butter Chocolate Balls
You won’t need anything fancy for these no-bake treats, which is another reason I love them so much! Forget stand mixers or special candy molds. We are keeping this setup simple so you can get these delicious **Peanut Butter Chocolate Balls** made fast.
Here are the few tools I always pull out when I start a batch:
- A sturdy medium mixing bowl for combining the peanut butter filling.
- A large spoon or rubber spatula—I prefer a spatula for scraping down the sides completely.
- A standard baking sheet.
- Wax paper or parchment paper to line that baking sheet. This is crucial for easy cleanup and keeping the chocolate from sticking!
- A heat-proof bowl for melting your chocolate. If you’re using a double boiler method, you’ll need a saucepan underneath it, too.
- A toothpick or a dipping fork. I actually prefer a standard fork and then carefully sliding the ball off with a second, dry fork to avoid dragging chocolate strings.
Step-by-Step Instructions for Amazing Peanut Butter Chocolate Balls
Alright, this is where the fun really starts! We are moving from prep work to actual assembly. Don’t rush the chilling steps, though, or you’ll end up with chocolate-covered messes all over your counter. We want firm, perfectly shaped treats!
Mixing the Base for Your Peanut Butter Chocolate Balls
First things first, grab that bowl with your softened butter and creamy peanut butter. Using your spoon or spatula, beat those two together until they are totally combined. It should look light and fluffy, like a really thick frosting. This initial creaming step is important because it helps incorporate the sugar evenly later on.
Next, start adding the powdered sugar. I always do this gradually—maybe a cup at a time. If you dump it all in at once, it’s going to fly everywhere, and trust me, cleaning powdered sugar off the ceiling is not fun. Mix slowly at first until the sugar starts to disappear into the peanut butter. Once it’s mostly incorporated, you can mix a little harder until you have a thick, uniform dough. It should be stiff enough that you can press your finger into it and it holds the shape.
Rolling and Chilling the Peanut Butter Chocolate Balls
Now for the structure! Cover that bowl tightly with plastic wrap—I mean really seal it up—and stick it in the refrigerator. This is the most important waiting game: you need at least two full hours. This chilling time hardens the fat content, which means your balls won’t flatten out into sad, wide discs when you try to roll them.
Once they are firm, line up your baking sheet with parchment paper. I use a small cookie scoop, or just a regular tablespoon, to make sure every ball is roughly the same size. Roll the portions quickly between your palms until they are nice and round. If the mixture starts getting too soft while you work, just pop the bowl back in the fridge for 15 minutes. After you roll them all, pop the sheet back into the freezer for about 15 to 20 minutes. This quick freeze helps them hold their perfect shape when they hit that warm chocolate.
Melting and Coating the Peanut Butter Chocolate Balls
While those are chilling, melt your chocolate wafers. If you are using the microwave, do it in 30-second bursts, stirring really well between each one. Stop microwaving when there are still a few small lumps left—the residual heat will melt those right out as you stir. If you overcook it, the chocolate gets grainy, and that’s a real pain to fix!
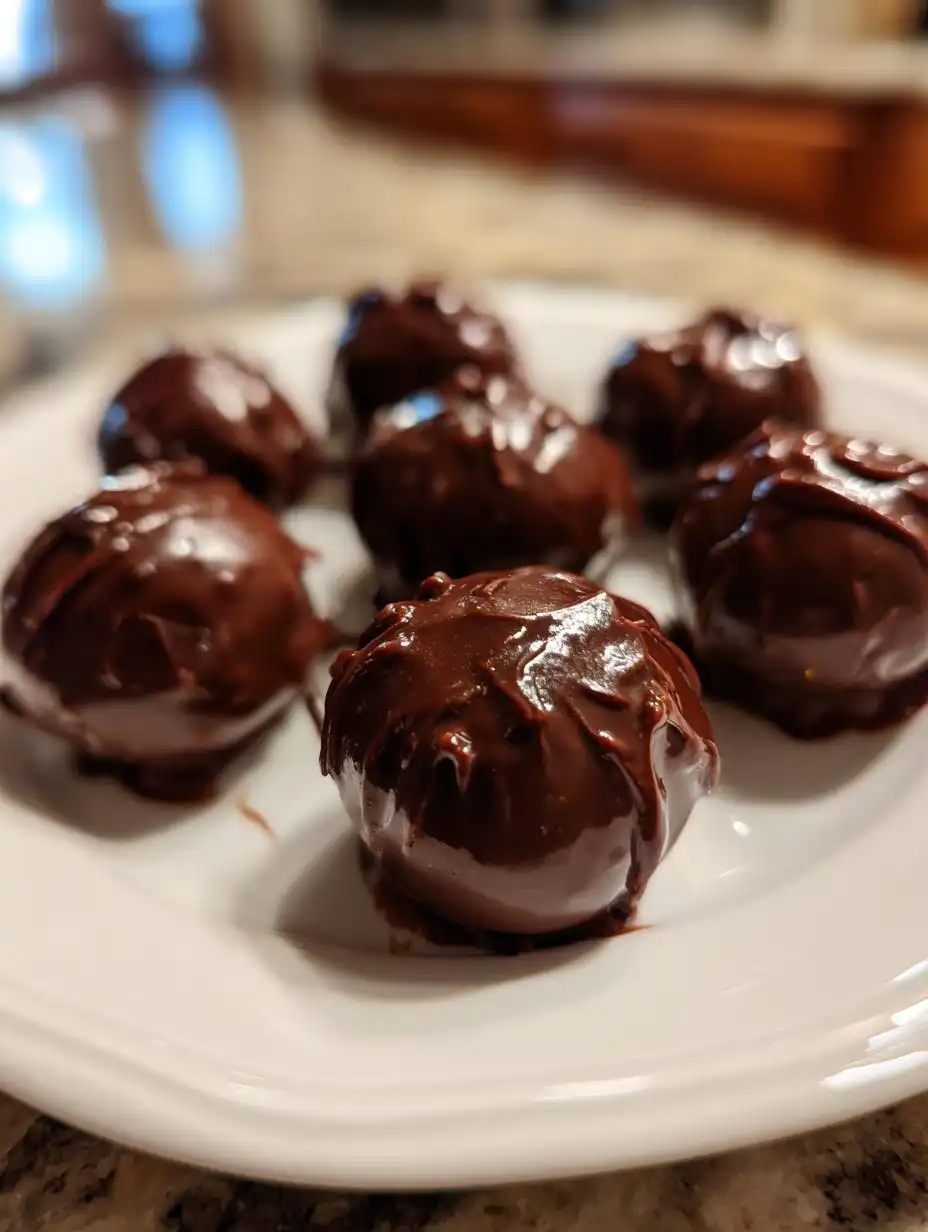
Take your semi-frozen balls out and get ready to dip. Carefully stick a toothpick into one ball. Dip it completely into the melted chocolate. Then, holding the toothpick, lift the ball out and gently tap the side of the bowl against the toothpick to let the excess chocolate drip off. You want a thin coat, not a thick shell!
Place the coated ball back onto your prepared parchment paper. If you used a toothpick, you might get a little chocolate spike on top where the hole was. I always wait about 30 seconds until the chocolate just starts to firm up slightly, then I gently poke that spot with a dry toothpick to smooth it out before removing the toothpick. Let them sit at room temperature until the chocolate is completely set, which usually takes about an hour, or speed it up in the fridge if you are in a rush.
Tips for Success with No-Bake Peanut Butter Chocolate Balls
Even though these are simple, there are a few little secrets I’ve picked up over the years to guarantee they turn out looking professional and tasting amazing. If you follow these tips, you won’t have any issues with melting or sticking!
- If your peanut butter filling seems too soft before chilling, don’t panic! Just stir in an extra quarter cup of powdered sugar. This happens sometimes if your kitchen is warm or your peanut butter brand is runnier than mine. The goal is a firm dough that doesn’t stick to your hands when rolling.
- Humidity is the enemy of chocolate dipping! If it’s a rainy or super humid day, the chocolate coating will take forever to set up, and it might look streaky or dull. If this happens, don’t bother setting them on the counter. Put them directly into the refrigerator for about 20 minutes to speed up the setting process.
- When dipping, use a fork or a dipping tool, but make sure you have a second, dry tool handy. After you lift the ball out of the chocolate, let it drip for a second, and then gently tap the fork against the side of the bowl. If you see a chocolate tail dragging, use that second clean fork to gently slice that tail away before placing it back on the parchment. This keeps your finished **Peanut Butter Chocolate Balls** looking neat.
- Don’t skip the quick freeze before dipping! That 15 to 20 minutes in the freezer is what keeps the ball perfectly spherical while the warm chocolate hits it. A room-temperature ball will melt slightly on contact, causing the chocolate shell to slide right off or create a huge puddle around the base.
Storing and Serving Your Peanut Butter Chocolate Balls
Once you’ve managed to let the chocolate set completely—which is harder than it sounds when they smell this good—you’ll want to know the best way to keep them fresh. The great thing about these no-bake candies is that they actually keep really well, much longer than a typical cake or cookie!
Since they are mostly fat and sugar, they don’t dry out easily, but you do need to keep them stored correctly, especially if you live somewhere warm. I always recommend keeping them in an airtight container. If you stack them in the container, make sure you place a small square of wax paper between the layers so the chocolate coating doesn’t stick to itself. Nobody wants to pull apart two sticky **Peanut Butter Chocolate Balls**!
They taste best when they are slightly cool, so storing them in the refrigerator is my usual go-to method. They firm up nicely, and that cool temperature gives you a wonderful snap when you bite into the chocolate shell.
Here’s a quick breakdown of how long you can expect these little gems to last:
| Storage Method | Approximate Shelf Life | Serving Tip |
|---|---|---|
| Room Temperature (Airtight) | 3–4 days | Best served within 24 hours for optimal chocolate texture. |
| Refrigerator (Airtight) | Up to 2 weeks | Allow them to sit out for 10 minutes before serving for a softer center. |
| Freezer (Airtight, wrapped) | Up to 3 months | No reheating needed! Thaw slightly before eating. |
And since these are no-bake, we don’t have to worry about reheating at all! If they get too hard straight from the freezer, just let them sit on a plate for 15 minutes, and they soften up perfectly. They are designed to be eaten cool and delicious straight from storage.
Frequently Asked Questions About Peanut Butter Chocolate Balls
I get so many messages about people making these for the first time, and honestly, I love hearing about your successes! It’s natural to have a few questions when you are working with a no-bake recipe, especially around ingredient consistency and setting times. Here are some of the things I hear most often about making the perfect batch of these easy desserts.
Can I substitute the peanut butter in these Peanut Butter Chocolate Balls
That’s a great question, especially if you have a nut allergy in the house! You absolutely can swap out the peanut butter, but you have to be careful about the texture. Since the recipe relies on the thick, no-stir peanut butter to form the base dough, you need a similar consistency. Sunflower seed butter (SunButter) works wonderfully for a peanut-free option. Almond butter can work, but you might need to add an extra tablespoon or two of powdered sugar to keep the mixture from getting too oily or loose.
If you use a natural, runny nut butter, you will definitely need to chill the mixture longer—maybe three or four hours—before you even attempt to roll it. We want firm centers for these **Peanut Butter Chocolate Balls**!
How long does it take for the chocolate coating to set on the Peanut Butter Chocolate Balls?
This is entirely dependent on the temperature of your kitchen! If you have a nice, cool kitchen (say, under 70 degrees Fahrenheit), the chocolate will usually set up just fine sitting on the counter. Give it a good hour, and it should be firm enough to handle without smudging. If your house is warm, or if you are in a hurry, definitely put them in the refrigerator. In the fridge, the chocolate will set up much faster—usually in about 20 to 30 minutes. Just make sure they don’t sit in there too long, or the peanut butter center can get rock hard!
Estimated Nutritional Snapshot for Peanut Butter Chocolate Balls
Now, I always tell people that these are a treat, not a health food, but it’s good to have a general idea of what you’re enjoying when you reach for one of these delicious candies! Remember, since we are dealing with homemade items and different brands of chocolate wafers, these numbers are just a general guideline based on the standard recipe portions. Don’t worry too much about tracking every single calorie when you are enjoying something this good!
This estimate is based on yielding about 24 servings, which is what I usually get from a standard batch of these **Peanut Butter Chocolate Balls**.
| Nutrient | Estimated Amount Per Ball |
|---|---|
| Calories | ~120 |
| Total Fat | ~8g |
| Carbohydrates | ~12g |
| Protein | ~3g |
Please keep in mind that these figures are estimates only. The exact nutritional content can change quite a bit depending on the specific brand of peanut butter and chocolate you select for your batch. Enjoy them responsibly!
If you love seeing behind-the-scenes looks at recipes like this, be sure to check out my Medium profile for more insights, or follow my latest creations on Pinterest!
Print
Amazing 24 Peanut Butter Chocolate Balls
- Total Time: ~2 hours 45 minutes
- Yield: About 24 balls
- Diet: Vegetarian
Description
A simple no-bake sweet treat made with peanut butter, butter, powdered sugar, and chocolate. Quick to make and perfect for parties or gifting.
Ingredients
- 1 cup creamy peanut butter (no-stir style)
- 6 tablespoons unsalted butter, softened
- 2 cups powdered sugar
- 16 oz (1 lb) chocolate melting wafers or chocolate bark
Instructions
- Stir together the peanut butter and softened butter until smooth and creamy.
- Gradually add the powdered sugar, mixing well until the mixture is thick and forms a dough.
- Cover the bowl and refrigerate the peanut butter mixture for at least 2 hours to firm up.
- Line a baking sheet with wax or parchment paper. Scoop out tablespoon-sized portions and roll into balls. Place them on the prepared sheet.
- Freeze the balls for about 15–20 minutes while you prepare the chocolate.
- Melt the chocolate wafers in a heat-proof bowl over simmering water or in short bursts in the microwave, stirring until smooth.
- Dip each peanut butter ball into the melted chocolate using a toothpick or fork, tapping off excess chocolate before placing it back on the lined sheet.
- Let the chocolate set completely at room temperature or in the refrigerator before serving.
Notes
- Chill time is about 2 hours, plus 15-20 minutes for freezing before dipping.
- The total time includes chilling and setting.
- Prep Time: 15 minutes
- Cook Time: 0 minutes
- Category: Dessert
- Method: No-Bake
- Cuisine: American