

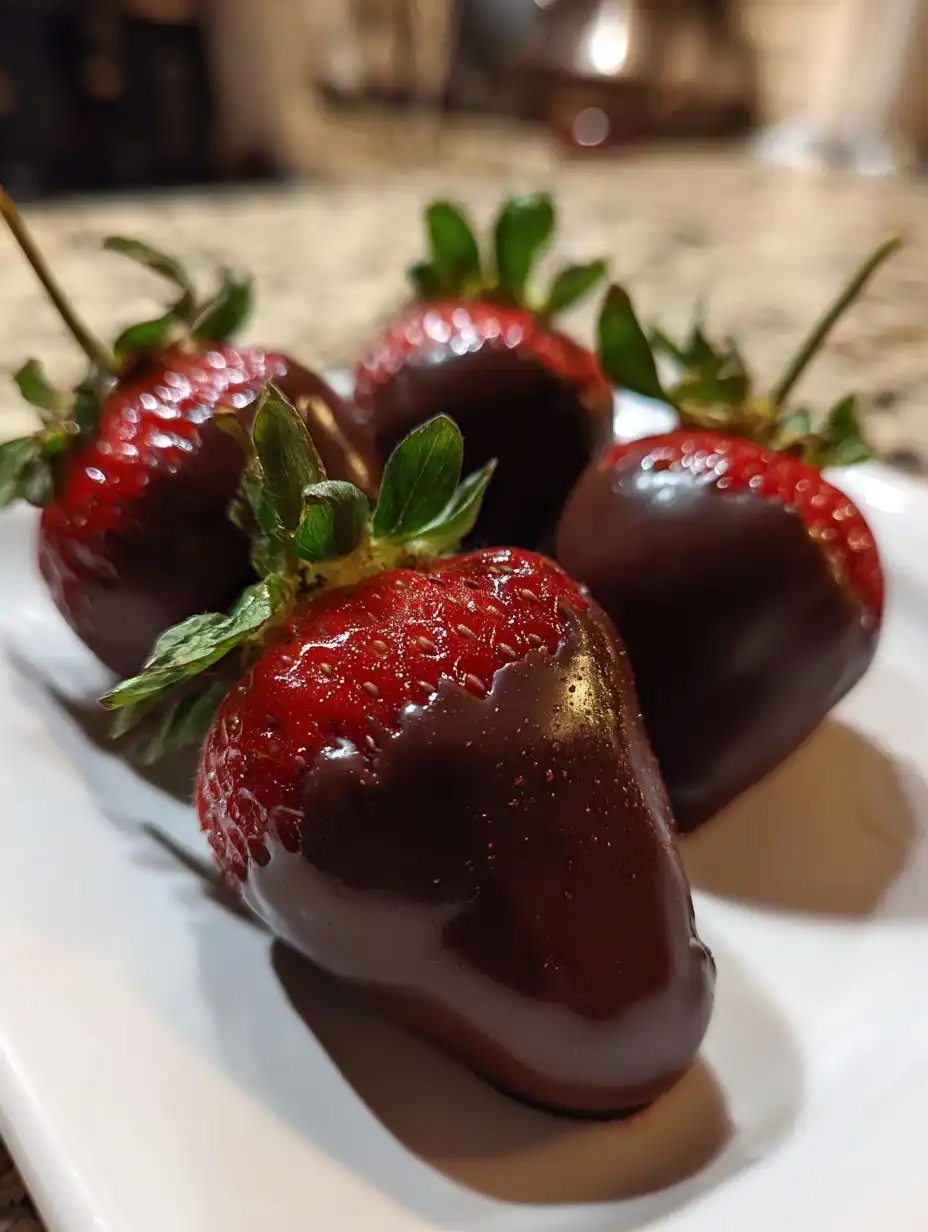
Dessert emergencies happen, right? I swear, sometimes I need something sweet, satisfying, and quick, like five minutes ago! That’s when I turn to my absolute favorite no-bake solution: Healthy Chocolate Covered Strawberries. Forget those overly rich, complicated desserts; these are naturally sweet, use amazing dark chocolate, and honestly, they feel like such a treat.
The beauty of this recipe is how simple it is. We’re talking about maybe ten minutes of prep—seriously! I’ve made these late on a Tuesday night when I needed a little pick-me-up but didn’t want to drag out the stand mixer. Because we use quality dark chocolate and the natural sweetness of the fruit, you get that indulgence without the guilt trip afterward. If you’re looking for a truly simple, fruit-forward, and guilt-free treat, you’ve found your go-to recipe. Get those berries ready; we’re diving in!

Essential Ingredients for Healthy Chocolate Covered Strawberries
When you’re making something this simple, ingredient quality is everything, trust me. Since these are Healthy Chocolate Covered Strawberries, we rely on the fruit and the chocolate to carry the flavor. That means ditching the waxy milk chocolate chips and going straight for the good stuff!
We’re using high-quality dark chocolate here. The higher the cocoa percentage, the less sugar you’ll have, which is exactly what makes this treat feel so much better for you. A tiny bit of coconut oil is our secret weapon to get that perfect, smooth dip.
Ingredient Clarity and Preparation
You’ll need about a pound of fresh strawberries—make sure they look bright red and firm. For the chocolate, grab one cup of dark chocolate chips, and don’t skimp on quality here! The recipe calls for one teaspoon of coconut oil. Before we even think about melting, every single strawberry must be washed and patted completely dry. Seriously, this is non-negotiable for Healthy Chocolate Covered Strawberries!
Equipment Needed for Success
You don’t need much fancy gear for this no-bake dessert. Make sure you have a microwave-safe bowl for melting the chocolate, a sturdy baking sheet, and some parchment paper to line it. That parchment paper is your best friend for easy cleanup later!
Step-by-Step Instructions for Healthy Chocolate Covered Strawberries
Okay, this is where the magic happens, and I promise it moves fast! Once you have your ingredients ready, the whole dipping process takes maybe ten minutes. Just follow these steps carefully, and you’ll have perfect Healthy Chocolate Covered Strawberries ready for the fridge.
Preparing the Strawberries
This first step is the most important one, so listen up! You need to wash your strawberries gently, but the real key is drying them. I mean bone dry! Moisture is the enemy here; if there is even a tiny drop of water left on the berry, the melted chocolate will seize up or just slide right off. Use paper towels and pat each one individually. Don’t rush this part—it sets up the entire success of the coating!
While you’re doing that, grab your baking sheet and line it with parchment paper. This prevents sticking and makes the cleanup ridiculously easy later on. Set that sheet aside so it’s ready for immediate action.
Melting the Dark Chocolate Coating
Next, we tackle the chocolate. In your microwave-safe bowl, combine the dark chocolate chips and that teaspoon of coconut oil. The oil is what thins the chocolate just enough so it coats beautifully without being too thick. Microwave it in short bursts—20 seconds at a time is perfect. You have to stir it vigorously between every single interval!
Don’t try to melt it all at once or you’ll burn it, and burned chocolate tastes sad. Keep stirring until it looks completely smooth and glossy. If you see any lumps, just give it another 10 seconds and stir again until it flows like silk. This smooth consistency is crucial for coating your Healthy Chocolate Covered Strawberries correctly.
Dipping and Setting the Healthy Chocolate Covered Strawberries
Now, grab a strawberry by the stem—that’s your natural little handle! Dip the berry into the melted chocolate. I like to swirl it around so about three-quarters of the berry is covered. You want to leave a little bit of that bright red showing; it looks so pretty!
When you pull it out, hold it over the bowl for a second or two so the excess chocolate drips back in. Don’t shake it too hard, or you’ll lose your coating! Place the dipped berry gently onto your prepared parchment paper. Repeat this until all your berries are coated. They need to chill now to set up properly, so transfer that baking sheet straight into the refrigerator for about 20 to 30 minutes.
Tips for Success with Your Healthy Chocolate Covered Strawberries
Honestly, these sound simple, and they are, but there are two tiny things that can make or break the final look of your Healthy Chocolate Covered Strawberries. I learned these the hard way—once I started paying attention to the details, my results went from okay to absolutely gorgeous!
Getting that perfect, smooth shell that sticks right where you want it takes a little finesse. Follow these quick tips, and you won’t have any chocolate sliding off into the fridge!
Troubleshooting Chocolate Adhesion Issues
If your chocolate is sliding right off the berry like it’s on ice skates, I can tell you exactly why that happened: moisture! You absolutely must ensure those strawberries are dry. I mean, dry like the Sahara desert dry. If you wash them and then let them sit on the paper towel for five minutes, they are usually fine, but if you dip them immediately after rinsing, the water droplets repel the chocolate. It’s the number one reason for failure when making Healthy Chocolate Covered Strawberries!
Selecting High-Quality Dark Chocolate
Since we are keeping these treats on the healthier side, the dark chocolate is doing most of the heavy lifting for flavor. Don’t grab the cheapest chips you see. I find that using chocolate chips that are 60% cocoa or higher gives you that deep, rich flavor that balances the fresh berry perfectly. If you use lower-quality chocolate, the coating might taste waxy or too sweet, and it won’t give you that lovely snap when you bite into it. It really elevates this simple fruit treat!
Common Questions About Healthy Chocolate Covered Strawberries
I get so many questions every time I post pictures of these, so let’s clear up the most frequent ones about making Healthy Chocolate Covered Strawberries. It’s always great to know the best practices so you can enjoy these guilt-free treats longer!
How Long Do Healthy Chocolate Covered Strawberries Last?
Because we are using fresh fruit here, they don’t last as long as shelf-stable candies, but that’s part of the appeal! If you store them properly in an airtight container in the refrigerator, they are best eaten within 2 days. After that, the berries start releasing moisture, which can soften the chocolate shell. I usually make just enough for what we plan to eat the next day!
Can I Substitute the Coconut Oil in Healthy Chocolate Covered Strawberries?
That little bit of coconut oil is fantastic because it helps the chocolate set up hard and shiny, and it keeps the fat content relatively clean. If you absolutely can’t use coconut oil, you can substitute it with an equal amount of shortening or even cocoa butter if you have it on hand. Some people try regular butter, but it can sometimes make the chocolate a little duller. For the best results when making Healthy Chocolate Covered Strawberries, stick to a neutral-flavored fat.
What is the Best Way to Serve Healthy Chocolate Covered Strawberries?
This is a matter of preference, really! If you like a very firm, snappy chocolate shell, serve them straight from the fridge—chilled is wonderful, especially on a hot day. However, if you want the natural flavor of the strawberry and the dark chocolate to really shine through, pulling them out about 15 minutes before serving lets them come up to a cool room temperature. They are still delicious either way!
Storing and Reheating Healthy Chocolate Covered Strawberries
Since these beautiful treats are so quick to make, I really recommend enjoying them the same day if you can. But if you’ve got leftovers, or you’re making a big batch for a party the next day, proper storage is key to keeping your Healthy Chocolate Covered Strawberries looking perfect.
Remember, we are dealing with fresh fruit here, so we are heading straight to the fridge. You never want to try and microwave these to warm them up—that just results in sad, soggy berries and melted chocolate puddles everywhere! The goal is just to keep them firm until serving time.
Optimal Storage Conditions
To keep the chocolate shell intact and the berries fresh, you must store them in an airtight container. I try to place a piece of wax paper between layers if I stack them, just to make sure the chocolate coating doesn’t stick to the layer above it. They do best when kept refrigerated, and honestly, they are good for about 48 hours. After that, the moisture from the berries starts to make the chocolate weep a little bit, and they lose their snap. Don’t freeze them either; thawing berries get mushy fast!
Serving Temperature Guidance
As I mentioned earlier, you have two great options here depending on what you like! If you serve them straight from the fridge after they’ve been chilling for that 30 minutes, the chocolate will be super hard and snappy. It’s incredibly refreshing this way. But if you want the true flavor profile to come out, take them out about 15 minutes before you plan to eat them. This lets the strawberry soften just slightly and the dark chocolate lose that icy chill. Either way, they are a winner!
Understanding the Nutrition of Healthy Chocolate Covered Strawberries
When we talk about Healthy Chocolate Covered Strawberries, I know a lot of you are curious about the nutritional breakdown. And that’s great! Knowing what you’re eating is always smart, especially when you’re trying to keep things light. If you want more general healthy eating tips, check out my thoughts on wellness.
However, I have to give you a quick disclaimer here. Because we are using fresh strawberries—which vary wildly in size—and different brands of dark chocolate chips, the exact calorie count can wiggle around a bit. I haven’t sent these off to a lab or anything, so I can’t give you super precise numbers for sugar or fat content. If you are looking for other quick, healthy dessert ideas, you might enjoy my recipe for no-bake peanut butter oat cups.
What I can tell you is that using dark chocolate (which has those great antioxidants!) and relying on the fruit for sweetness keeps this treat much lighter than a candy bar. For about 85 calories per berry, you get fiber and fruit goodness. Just remember, these estimates are based on average sizes, so treat the specific numbers as a general guide for your Healthy Chocolate Covered Strawberries!
Share Your Experience Making Healthy Chocolate Covered Strawberries
I just love hearing how your batches turned out! Did you use 70% dark chocolate or did you go even darker? Let me know if the drying step worked perfectly for you! You can always share your creations on our Pinterest board.
Drop a comment below and tell me how many you managed to make before they all disappeared. I always rate mine a solid 10 out of 10!
Print
5 Minute Healthy Chocolate Covered Strawberries Joy
- Total Time: 15 minutes
- Yield: 12 strawberries
Description
Healthy chocolate covered strawberries using rich dark chocolate. This is a simple, no-bake treat that is naturally sweet and simple to prepare.
Ingredients
- 1 pound fresh strawberries
- 1 cup dark chocolate chips
- 1 teaspoon coconut oil
Instructions
- Wash strawberries and pat completely dry with paper towels. Moisture stops chocolate from sticking.
- Line a baking sheet with parchment paper and set it aside.
- Add dark chocolate chips and coconut oil to a microwave-safe bowl.
- Microwave in 20-second intervals, stirring between each, until the mixture is melted and smooth.
- Hold each strawberry by the stem and dip it into the melted chocolate, swirling to coat about three-quarters of the berry.
- Let the extra chocolate drip off, then put the strawberry onto the prepared baking sheet.
- Repeat this process with the remaining strawberries.
- Refrigerate for 20 to 30 minutes, or until the chocolate is set.
- Serve the strawberries chilled or at cool room temperature.
Notes
- Any moisture on the strawberries will prevent the chocolate from adhering properly.
- Use high-quality dark chocolate for the best flavor.
- Prep Time: 10 minutes
- Cook Time: 5 minutes


