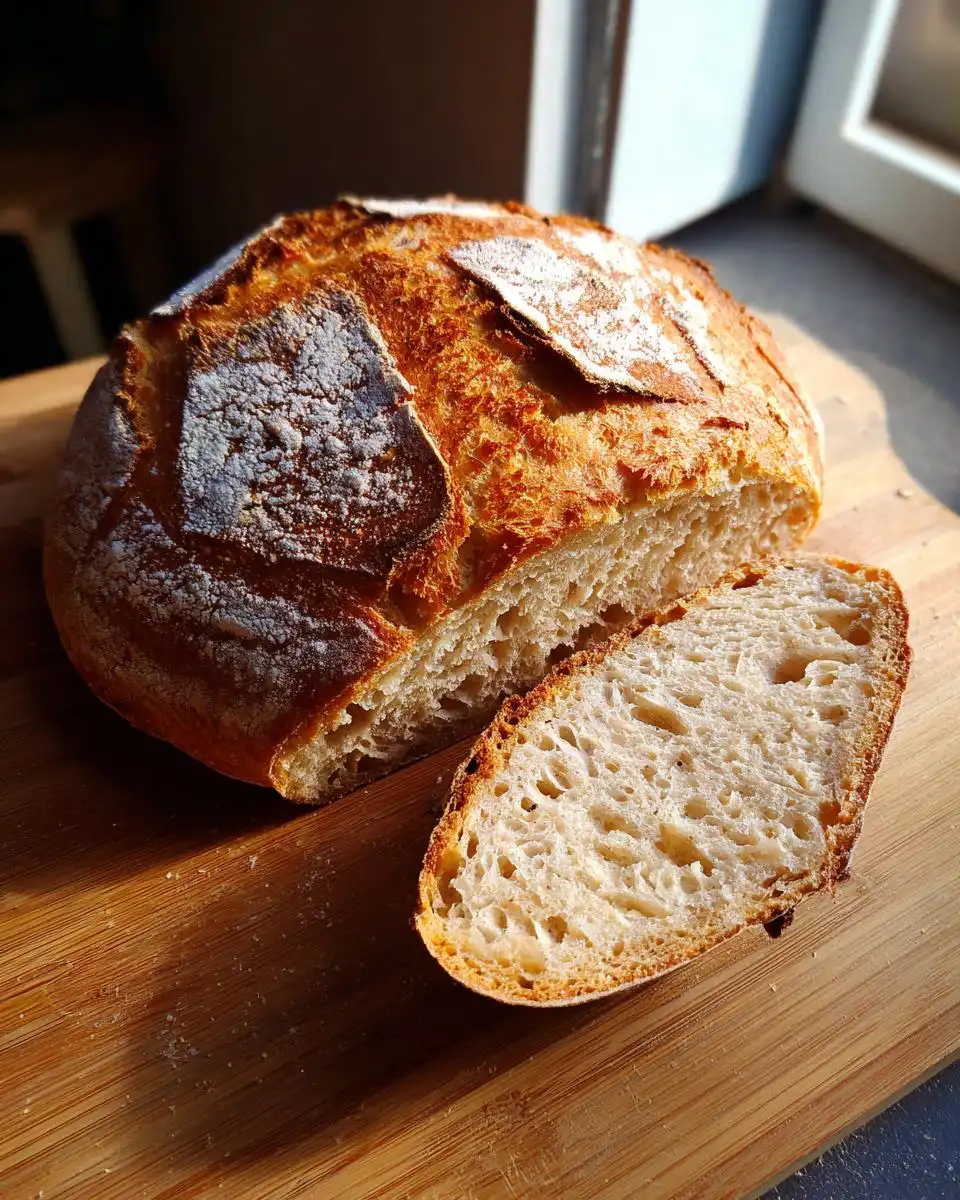
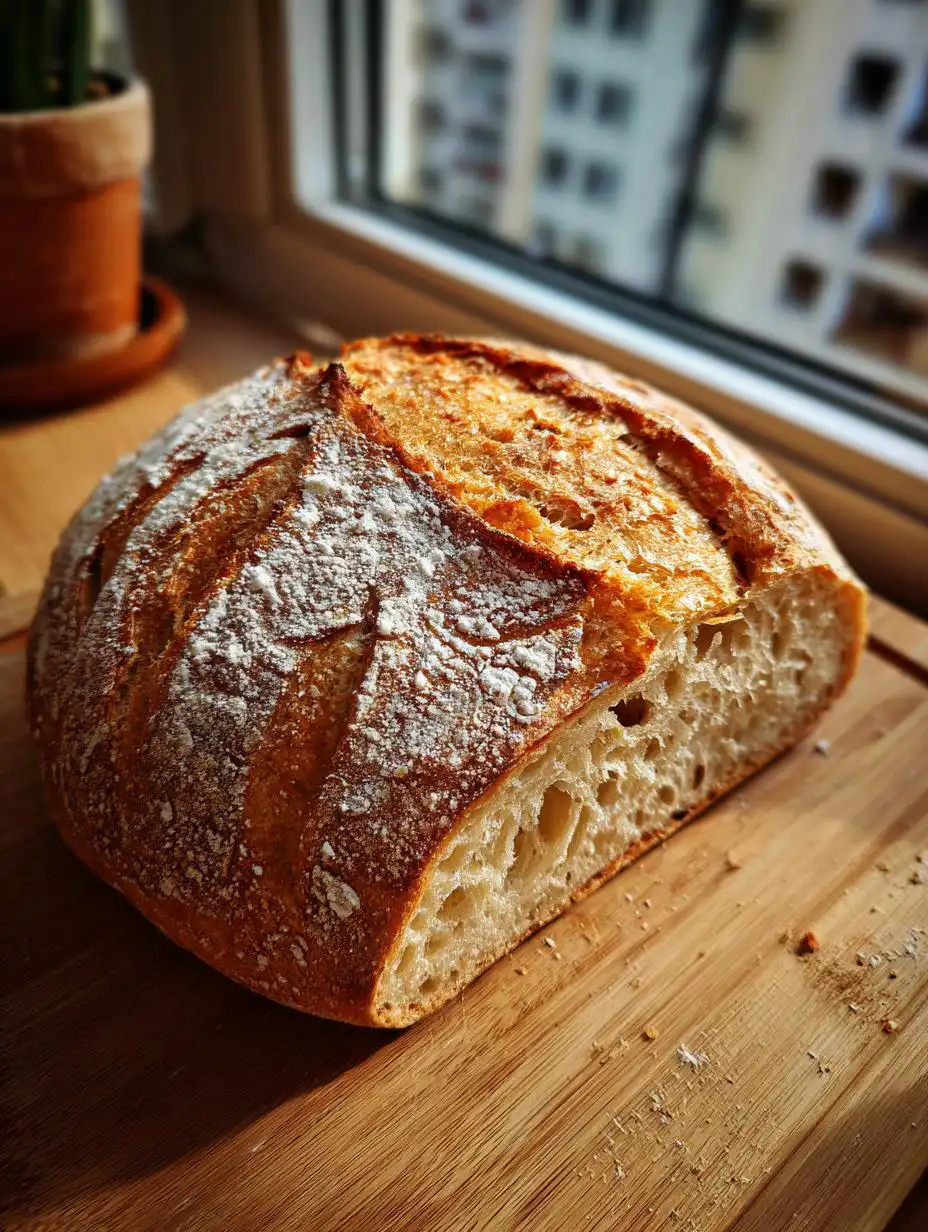
Getting that gorgeous, shatteringly crisp crust paired with a soft, airy interior is the dream, isn’t it? Well, trust me, this Healthy Homemade Sourdough Loaf recipe delivers that magic every single time. I’ve stopped buying bread entirely since perfecting this method for my family’s daily toast and sandwiches. It looks intimidating, but it’s actually incredibly reliable once you get the timing down. This is the sourdough loaf you’ll want to bake week after week!
Essential Ingredients for Your Healthy Homemade Sourdough Loaf
The real secret sauce to any great sourdough, especially one aiming to be a reliable, Healthy Homemade Sourdough Loaf, is respecting what goes into the mix. We aren’t using any commercial yeast here, so our starter needs to be happy, and our flours need to be good quality. I learned quickly that using a mix of white and whole grain flour gives the best flavor profile—the whole wheat adds nutrition and depth, while the bread flour gives us that necessary structure for a big oven spring.
Don’t skip paying attention to the water temperature either! It might seem fussy, but room temperature water helps the fermentation process start smoothly. If your kitchen is cold, use slightly warmer water; if it’s super hot in the summer, stick to cooler water. You want everything to be happy and cooperative.
Here’s a quick breakdown of exactly what you need:
Ingredient Breakdown for the Levain
The levain isn’t just a starter boost; it’s the heart of the bread! You need to mix your active starter with fresh flour and water and let it bubble up until it’s doubled, maybe a little more. If your levain floats when you drop a tiny bit in water, you’re golden! If it sinks, give it another hour. That bubbly, active levain is what gives your final loaf that beautiful, tangy flavor.
Main Dough Components for the Healthy Homemade Sourdough Loaf
When mixing the main dough for your Healthy Homemade Sourdough Loaf, we use a blend that balances nutrition with baking performance. We use bread flour—it has higher protein which is crucial for developing that strong gluten network needed to trap all those fermentation gases. The whole wheat flour brings in that lovely, earthy flavor and extra fiber we want in a healthier bread.
And please, measure the salt! Salt does more than just taste good; it controls the yeast activity. Too little, and your dough will fly away from you; too much, and it slows things down too much. Always use fine salt so it dissolves right away when mixing.
Here’s what you need for the main dough:
- Water: 3/4 cup, room temperature
- Ripe Levain: 1 cup
- Bread Flour: 2 cups
- Whole Wheat Flour: 1 cup
- Fine Salt: 1 1/2 teaspoons
Equipment Needed for Baking Your Healthy Homemade Sourdough Loaf
You don’t need a million fancy gadgets for this, but a few key items really help achieve that professional look on your Healthy Homemade Sourdough Loaf. The absolute must-have is a Dutch oven. Seriously, if you want that super crisp crust, the covered baking traps the steam, which is what allows the loaf to expand beautifully before the crust sets.
Next up, grab a banneton—that’s the proofing basket. Dusting it heavily prevents sticking and gives your loaf those gorgeous, professional rings when you flip it out. A sharp razor blade or a very sharp knife for scoring is also important, otherwise, you just smoosh the dough!
- Dutch Oven (essential for steam)
- Banneton or a bowl lined with a heavily floured tea towel
- Large mixing bowl
- Bench scraper (a lifesaver for handling sticky dough!)
Step-by-Step Instructions for the Healthy Homemade Sourdough Loaf
Okay, now for the fun part—turning that beautiful starter into bread! Sourdough is all about timing and touch. Don’t rush the resting periods; they are just as important as the mixing. I always set timers for everything, or I’d forget where I was in the process!
Building the Active Levain
First things first, we need that bubbly power source. In a small bowl, just stir together your active sourdough starter, the bread flour designated for the levain, and the water for it. It’s going to look like thick paste. Cover that bowl—I usually just use a plate—and leave it on the counter. You are aiming for it to double in size and look super active, covered in little bubbles. This usually takes about four hours, depending on how warm your kitchen is. Don’t move on until it’s ready!
Mixing and Initial Hydration
Once your levain is peaking, grab your big mixing bowl. Pour in the 3/4 cup of room temperature water, then add your ripe levain. Stir them together gently until the starter starts to look a little milky or dissolved. Now, dump in all your flours—the bread flour and the whole wheat flour—and the salt on top. Mix this all up with a wooden spoon or your hands until there are absolutely no dry spots left. It will look really messy and shaggy, kind of like a rough oatmeal mix. That’s perfect! Cover the bowl and let it rest for 30 minutes. This rest lets the flour fully absorb the water, which we call hydration, and makes the next step much easier.
Developing Strength with Stretch and Folds
This is where we build the structure without kneading! After the 30-minute rest, it’s time for the stretch and folds. You’ll do four sets of these, spaced 30 minutes apart. To do a fold, gently wet your hands so the dough doesn’t stick. Reach under one side of the dough, stretch it up high without tearing it, and fold it over the top. Rotate the bowl a quarter turn and repeat that three more times until you’ve folded all four sides. Cover it and wait 30 minutes before the next set. By the fourth set, you should feel a big difference—the dough will feel smoother, stronger, and hold its shape a bit better.
Bulk Fermentation and Shaping the Healthy Homemade Sourdough Loaf
After those four sets of folds are done, cover the dough one last time and let it sit undisturbed for about three hours. This is bulk fermentation. You are looking for the dough to increase in volume by about 50 percent—it won’t double! You should see some nice bubbles popping on the surface. When it looks puffy, turn the dough gently onto a surface where you’ve sprinkled just a tiny bit of flour. Shape it into a smooth round, let it chill out for 20 minutes, and then you need to tighten it up into a final boule shape. Place it seam-side up in your heavily floured banneton. Now, cover it tightly and pop it in the fridge for 8 to 14 hours. This cold fermentation is key to the flavor of your Healthy Homemade Sourdough Loaf.
Cold Proofing and Oven Preparation
While the dough is chilling overnight, get your oven ready. About 30 minutes before you plan to bake, put your Dutch oven right inside the cold oven and preheat everything to 450°F. That pot needs to get screaming hot! You want that intense heat shock when the dough goes in.
Baking for a Crisp Crust and Soft Crumb
When the oven is fully preheated, carefully take your dough out of the fridge. Place a piece of parchment paper over the banneton, flip the whole thing over, and the dough should release onto the paper. Score the top quickly with your razor—a deep slash lets the steam escape where you want it to. Carefully transfer the dough (using the parchment paper as a sling) into the hot Dutch oven. Put the lid on and immediately drop the temperature down to 425°F. Bake it covered for 25 minutes. This steamy environment gives you that big oven spring. After 25 minutes, take the lid off, lower the heat again to 400°F, and bake uncovered for another 15 to 20 minutes until it’s deeply golden brown. You want that internal temperature to hit around 200°F for a perfectly cooked crumb!
Tips for Success with Your Healthy Homemade Sourdough Loaf
Sourdough is wonderful, but it can be picky! I’ve made enough loaves to know a few little tricks that turn a flat pancake into a beautiful Healthy Homemade Sourdough Loaf. My first big tip is regarding your starter—always use it when it’s at its peak activity, which is usually right after it doubles. If you wait too long, the yeast starts to run out of steam.
Second, don’t be afraid of sticky dough during the stretch and folds. If you keep your hands slightly wet instead of dumping flour everywhere, you’ll find the dough becomes less sticky as you work it. It’s counterintuitive, but it works wonders for developing strength! You can see some of my other baking tips on my Medium page.
Third, when shaping the final boule, be gentle but firm. You want to create surface tension without degassing all the beautiful air bubbles you spent hours creating. A tight skin on the outside holds the shape in the oven.
Fourth, trust your eyes over the clock during bulk fermentation. If your kitchen is cold, it might take five hours instead of three for that 50% volume increase. Look for the bubbles and the jiggly texture—that’s how you know your Healthy Homemade Sourdough Loaf is ready for the fridge!
- Use peak levain activity for the best rise.
- Keep hands wet, not floured, during stretch and folds.
- Shape gently to maintain internal gas structure.
- Watch the dough volume, not just the timer, during bulk ferment.
Storing and Enjoying Your Healthy Homemade Sourdough Loaf
You’ve done the hard work, and now you’re staring at that gorgeous loaf, smelling that incredible tang. Resist the urge to slice immediately! The structure of your Healthy Homemade Sourdough Loaf is still setting up inside, and cutting it too soon will result in a gummy texture, no matter how perfectly you baked it.
Once it’s completely cool, this bread is fantastic for everything. It makes the best avocado toast, and it holds up perfectly for hearty sandwiches. For storage, I find keeping it cut-side down on a cutting board helps keep the crust crisp for a day or two. If you have a lot left over, slicing it and freezing it is the best way to keep that fresh-baked quality around! Check out my focaccia bread recipe if you want another bread option!
Optimal Cooling Time Before Slicing
This is probably the hardest step for me, honestly! You absolutely must let your loaf cool on a wire rack for a minimum of two hours, but three is even better. When the bread comes out of that hot Dutch oven, the starches inside are still gelatinized, kind of like thick pudding. As it cools, that moisture redistributes and the internal structure firms up. If you slice it hot, you’ll get that sticky, slightly wet crumb that just won’t do justice to your beautiful bake. Wait for it—your patience will be rewarded with that soft, perfect interior!
Here’s a quick guide for keeping your loaf perfect:
| Storage Method | Duration | Best For |
|---|---|---|
| Room Temperature (Cut-side down) | 1-2 Days | Immediate use, preserving crust |
| Airtight Bag | Up to 4 Days | Softer crust texture |
| Freezer (Sliced) | Up to 3 Months | Long-term freshness |
Frequently Asked Questions About Your Healthy Homemade Sourdough Loaf
I get so many questions about this recipe, especially when people are new to sourdough! It’s totally normal to have a few loaves that don’t look perfect on the first try. Don’t get discouraged! Most issues with the Healthy Homemade Sourdough Loaf usually come down to temperature or timing.
Here are the top three things folks ask me about:
Q1. My crumb is dense, not soft. What went wrong?
Usually, a dense crumb means one of two things: either your levain wasn’t active enough when you mixed it, or you didn’t develop enough strength during the stretch and folds. If the dough isn’t strong, it can’t hold the gas bubbles, and it collapses a bit during baking. Make sure your dough has visibly increased by 50% during bulk fermentation!
Q2. Why didn’t my loaf score well? It just ripped everywhere!
Scoring needs a sharp blade and a confident hand! If you’re using a dull knife, it will drag the dough instead of slicing it cleanly. Also, make sure the dough is cold when you score it—the coldness keeps the surface tight. If your Healthy Homemade Sourdough Loaf is too warm when you try to slash it, it smears.
Q3. How do I know if my starter is healthy enough for this bread?
Your starter should reliably double in size within four to six hours after feeding, and it should pass the float test when it’s at its peak. If your starter is sluggish, try feeding it twice a day for a couple of days before you start the levain build. A happy starter makes for a happy loaf! For more visual inspiration, check out my Pinterest boards.
Q4. Can I skip the cold fermentation in the fridge?
You really shouldn’t skip the cold proofing for this Healthy Homemade Sourdough Loaf. That long, slow chill is what develops that complex, tangy flavor and firms up the dough so it holds its shape beautifully when it hits the hot Dutch oven.
Nutritional Estimates for This Healthy Homemade Sourdough Loaf
Now, listen, I’m a baker, not a nutritionist, so please take these numbers with a grain of salt—pun intended! Since we are using whole wheat flour, this is definitely a healthier option for your daily bread, but these values are just rough estimates based on the ingredients we used for this Healthy Homemade Sourdough Loaf.
It’s simple, whole food baking, and that’s what matters most to me!
| Nutrient | Estimate Per Slice |
|---|---|
| Calories | 150 |
| Protein | 5 g |
| Carbohydrates | 30 g |
| Fat | 1 g |

Amazing 3 Step Healthy Homemade Sourdough Loaf
- Total Time: 1 day 1 hour
- Yield: 1 loaf, about 12 slices
Description
Healthy homemade sourdough loaf with a crisp crust and soft crumb. Naturally fermented with simple ingredients for better flavor and everyday baking.
Ingredients
- Levain: 1/4 cup active sourdough starter
- Levain: 1/3 cup bread flour
- Levain: 1/3 cup water
- Dough: 3/4 cup water, room temperature
- Dough: 1 cup ripe levain
- Dough: 2 cups bread flour
- Dough: 1 cup whole wheat flour
- Dough: 1 1/2 teaspoons fine salt
Instructions
- Stir together the levain ingredients in a small bowl. Cover and let rise until doubled and bubbly, about 4 hours.
- In a large bowl, mix water and levain until milky. Add bread flour, whole wheat flour, and salt. Stir until a shaggy dough forms.
- Cover and rest 30 minutes to hydrate the flour.
- Perform four sets of stretch and folds every 30 minutes over 2 hours until the dough becomes smooth and elastic.
- Cover and let bulk ferment until the dough increases about 50 percent in volume and shows bubbles on the surface, about 3 hours.
- Turn dough onto a lightly floured surface, shape into a round, and rest 20 minutes.
- Tighten the shape into a boule and place seam-side up in a floured bowl or banneton.
- Cover and refrigerate 8 to 14 hours for cold fermentation.
- Preheat oven to 450°F with a Dutch oven inside for 30 minutes.
- Turn dough onto parchment, score the top, and transfer to the hot Dutch oven. Cover and bake at 425°F for 25 minutes.
- Remove lid, lower oven to 400°F, and bake 15 to 20 minutes more until deeply golden and the internal temperature reaches about 200°F.
- Cool completely on a rack for at least 2 hours before slicing.
Notes
- This recipe is ideal for beginners wanting a reliable everyday bread.
- Perfect for sandwiches, toast, and meal prep.
- Prep Time: 40 minutes
- Cook Time: 45 minutes