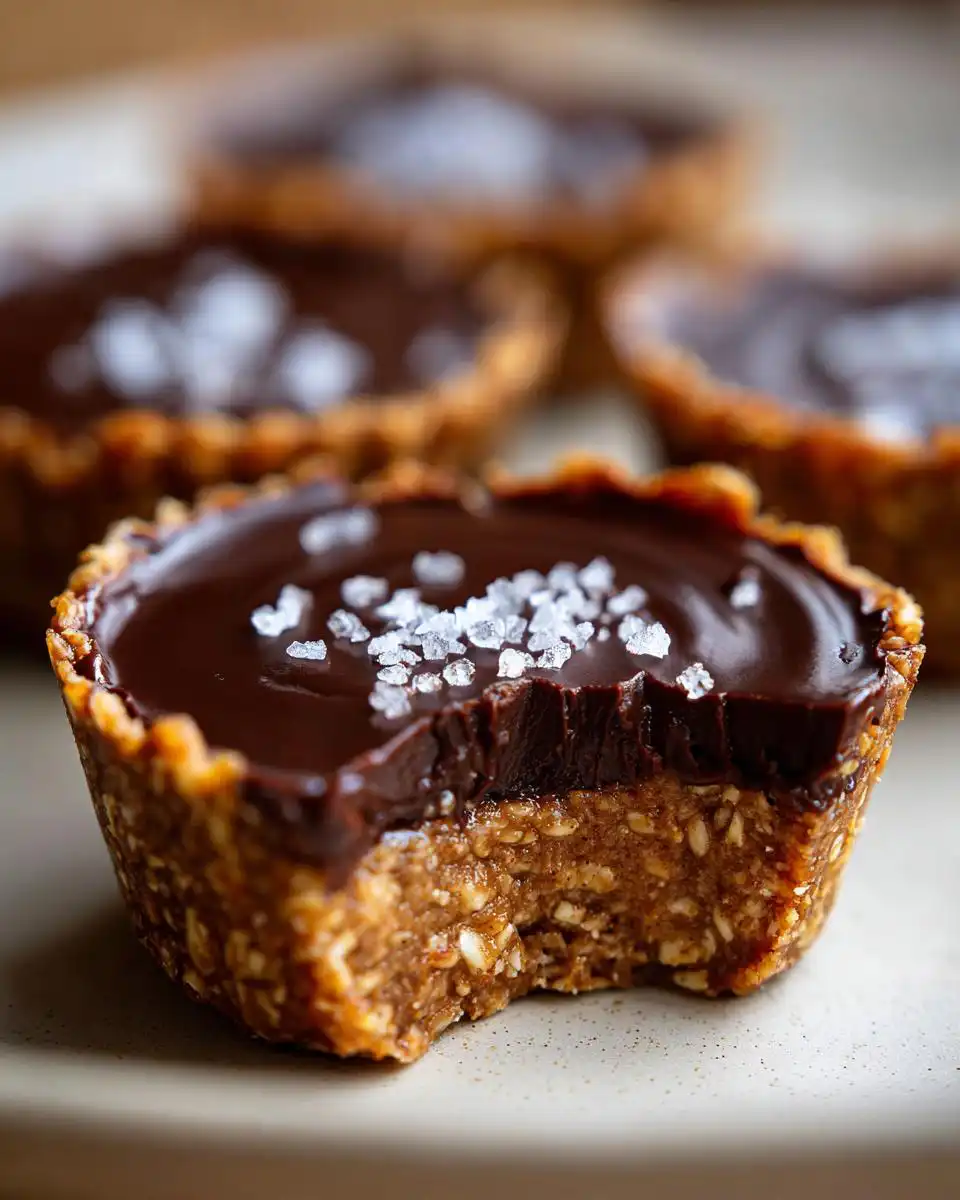
When the craving hits for something sweet but you absolutely cannot turn on the oven—because maybe it’s ninety degrees outside or maybe you just don’t want to wait—I have the perfect solution. Forget complicated baking; we are diving headfirst into the world of no bake peanut butter oat cups! These little delights are my absolute secret weapon when I need a quick, satisfying snack that actually feels a little bit wholesome.
I first started making these years ago when I was trying to keep up with my little brother’s endless after-school hunger pangs. He needed energy, and I needed speed. I realized that blending creamy peanut butter with rolled oats and topping it with dark chocolate was the perfect combination. Seriously, you can mix these up faster than you can decide what movie to watch. You can see more quick snack ideas on my Medium profile!
The beauty of this recipe is how simple it is. We are talking minimal fuss, maximum reward. They set up beautifully in the fridge and they are just sweet enough without feeling like you’ve eaten an entire dessert. Trust me, once you try this version of no bake peanut butter oat cups, you won’t look back!
Gathering Your Ingredients for No Bake Peanut Butter Oat Cups
Listen, the beauty of these no bake peanut butter oat cups is that you probably have almost everything sitting in your pantry right now. There’s no fancy technique needed here, but you do need the right ratios to make sure they set up perfectly and aren’t too oily or too crumbly.
The most important prep step is grinding those oats! Don’t skip that part or you’ll end up with chunky cups instead of that wonderfully dense base. Also, make sure your peanut butter is the creamy kind—the natural, oily kind can sometimes throw off the balance, so stick to the regular stuff for consistency.
Ingredient List for No Bake Peanut Butter Oat Cups
Here is exactly what you need to make a dozen of these fantastic no bake peanut butter oat cups:
| Ingredient | Amount | Notes |
|---|---|---|
| Creamy Peanut Butter | 1 ½ cups | Must be creamy, not crunchy! |
| Rolled Oats | 1 ½ cups | These need to be ground first. |
| Pure Maple Syrup | ¼ cup | For sweetness and binding. |
| Semisweet Chocolate Chips | 1 cup | For the glossy topping. |
| Coconut Oil | 1 teaspoon | Helps the chocolate melt smooth. |
| Flaky Salt | For garnish | Don’t skip this—it balances the sweet! |
Essential Equipment for Perfect No Bake Peanut Butter Oat Cups
You don’t need a stand mixer or a fancy oven for these, which is why I love them so much! For perfect no bake peanut butter oat cups, you only need a few key items. First up, grab your food processor. This is non-negotiable because we have to turn those rolled oats into a fine powder. It makes all the difference! If you are looking for other quick recipes, check out my quick snack board ideas.
Next, you’ll need a microwave-safe bowl for melting the chocolate and peanut butter mixture. Finally, and this is crucial, line a standard 12-cup muffin tin with paper liners or those handy silicone ones. Trust me, trying to peel these out without liners is a sticky nightmare!
Step-by-Step Guide to Making No Bake Peanut Butter Oat Cups
Okay, now for the fun part! Since we aren’t baking anything, this process is all about quick mixing and setting. If you have a helper, this goes even faster, but honestly, you can whip up a batch of these no bake peanut butter oat cups before your coffee even cools down. Just make sure you have your muffin tin lined and ready to go before you start mixing the base!
Preparing the Oat Base for Your No Bake Peanut Butter Oat Cups
First things first, we need to deal with those oats. Toss your rolled oats right into the food processor. You want to pulse these until they look like a coarse flour—not completely powdery like wheat flour, but definitely not whole oats anymore. This grinding step is what gives our no bake peanut butter oat cups that nice, uniform texture instead of a mouthful of chewiness.
Next, grab a microwave-safe bowl. Combine your creamy peanut butter and the maple syrup. Microwave this mixture for about 45 seconds to a minute. You want it warm enough to stir easily, but not scorching hot. Stir it until it’s beautifully smooth. Now, dump in those ground oats and mix everything together. It will get really thick and sticky, almost like dough. If it seems too stiff, just add a tiny splash—maybe a teaspoon—of extra maple syrup or peanut butter until it holds together well when you squeeze it.
Assembling and Setting the Peanut Butter Oat Cups
With your base mixed, turn your attention to your prepared muffin tin. You should have 12 liners ready. Scoop the peanut butter oat mixture evenly into each liner. This is where you need to use some muscle! Press that mixture down firmly using the back of a small spoon or your clean fingers. You want a nice, compact base so it doesn’t crumble when you try to eat it later. Make sure the tops are as flat as you can get them—this makes the chocolate layer look professional!
Creating the Glossy Chocolate Topping
Now for the layer everyone waits for! In a separate small bowl, combine your chocolate chips and that tiny teaspoon of coconut oil. The coconut oil is my little trick; it keeps the chocolate shiny and soft enough to bite through easily when chilled. Microwave this in short bursts—30 seconds at a time—stirring well between each one. Stop heating as soon as you see just a few tiny lumps left, then just stir until those melt away. That prevents the chocolate from seizing up on you! You can find more of my baking tips on Pinterest.
Carefully spoon the melted chocolate over the firm peanut butter bases. I try to use the back of the spoon to gently spread it right to the edges of the liner. You only need a thin layer here; we aren’t making fudge cups!
Final Touches and Chilling Time for No Bake Peanut Butter Oat Cups
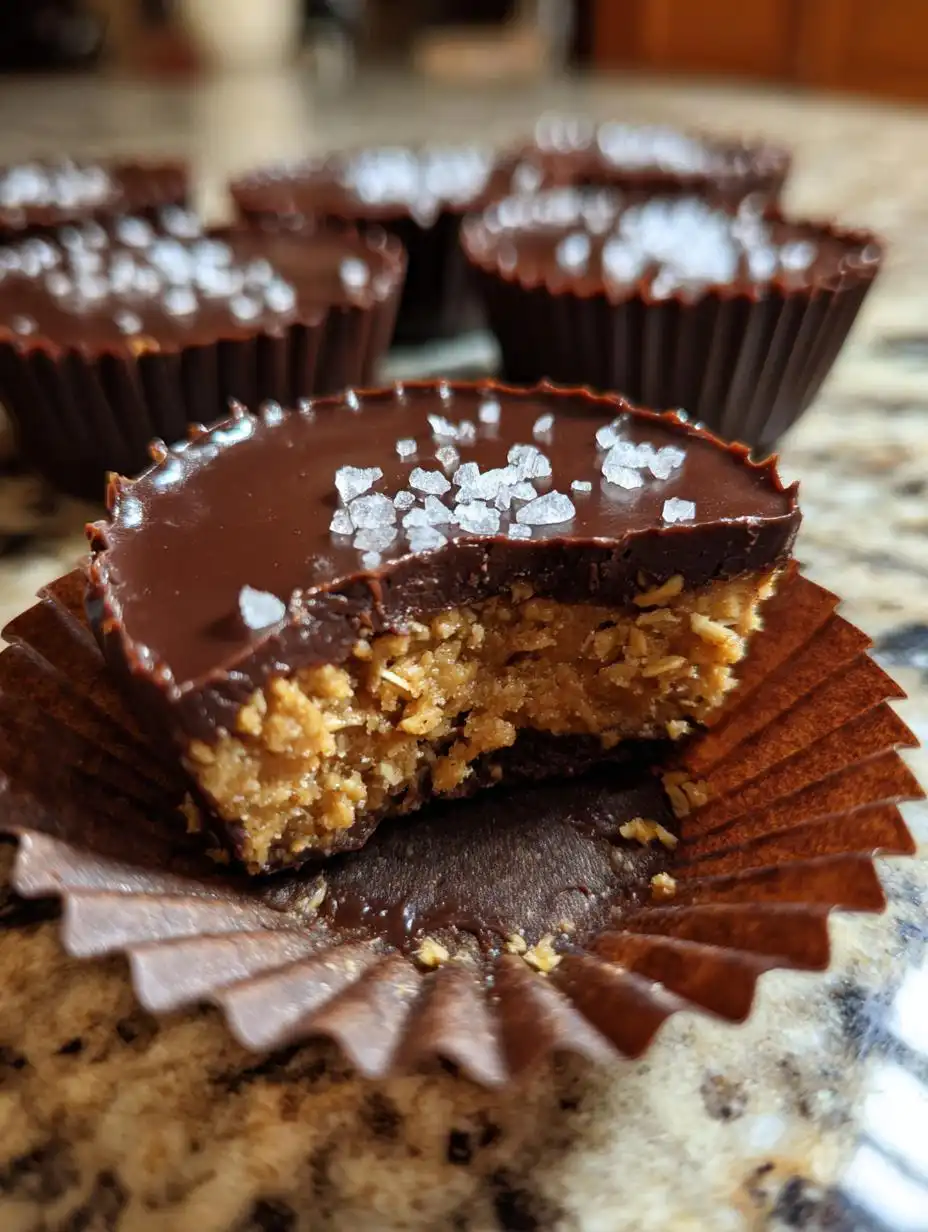
This is my favorite part because it makes them look gourmet! Grab your flaky sea salt—don’t use regular table salt, please, the texture is all wrong here—and sprinkle just a tiny pinch over the top of the wet chocolate on each cup. This contrast between salty, sweet, and rich is what makes these no bake peanut butter oat cups irresistible. If you are interested in other oat-based recipes, check out these banana oatmeal bars.
Now, they need to set. Pop the entire muffin tin into the refrigerator. They need at least two to three hours in there. Resist the urge to taste-test before the full time is up, or you’ll end up with a sticky mess on your fingers. They need that time to firm up completely so they release cleanly from the liners!
Tips for Success with No Bake Peanut Butter Oat Cups
Even though these are no-bake, there are a few little secrets I’ve learned over the years to make sure your no bake peanut butter oat cups turn out absolutely perfect every time. Don’t worry if your mixture seems a little too dry or too wet when you first mix it—that’s common!
If the oat mixture seems too dry and crumbly when you try to press it into the liners, don’t panic! Just stir in another teaspoon of warm peanut butter or maple syrup until it holds its shape when squeezed. If it seems too oily or loose, add another tablespoon of your finely ground oats. This little adjustment fixes most texture issues. For other great snack ideas, see my recipe for dark chocolate nut bars.
My other big tip for amazing no bake peanut butter oat cups is about the chilling. Don’t try to rush this step. If you pull them out too early, the chocolate layer will smear everywhere when you try to remove the paper liners. Give them the full two to three hours in the fridge to get rock solid. Also, remember that flaky salt garnish; it truly elevates these from simple snacks to something special!
Frequently Asked Questions About No Bake Peanut Butter Oat Cups
I get so many questions about these little gems, especially since they are so quick to make! People always want to know about substitutions or how to keep them fresh. I’ve gathered the most common things folks ask about when making their first batch of no bake peanut butter oat cups.
It’s important to remember that since we aren’t baking, the binding agents are really important, so some substitutions work better than others. But don’t worry, we can usually find something that works for everyone! If you are looking for baked oat recipes, check out my guide on baked oats for weight loss.
Can I substitute the peanut butter in these no bake peanut butter oat cups?
Yes, you absolutely can swap out the peanut butter, though the texture might change slightly depending on what you use. Almond butter works beautifully and gives a slightly different nutty flavor to your no bake peanut butter oat cups. Cashew butter is also a great choice if you want something milder. The key is that whatever nut butter you choose, it needs to be creamy, not the super-natural kind where the oil separates easily, or you might need to add an extra teaspoon of maple syrup to keep things bound together.
How long do no bake peanut butter oat cups last in the refrigerator?
These no bake peanut butter oat cups keep wonderfully! Because they are stored cold, they stay fresh and firm for quite a while. I usually keep mine in an airtight container in the fridge, and they are perfect for up to five days. If you try to keep them longer than that, the oats might start to soften a bit too much. They don’t really need to be frozen, but if you wanted to make a huge batch, you could freeze them layered between wax paper for about a month!
Storing and Handling Your No Bake Peanut Butter Oat Cups
Once you’ve successfully chilled your no bake peanut butter oat cups and they are firm—which is the crucial moment—storage is easy breezy. Since we skipped the oven, these treats rely on the cold to maintain their structure. You want to keep them airtight to prevent them from absorbing any weird smells from the fridge. I always use a glass container with a tight-fitting lid.
They are best enjoyed cold, straight from the refrigerator. If you leave them out on the counter for too long, especially on a warm day, that chocolate topping starts to get soft and gooey, and the peanut butter base can get a little too soft to handle. But honestly, they rarely last long enough in my house to worry about them going bad!
| Storage Method | Duration | Notes |
|---|---|---|
| Airtight Container (Refrigerator) | Up to 5 Days | Best method for maintaining texture. |
| Freezer | Up to 1 Month | Layer with wax paper. Thaw slightly before eating. |
Understanding the Nutrition in Your No Bake Peanut Butter Oat Cups
Now, I won’t pretend these are kale smoothies, because they have chocolate and peanut butter, and that’s just not going to happen! However, they are certainly a better choice than a store-bought candy bar, especially since we are using pure maple syrup and whole rolled oats. I always tell people that these no bake peanut butter oat cups are a snack that actually fills you up!
Since we aren’t using flour or baking soda, the nutritional profile comes mostly from the fats in the peanut butter and the natural sugars. Please remember that these numbers are just my best estimates based on the ingredients I use, as exact values can change based on what brand of peanut butter you grab. They are a good rough guide!
| Nutrient | Estimate Per Cup |
|---|---|
| Calories | 220 |
| Fat | 13g |
| Carbohydrates | 20g |
| Protein | 7g |

12 Amazing No Bake Peanut Butter Oat Cups
- Total Time: 10 minutes
- Yield: 12 cups
- Diet: Vegetarian
Description
These no bake peanut butter oat cups blend creamy peanut butter, oats, and chocolate for a quick, wholesome treat ready in minutes. They are perfect for quick snacks and store well in the refrigerator.
Ingredients
- 1 ½ cups creamy peanut butter
- 1 ½ cups rolled oats
- ¼ cup pure maple syrup
- 1 cup semisweet chocolate chips
- 1 teaspoon coconut oil
- Flaky salt for garnish
Instructions
- Place oats in a food processor and blend until finely ground.
- Combine peanut butter and maple syrup in a microwave-safe bowl. Heat for 40 to 60 seconds until warm, then stir until smooth.
- Add ground oats to the peanut butter mixture and mix until thick and slightly sticky. If too dry, stir in 1 teaspoon of peanut butter or maple syrup at a time.
- Line a 12-cup muffin pan with paper or silicone liners.
- Evenly spoon the oat mixture into each liner, pressing it down firmly to create a smooth base.
- In a small microwave-safe bowl, add chocolate chips and coconut oil. Microwave in 30-second bursts, stirring until melted and glossy.
- Pour a thin layer of melted chocolate over each peanut butter oat base, spreading evenly with the back of a spoon.
- Sprinkle lightly with flaky salt.
- Refrigerate for 2 to 3 hours until firm.
- Remove from liners and store in an airtight container in the refrigerator for up to 5 days.
Notes
- For best results, ensure the oat mixture is thick and slightly sticky before pressing into liners.
- Store leftovers in an airtight container in the refrigerator for up to 5 days.
- Prep Time: 10 minutes
- Cook Time: 0 minutes
- Category: Dessert
- Method: No Bake
- Cuisine: American