When I tell people I made a batch of chocolate peanut butter truffles, they usually ask if I spent all day over a double boiler. Nope! That’s the absolute best part about this recipe—it’s pure magic and zero fuss. Seriously, you won’t believe how quickly these creamy chocolate peanut butter truffles come together.
This isn’t some fussy, baked dessert that requires turning on the oven. We’re talking about mixing a few simple things, rolling them into little balls, and letting the freezer do the heavy lifting. My kitchen gets way too hot in the summer, so these no-bake peanut butter balls are my go-to when a serious chocolate craving hits fast. They look so fancy sitting on a platter, but trust me, the prep time is ridiculously short.
You only need about 20 minutes of active work to get these gorgeous treats ready for their chill time. If you’ve ever needed a last-minute impressive dessert that tastes like your favorite candy bar, you’ve found it right here. Let’s get mixing!
Gathering Your Ingredients for Perfect Chocolate Peanut Butter Truffles
Okay, so you’ve got your game face on, and you’re ready to whip up a batch of these incredible chocolate peanut butter truffles. The beauty of this recipe is that everything probably lives in your pantry already, which is why they’re my emergency dessert go-to. If you are looking for other quick dessert ideas, check out my banana oatmeal bars.
Don’t overthink the ingredients here; simplicity is the key to making these perfect peanut butter balls. Just make sure your butter is properly softened—that’s important for the texture, trust me. Let’s break down exactly what you need to pull off this no-bake masterpiece.
Essential Components for Chocolate Peanut Butter Truffles
For the inside dough, we need one cup of creamy peanut butter. Make sure it’s the smooth kind; I find crunchy ones make the centers too crumbly, and we want that velvety texture for our dark chocolate nut bars. Next, grab a quarter cup of unsalted butter, and it absolutely has to be softened—room temperature, not melted! If it’s too cold, it won’t blend right.
Then we sweeten things up with a full cup of powdered sugar, which dissolves beautifully. A half teaspoon of vanilla extract is all you need for that classic, comforting flavor. For the outer shell, you’ll melt down ten ounces of semi-sweet chocolate chips. Here’s a little trick: always mix in one tablespoon of coconut oil with your chocolate chips. It keeps the chocolate coating thin and shiny, so it doesn’t crack when you bite into your chocolate peanut butter truffles.
Optional Garnish for Your Chocolate Peanut Butter Truffles
Now, this part is totally up to you, but I highly recommend it! If you want a little crunch to offset all that creamy goodness, grab two tablespoons of finely chopped roasted peanuts. You sprinkle these right on top while the chocolate coating is still wet.
It adds a fantastic texture contrast to the smooth centers of your chocolate peanut butter truffles. If anyone you’re serving has a severe nut allergy, just skip this part entirely. They’ll be just as amazing without the garnish! For more sweet inspiration, you might enjoy my lemon raspberry eclairs recipe.
Quick Equipment List for Making Chocolate Peanut Butter Truffles
You don’t need a fancy stand mixer or any complicated gadgets to make these amazing chocolate peanut butter truffles. Keep it simple! I usually grab two medium-sized bowls—one for mixing the center and one for melting the chocolate coating.
You’ll need a sturdy spoon or a hand mixer for the initial dough, but seriously, a wooden spoon works just fine. Make sure you have a baking sheet lined with parchment paper ready for setting the peanut butter balls. A simple fork is the secret weapon for dipping all those gorgeous chocolate peanut butter truffles!
Step-by-Step Instructions to Create Your Chocolate Peanut Butter Truffles
Alright, here is where the magic happens! Don’t rush these steps, especially the chilling parts, because that’s what keeps your chocolate peanut butter truffles from turning into a gooey mess. We’re moving fast, but we need the freezer to help us out a bit.
Preparing the Creamy Peanut Butter Centers
First things first, grab your medium mixing bowl. We’re going to beat the one cup of creamy peanut butter right along with that quarter cup of softened butter. You want this mixture to be completely smooth—no lumps of cold butter hiding in there! Keep mixing until it looks uniform and perfectly creamy. This forms the base of our delicious peanut butter balls.
Next, gently mix in your cup of powdered sugar and that half teaspoon of vanilla extract. Be careful when you add the sugar, or you’ll end up with a white cloud all over your kitchen! Keep mixing until all that sugar disappears and you have a thick, manageable dough. It should feel like playdough, ready to be shaped.
Now, take a small spoon or a cookie scoop and portion out about one-inch balls of that dough. Roll them gently between your palms to make them smooth little spheres. Place them neatly onto that parchment-lined baking sheet. Try to make them all roughly the same size so they look uniform when they’re finished chocolate peanut butter truffles.
Chilling and Melting for the Chocolate Coating
This is a critical step! Get that tray of peanut butter balls into the freezer. They need to be rock solid before they hit the hot chocolate, or they’ll just fall apart. I set my timer for a solid 30 minutes. Don’t skimp on this—30 minutes firm is the goal!
While those are chilling, we tackle the coating. Grab your microwave-safe bowl. Combine the ten ounces of semi-sweet chocolate chips with that tablespoon of coconut oil. Remember what I said about the oil? It keeps things silky smooth! Microwave on medium power, but only for 30-second bursts. Stir well after every 30 seconds. Keep doing this until it’s totally melted and glossy. If you blast it on high, you’ll burn the chocolate, and you’ll have to start over!
Dipping and Setting Your Chocolate Peanut Butter Truffles
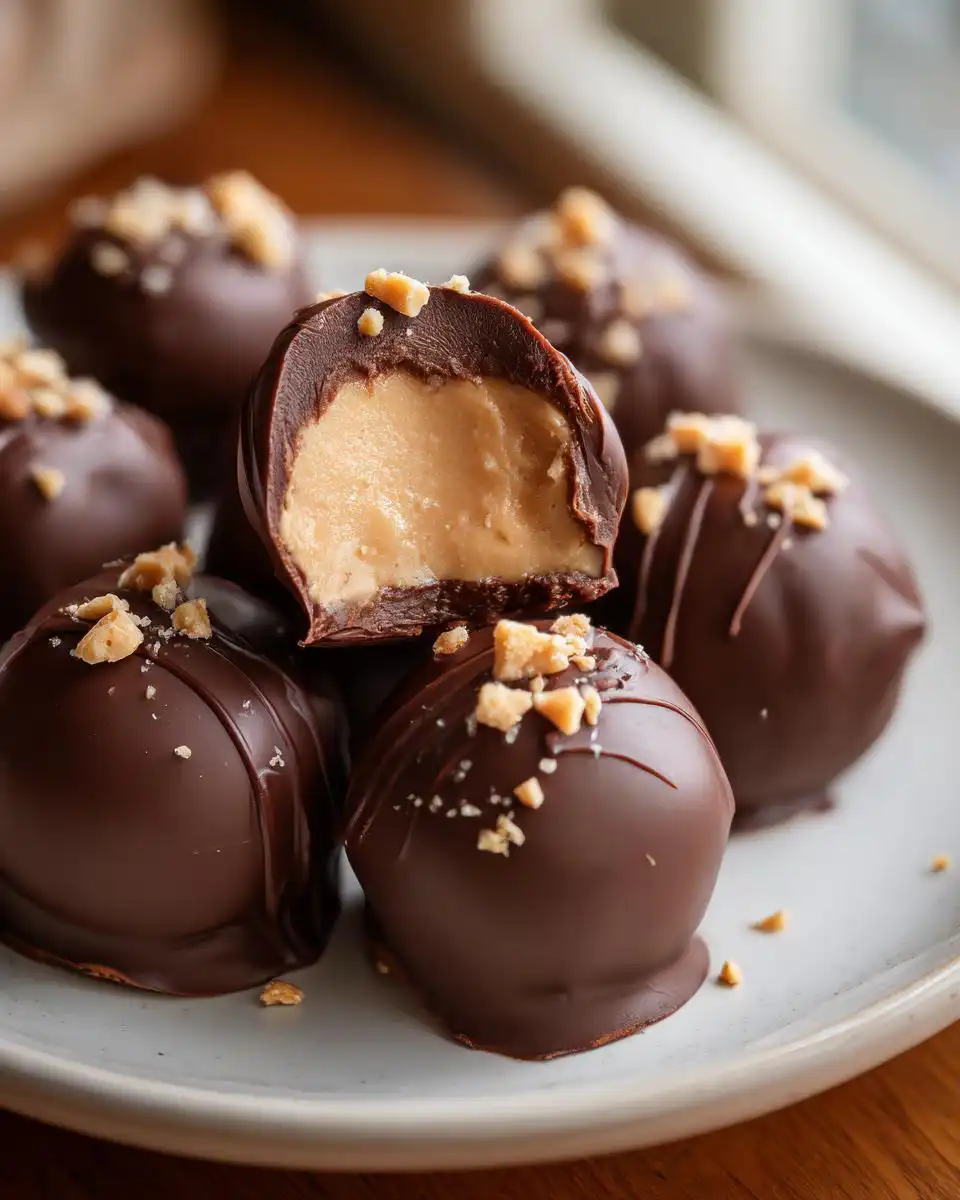
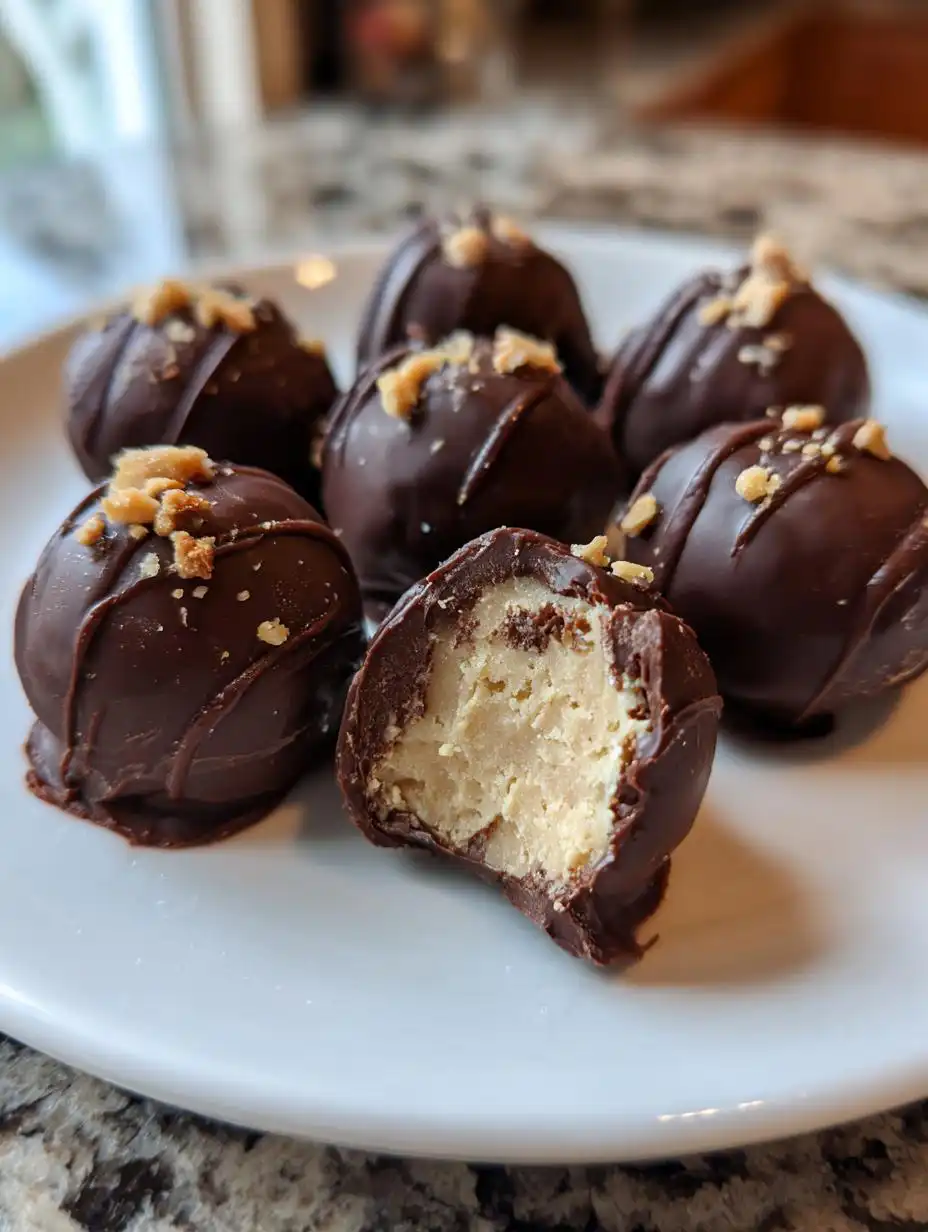
Once your centers are frozen solid, it’s dipping time! Take the chilled balls out, and working quickly, drop one into the melted chocolate. Use a fork—that’s the best tool for this—to roll it around until it’s completely covered. Lift it out with the fork, gently tap the side of the bowl to let all that excess chocolate drip back in. We don’t want thick, clumpy chocolate peanut butter truffles, right?
Place the coated ball back onto the parchment paper. If you’re using chopped peanuts, sprinkle them on immediately before the chocolate sets. Repeat this process until every ball is dipped. Then, back into the fridge they go for at least one hour. You need the chocolate to set completely hard before you try to move or store these beautiful chocolate peanut butter truffles.
Tips for Success When Making Chocolate Peanut Butter Truffles
Even though these chocolate peanut butter truffles are super easy, there are always a few little things that can trip you up. If you follow these suggestions, you’ll get perfect, professional-looking results every single time. Trust me, I learned these the hard way! You can find more helpful tips on my Medium profile.
First, the temperature of your fillings matters more than you think. If your peanut butter dough balls are too warm when they hit the melted chocolate, the cold center will cause the warm coating to seize up and get grainy almost instantly. That’s why the 30-minute freeze is non-negotiable for these peanut butter balls.
Second, when melting the chocolate, patience is your best friend. If you use high power in the microwave, you risk scorching the chocolate, which makes it impossible to get a smooth coating on your chocolate peanut butter truffles. Stick to medium power and stir frequently. If it still seems too thick, add just a tiny bit more coconut oil, not milk or butter, to thin it out.
Finally, if you want that super clean, smooth look, use a toothpick or a small skewer to gently poke the bottom of the truffle right after you set it on the parchment paper. This pushes out any little pool of chocolate that gathers at the base. Once they are almost set, you can gently slide the toothpick out and smooth the tiny hole over with the tip of a warm knife. It makes those finished chocolate peanut butter truffles look like they came from a candy shop! For more easy recipes, check out my broccoli cheddar pasta.
Storing and Serving Your Homemade Chocolate Peanut Butter Truffles
Now that you’ve made these perfect chocolate peanut butter truffles, the biggest struggle is not eating them all in one sitting! Because we used fresh ingredients like butter in the center, these are not shelf-stable like a hard candy. They absolutely need to stay cool to maintain their shape and texture.
You want to serve these slightly chilled, but not ice-cold straight from the coldest part of the fridge. Let them sit on the counter for about 15 minutes before you plan to eat them. This softens the peanut butter center just enough for that perfect melt-in-your-mouth moment. Here’s a quick summary of how to keep your homemade chocolate peanut butter truffles fresh. You can see more of my recipe ideas on Pinterest.
| Storage Location | Recommended Time |
|---|---|
| Airtight Container in Refrigerator | Up to 2 weeks |
| Freezer (Airtight) | Up to 3 months |
Storage Guidelines for Optimal Freshness
These chocolate peanut butter truffles must be stored in the refrigerator. If you leave them out on the counter for too long, especially in a warm room, that soft peanut butter filling will start to sweat right through the chocolate coating, and your beautiful truffles will get messy fast. Keep them in a tightly sealed, airtight container so they don’t absorb any other fridge smells.
They stay wonderfully fresh for about two weeks in the fridge, but honestly, they rarely last that long around my house! If you need to make a huge batch ahead of time, you can absolutely freeze them. Just make sure they are in a freezer-safe container with a good seal. They freeze beautifully, and you can thaw them overnight in the fridge before serving.
Frequently Asked Questions About Chocolate Peanut Butter Truffles
I get so many questions about these little gems, and honestly, that just proves how much everyone loves a simple, delicious no-bake dessert! Here are the things I hear most often when people try making their first batch of chocolate peanut butter truffles.
Q1. Can I use natural, oily peanut butter instead of creamy Jif-style?
Oh, I wouldn’t recommend it for this recipe. Natural peanut butter tends to separate, and it makes the dough too soft and oily, which means your peanut butter balls won’t freeze firm enough. Stick to the standard creamy kind for the best results in this no-bake dessert.
Q2. My chocolate coating is cracking when I try to eat it. What went wrong?
That usually happens for one of two reasons! Either your truffle centers weren’t frozen solid enough, or you added too much liquid to the chocolate while melting. Remember, the coconut oil is the only thing that should thin the chocolate. If the centers are cold, the chocolate coating should snap nicely, not crack sharply.
Q3. Can I substitute the coconut oil in the chocolate coating?
You can, but coconut oil is magic here because it melts smoothly and hardens quickly, which helps release the chocolate peanut butter truffles from the parchment paper easily. If you absolutely can’t use it, use a neutral vegetable shortening instead, but avoid butter, which can cause the chocolate to seize.
Q4. How long do these peanut butter balls last once they are refrigerated?
They are best eaten within the first week, but they stay perfectly safe and delicious for up to two weeks when stored tightly sealed in the fridge. They are such a great make-ahead treat!
Estimated Nutritional Snapshot of Chocolate Peanut Butter Truffles
Now, I always tell folks not to worry too much about the numbers when you’re enjoying something this delicious, but for those of you who like to track things, here’s a rough idea of what’s in one of these amazing chocolate peanut butter truffles. Remember, these are just estimates, since every swirl of peanut butter is a little different!
We get a good balance of fat and carbs in these little treats. Here is the breakdown for one truffle:
| Nutrient | Amount (Approx.) |
|---|---|
| Calories | 140 |
| Fat | 10 g |
| Carbohydrates | 12 g |
| Protein | 3 g |

Amazing 20 Min Chocolate peanut butter truffles
- Total Time: 22 minutes plus chilling
- Yield: 24 truffles
Description
Creamy chocolate peanut butter truffles come together fast with no baking required. Dip smooth peanut butter centers in melted chocolate for bite-sized treats everyone loves.
Ingredients
- 1 cup creamy peanut butter
- 1/4 cup unsalted butter softened
- 1 cup powdered sugar
- 1/2 teaspoon vanilla extract
- 10 ounces semi-sweet chocolate chips
- 1 tablespoon coconut oil
- 2 tablespoons finely chopped roasted peanuts (optional garnish)
Instructions
- Beat peanut butter and softened butter in a medium bowl until smooth.
- Add powdered sugar and vanilla extract then mix until a dough forms.
- Scoop 1-inch balls onto a parchment-lined baking sheet and roll smooth with your hands.
- Freeze balls for 30 minutes until firm.
- Melt chocolate chips and coconut oil in a microwave-safe bowl on medium power in 30-second intervals stirring after each until smooth.
- Dip each chilled ball into melted chocolate using a fork letting excess drip off.
- Place back on the baking sheet and sprinkle with chopped peanuts if desired.
- Refrigerate for 1 hour until chocolate sets completely.
- Store truffles in an airtight container in the refrigerator.
Notes
- These truffles are best stored in the refrigerator.
- Prep Time: 20 minutes
- Cook Time: 2 minutes