

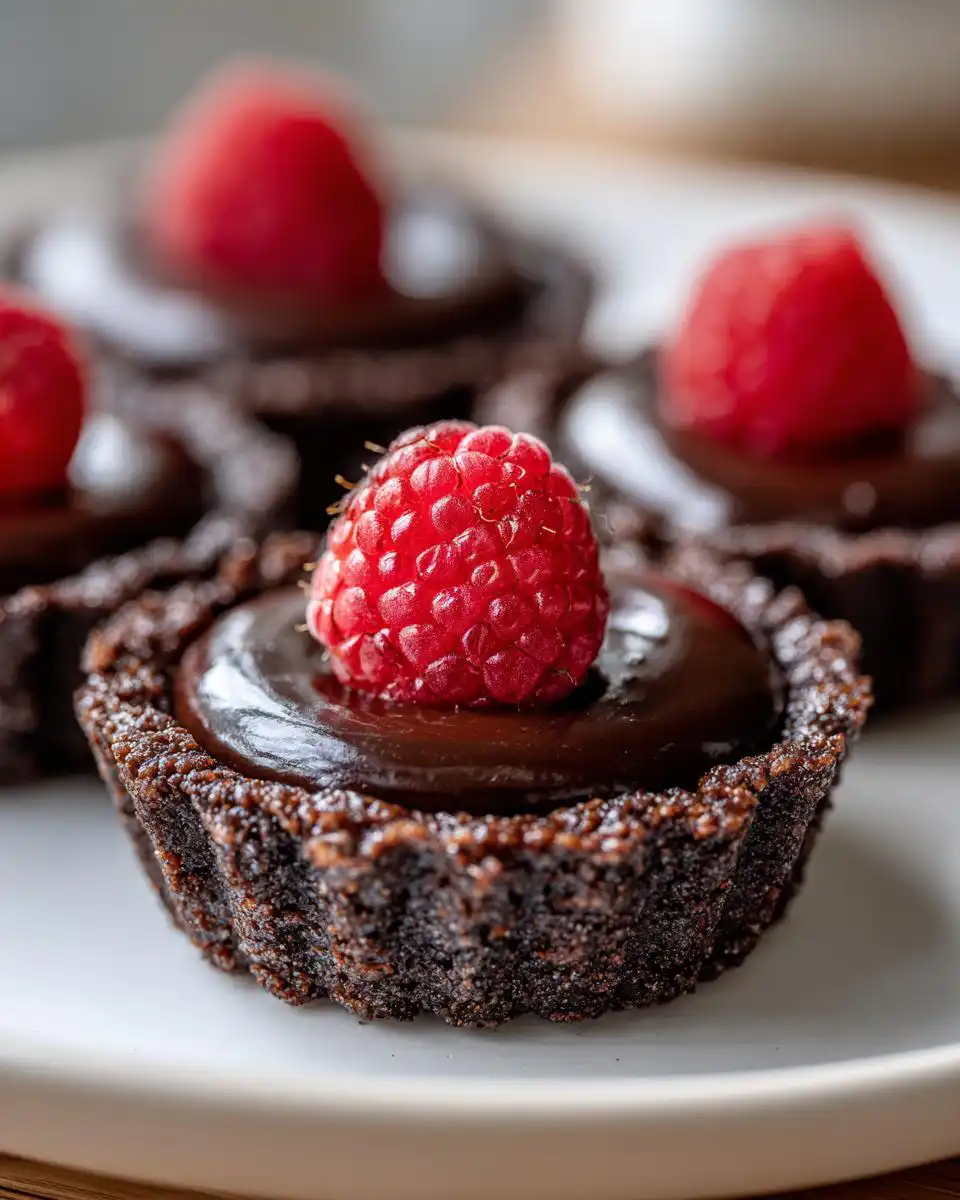
If you think baking gluten-free means giving up on dessert that looks absolutely stunning at a dinner party, think again! I’m going to let you in on my absolute favorite little secret: these Gluten-Free Chocolate Raspberry Tartlets. Honestly, they look like they came straight from a fancy French bakery, but trust me, they are shockingly simple to pull together, even on a busy weeknight.
I started making these tartlets specifically when my niece went gluten-free a few years back, and suddenly I needed something impressive for holiday gatherings that everyone could enjoy. The rich cocoa crust is just divine, and the way the fresh raspberry pops against the dark chocolate ganache? Perfection! You won’t believe how quickly these come together, either. They bake up in about ten minutes, and the whole process feels more like assembling jewels than actual baking.
The best part is that the crust uses coconut flour—no weird gluten-free blends needed here. If you’re looking for an elegant, dairy-free treat that truly wows your guests without demanding hours of your time, stick with me. We’re going to make magic!
Why You Love These Gluten-Free Chocolate Raspberry Tartlets
I know what you’re thinking: elegant desserts take forever, right? Wrong! These tartlets are designed for real life. They deliver maximum wow-factor with minimal fuss, making them a weeknight favorite or a showstopper for company. Here is exactly why I keep this recipe on constant rotation.
Quick Preparation Time
- Total time is only about 30 minutes, which is unheard of for a dessert this fancy!
- The crust bakes up fast—just 8 to 10 minutes in a hot oven.
Rich Dairy-Free Dessert
- We use coconut milk and coconut oil, meaning these are completely dairy-free without sacrificing that rich, creamy texture in the filling.
- The dark chocolate and cocoa give you that deep, satisfying flavor that feels indulgent.
Perfect Portion Control
- This recipe yields exactly 24 mini tartlets, which is fantastic. Everyone gets their own perfect little bite, and it makes serving simple—no slicing needed!
Gathering Ingredients for Gluten-Free Chocolate Raspberry Tartlets
Okay, now that you know how easy these are, we need to talk about ingredients. Baking gluten-free, especially with alternative flours like coconut flour, means you need to be super precise. Don’t try to eyeball these measurements—it really does matter when you’re working without gluten structure!
I laid out the ingredients below exactly as they should be measured for the best result. We are only using a few powerhouse ingredients here, so make sure they are good quality, especially that chocolate. We need to separate them into the three main components: the crisp crust, the luscious filling, and the bright topping. Getting this right is half the battle for perfect Gluten-Free Chocolate Raspberry Tartlets.
Cocoa Crust Components
For the base that holds everything together, grab these five things. Remember, we need the coconut oil softened, not melted! That’s a key texture point for the dough.
- Three-quarters cup coconut flour
- One-quarter cup unsweetened cocoa powder
- One-quarter teaspoon fine sea salt
- One-third cup pure maple syrup
- One-half cup coconut oil, softened
Smooth Chocolate Ganache Filling
This filling is so simple, but it relies on the quality of your chocolate. I always use a bar that’s at least 70% cacao, and make sure it’s dairy-free if you are sticking to the recipe!
- Six ounces dark chocolate, finely chopped
- One-third cup canned full-fat coconut milk
Fresh Toppings
And finally, the fresh pop of color and flavor that makes these tartlets sing!
- Twenty-four fresh raspberries
Essential Equipment for Your Tartlets
You don’t need a ton of fancy gadgets for these, which is another reason I love them! But having the right tools makes the process smooth sailing. Don’t substitute when it comes to the pan—you really need the mini muffin tray for the right shape.
- A 24-cavity mini muffin pan is non-negotiable for getting those perfect little shells.
- You’ll need a couple of mixing bowls—one for the dry crust ingredients and one larger one for combining everything.
- A small saucepan is necessary for gently heating that coconut milk for the ganache.
- A small knife or even a toothpick is handy for gently coaxing the baked crusts out of the pan later on.
Step-by-Step Instructions for Gluten-Free Chocolate Raspberry Tartlets
This is where the real fun begins! Even though the ingredient list is short, the technique for these Gluten-Free Chocolate Raspberry Tartlets is what guarantees that crisp crust and that melt-in-your-mouth filling. Don’t rush the cooling stage; that’s my biggest piece of advice here because coconut flour dough can be a little fragile when warm.
Preparing the Cocoa Crust
First things first, get that oven warmed up to 350 degrees Fahrenheit. You want it ready to go! Lightly grease every single cup in your 24-cavity mini muffin pan. I use a little bit of the coconut oil we use in the recipe for this—it keeps everything consistent.
In a mixing bowl, whisk together your dry stuff: the coconut flour, the cocoa powder, and that tiny pinch of salt. Whisking really well helps break up any little clumps in the coconut flour, which can be stubborn. Next, pour in the maple syrup and the softened coconut oil. Now, this dough is going to feel a little strange; it won’t look like traditional flour dough. It’s going to be soft, almost like thick, wet sand.
Use your hands if you need to—seriously, ditch the spoon at this point! Press that dough together until it’s one cohesive ball. Then, divide it up evenly among those 24 little muffin cups. Press the dough firmly into the bottom and then up the sides to create your shell. Make sure the sides aren’t too thick, or they won’t cook through properly. This takes a minute, but it’s important for structure!
Pop that pan into the oven and bake for just 8 to 10 minutes. You’re looking for the edges to look set and maybe just a hair darker. Once they come out, you absolutely must let them cool completely in the pan. If you try to rush this, they will crumble when you try to lift them out. Once cooled, gently use a small knife or even a toothpick to coax them out onto a rack.
Making the Silky Chocolate Ganache
While those shells are cooling down—and be patient!—we make the filling. This is pure decadence, and it’s so easy. Put all your finely chopped dark chocolate into a heatproof bowl. Don’t skip the chopping; smaller pieces melt faster and more evenly.
Now, take your small saucepan and heat that full-fat coconut milk over medium heat. You want it steaming hot—you’ll see little wisps of vapor rising—but please, do not let it boil! Boiling coconut milk can sometimes separate when it hits the chocolate. As soon as it’s steaming, pour it right over your chopped chocolate. Let it sit there, untouched, for a full minute. This is crucial; it lets the heat penetrate the chocolate evenly.
After that minute, just start stirring gently from the center outward. Keep stirring slowly until it all comes together into a gorgeous, glossy ganache. Wow, the smell is incredible! It should look smooth and shiny, with zero lumps remaining.
Assembling and Chilling the Tartlets
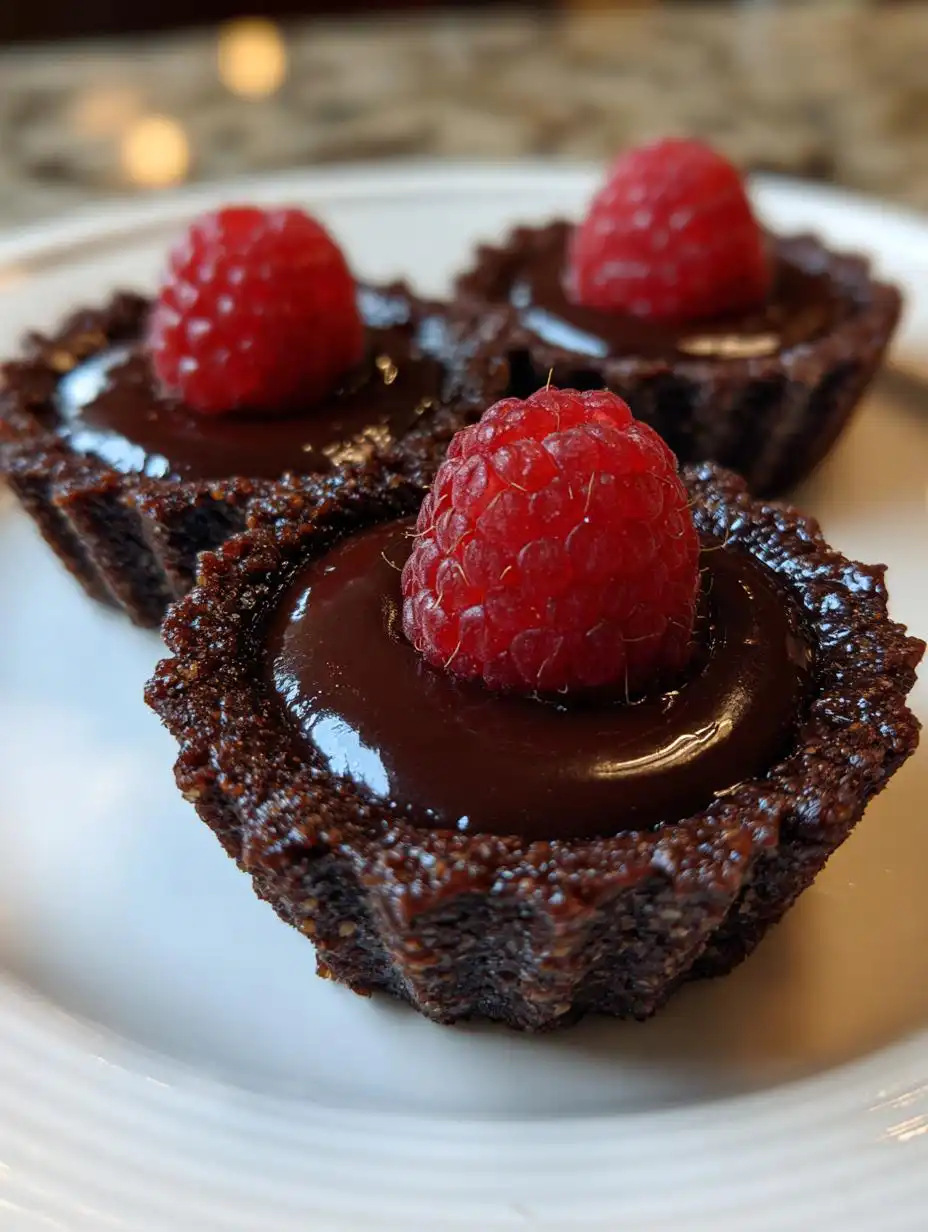
Once your cocoa shells are totally cool, it’s time to fill them up! Spoon the ganache right into the shells, filling them almost to the top. If you have a piping bag, that makes it look extra neat, but a teaspoon works just fine too.
Finally, take one beautiful fresh raspberry and gently place it right on top of the chocolate in the center of each tartlet. They look so elegant already! To make sure that rich ganache sets up nicely before serving, they need a little chill time. Pop the whole tray into the refrigerator for about 15 minutes to let everything firm up.
Achieving a Smooth Ganache
My biggest lesson learned with ganache, especially when using coconut milk instead of heavy cream, is temperature control. If that milk gets too hot, the fat and water separate, and you end up with grainy chocolate instead of glossy silkiness. Remember: steam, not a rolling boil! Also, when you stir, start slow. You want to encourage the emulsion to form gently, not beat all the air out of it.
Ensuring Crust Structure
Coconut flour is thirsty, so pressing the crust firmly into the pan is your insurance policy against crumbling. Really pack it in there along the sides and bottom—think of it as building strong walls! And when they come out of the oven, resist the urge to touch them for at least 20 minutes while they cool in the pan. They stiffen up significantly as they cool, making removal so much easier.
Tips for Perfect Gluten-Free Chocolate Raspberry Tartlets
Even though these tartlets are simple, there are a couple of little tricks that take them from “good” to “I can’t believe these are gluten-free!” I’ve made enough batches to know exactly where things can go sideways, so listen up! These tips will save you from cracked crusts and grainy fillings.
Ensuring Crust Structure
Since we aren’t using any binding gluten, the crust relies entirely on the coconut oil and the pressing action. When you are pressing the dough into those little muffin cups, use the back of a small spoon or your thumb and really press it firmly against the bottom and up the sides. You want a solid wall! If the crust is too thin or loose, it will definitely break when you try to lift it out after baking. Also, I cannot stress this enough: they must be stone cold before you try to remove them.
Achieving a Smooth Ganache
The ganache is the star, and it needs to be mirror-shiny. My note about not boiling the coconut milk is critical here. Coconut milk is prone to separating when it gets too hot, which results in a gritty, oily chocolate mess instead of that lovely, smooth texture you want. When you start stirring that hot milk into the chocolate, use a small whisk or a spatula and stir slowly. Just guide the ingredients together until they melt and emulsify. Don’t whip it! Gentle stirring is the secret to the silkiest chocolate filling for your Gluten-Free Chocolate Raspberry Tartlets.
Storage and Keeping Your Gluten-Free Chocolate Raspberry Tartlets Fresh
These little beauties are best eaten the day they are made, but I know that’s not always realistic! Luckily, because of the sturdy cocoa crust and the high-fat ganache, these Gluten-Free Chocolate Raspberry Tartlets hold up really well in the fridge. You don’t want them sitting out on the counter, especially with the fresh fruit.
Refrigeration Guidelines
You need to keep these chilled. Place the finished tartlets in an airtight container. The recipe note mentioned this, but I want to reiterate: they are good for up to three days when stored this way in the refrigerator. Just make sure the lid seals tight so they don’t absorb any weird fridge smells!
Reheating or Serving Cold
Honestly, I never reheat them. The ganache is designed to be perfectly set and firm when cold, and that fresh raspberry tastes best chilled. So, pull them out of the fridge about 10 minutes before you plan to serve them so they aren’t rock hard, but they should definitely be served cool.
Frequently Asked Questions About This Dessert
I get so many questions about these little gems! People are always worried that because they are gluten-free, they must be fussy or fragile. Nope! Here are the answers to the most common things I hear about making these Gluten-Free Chocolate Raspberry Tartlets.
Can I make the crust ahead of time
Oh, you absolutely can, and I often do this when I’m planning a big gathering! You can bake the cocoa crusts and let them cool completely, then store them in an airtight container at room temperature for a day. Just wait until the day you plan to serve them to make the ganache and assemble them. If you store the finished, filled tartlets, they must go straight into the fridge.
What kind of dark chocolate works best
This is where you splurge a little bit. Since the ganache is just chocolate and coconut milk, the chocolate flavor really shines through. I highly recommend using a high-quality bar, preferably 70% cacao or higher, because the flavor is so intense. Since the recipe is naturally dairy-free, make absolutely sure the dark chocolate bar you buy doesn’t contain any hidden milk solids or butterfat!
Are these tartlets suitable for freezing
I would advise against freezing the fully assembled tartlets. While the crust and ganache would probably freeze fine, the fresh raspberries on top tend to get mushy and weep water when they thaw. If you want to freeze them, bake the shells only, cool them completely, and freeze those in an airtight container. Then, thaw them overnight before filling them with the fresh ganache and raspberries the day you want to serve them.
Estimated Nutritional Data for Gluten-Free Chocolate Raspberry Tartlets
Since we are working with natural ingredients like coconut flour and maple syrup, the exact nutritional breakdown can vary slightly depending on your specific dark chocolate percentage. Please remember that these numbers are just an estimate per single tartlet, based on the ingredients listed above. I try to keep track, but sometimes those unknowns pop up! You can find more visual inspiration for recipes like this on my Pinterest page.
Nutritional Breakdown Table
Here’s a quick look at what you can expect in one of these little bites:
| Metric | Value |
|---|---|
| Serving Size | 1 tartlet |
| Calories | 110 |
| Fat | 7g |
| Carbohydrates | 10g |
| Protein | 1g |
| Sugar | Unknown |
Share Your Gluten-Free Chocolate Raspberry Tartlets Experience
Now it’s your turn! I’ve shared all my secrets for getting that perfect cocoa crust and that shiny ganache. Did you try them out? Did your guests rave about how elegant they looked? I absolutely love hearing how my recipes turn out in your kitchens. For more behind-the-scenes thoughts on healthy eating, check out my Medium profile.
Drop a comment below and let me know how they went, or give this recipe a rating so other bakers know they can trust this method. Happy baking!
Print
Shocking 24 Gluten-Free Chocolate Raspberry Tartlets
- Total Time: 30 minutes
- Yield: 24 tartlets
- Diet: Gluten Free
Description
These gluten-free chocolate raspberry tartlets have a rich cocoa crust and a smooth chocolate filling, finished with fresh raspberries. They are elegant and simple to make.
Ingredients
- ¾ cup coconut flour
- ¼ cup unsweetened cocoa powder
- ¼ teaspoon fine sea salt
- ⅓ cup pure maple syrup
- ½ cup coconut oil, softened
- 6 ounces dark chocolate, finely chopped
- ⅓ cup canned full-fat coconut milk
- 24 fresh raspberries
Instructions
- Preheat oven to 350°F. Lightly grease a 24-cavity mini muffin pan with coconut oil.
- In a mixing bowl, whisk coconut flour, cocoa powder, and salt until combined.
- Add maple syrup and softened coconut oil. Mix until a soft dough forms, pressing out any lumps. Use your hands if needed to bring the dough together evenly.
- Divide the dough evenly among the muffin cups and press into the bottoms and up the sides to form small shells.
- Bake for 8 to 10 minutes, until the crusts are set and slightly darkened around the edges.
- Cool completely in the pan, then gently lift out tart shells using a small knife or toothpick.
- Place chopped dark chocolate in a heatproof bowl.
- In a small saucepan, heat coconut milk over medium heat until steaming but not boiling. Pour it over the chocolate and let stand for 1 minute.
- Stir until smooth and glossy to form the ganache.
- Spoon or pipe the ganache into the cooled tart shells.
- Top each tartlet with a fresh raspberry.
- Chill for 15 minutes to set before serving. Store leftovers refrigerated in an airtight container for up to 3 days.
Notes
- These tartlets are dairy-free.
- The recipe yields 24 small tartlets.
- Store any remaining tartlets in an airtight container in the refrigerator for up to 3 days.
- Prep Time: 20 minutes
- Cook Time: 10 minutes
- Category: Dessert
- Method: Baking
- Cuisine: American


