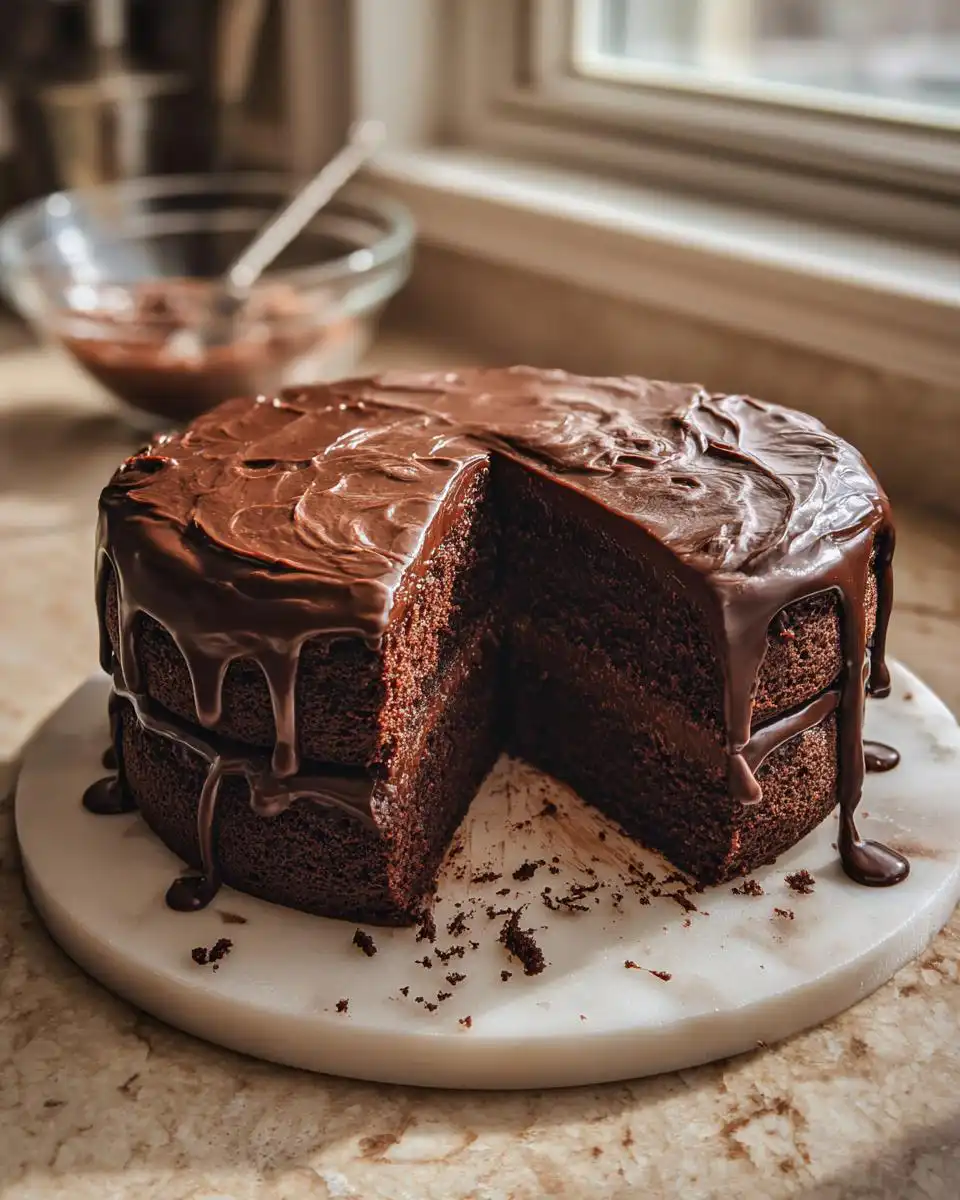
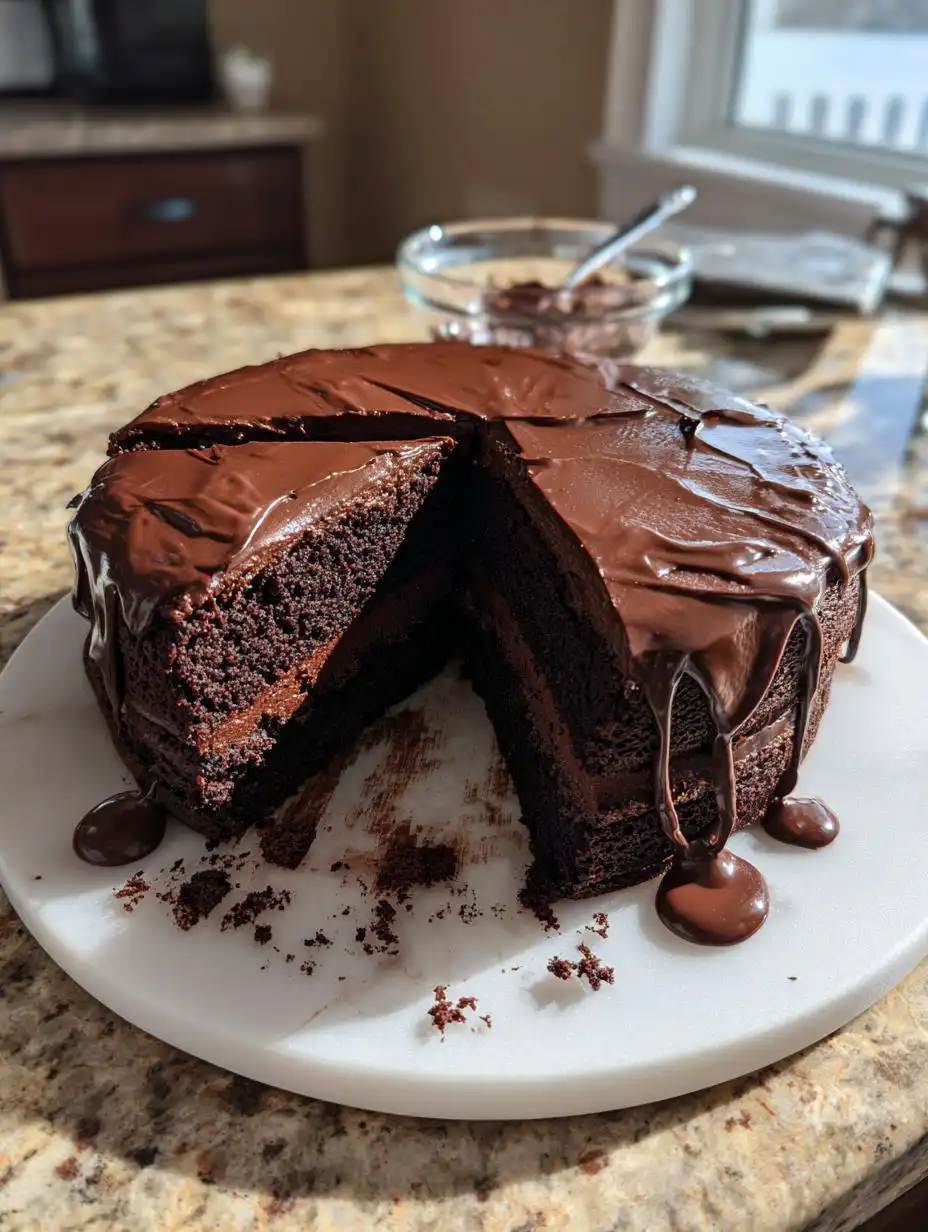
If you’ve been hunting for that show-stopping dessert that tastes like it came from a fancy patisserie, stop looking right now! I’ve been perfecting this Chocolate Ganache Cake recipe for years, and trust me, it’s the one you need. The layers are unbelievably tender—not dry or crumbly like some chocolate cakes you find—and the filling is pure, thick, glossy magic.
What makes this recipe my absolute favorite for birthdays? It’s the contrast! You get that fluffy, rich cake base, then the dense, creamy ganache filling, and finally, that perfect, smooth chocolate drip cascading down the sides. It looks complicated, but I promise if you follow my steps, you’ll pull off the best homemade fudge cake you’ve ever had. Let’s get baking!
Essential Components for Your Chocolate Ganache Cake
Okay, so before we dive into the mixing bowl chaos, let’s talk ingredients. For a cake this decadent, you can’t skimp on quality, especially when it comes to the chocolate! This recipe relies on a few key players to give you those tender layers and that incredible mouthfeel. Don’t let the ingredient list scare you; it breaks down nicely into the cake itself and the amazing ganache.
The key to this whole operation is ensuring your wet ingredients are at room temperature, especially those eggs. It makes a huge difference in how they emulsify with the fats in the batter. And seriously, use good dark chocolate. It’s the star of the show!
Ingredient Breakdown for Perfect Chocolate Ganache Cake Layers
For the actual cake layers, we are building flavor right from the start. We need the dry bits whisked together first—that’s 2 cups of flour, 1 and three-quarters cups of sugar, plus the cocoa powder, baking powder, baking soda, and just a half teaspoon of salt. Make sure you whisk these well so you don’t get any baking soda clumps!
For the wet side, we use buttermilk and sour cream together to give the crumb a wonderful tang and softness. That’s three-quarters cup buttermilk and a half cup sour cream. Then you add the oil, three room-temp eggs, and 2 teaspoons of vanilla. The powerhouse ingredient that makes this Chocolate Ganache Cake so dark and rich? A full three-quarters cup of hot brewed coffee whisked in last. Don’t skip the hot coffee; it blooms the cocoa and makes the cake taste intensely chocolatey.
Creating the Rich Dark Chocolate Ganache Filling and Drip
This is where we get serious about chocolate! For the filling and frosting, you’ll need 18 ounces of finely chopped dark chocolate and 2 cups of heavy cream. You heat the cream until it just simmers, pour it over the chocolate, let it sit, and stir until it’s that gorgeous, glossy look. You chill this down, and then you whip half of it until it’s fluffy for the outside frosting. The other half stays dense for the filling between the layers.
For the beautiful drip effect that makes this Chocolate Ganache Cake so photogenic, we keep the ratio a little looser. You’ll use just 3 ounces of dark chocolate and a quarter cup of heavy cream. This mix stays runnier when it cools slightly, perfect for spooning over the top edge so it cascades down the sides exactly how you want it to!
Equipment Needed for Baking This Chocolate Ganache Cake
You don’t need a ton of fancy gadgets for this one, but having the right basics makes life so much easier! Make sure you have two 8-inch round cake pans—parchment paper is non-negotiable for easy removal. You’ll definitely need a sturdy whisk for the batter, and a hand or stand mixer is a lifesaver for whipping that ganache later on. And of course, a wire rack is essential for cooling everything down properly before we start assembling the cake.
Step-by-Step Instructions for Your Chocolate Ganache Cake
Alright, let’s get down to the real work! Baking this cake is a two-part event: getting those layers baked perfectly, and then making the chocolate magic happen with the ganache. Don’t rush the cooling steps; that’s where most people go wrong! We want everything stable before we start stacking our beautiful Chocolate Ganache Cake.
Baking the Tender Cake Layers
First things first, get your oven preheated to 350°F. Grease and line those two 8-inch cake pans—I always double-check my parchment paper fit. Now, remember how we talked about mixing? Whisk all your dry ingredients together in a big bowl until they look uniform. Then, in a separate bowl, mix up the buttermilk, sour cream, oil, eggs, and vanilla. Pour the wet into the dry and mix until it’s *mostly* smooth. Don’t overdo it!
This batter is going to be thin, so don’t panic! Pour in that hot coffee last and whisk gently until everything is lump-free. That thin batter is what gives you the tender crumb in the finished Chocolate Ganache Cake. Divide it evenly between your prepared pans. They go into the oven for about 25 to 30 minutes. You know they’re done when that toothpick comes out clean, or maybe with just a few moist crumbs clinging to it. Let them sit in the pans for about 10 minutes before you carefully flip them out onto wire racks to cool completely. Seriously, cool them completely, or that ganache will melt right off!
Assembling and Finishing the Chocolate Ganache Cake
While the cakes cool, make your main ganache. Heat the 2 cups of heavy cream until it’s simmering, then pour it over the 18 ounces of chopped dark chocolate. Let it sit for five minutes—don’t touch it! Then stir slowly until it’s glossy. Now, this is crucial for the structure of your Chocolate Ganache Cake: chill that ganache for about 30 minutes until it’s thick enough to spread but not rock hard. Divide it in half.
Take one half and whip it up until it’s light and fluffy—that’s your frosting! The other half stays dense for the filling. Place your first layer down. Pipe that thick, unwhipped ganache around the edge like a dam, then fill the center. Top with the second layer and frost the entire outside with the fluffy whipped ganache. Chill the assembled cake for another 20 minutes to firm up the frosting.
Finally, the drip! Mix the remaining 3 ounces of chocolate with the quarter cup of cream. Let this cool for about 15 minutes until it’s the perfect drizzling consistency—not watery, but definitely pourable. Spoon it gently over the top edge, encouraging it down the sides. Chill the entire Chocolate Ganache Cake for at least 30 minutes before slicing so those layers stay neat!
Tips for Success with Your Homemade Chocolate Ganache Cake
Baking this magnificent Chocolate Ganache Cake is easy, but a few little tricks will take it from great to absolutely legendary. My number one rule, which I learned the hard way, is using room temperature eggs! They mix so much better into the batter, giving you that smooth, even texture we want. If you want more baking tips, check out my latest posts!
When making the ganache, resist the urge to stir it right away after adding the hot cream to the chocolate. Let it sit for a full five minutes—patience is key here! Also, don’t rush the chilling process for the frosting. If it’s too warm, your final layer will slide right off. If it gets too stiff while chilling, just let it sit on the counter for ten minutes. A perfectly chilled Chocolate Ganache Cake is worth the wait!
Storing and Serving Your Perfect Chocolate Ganache Cake
This rich Chocolate Ganache Cake is actually even better the next day once all those flavors have really settled into the layers. Because of all the cream and butter in the ganache, refrigeration is definitely necessary to keep everything stable and safe. If you’re not eating the whole thing right away, wrap the cut edges tightly with plastic wrap to stop the cake from drying out in the fridge. For more dessert ideas, take a look at these dessert recipes.
When it comes time to serve, you absolutely cannot slice this straight from the refrigerator. It will be hard, and the ganache will crack when you cut it. You need to let your Chocolate Ganache Cake sit on the counter for about an hour before you plan to serve it. That little bit of warmth softens the frosting just enough for that perfect, creamy texture.
Recommended Storage and Reheating Guidelines
Keeping this cake fresh is straightforward, but you do need to be mindful of temperature. The dense chocolate layers hold up really well, but the ganache coating needs protection. If you’re making this for a party, assembling it the day before is ideal! If you need inspiration for party appetizers, check out my quick snack board ideas.
Here’s a quick guide for keeping your beautiful Chocolate Ganache Cake in top shape:
- Counter (Short Term): If it’s cool in your kitchen, you can keep it covered loosely for up to 4 hours after serving.
- Refrigerator: Keep tightly wrapped for up to 4 days.
- Freezing: Yes, you can freeze it! Wrap tightly in plastic wrap, then foil, for up to 2 months. Thaw overnight in the fridge first.
Remember that hour on the counter before slicing—that’s the closest thing to reheating you’ll need! It brings the cake back to that melt-in-your-mouth state.
Frequently Asked Questions About This Chocolate Ganache Cake
I get so many questions about this recipe because everyone wants that perfect, fudgy result! It’s a little more involved than a standard box cake, but the payoff is huge. Here are the things I hear most often when people are making their first Chocolate Ganache Cake. You can see more of my recipe inspiration on Pinterest.
Can I use milk instead of buttermilk in this Chocolate Ganache Cake?
You technically can, but I really, really advise against it if you want the texture to shine. Buttermilk is acidic, and that acid reacts with the baking soda to give you a beautiful lift and tenderness in the crumb. If you absolutely must substitute, you can try making a quick substitute: add one tablespoon of white vinegar or lemon juice to a cup of regular milk and let it sit for five minutes until it curdles slightly. But honestly, the sour cream and buttermilk combo is what makes these layers so moist!
How thick should the ganache drip be before pouring it?
This is all about timing! You want the drip mixture (the smaller batch) cooled down so it doesn’t melt your exterior frosting, but you don’t want it hard. It should be slightly warm to the touch, or thick enough that when you lift your spoon, it falls off in a slow, thick ribbon—not a fast stream. If it looks like thin gravy, wait five more minutes. If it looks like peanut butter, you’ve waited too long and need to warm it slightly over a double boiler.
What is the best way to cut clean slices of this rich cake?
This is the secret to getting those picture-perfect slices of your Chocolate Ganache Cake! The cake must be well-chilled before you attempt to cut it. Run a large, sharp knife under very hot water for about 30 seconds, wipe it completely dry, and then make your cut. Wipe the knife clean and reheat it before every single slice. This keeps the ganache from dragging and makes sure your layers stay beautifully defined! For other baking projects, check out my banana oatmeal bars.
Sharing Your Delicious Chocolate Ganache Cake Experience
There you have it—the ultimate guide to conquering the homemade Chocolate Ganache Cake! I truly hope this recipe brings as much joy to your kitchen as it does to mine. Now that you’ve mastered the drip and the layers, I want to hear all about it! Drop a comment below and let me know how it turned out, or better yet, snap a picture and tag me online. Happy baking, everyone!
Print
Amazing Chocolate Ganache Cake 1 Hour Wait
- Total Time: 1 hour 20 minutes
- Yield: 14 slices
- Diet: N/A
Description
Make a rich chocolate ganache cake with tender layers, creamy ganache filling, and a smooth chocolate drip. Perfect for birthdays or celebrations.
Ingredients
- 2 cups all-purpose flour
- 1 ¾ cups granulated sugar
- ⅜ cup unsweetened cocoa powder
- 2 teaspoons baking powder
- ½ teaspoon baking soda
- ½ teaspoon salt
- ¾ cup buttermilk
- ½ cup sour cream
- ⅜ cup vegetable oil
- 3 large eggs, room temperature
- 2 teaspoons pure vanilla
- ¾ cup hot brewed coffee
- 18 ounces dark chocolate, finely chopped (for filling/frosting)
- 2 cups heavy cream (for filling/frosting)
- 3 ounces dark chocolate, finely chopped (for drip)
- ⅜ cup heavy cream (for drip)
Instructions
- Preheat the oven to 350°F. Grease and line two 8-inch round cake pans with parchment paper.
- In a large bowl, whisk flour, sugar, cocoa powder, baking powder, baking soda, and salt until combined.
- Add buttermilk, sour cream, oil, eggs, and vanilla. Mix until mostly smooth.
- Pour in the hot coffee and whisk until a runny, lump-free batter forms.
- Divide batter evenly into the pans and bake for 25 to 30 minutes, or until a toothpick inserted in the center comes out clean.
- Let the cakes cool in the pans for 10 minutes, then transfer to wire racks to cool completely.
- To make the ganache, heat the heavy cream in a saucepan until it begins to simmer. Pour over chopped chocolate. Let stand 5 minutes, then stir until glossy and smooth.
- Chill the ganache for 30 minutes until thickened but spreadable. Divide in half; whip one half with an electric mixer until fluffy.
- Place one cake layer on a platter. Pipe or spread whipped ganache around the border and fill the center with the unwhipped ganache. Top with the second cake layer and frost all over with remaining whipped ganache.
- For the drip, heat the cream and pour over the chopped chocolate. Stir until smooth, then let cool 15 minutes until slightly thickened. Spoon or pour gently over the top of the chilled cake, letting it drip down the sides.
- Chill the finished cake for at least 30 minutes before slicing for clean layers.
Notes
- Use room temperature eggs for better cake texture.
- Ensure the coffee is hot when added to the batter.
- Chill the ganache enough so it is spreadable but not hard.
- Prep Time: 50 minutes
- Cook Time: 30 minutes
- Category: Dessert
- Method: Baking
- Cuisine: American