If you’re anything like me, sometimes you crave something utterly decadent, intensely flavorful, but you absolutely do not want to turn on the oven. That’s why I’m obsessed with these Chocolate Strawberry Cups. Seriously, they are little bites of heaven, and the fact that they are completely no-bake makes them my go-to when a sweet tooth strikes at 3 PM.
I’ve tried so many “healthy-ish” desserts over the years, and often they fall flat—either they taste too much like coconut oil or they just don’t satisfy that rich chocolate craving. Not these! The secret weapon here is using freeze-dried strawberries, which pack a punch of real berry flavor without introducing extra water that would ruin the chocolate shell. Trust me, this recipe is my tried-and-true method for clean, simple indulgence.
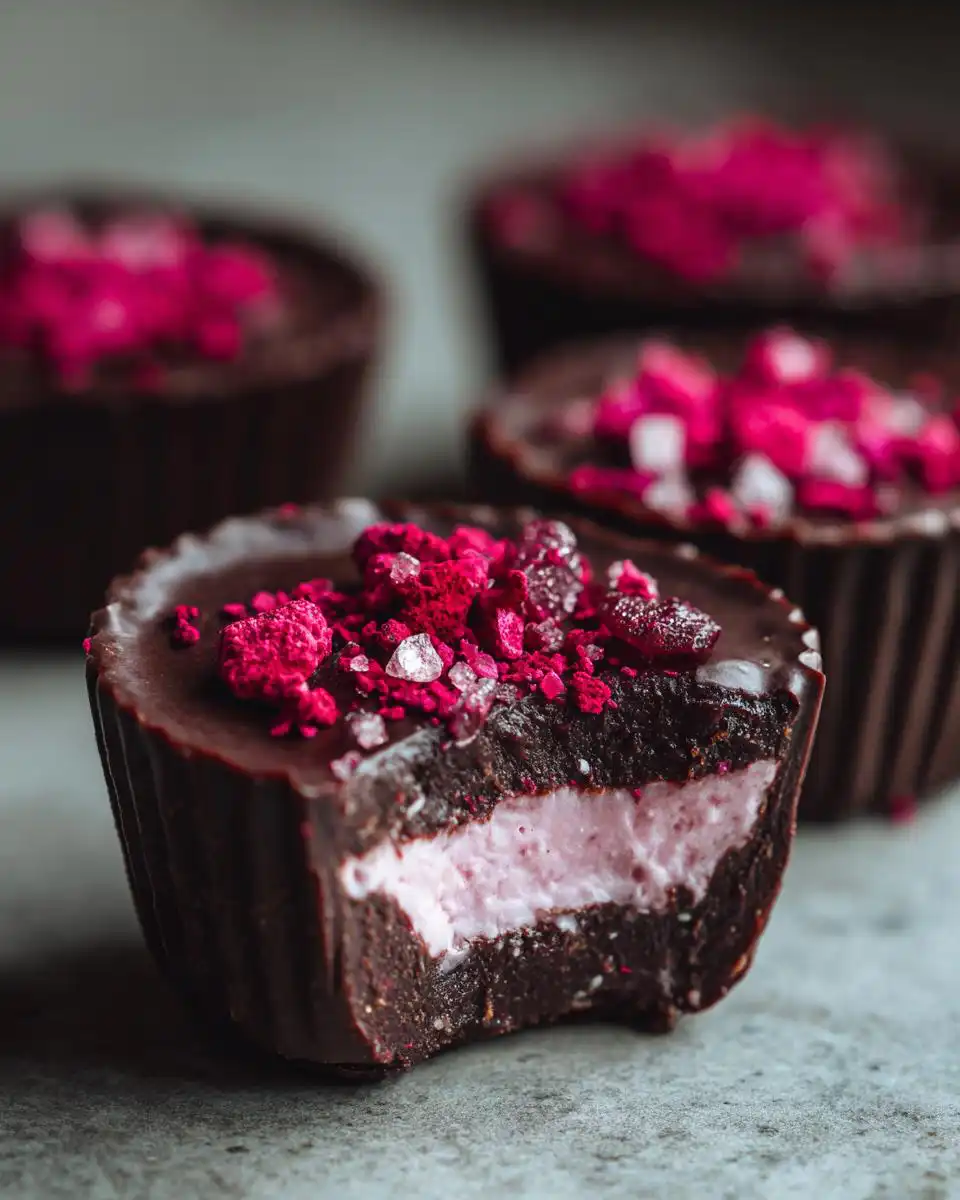
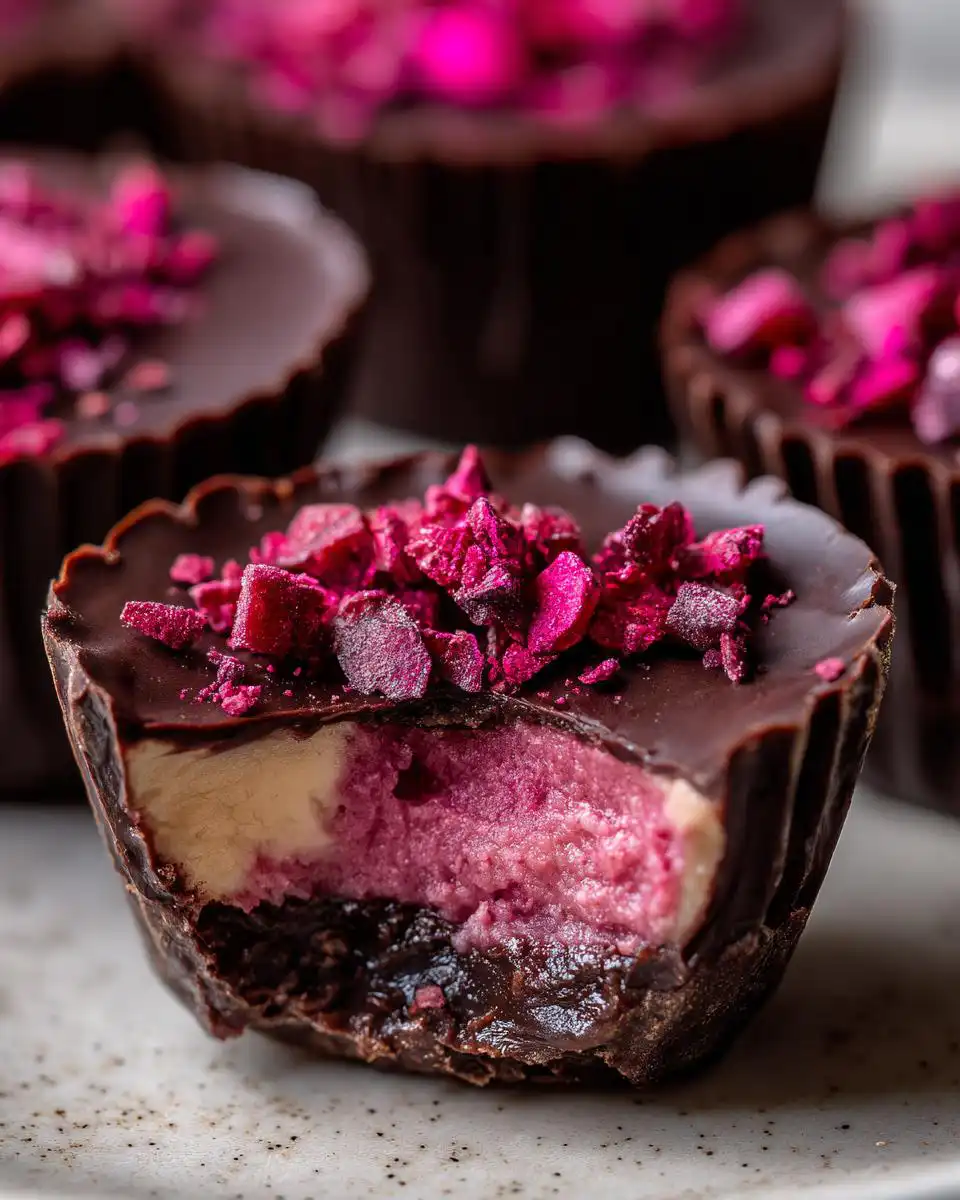
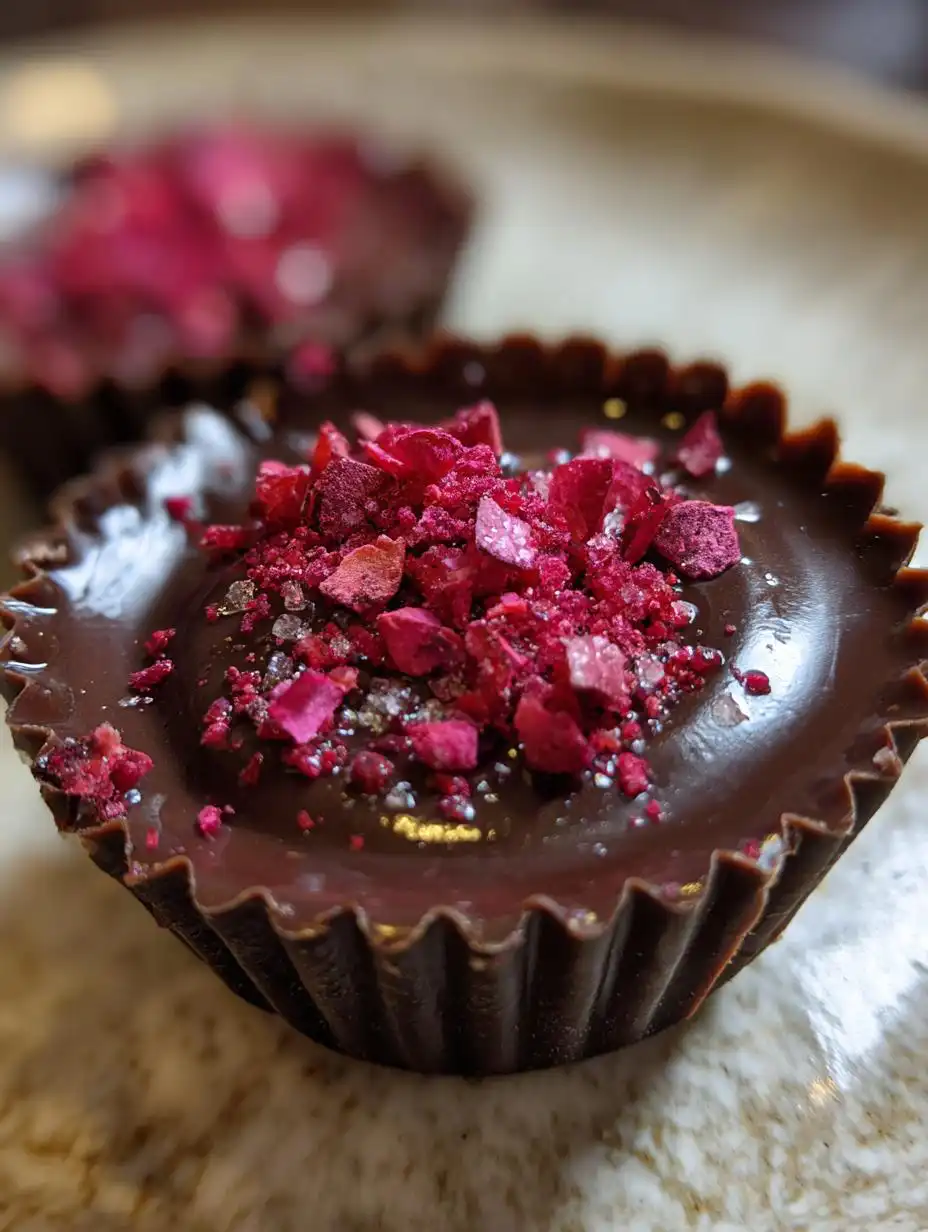
We’re talking about a crisp, snappy chocolate shell holding a creamy, tangy strawberry center. It takes about 20 minutes total if you’re moving quickly, and the payoff is huge. You’ll be showing these off at parties, but honestly, they are just as good eaten straight over the sink when nobody’s looking. Let’s get these simple Chocolate Strawberry Cups made!
Gather Your Ingredients for Chocolate Strawberry Cups
Okay, so this recipe is brilliant because it uses just a few things, but those things have to be the *right* things. Since we aren’t baking anything, the quality of what you put in really shines through. Don’t stress about finding complicated things, though; most of this should be easy to grab. When you look at the list, you’ll notice freeze-dried strawberries are essential. They are the superstar here because they give you that intense, bright strawberry taste without adding any extra water that would make your beautiful chocolate shells melt or get soft. That’s the key to a great no-bake treat!
We’re dividing our haul into two main groups: the shells and the filling. Make sure you have your measuring spoons ready because the amounts here are small but precise. Getting the balance right between the rich cocoa and the sweet fruit is what makes these Chocolate Strawberry Cups addictive. If you want to see more of my sweet creations, check out my Pinterest page for visual inspiration.
Ingredients for the Chocolate Shell
The shell is super simple, really just three things, and they come together fast. You need:
- 1/2 cup coconut oil, melted. This is crucial, honey. The coconut oil is what makes the shell harden up perfectly in the fridge. If you use regular oil, it won’t set right, trust me.
- 1/2 cup unsweetened cocoa powder. Don’t skimp on the cocoa; this is where your deep chocolate flavor comes from.
- 1/4 cup maple syrup. This is our sweetener for the shell, and it mixes beautifully with the coconut oil.
Ingredients for the Creamy Filling and Garnish
Now for that gorgeous pink center. You need coconut butter here, which is different from coconut oil—it’s thicker and creamier. You also need two different textures of our star berry:
- 1/2 cup coconut butter, melted. This gives us that smooth, almost truffle-like texture for the filling.
- 1/2 cup freeze-dried strawberries, very finely crushed. I mean, grind these down until they are almost a powder. This is what colors and flavors the filling deeply.
- 2 tablespoons freeze-dried strawberries, just crushed. These are for sprinkling on top at the very end, so they look a little chunkier and prettier.
Essential Equipment for Perfect Chocolate Strawberry Cups
You don’t need a huge arsenal of fancy gadgets for these Chocolate Strawberry Cups, which is another reason I love them! The most important thing you’ll need is something to hold the shape while they set up. Grab your trusty mini muffin tin—that’s the perfect size for these little bites.
You absolutely must have 12 paper liners to go inside the tin. If you skip the liners, getting these delicate chocolate shells out will be a nightmare, and you’ll end up with broken cups, which is just sad. Also, have a small whisk handy for mixing that chocolate base, and a couple of small bowls for mixing the shell and the filling separately. That’s really it! Simple tools for a simple, delicious treat. For more quick dessert ideas, check out my post on dark chocolate nut bars.
Step-by-Step Instructions to Create Chocolate Strawberry Cups
Alright, buckle up, because this is where the magic happens! Since we aren’t dealing with an oven, our main tool is the refrigerator. We have to work smartly with the chilling times so nothing melts into everything else. Keep your mini muffin tin handy and ready to go.
Preparing the Chocolate Base
First things first, line up those 12 paper liners in your mini muffin tin. Now, let’s make the chocolate shell mixture. In a bowl, take your melted coconut oil, your cocoa powder, and your maple syrup. You need to whisk this really well. I mean, whisk until you don’t see any dry pockets of cocoa powder hiding at the bottom. It should look glossy and smooth. Don’t be afraid to taste it here—if you want it sweeter, stir in just a tiny bit more maple syrup now, like a teaspoon, before you pour!
Next, we portion it out. Spoon just about 1 teaspoon of this chocolate mixture into the bottom of each liner. You want a thin, even coating that covers the base completely. Don’t make the walls too thick yet, or your cups will be mostly chocolate! Once they are all filled, slide that whole tin into the refrigerator. They need about 10 minutes to firm up. Go check your phone or wash a dish—just give that chocolate a chance to set hard! You can read more about my recipe philosophy on Medium.
Mixing and Layering the Strawberry Filling
While that base is chilling, we move straight to making that beautiful filling. Get your melted coconut butter ready. Pour it into a bowl and toss in the finely crushed freeze-dried strawberries—that half cup measurement. Stir this really vigorously. You’ll notice right away that the coconut butter takes on this gorgeous, bright pink color. Keep stirring until it’s totally uniform and creamy. If it looks gritty or separated, just keep mixing; the heat from the butter should smooth it out.
Once your chocolate bases are firm (give them a little poke to check!), take them out. Now, gently spoon about 1/2 teaspoon of that pink strawberry filling right on top of each chocolate base. Try to keep the filling centered and don’t let it touch the very edge of the chocolate shell, or it might ooze out later.
Finishing and Setting Your Chocolate Strawberry Cups
Time to seal the deal! Take the remaining chocolate mixture you made earlier and spoon another teaspoon over the top of the strawberry filling in each cup. Use the back of the spoon or a small offset spatula to gently spread this top layer so it seals the filling underneath and makes a nice, flat top. This layer acts as the lid to your little candy cup.
For the final flourish, grab those 2 tablespoons of slightly chunkier crushed freeze-dried strawberries. Sprinkle a little bit over the top of that final layer of chocolate on each cup. It adds such a nice pop of color and texture! Back into the fridge they go. These need another 10 minutes, minimum, to get totally firm and ready to handle. Twenty minutes total chilling time gets you the best results for these Chocolate Strawberry Cups!
Tips for Success with Your Chocolate Strawberry Cups
These Chocolate Strawberry Cups are so simple, but like any good no-bake recipe, success hinges on a couple of details. My biggest piece of advice, which I learned the hard way when my first batch was a sloppy mess, is about the ingredients you choose. First, please, please use quality cocoa powder. Since there’s no baking to mellow out any harsh flavors, the cocoa needs to be rich and deep.
Second, texture control is everything here, especially with the coconut products. Make sure your coconut oil and coconut butter are fully melted before you mix them. If they are just slightly soft, you’ll end up with lumps in your shells or filling. That smooth, creamy texture we want in the filling only comes when the coconut butter is liquid. If you are looking for other simple, decadent treats, you might enjoy my recipe for allulose keto brownies.
Finally, don’t rush the chilling times! That 10 minutes for the base is non-negotiable, or you’ll just mix the filling right into the liquid shell. And the final 10 minutes ensures they are firm enough to pop right out of those paper liners without squishing. Patience for 20 minutes means you get perfect Chocolate Strawberry Cups every single time!
Storing and Serving Your Chocolate Strawberry Cups
Since these Chocolate Strawberry Cups rely on coconut oil to stay firm, they are very sensitive to room temperature. You absolutely must store these in the refrigerator, or they will start to soften and lose that wonderful snappy shell. They keep really well, though! I find they are best eaten within the first three days, but honestly, they are usually gone way before then.
The best part is you don’t have to reheat them at all—they are served straight from the fridge! If you try to leave them out on the counter for too long, the filling stays creamy, but the chocolate shell turns soft and greasy. So, keep them chilled until serving time. Here’s a quick rundown of how long you can expect them to last:
Storage and Reheating Guidelines
Never try to microwave these, obviously! They are designed to be enjoyed cold. For the best texture, keep them in an airtight container. If you stack them, put a small piece of parchment paper between each layer so they don’t stick together, especially since the tops are garnished.
| Storage Location | Maximum Recommended Time | Texture Notes |
|---|---|---|
| Countertop (Room Temp) | Less than 30 minutes | Shell will soften significantly. |
| Refrigerator | Up to 5 days | Ideal for maintaining crisp shell and creamy filling. |
| Freezer | Up to 2 months | Great for long-term, but allow 15 minutes to thaw before eating. |
Frequently Asked Questions About Chocolate Strawberry Cups
I always get questions about these little cups because they seem almost too easy to be true! People want to know if they can swap ingredients around or if they can speed up the process. It’s great that you’re thinking ahead about customizing them, but remember, the balance of fat here is what keeps them firm!
Since these are no-bake and rely on fats to solidify, substitutions can be tricky, but I’ve tested a few things. Don’t worry, though; the way they are written is the best way to get that perfect snap! For more recipe ideas, take a look at my desserts category.
Can I substitute the coconut butter in the filling?
This is the most common question! Coconut butter is what gives the filling that smooth, almost fudge-like texture when chilled. If you absolutely cannot find it, you *can* try using an equal amount of melted cashew butter or almond butter, but you will likely need to add a little extra sweetener, like another teaspoon of maple syrup, because nut butters aren’t as naturally sweet as coconut butter. Just be prepared that the texture might be slightly denser than my original creamy version.
Why use freeze-dried strawberries in these Chocolate Strawberry Cups?
This is my number one non-negotiable tip! Fresh strawberries are full of water, and water hates chocolate—it makes it seize up, bloom, or melt the coconut oil shell. Freeze-dried strawberries are dehydrated, so they bring all the concentrated flavor without any of the moisture. When you crush them finely, they dissolve into the coconut butter, creating that intense pink color and tartness we love, all while keeping the shell perfectly crisp. It’s the secret to intense flavor without the mess! Feel free to share your results on social media using the Medium platform.
Enjoying Your Homemade Chocolate Strawberry Cups
I really hope you loved making these little Chocolate Strawberry Cups as much as I love eating them! They are such a fun, quick win when you need a fantastic dessert fast. Once you try that intense freeze-dried strawberry flavor against the snappy chocolate, you’ll be hooked.
Let me know how yours turned out! Did you stick to the simple chocolate top, or did you get fancy? Drop a comment below and tell me what you thought of the texture!
Print
Guaranteed 12 Chocolate Strawberry Cups Bliss
- Total Time: 20 minutes
- Yield: 12 cups
- Diet: Vegan
Description
Make easy chocolate strawberry cups with creamy strawberry filling in homemade chocolate shells. This no-bake treat uses coconut oil, cocoa, and freeze-dried strawberries for intense berry flavor. Ready quickly, these bites satisfy sweet cravings.
Ingredients
- 1/2 cup coconut oil melted (for shell)
- 1/2 cup unsweetened cocoa powder (for shell)
- 1/4 cup maple syrup (for shell)
- 1/2 cup coconut butter melted (for filling)
- 1/2 cup freeze-dried strawberries finely crushed (for filling)
- 2 tablespoons freeze-dried strawberries crushed (for garnish)
Instructions
- Line a mini muffin tin with 12 paper liners.
- Whisk the melted coconut oil, cocoa powder, and maple syrup until smooth. Taste and add 1 teaspoon more maple syrup if you prefer more sweetness.
- Spoon 1 teaspoon of the chocolate mixture into each liner to cover the bottom thinly.
- Refrigerate the bases for 10 minutes to set.
- Stir the melted coconut butter and the finely crushed freeze-dried strawberries until combined and pink. This is your filling.
- Spoon 1/2 teaspoon of the strawberry filling onto each set chocolate base.
- Cover the filling with 1 teaspoon of the remaining chocolate mixture, spreading it smooth.
- Sprinkle the crushed freeze-dried strawberries on top of each cup.
- Refrigerate for another 10 minutes until the cups are firm.
Notes
- Freeze-dried strawberries give the best flavor without adding extra moisture.
- Coconut butter creates a smooth, rich texture in the filling.
- This recipe is no-bake.
- Prep Time: 10 minutes
- Cook Time: 0 minutes
- Category: Dessert
- Method: No-Bake
- Cuisine: American