Forget those dry, crumbly peanut butter cookies you sometimes run into! I promise you, the ones in this recipe are different. They are ridiculously soft and stay that way for days—seriously, days! That’s the magic right there. I usually make a huge batch of these ultra-soft peanut butter cookies right before Christmas because they travel so well and everyone begs for them.
The secret isn’t just in the texture, though. It’s the combination of creamy peanut butter, a little bit of shortening (trust me on this one!), and those adorable little chocolate hearts we press right on top while they are still hot from the oven. It makes them feel super special, like they took hours, but they come together faster than you can brew a pot of coffee.
If you’re looking for that perfect, chewy bite that melts in your mouth, this is the recipe. I’ve tried every trick out there, and this method consistently gives me the best results for holiday platters and last-minute sweet cravings.
Gathering Ingredients for Your peanut butter cookies
Before we even think about turning on the mixer, we need to get everything lined up. Part of the joy of baking these peanut butter cookies is how quickly they come together, but that speed means you can’t be hunting for ingredients mid-mix! I always pull out my butter and eggs ahead of time so they are perfectly room temperature, which helps everything blend beautifully.
This list is exactly what you’ll need for 24 perfect, soft cookies. Don’t skimp on the quality of your peanut butter, either—creamy works best here to maintain that smooth dough!
Exact Measurements for perfect peanut butter cookies
When you measure for these peanut butter cookies, pay close attention to the sugars. Brown sugar needs to be packed tightly into the cup, but the granulated sugar for the dough should be spooned lightly. For the coating, you need a full half cup ready to go. Also, make sure your butter is truly softened; cold butter leads to lumpy dough, and we want smooth sailing!
- 1/4 cup unsalted butter, softened
- 1/4 cup vegetable shortening
- 1/2 cup creamy peanut butter
- 1/2 cup packed light brown sugar
- 1/2 cup granulated sugar (plus more for rolling)
- 2 large eggs, room temperature
- 1/2 teaspoon vanilla extract
- 1 and 1/2 cups all-purpose flour
- 1 teaspoon baking soda
- 1/4 teaspoon salt
- 24 small chocolate candy hearts, unwrapped
Necessary Equipment List
You don’t need anything fancy for these, which is why I love them! But having the right tools makes the process cleaner and faster. Make sure your electric mixer is handy because we need to cream things up nicely.
- Large mixing bowl
- Electric mixer (handheld or stand mixer)
- Two small bowls for dry ingredients and sugar coating
- Two baking sheets
- Parchment paper
- 1 and a half tablespoon cookie scoop (this is a lifesaver!)
- Wire cooling rack
Preparing the Dough for Amazing peanut butter cookies
Okay, let’s get mixing! This is where the texture of our peanut butter cookies is truly set. If you rush the creaming stage, the cookies won’t have that lovely, soft interior we are aiming for. Remember, we are building air pockets right from the start, which is crucial for keeping them chewy even after they cool down completely.
Take your time during the wet mixing, and then be really careful not to overmix once the flour goes in. I learned that the hard way once—I ended up with cookies that tasted great but were tough as rocks! We want tender, not tough, every single time we make these.
Creaming Fats and Sugars
Get your softened butter, shortening, peanut butter, brown sugar, and the first half-cup of granulated sugar into your big bowl. Now, turn that mixer up to medium-high! You need to beat this mixture for a solid two minutes. Don’t stop early just because it looks combined. We are looking for it to get visibly lighter in color—almost pale yellow—and fluffy. When it looks like whipped frosting, that’s when you know you’ve created the perfect base for soft peanut butter cookies.
Once it’s fluffy, drop in your room-temperature eggs, one at a time, beating well after each addition. Then, swirl in that vanilla extract until everything is smooth and gorgeous.
Combining Wet and Dry Components
While the wet ingredients were mixing, you should have whisked your flour, baking soda, and salt together in a separate bowl. This ensures the leavening agents are evenly spread out, so you don’t end up with one cookie that puffs up funny. Now, turn your mixer down low—we are being gentle here. Add the dry mixture into the peanut butter base slowly. Mix only until you can’t see any more white streaks of flour. Stop the mixer immediately! A few tiny lumps are totally fine, but over-mixing develops gluten, and we absolutely do not want that.
Shaping and Coating Your peanut butter cookies
Time for the fun part! Get your 1 and a half tablespoon scoop ready. Scoop out 24 portions of the dough. Roll each one gently between your palms until you have a smooth, neat ball. Now, grab that shallow bowl with the remaining half-cup of granulated sugar. Roll each dough ball completely in the sugar until it’s coated everywhere. This sugar coating is what gives the final peanut butter cookies that beautiful, sparkly finish and a tiny bit of extra crispness on the outside.
Baking Tips for Soft peanut butter cookies
Preheating is non-negotiable! Make sure your oven is fully up to 375°F before you even think about putting these in. I line my sheets with parchment paper because these cookies are tender, and I don’t want to risk anything sticking when they cool. We are aiming for a cookie that looks set but still feels soft in the middle. This is the absolute key to getting the best, chewiest peanut butter cookies that last for days!
Remember, we are baking for texture here, not just color. Keep an eye on them; they bake fast!
Critical Baking Times and Temperatures
You’re going to bake these for only 8 to 9 minutes. Seriously, don’t walk away! When they look done, they are probably overdone for our purposes. You want the edges to look just set, maybe lightly golden brown around the rim, but the center should still look slightly pale and soft—almost like it hasn’t quite finished baking. That slight underbake is what guarantees that amazing, melt-in-your-mouth chewiness in your peanut butter cookies later on.
If you wait until they look perfectly baked through on the baking sheet, they will be hard by the time they cool. Trust the look of the edges and pull them out!
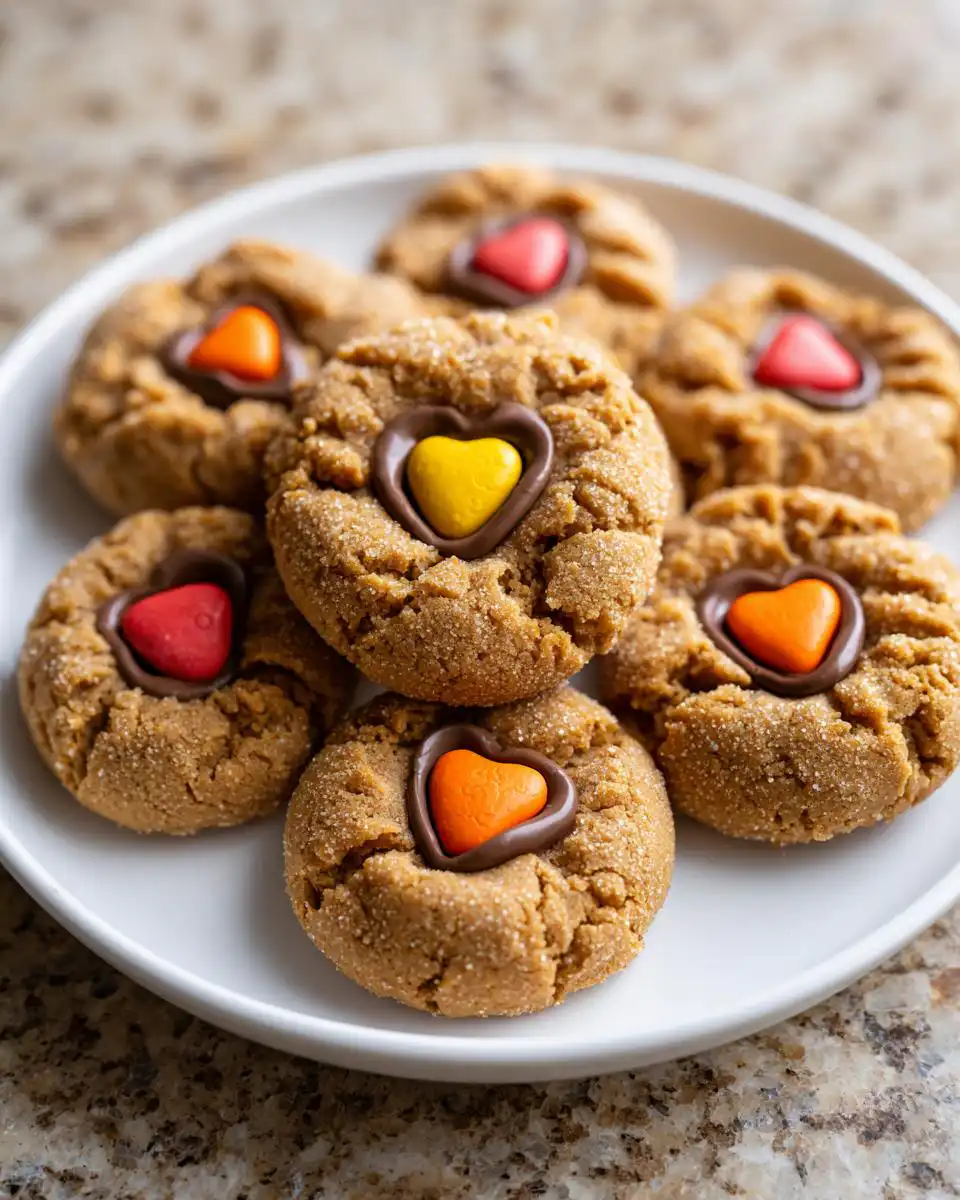
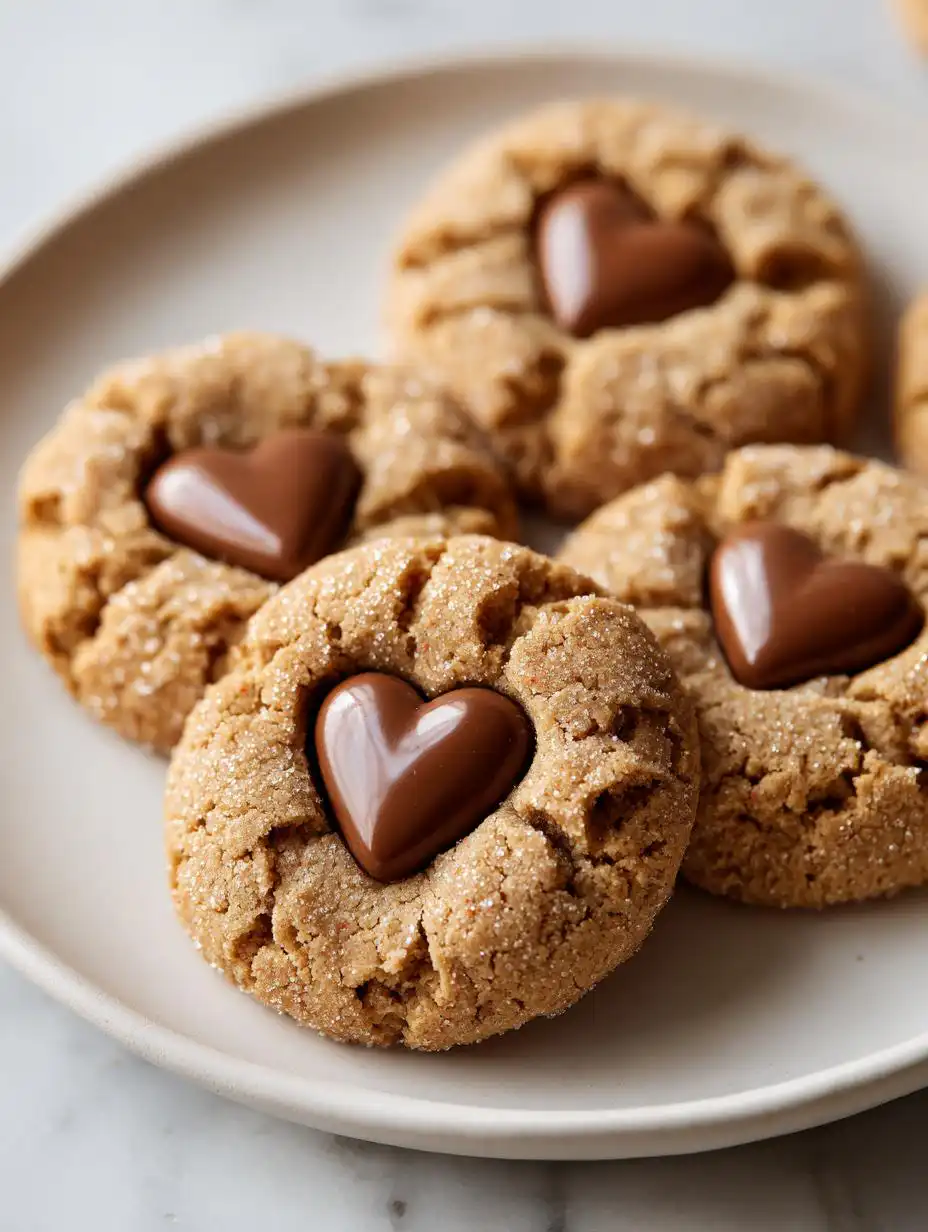
Adding the Chocolate Candy Hearts
This step happens the second they come out of the oven, so have your chocolate hearts unwrapped and waiting right next to the stove—I keep mine in a little bowl. As soon as the sheet slides out, gently press one candy heart right into the center of each hot cookie. The residual heat is just enough to soften the chocolate so it sinks in slightly without melting everywhere and making a mess.
This is important: let them sit right there on that hot baking sheet for a full five minutes. This resting period allows the center to finish cooking just a tiny bit more and lets the cookie structure firm up around the candy. If you try to move them too soon, they might crumble right under your spatula!
Ingredient Notes and Simple Substitutions
I know some of you might look at the shortening and wonder why I don’t just use all butter. Honestly, I tried it! But the combination of butter and shortening is what makes these cookies hold their beautiful shape while staying incredibly soft inside. Shortening has a higher melting point, which stops them from spreading into flat pancakes while baking. It’s the perfect structural partner for the butter’s flavor.
If you absolutely cannot use shortening, I suggest using an equal amount of high-quality lard or even a vegetable-based shortening alternative. However, if you must swap it for all butter, you’ll need to chill the dough for at least an hour before scooping. This will help prevent too much spreading, but I can’t guarantee the exact same tenderness.
Also, room temperature eggs are a must! Cold eggs cause the creamed butter mixture to seize up, and we lose all that lovely air we just worked so hard to whip in.
Storing and Maintaining Softness in peanut butter cookies
The best part about these peanut butter cookies is that they are designed to last! We put in all that work to make them soft, so we don’t want them to dry out on the counter. Cooling is the very first step—don’t rush it! They need that 5-minute rest on the pan, and then another 15 minutes on the wire rack to get completely cool before you even think about packaging them up. If you store them warm, they steam up and get sticky!
Once they are totally cooled, you want an airtight container. These stay wonderfully tender for about four or five days when stored correctly. If you’re making a double batch for later, you can freeze them too, which is a lifesaver during busy times. These peanut butter cookies are truly excellent keepers!
Best Practices for Storing Leftover peanut butter cookies
To maximize that soft texture, I always recommend storing them with a slice of bread or a small piece of apple in the container. The moisture transfers to the cookies, keeping them tender. Just remember to swap out the bread slice every couple of days!
| Storage Method | Duration | Notes |
|---|---|---|
| Airtight Container (Counter) | 4 to 5 days | Add a slice of bread to maintain softness. |
| Airtight Container (Refrigerator) | Up to 1 week | They might firm up slightly; let them come to room temperature first. |
| Freezer (Airtight Bag) | Up to 3 months | Thaw at room temperature for a few hours. |
Answers to Common Questions About peanut butter cookies
You know how it is—even with the best recipe, sometimes things just don’t come out exactly as planned! I get so many questions about texture because that’s the whole point of this recipe. If you’re wondering why your batch of peanut butter cookies didn’t look exactly like mine, chances are it’s one of these small details we can fix next time!
Don’t feel bad if you have questions; baking is all about trial and error, even when you follow the steps perfectly. Here are the most common things folks ask me about getting these chewy peanut butter cookies just right. You can also check out my thoughts on baking over on Medium.
Why are my peanut butter cookies spreading too much?
This usually comes down to two things: temperature or the ratio of fat to flour. If your butter and shortening were too warm or even slightly melted when you started creaming, the dough is too soft to hold its shape in the oven. Also, if you accidentally used too much butter or shortening compared to the flour, they will definitely spread out more than we want.
When in doubt, chill the dough! If you notice the dough seems a little slack before you roll it, just pop the whole bowl into the fridge for 20 minutes. That little break helps everything firm up so you get those nice, thick discs rather than flat ones.
Can I use crunchy peanut butter in this recipe?
Yes, you absolutely can! But be warned, it changes the texture of your final peanut butter cookies. Crunchy peanut butter has actual nut pieces in it, which means you lose some of that super-smooth, melt-in-your-mouth quality we love. If you use crunchy, the cookies will be a bit more crumbly and less uniform in texture.
If you try it, I still recommend chilling the dough for an extra 15 minutes because the nut pieces can interrupt the way the dough holds together during mixing. They still taste fantastic, of course, but they won’t be quite as cloud-like soft as the creamy version! For more sweet inspiration, check out these banana oatmeal bars.
Sharing Your Delicious Results
I truly hope these cookies make your day a little sweeter! When you try this recipe, please come back and tell me how they turned out. I love hearing which holiday you baked them for or if you added any fun sprinkles instead of the chocolate hearts. Feel free to share your results on Pinterest!
Leave a rating below so others know how soft and chewy they are. Happy baking, friend!
Print
Amazing peanut butter cookies: 24 soft bites
- Total Time: 24 minutes
- Yield: 24 cookies
- Diet: Vegetarian
Description
Ultra-soft peanut butter cookies rolled in sparkly sugar and topped with chocolate candy hearts. These chewy treats stay tender for days and are perfect for gifting.
Ingredients
- 1/4 cup unsalted butter, softened
- 1/4 cup vegetable shortening
- 1/2 cup creamy peanut butter
- 1/2 cup packed light brown sugar
- 1/2 cup granulated sugar, plus 1/2 cup for rolling
- 2 large eggs, room temperature
- 1/2 teaspoon vanilla extract
- 1 and 1/2 cups all-purpose flour
- 1 teaspoon baking soda
- 1/4 teaspoon salt
- 24 small chocolate candy hearts, unwrapped
Instructions
- Preheat oven to 375°F and line two baking sheets with parchment paper.
- Beat softened butter, shortening, peanut butter, brown sugar, and 1/2 cup granulated sugar together in a large bowl with an electric mixer on medium-high speed for 2 minutes until light and fluffy.
- Add eggs one at a time, beating well after each addition, then mix in vanilla extract until smooth.
- Whisk together flour, baking soda, and salt in a separate bowl until evenly combined.
- Add dry ingredients to the peanut butter mixture and stir on low speed just until no flour streaks remain and dough comes together.
- Pour remaining 1/2 cup granulated sugar into a shallow bowl.
- Scoop dough into 24 portions using a 1 and 1/2 tablespoon cookie scoop, roll each portion into a smooth ball, then roll in sugar to coat completely.
- Place sugar-coated dough balls 3 inches apart on prepared baking sheets, spacing 12 cookies per sheet.
- Bake for 8 to 9 minutes until edges are set and lightly golden but centers still look slightly underbaked and soft.
- Remove from oven and immediately press one chocolate candy heart gently into the center of each hot cookie.
- Let cookies cool on the baking sheet for 5 minutes to set, then transfer to a wire rack to cool completely.
Notes
- The combination of butter and shortening creates a cookie that holds its shape while remaining exceptionally soft.
- Rolling the dough in granulated sugar adds a delicate crunch.
- These cookies stay tender for days.
- Prep Time: 15 minutes
- Cook Time: 9 minutes
- Category: Dessert
- Method: Baking
- Cuisine: American