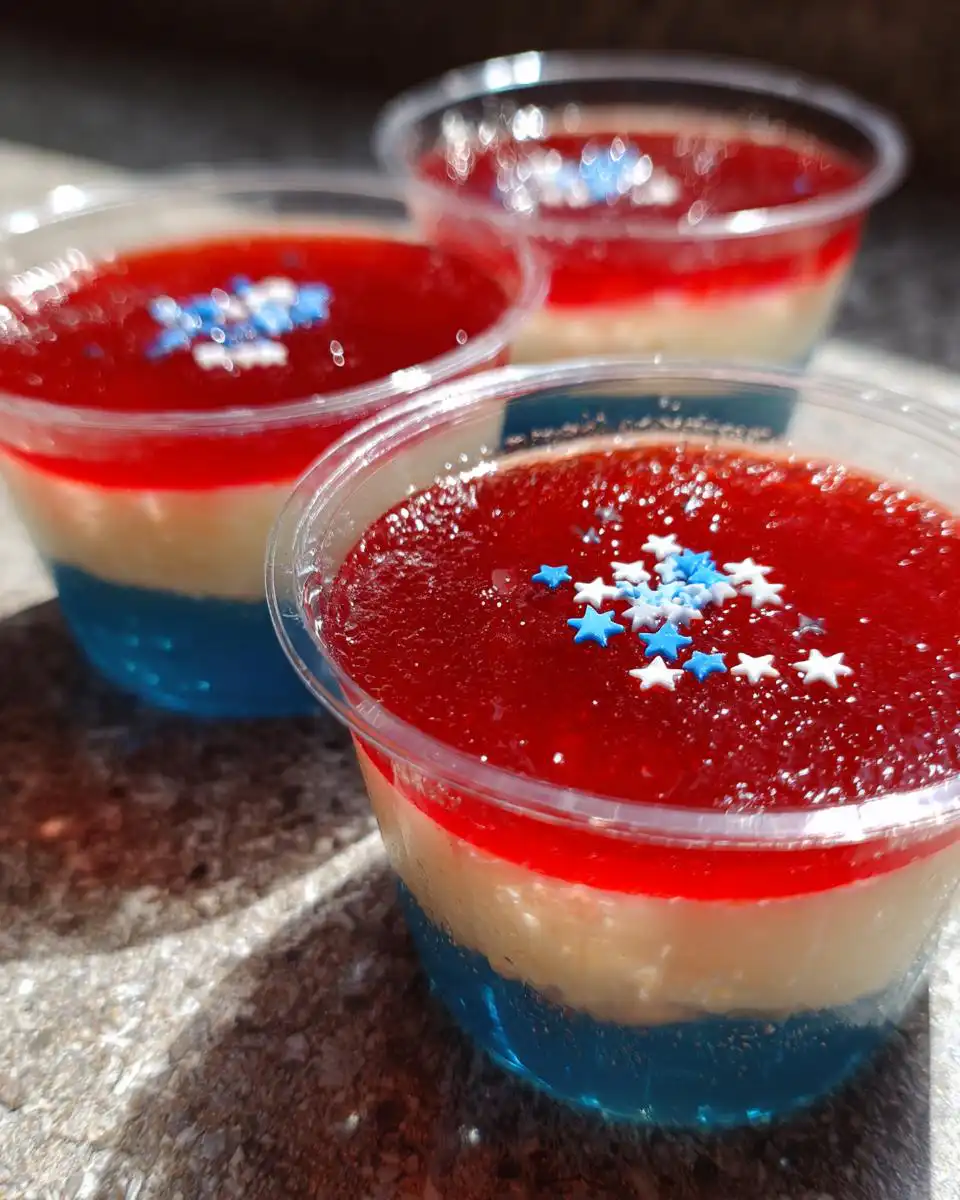
It’s that time of year again when the grill is hot and the yard is full of folks, and you just need a dessert that screams America but doesn’t take up your whole afternoon—and that’s exactly why I’m sharing my recipe for Easy Red White Blue Jello Cups. Seriously, these things are foolproof! I’m Jordan Bell, checking in from Asheville, NC, and if you’ve followed my journey over at the Easy Detox Recipes blog, you know I love taking those rich, comforting Southern dishes we all crave and cleaning them up without losing the soul. After dropping over 80 pounds, I learned that joy doesn’t have to mean heavy ingredients, and these layered Jello cups are the perfect example of light, festive celebration food.
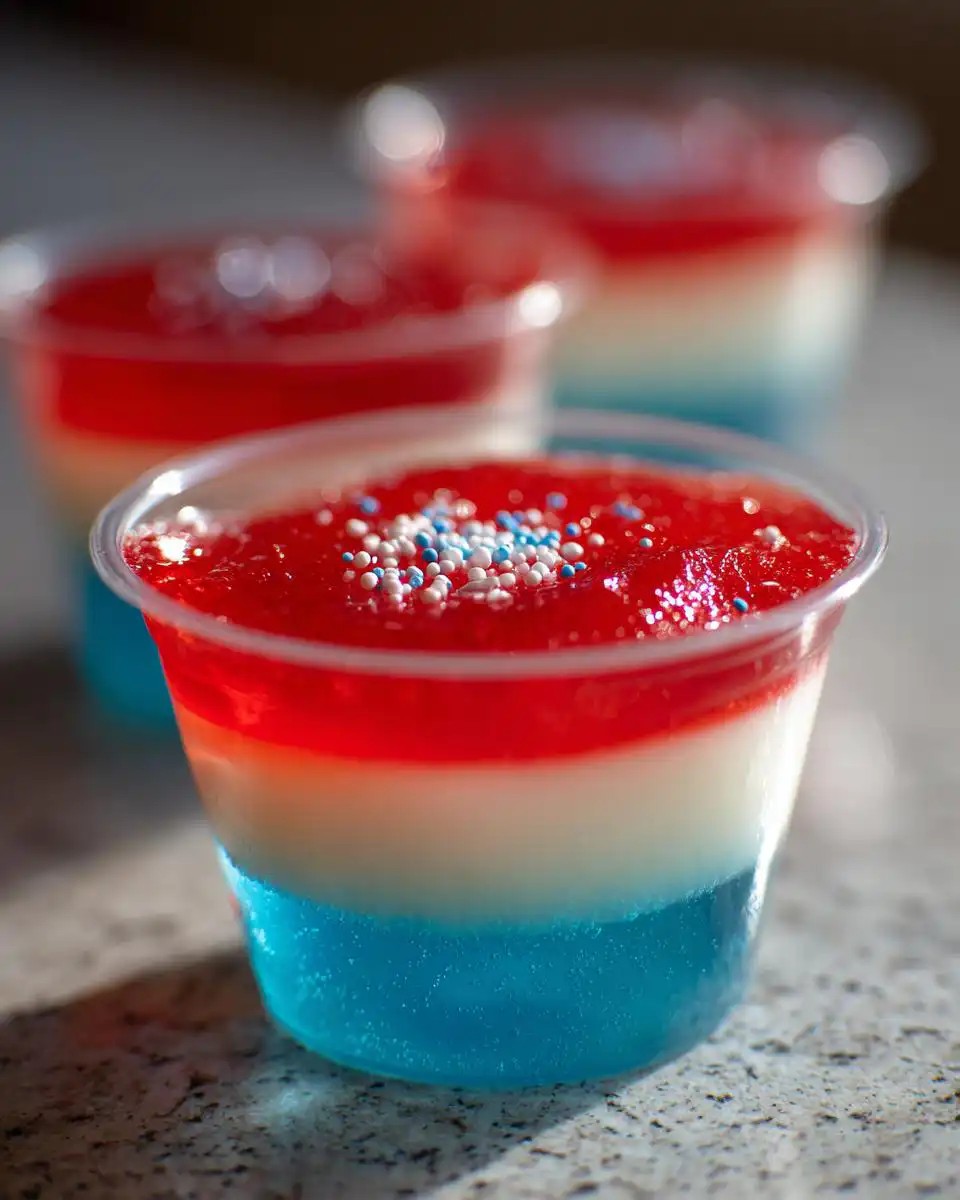
These Jello cups are my go-to because they are naturally no-bake, stack beautifully in the fridge, and you get that perfect, wobbly bite of cherry, creamy white, and bright blue. Forget fussy cakes! When you’re juggling sides and main dishes for a holiday cookout, you need something that sets itself. We’re talking simple gelatin magic here, folks. Let’s get these patriotic treats assembled!
Gather Your Components for Easy Red White Blue Jello Cups
Before we dive into the layering magic, let’s get everything lined up. These Easy Red White Blue Jello Cups rely on having the right stuff ready to go because once that gelatin starts setting, you can’t stop to hunt for ingredients! Trust me, having your liquids measured and your cups arranged makes the whole process smooth as silk. We need three distinct parts: the blue base, the creamy white middle, and the red top.
Essential Ingredients for Layered Gelatin
- 3 oz berry blue jello
- 1 cup boiling water, plus 1/2 cup cold water for the blue layer
- 1/2 oz unflavored gelatin (that’s usually two standard packets)
- 1/2 cup cold water, plus 1 cup boiling water for the white layer
- 14 oz sweetened condensed milk (this is non-negotiable for the creamy texture!)
- 3 oz cherry jello
- 1 cup boiling water, plus 1/2 cup cold water for the red layer
- Star sprinkles (optional, but highly recommended for that extra pop!)
Necessary Equipment for Easy Red White Blue Jello Cups
You’ll need space in your fridge, so make sure you have a tray that fits before you start mixing! We are using individual 1-oz cups, and I highly recommend having about 60 of those little disposable cups with lids ready to go. Oh, and grab a spouted measuring cup—it makes pouring those thin layers without messy spills so much easier.
Step-by-Step Guide to Making Easy Red White Blue Jello Cups
Okay, deep breath! This seems like a lot of steps because we are building three separate layers, but I promise you, once you get the rhythm down, making these Easy Red White Blue Jello Cups is just a repeat of dissolving and chilling. The most important thing here is patience—you cannot rush the setting time, or you’ll end up with a muddy mess instead of beautiful stripes!
Preparing the Blue Layer Base
First things first, grab that tray with all 60 of your little cups lined up. For the bottom blue layer, take your berry blue jello and whisk it vigorously into one cup of boiling water until every single granule is dissolved. I mean it, you shouldn’t feel any grit at the bottom. Then, stir in the half-cup of cold water. Now, using your spouted cup, gently pour this mixture into each cup, filling them only about one-third full. Don’t overfill! Pop that tray straight into the fridge for about 30 minutes. You want it firm to the touch—not totally solid, but definitely not liquidy.
Creating and Setting the White Layer
This white layer is the real anchor of the dessert. Take your unflavored gelatin (those two packets) and sprinkle it over a half-cup of cold water. Let it sit there for five minutes—this is called blooming, and it lets the gelatin absorb the water so it dissolves smoothly later. Once it looks thick and spongy, stir in one full cup of boiling water until it’s totally clear again. Now, whisk in that entire can of sweetened condensed milk. Wow, look how creamy that gets! This mix needs to cool down a bit before it goes on the blue layer, otherwise, it will melt the blue. Let it sit on the counter for ten minutes, checking it often. Once it’s just slightly warm, pour it over the set blue layer, filling them up to about two-thirds full. Back into the fridge they go for another 30 minutes until this white layer is opaque and set.
Completing the Red Layer and Final Chill
We’re on the home stretch! Mix up your cherry jello just like you did the blue: whisk into one cup of boiling water, then stir in the cold water. This red layer doesn’t need to cool down as much because it’s going right on top of a firm, opaque white layer. Fill the cups right to the top with the red mixture. Now, they need their final, long chill. These Easy Red White Blue Jello Cups must refrigerate for a minimum of two hours until they are completely firm and have that great wobbly texture. Once they are ready, you can top them with those cute star sprinkles before popping on the lids!
Tips for Success with Your Easy Red White Blue Jello Cups
Getting those razor-sharp layers in your Easy Red White Blue Jello Cups is all about respecting the chilling process. It takes a little more time, but it’s worth it to avoid that gray, muddy look where the colors bleed together. You want proud, distinct stripes for your patriotic dessert, right?
Mastering Layer Setting Times
This is my biggest piece of advice: Don’t eyeball the setting time! The moment you pour a new layer on top of an unset layer, the heat from the new liquid will melt the layer beneath it, and boom—you’ve got a swirl. You must let each layer get firm to the touch before moving on. For the blue, 30 minutes usually does it, but the white layer needs to be opaque and set, which might take a little longer depending on how warm your white mixture was when you poured it. If you’re making a double batch, you might even need an extra 15 minutes between layers!
Tips for Neat and Attractive Easy Red White Blue Jello Cups
Pouring is everything here. If you pour the liquid straight down into the center of the cup, it splashes and ruins the clean line. Always use a spouted measuring cup, and pour slowly against the side of the cup—almost like you’re trying to gently float the liquid on top of the set layer beneath it. This keeps things neat! And seriously, don’t skip the star sprinkles if you can find them. A little bit of sparkle on that top red layer makes these Easy Red White Blue Jello Cups look instantly festive and totally professional.
Ingredient Notes and Simple Substitutions
Sometimes you look in the pantry and realize you’re missing just one thing, or maybe you want to lighten things up a bit. That’s fine! These Easy Red White Blue Jello Cups are flexible, but we have to keep the structure intact, especially that creamy middle layer. You can swap out the red for strawberry jello if cherry isn’t your favorite, and if you want a slightly lighter white layer, you can replace the sweetened condensed milk with coconut milk. It gives a subtle flavor difference, but the texture holds up beautifully.
Also, if you want a little extra tartness in that top red layer, try adding a few fresh cranberries right into the jello mixture before you pour it in—it’s a fantastic little surprise! Just remember, the goal is to keep the gelatin ratios the same so the layers set correctly. If you are interested in other gelatin-based recipes, check out this gelatin trick recipe for more ideas.
Common Questions About Easy Red White Blue Jello Cups
I get so many questions once people start making these, which just proves how popular they are for summer gatherings! They are such a fantastic, easy make-ahead option when you are planning a big party. Here are the few things folks ask me most often about perfecting their Easy Red White Blue Jello Cups.
Can I make these Easy Red White Blue Jello Cups ahead of time?
Absolutely! This is honestly one of the best features of this dessert. Since they are stored covered in the fridge, they hold up really well. You can safely make these up to five days in advance. If you need even more lead time, you can freeze them for up to a month! Just make sure you thaw them overnight in the refrigerator before you plan to serve them. They come out perfectly fine, ready for your next big patriotic dessert event.
What is the best way to get clean, distinct layers?
The secret isn’t just time; it’s temperature control. You have to ensure the layer underneath is firm *before* pouring the next one. For the blue layer, 30 minutes usually works. For the white layer, you must let the milk mixture cool slightly on the counter before pouring it over the blue, or the heat will cause bleeding. If you pour too fast, you disrupt the surface, so always pour slowly against the side of the cup!
Storing and Serving Your Patriotic Dessert
Once you’ve managed to create these stunning, striped Easy Red White Blue Jello Cups, you want to make sure they stay perfect until the big day. Since they’re already portioned into individual cups with lids, cleanup and transport are a breeze! They are designed to be a make-ahead powerhouse, which is such a relief when hosting. Don’t worry about reheating them, of course—these are meant to be served chilled straight from the fridge!
Table for Storage and Reheating Guidelines
Here is the simple breakdown for keeping your patriotic dessert looking its best:
| Storage Method | Duration | Notes |
|---|---|---|
| Refrigerator (Covered) | Up to 5 days | Ensure lids are secure to prevent drying out. |
| Freezer | Up to 1 month | Thaw overnight in the refrigerator before serving. |
Share Your Experience with Easy Red White Blue Jello Cups
Well, that’s it! You’ve made the perfect set of Easy Red White Blue Jello Cups! I hope they bring as much joy to your table as they do mine. If you loved how simple this recipe was, please leave me a rating below so other cooks know this is the go-to patriotic dessert. And if you snap a picture, tag me on social media—I absolutely love seeing your creations! You can also find more inspiration on my Pinterest page.
Print
Easy Red White Blue Jello Cups: 60 Flawless Bites
- Total Time: 4 hours 45 minutes
- Yield: 60 servings
Description
Easy Red White Blue Jello Cups are patriotic, layered treats featuring cherry, creamy white, and berry blue gelatin. This no-bake dessert is simple for busy cooks and perfect for festive gatherings.
Ingredients
- 3 oz berry blue jello
- 1 cup boiling water
- ½ cup cold water
- ½ oz unflavored gelatin (2 packets)
- ½ cup cold water
- 1 cup boiling water
- 14 oz sweetened condensed milk
- 3 oz cherry jello
- 1 cup boiling water
- ½ cup cold water
- 60 1-oz disposable cups with lids
- Star sprinkles (optional)
Instructions
- Arrange 60 disposable cups on a tray that fits in the fridge.
- For blue layer, whisk berry blue jello into 1 cup boiling water until dissolved. Stir in ½ cup cold water.
- Pour into cups to ⅓ full. Refrigerate 30 minutes until firm to the touch.
- For white layer, sprinkle unflavored gelatin over ½ cup cold water; let sit 5 minutes to thicken.
- Stir in 1 cup boiling water until dissolved, then add sweetened condensed milk. Cool slightly.
- Pour over blue layer to ⅔ full. Refrigerate 30 minutes until set and opaque.
- For red layer, whisk cherry jello into 1 cup boiling water until dissolved. Stir in ½ cup cold water.
- Fill cups to the top. Refrigerate 2 hours until fully firm and wobbly.
- Sprinkle star sprinkles if desired. Secure lids.
Notes
- Swap cherry jello for strawberry jello.
- Use raspberry jello instead of berry blue.
- Replace condensed milk with coconut milk for lighter white layer.
- Add fresh cranberries to red layer for tartness.
- Use lime jello for green layer variation.
- Ensure fridge space for the tray before starting.
- Let each layer fully set before adding next to prevent mixing.
- Use a spouted measuring cup for neat pouring.
- Double batch for larger parties.
- Garnish with winter berries for extra flair.
- Store covered in fridge up to 5 days. Freeze up to 1 month; thaw overnight in fridge.
- Prep Time: 15 minutes
- Cook Time: 0 minutes