No heading needs to be written for the introduction.
When I talk about my cheese stuffed mini peppers, I’m really talking about survival food for busy weeknights. Hi everyone, I’m Jordan Bell, coming to you from Asheville, NC. After my own journey of losing eighty pounds, I learned that ‘clean eating’ doesn’t have to mean complicated cooking—especially when you’re trying to keep the flavor of Southern comfort food alive! On my Easy Detox Recipes blog, I focus on making healthy food fast, and this recipe proves you can hit your goals without spending hours in the kitchen. This is my go-to when I need a high-protein snack ready faster than delivery gets here. 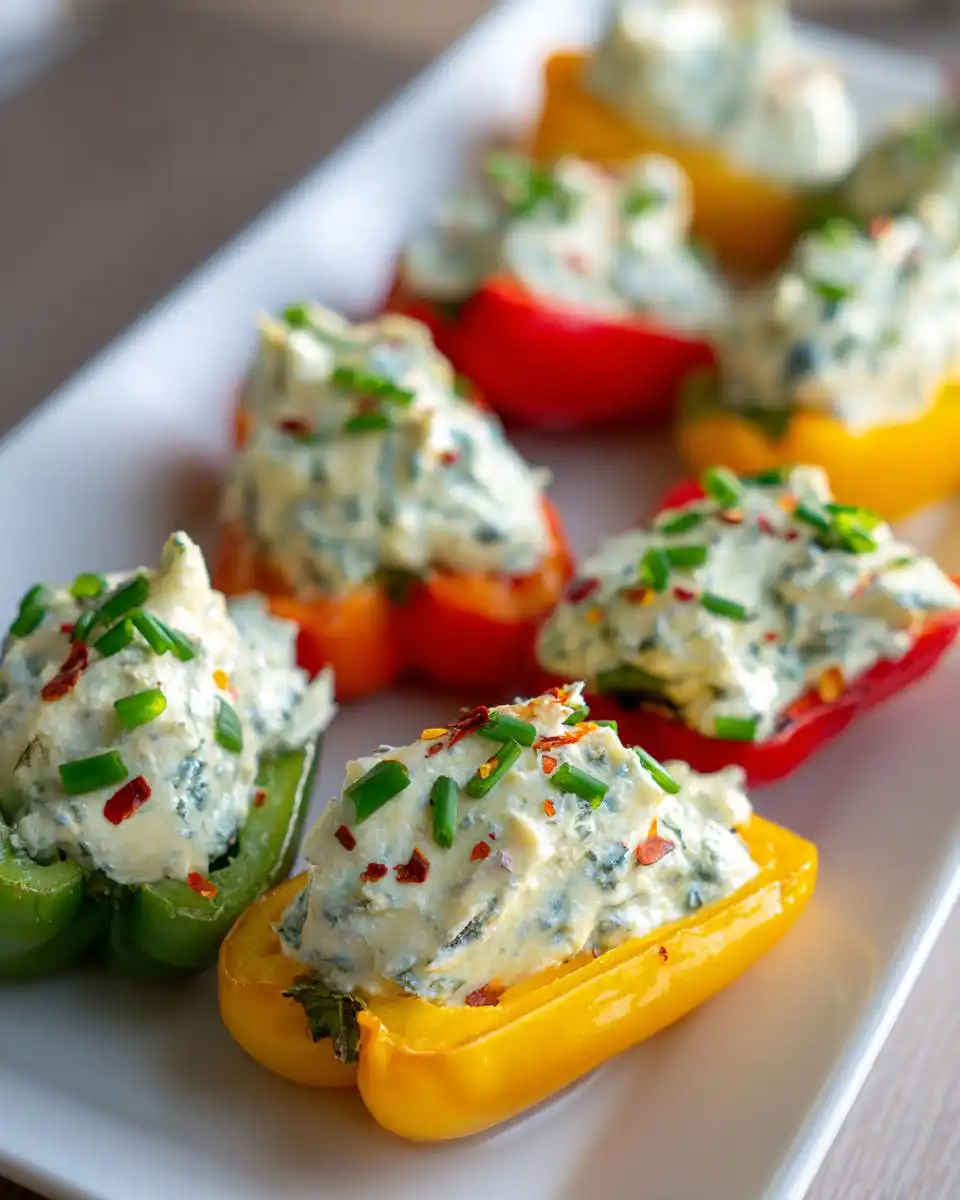
Why You’ll Love These Quick Cheese stuffed mini peppers
Honestly, these are game-changers when life gets hectic. I developed this version because my schedule sometimes looks like controlled chaos, and I need satisfying snacks that don’t require me to turn on the oven. These little bites pack a punch of flavor and protein without any cooking time at all. You’ll be amazed how quickly you can whip these up!
- They are truly no-bake—ready in about five minutes flat.
- Each serving gives you a solid 4 grams of clean protein.
- They look fancy but require zero actual cooking skill.
- Perfect for grabbing when you need something quick before the gym or while meal prepping lunches.
- They hold up beautifully in the fridge, so you can make a huge batch!
Gather Your Ingredients for Cheese stuffed mini peppers
To make these fantastic cheese stuffed mini peppers, you don’t need much, but the quality of what you use really makes a difference. Because this is a no-bake recipe, the filling needs to be perfect before it ever touches the pepper. Don’t worry about finding a ton of exotic things; we are keeping this simple and fast, just like I promised!
Precise Measurements for the Cream Cheese Filling
The filling is where all the flavor magic happens, so measure carefully. You want that creamy texture to shine through, not be grainy or watery. Make sure that cream cheese is truly soft—I mean, leave it out for a good 30 minutes before you start!
- 8 oz cream cheese, fully softened to room temperature.
- ½ cup sharp cheddar cheese, freshly shredded (pre-shredded can be dry!).
- 2 tablespoons fresh chives, finely chopped.
- 1 tablespoon fresh parsley, minced finely.
- ½ teaspoon garlic powder.
- ¼ teaspoon onion powder.
- ¼ teaspoon salt.
- ⅛ teaspoon black pepper.
Selecting the Best Mini Sweet Peppers
When you’re picking out your peppers, look for firm, vibrant ones—I love mixing the colors because it makes the final platter look so much happier! You need about 12 peppers total for this batch. Make sure they don’t have any soft spots or blemishes. Remember, we are cutting these in half and scooping out the insides, so they need to be sturdy enough to hold that creamy filling without collapsing on you.
Essential Equipment for Perfect Cheese stuffed mini peppers
Since this recipe is all about speed, having the right gear makes the difference between five minutes and fifteen minutes! For these cheese stuffed mini peppers, you don’t need much, but a couple of items really help achieve that professional look. You’ll definitely want a good mixing bowl—a sturdy one that won’t slide everywhere when you start beating the filling.
- A hand mixer or a strong fork for creaming the cheese.
- A small spoon or your fingers for cleaning out the peppers.
- A piping bag (or a sturdy ziplock bag with the corner snipped) for neat filling.
Step-by-Step Instructions for Cheese stuffed mini peppers
Okay, here is where the magic happens, and I promise you, if you follow these steps, your cheese stuffed mini peppers will be done, garnished, and ready to eat in about five minutes total. We are moving fast, but we aren’t skipping the important details that make the filling smooth and the peppers look great. Pay attention to drying those peppers—that’s a small step that prevents a messy final product! 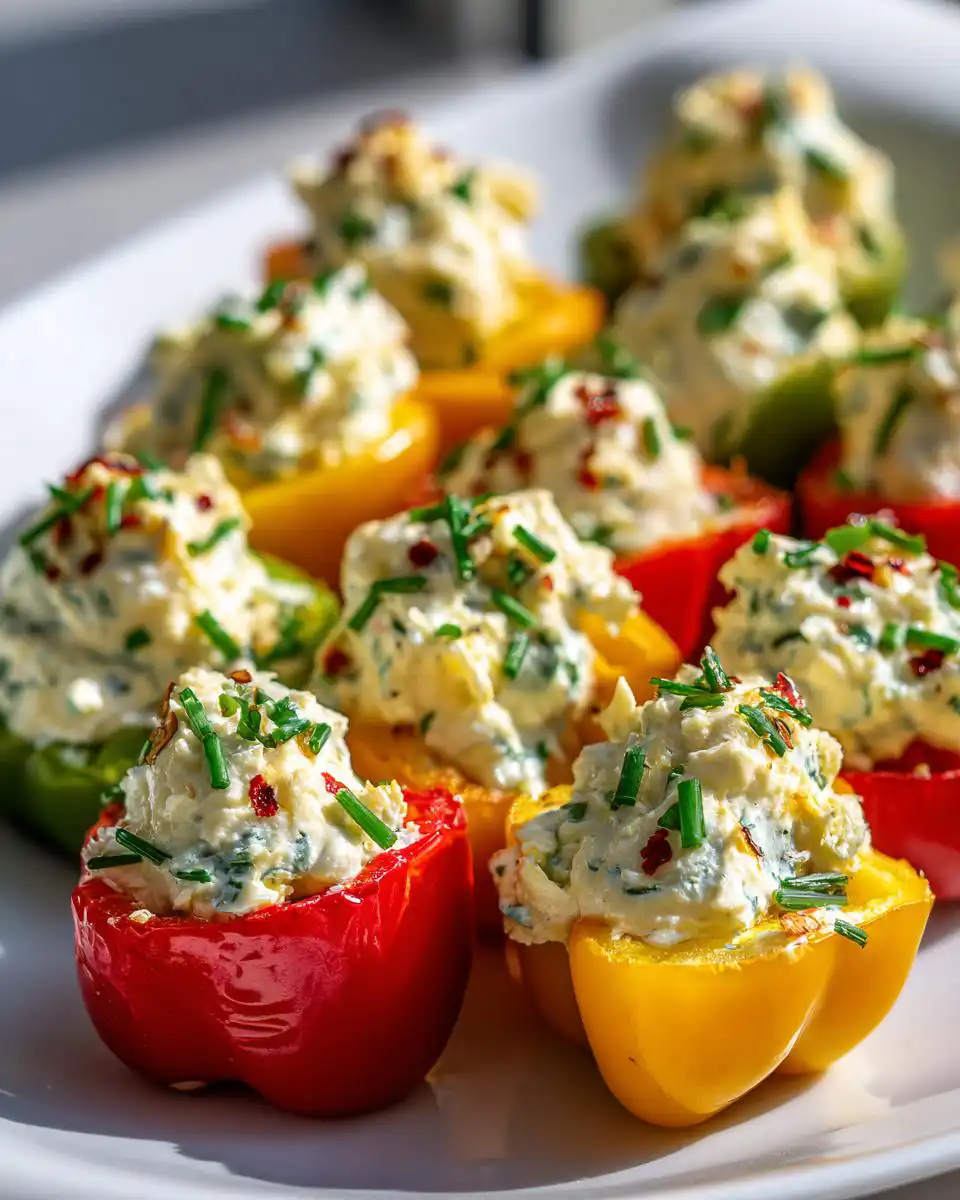
Preparing the Mini Pepper Shells
First things first: wash those beautiful peppers under cold water. Then, and this is crucial, pat them completely dry with a paper towel. If they are wet, the cream cheese filling won’t stick right. Next, take a sharp paring knife and slice each mini pepper right down the middle, from stem to tip. If you want them to look extra nice for company, leave the little green stem on one half—it makes them look like tiny boats!
Now, use a small spoon, or honestly, your clean fingers work great, to scoop out all the seeds and those white ribs inside. You want a clean, empty shell ready for filling. Toss the scraps, and set those clean pepper halves aside. See? That part only took maybe a minute or two!
Creating the Smooth Cream Cheese Mixture
Grab your mixing bowl. We are combining everything for the filling now. Dump in your softened cream cheese, the shredded cheddar, all those fresh herbs—the chives and parsley—and all your powders: garlic, onion, salt, and pepper. Do not skip softening the cream cheese; cold cream cheese will give you a lumpy mess, and we want smooth, luxurious filling!
Now, get your mixer going, or just put your back into stirring vigorously with a fork. You need to beat this mixture until it’s completely smooth and looks homogenous—no streaks of white cream cheese left! I usually time this for about two minutes. That two-minute beat time really incorporates air and makes the filling lighter, even though we aren’t baking them.
Filling and Presenting Your Cheese stuffed mini peppers
Time to fill these beauties! I always use a piping bag because it gives you that perfect, swirly mound of filling that looks so professional. Just transfer your smooth mixture into the bag and snip a decent-sized corner off. Pipe about one tablespoon of the cheese mixture into each pepper half until it’s generously mounded over the top. If you don’t have a piping bag, just use a little spoon and dollop it in!
Once they are all filled, arrange them nicely on a platter. This is your chance to make them shine! I usually sprinkle mine with a little extra chopped chives for color, or if I’m feeling spicy, a tiny pinch of crushed red pepper flakes. Everything bagel seasoning is also amazing here if you have it! Serve them right away, or cover them up and pop them in the fridge for later.
Tips for Success with Your Cheese stuffed mini peppers
Getting these cheese stuffed mini peppers perfect every time really hinges on a couple of small details that I learned the hard way. My biggest piece of advice, seriously, is about the cream cheese. You absolutely MUST soften it properly! If you rush this step and try to mix hard cheese, you will end up with lumps, and no amount of mixing will fix that lumpy texture once it’s chilled. Let it sit out for a full 30 minutes; it should yield easily to gentle pressure.
For presentation, always choose those firm, brightly colored mini peppers. They look fantastic against the white and green filling. If you want to experiment with flavor right now, try adding some crunch! I love tossing in a couple of tablespoons of chopped pecans into the filling mixture—it gives you an unexpected textural surprise.
Also, think about your garnish! While the basic chives are lovely, don’t be afraid to use those optional toppings. A tiny sprinkle of everything bagel seasoning adds salt, crunch, and garlic flavor all at once, elevating these simple snacks instantly. Remember, even though they are fast, presentation matters! You can see more of my quick snack ideas on my Medium profile.
Ingredient Substitutions and Variations
One of the best things about these cheese stuffed mini peppers is how adaptable they are. I love sticking close to the original recipe because that cheddar and herb blend is perfect, but life happens, and sometimes you run out of something! Don’t panic if you need to swap an ingredient; these peppers handle changes really well.
If you’re looking for a tangier bite, ditch the cheddar cheese and use salty feta instead. That gives you a little Mediterranean twist, and it’s delicious! For my friends who are trying to sneak in extra texture—and trust me, I love a good crunch—toss in about two tablespoons of chopped walnuts or pecans right into the filling mixture before you pipe it.
If you really want to lean into that Southern comfort flavor, try mixing in about two tablespoons of drained and chopped pimentos. It turns your snack into a mini pimento cheese bite! And for those of you watching fat intake, you can swap out the full-fat cream cheese for cottage cheese. It makes the filling a bit higher in protein, which is always a win in my book! If you are interested in other high-protein swaps, check out my thoughts on high-protein breakfast quesadillas.
Answering Common Questions About Cheese stuffed mini peppers
I get so many questions about these speedy cheese stuffed mini peppers because people are shocked how good they taste for taking almost no effort! Since they are so versatile, folks often wonder about making them for parties or adjusting them for specific diets. Here are the top things I hear, especially from my friends focused on clean eating and getting enough protein.
Can I make these Cheese stuffed mini peppers ahead of time?
Oh yes, this is one of their best features! You can totally make these ahead of time for your meal prep lunches or game-day spreads. Once they are filled, arrange them on a platter or in an airtight container. You can safely store them in the refrigerator for up to five days. Trust me, they taste just as good on day four as they do fresh!
Are these Cheese stuffed mini peppers suitable for a low carb diet?
Absolutely! These are a fantastic keto snack option. Since we aren’t adding any breading or high-carb fillers, the main components are peppers and cheese, which are naturally low in carbohydrates. Plus, you get that great boost of protein—about 4 grams per serving—making them a really satisfying stop-gap between meals when you need something clean and filling.
What if I do not have a piping bag for my Cheese stuffed mini peppers?
Don’t let kitchen tools stop you! If you don’t have a piping bag handy, there are super easy alternatives. Take a sturdy, gallon-sized ziplock bag—make sure it’s not thin!—and scoop the cheese mixture into it. Then, just snip one corner off with scissors. You get almost the same professional swirl as a piping bag. If you are in a huge rush, just use a regular small spoon and dollop the filling right into the pepper halves. It might look a little more rustic, but I promise it tastes just as good!
Storing and Keeping Leftover Cheese stuffed mini peppers
If you manage to have any cheese stuffed mini peppers left over—which is rare in my house—storage is super simple. Since these are no-bake, we need to keep them cool to maintain that fresh herb flavor and prevent the cheese from getting oily. Just cover the platter tightly with plastic wrap or transfer them to an airtight container. They hold up wonderfully in the refrigerator!
Storage and Reheating Guide
These are best eaten cold, so we generally skip reheating, but here is the rundown on keeping them fresh:
| Storage Method | Maximum Time | Reheating Note |
|---|---|---|
| Airtight Container (Refrigerated) | Up to 5 Days | Serve chilled or let sit at room temperature for 15 minutes. |
Share Your Experience with This Cheese stuffed mini peppers Recipe
I hope these quick cheese stuffed mini peppers save your busy weeknights like they save mine! They are proof that clean eating doesn’t need to be complicated. If you whipped these up, please hop down below and leave me a star rating! I’d love to hear what toppings you chose or if you tried any of those fun variations I mentioned! For more visual inspiration, check out my Pinterest boards.
Print
5 Min Cheese Stuffed Mini Peppers Bliss
- Total Time: 5 minutes
- Yield: Serves 6 (4 pepper halves per serving)
Description
These cheese stuffed mini peppers offer a quick, no-bake protein snack ready in just 5 minutes. They use fresh mini sweet peppers filled with a creamy herb and garlic cream cheese mixture, providing 4 grams of protein per serving. This recipe is great for busy weeknights, meal prep lunches, picnics, or game-day spreads.
Ingredients
- 12 mini sweet peppers, mixed colors
- 8 oz cream cheese, softened
- ½ cup shredded cheddar cheese
- 2 tablespoons fresh chives, chopped
- 1 tablespoon fresh parsley, minced
- ½ teaspoon garlic powder
- ¼ teaspoon onion powder
- ¼ teaspoon salt
- ⅛ teaspoon black pepper
- Extra chopped chives (Optional Topping)
- Crushed red pepper flakes (Optional Topping)
- Everything bagel seasoning (Optional Topping)
Instructions
- Wash the mini sweet peppers under cold running water and pat them completely dry.
- Cut each pepper in half lengthwise from stem to tip. Keep the stem intact for looks if you wish.
- Use a small spoon or your fingers to scoop out and discard the seeds and white ribs from inside each pepper half.
- Place the softened cream cheese, shredded cheddar cheese, chopped chives, parsley, garlic powder, onion powder, salt, and black pepper in a medium mixing bowl.
- Beat the mixture with a hand mixer or stir vigorously with a fork until smooth, creamy, and well combined, about 2 minutes.
- Transfer the cream cheese mixture to a piping bag or a ziplock bag with one corner snipped off.
- Pipe or spoon about 1 tablespoon of the cream cheese mixture into each pepper half, filling them generously to the top.
- Arrange the stuffed peppers on a serving platter. Garnish with extra chopped chives, crushed red pepper flakes, or everything bagel seasoning if you want. Serve immediately or cover and refrigerate until ready to eat.
Notes
- Replace fresh herbs with 1 tablespoon ranch seasoning mix for a faster version.
- Use feta cheese instead of cheddar for a Mediterranean flavor.
- Add 2 tablespoons chopped pecans or walnuts to the filling for extra crunch.
- Mix in 2 tablespoons drained and chopped pimentos for a pimento cheese variation.
- Use cottage cheese instead of cream cheese for a higher-protein, lower-fat option.
- For warm peppers, bake filled peppers at 400°F for 8 to 10 minutes.
- Choose firm, multi-colored mini peppers for the best presentation.
- Soften cream cheese for 30 minutes at room temperature for a smooth filling.
- Store assembled peppers in an airtight container in the refrigerator for up to 5 days.
- Prep Time: 5 minutes
- Cook Time: 0 minutes