When I think about Grandma’s Thanksgiving Stuffing, I don’t just think about food; I think about home. Down here in Asheville, NC, where the air gets crisp right around turkey time, our holiday meal hinges on this savory dish. I’m Jordan Bell, and while you might know me from my Easy Detox Recipes blog where I talk about clean eating after my own 80-pound weight loss journey, I still believe in Southern comfort food. But I’ve learned how to make those traditions work for you!
Let’s be honest, the centerpiece of any great Thanksgiving dinner isn’t just the roasted turkey; it’s what you stuff it with—or rather, what you bake beside it! My grandma’s stuffing recipe is the real deal. It uses those perfect bread cubes and aromatic herbs that make your kitchen smell like pure holiday magic. You need a recipe that tastes like tradition but doesn’t require you to spend all day stressing. This one is straightforward, flavorful, and absolutely essential for a perfect holiday cooking spread.
Why You’ll Love This Grandma’s Thanksgiving Stuffing Recipe
This isn’t just another stuffing recipe; it’s the blueprint for a stress-free holiday table. I designed this to taste exactly like the classic savory dish I grew up on, but without the fussy, all-day commitment. It brings that undeniable warmth and tradition to your Thanksgiving dinner without keeping you chained to the stove.
- It uses simple, accessible ingredients that let the fresh herbs shine.
- The hands-on time is shockingly low, giving you more time for gravy!
- It guarantees that perfect balance of moist interior and crisp top every single time.
Quick Prep for Your Thanksgiving Dinner
Honestly, getting this stuffing ready is a breeze. With only about 20 minutes of actual prep work—just chopping some onion and celery and mixing—you can get this into the oven quickly. That means less time worrying about the stuffing recipe and more time basting that beautiful roasted turkey. It’s holiday cooking made easy, period.
Essential Ingredients for Authentic Grandma’s Thanksgiving Stuffing
Okay, let’s talk about what makes Grandma’s stuffing taste like a hug from the past. It’s not secret stuff, I promise, but it is about using the right components and treating them right. If you stick to these core ingredients, you’ll nail this savory dish for your Thanksgiving dinner. Forget those dry, crumbly boxes you might have tried before—we are making something truly memorable here!
Notice I’ve listed fresh herbs. That’s non-negotiable for me! The difference between dried and fresh aromatic herbs in a stuffing recipe is night and day. You’ll need about 10 cups of bread cubes, so start sorting those out the day before. Here’s the rundown of what you need before we start mixing:
| Ingredient | Quantity | Preparation Note |
|---|---|---|
| Bread (Sourdough or French) | 10 cups cubed | Dried overnight or lightly toasted |
| Onion | 1 large | Finely diced |
| Celery | 2 cups | Finely chopped (about 3-4 stalks) |
| Sage | 2 tbsp | Fresh, finely chopped |
| Thyme | 2 tbsp | Fresh, finely chopped |
| Rosemary | 1 tbsp | Fresh, finely chopped |
| Low-sodium broth | 4 cups | Chicken or vegetable |
| Unsalted butter | ½ cup | Melted |
Choosing the Right Bread Cubes
This is where so many stuffing recipes fall apart, literally! You need structure for this homemade stuffing. I insist on using sourdough or good, crusty French bread. Why? Because when you dry those bread cubes out, they hold up better to the broth and don’t turn into total mush when we bake it. If your bread is too soft, the final texture won’t be right. Let it sit out on a sheet pan overnight—it’s worth the planning!
Selecting Aromatic Herbs for Depth
The herbs are the soul of this savory dish, trust me. We use a triple threat: sage, thyme, and rosemary. You must use them fresh if you can. Sage brings that classic, warm holiday flavor that screams Thanksgiving dinner. The thyme adds a subtle earthiness, and the rosemary just cuts through the richness of the butter and poultry fat beautifully. Don’t skimp here; this is what separates Grandma’s recipe from everything else on the table.
Step-by-Step Instructions for Perfect Grandma’s Thanksgiving Stuffing
We’re moving into the fun part now! Remember, the total active time for this amazing stuffing recipe is only about 20 minutes of prep, and then 45 minutes of baking. That’s why this recipe is a holiday lifesaver. Follow these steps closely, and you’ll have the best savory dish ready for your roasted turkey.
Preparing the Base Vegetables
First things first, get a large skillet heating over medium heat. Melt your butter right in there—we want it nice and hot, but not smoking! Toss in your finely diced onion and celery. You need to cook these down until they are genuinely tender, which usually takes about five to seven minutes. They should soften up nicely and smell sweet. While they are cooking, give them a light sprinkle of salt and pepper; this helps draw out their flavor. Once they look soft and translucent, take them off the heat and set them aside. Don’t burn them; we are building flavor, not charring!
Combining and Moistening the Bread Cubes
Now, grab your biggest mixing bowl—you’ll need space for all those bread cubes! Dump in your dried bread cubes first. Then, pour that warm, buttery vegetable mixture right over the top. Next come those beautiful aromatic herbs—your fresh sage, thyme, and rosemary. Give it a gentle stir to combine everything. Here is where you need to use your judgment: start adding the warm broth slowly. I mean slowly! You want the mixture to be evenly moistened, but stop adding broth the moment it looks damp, not swimming. You are aiming for moist, not soggy. If you accidentally add too much broth, don’t panic; just toss in a few extra dry bread cubes until it feels right.
Baking This Savory Dish to Perfection
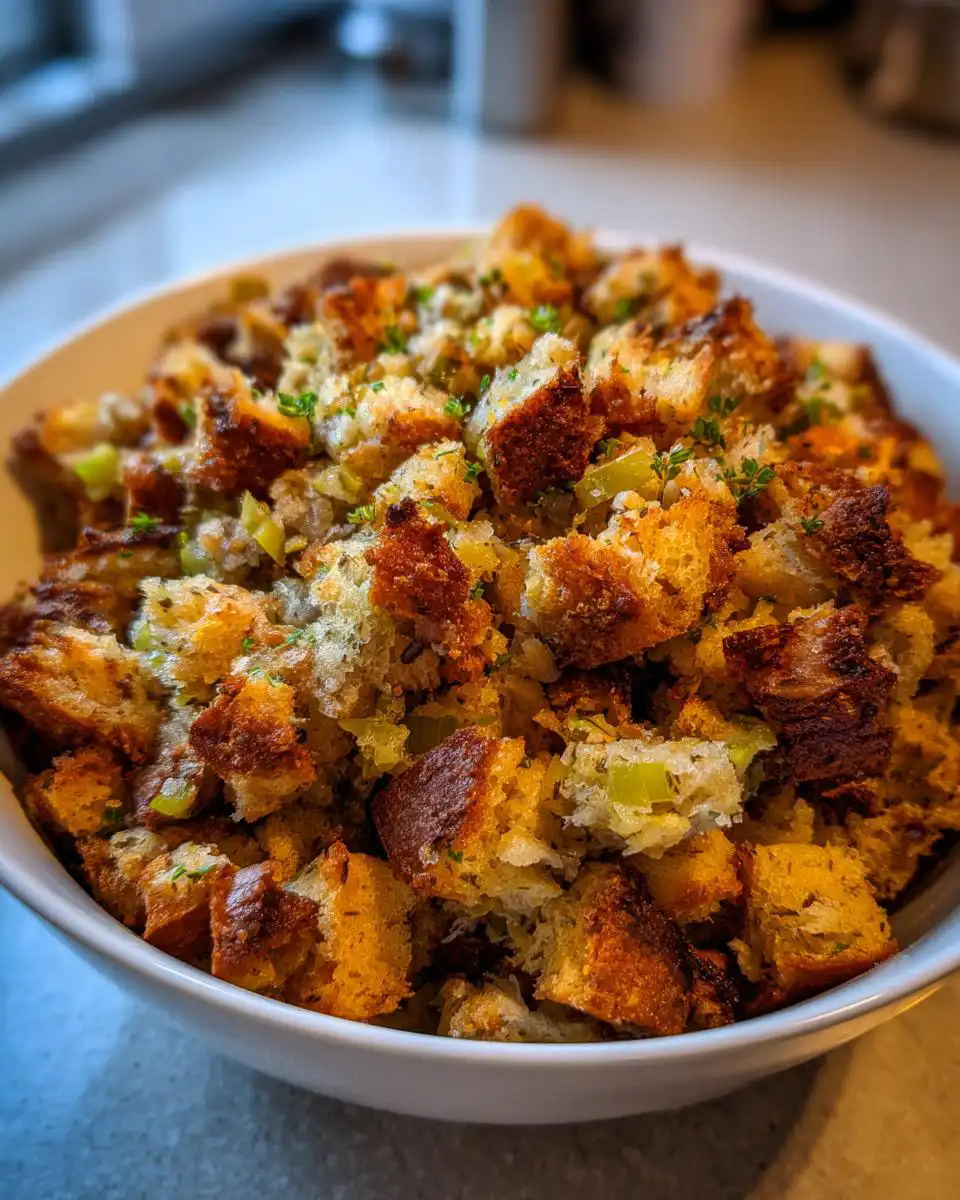
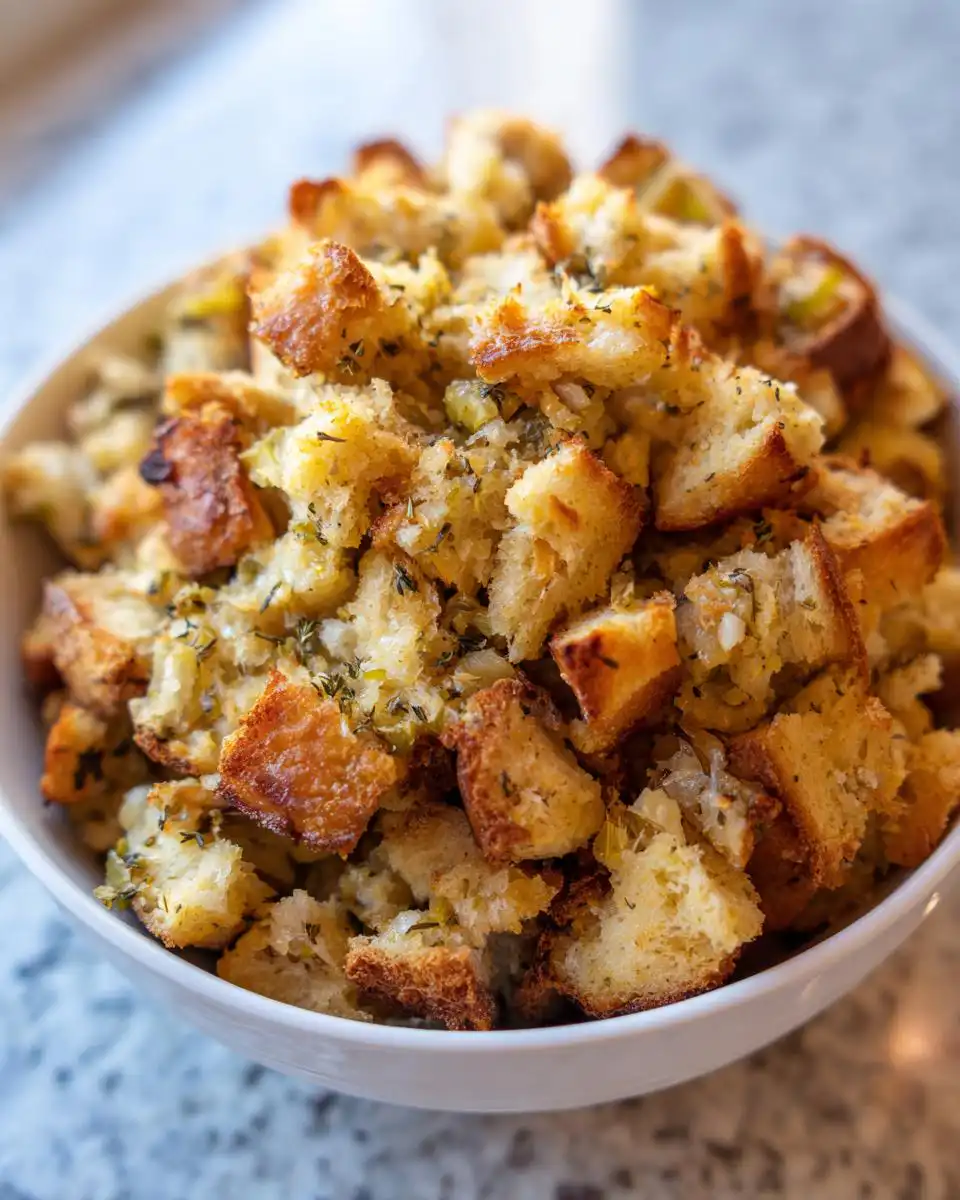
Time for the oven! Preheat it to 350°F (175°C). Grease a baking dish—I usually use a 9×13 for this amount. Transfer all your stuffing mixture into the dish and pat it down gently. Cover the whole thing tightly with aluminum foil. This steamy environment cooks the interior through. Bake it covered for 30 minutes. After that, pull it out, take the foil off completely, and pop it back in for another 15 minutes. That second stage is crucial! It allows the top layer of bread cubes to get that gorgeous, golden brown crispness that everyone fights over at the Thanksgiving dinner table. Let it sit for five minutes before serving!
Tips for Success with Your Stuffing Recipe
Look, I’ve made this Grandma’s Thanksgiving Stuffing recipe dozens of times, especially when I was trying to lighten up my diet years ago—even clean versions need great texture! The key to making this stuffing recipe truly shine isn’t just the ingredients; it’s knowing how to manage that bake time. People often complain their stuffing is either too dry or a puddle, but we’re aiming for that beautiful contrast that makes this savory dish so comforting.
Achieving Optimal Texture in Your Grandma’s Thanksgiving Stuffing
If you want that perfect bite—crisp edges, soft middle—you have to play with the foil. The first 30 minutes covered ensures everything steams together nicely, letting those aromatic herbs really bloom. But that second 15 minutes uncovered? That’s where the magic happens for the top layer! If you want it extra crispy, you can skip the foil entirely, but you’ll need to check it around the 35-minute mark so it doesn’t burn. Remember, we always taste it before baking: if it feels dry then, it’ll be rock hard later. You want it moist, not waterlogged.
Broth Choice for Roasted Turkey Pairings
The broth choice really changes the final flavor profile of this stuffing recipe. If you’re serving a huge roasted turkey and want that deep, traditional flavor, definitely use chicken broth. It adds an extra layer of richness that complements the poultry perfectly. However, if you’re keeping it vegetarian, or just want the seasonal vegetables and herbs to really pop without being overshadowed, vegetable broth is fantastic. It keeps the dish lighter, which I prefer sometimes, even though I’m not strictly detoxing anymore. Either way, low-sodium is my go-to so I can control the final salt level.
Serving Suggestions for Your Thanksgiving Dinner Side Dish
This Grandma’s Thanksgiving Stuffing recipe is so robust and flavorful, it deserves a spot right next to the best items on your Thanksgiving dinner table. Since it’s packed with aromatic herbs and savory goodness, it really shines next to simple, perfectly cooked poultry. Forget those complicated casseroles; this stuffing can stand on its own!
It’s the perfect companion for that juicy roasted turkey, of course. But don’t stop there! It pairs beautifully with creamy mashed potatoes and gravy, soaking up all those extra delicious drippings. For me, the best plate always includes a side of brightly colored seasonal vegetables—think roasted Brussels sprouts or sweet glazed carrots—to cut through the richness of this savory dish. It truly completes the whole holiday cooking experience.
Storing and Reheating Leftover Grandma’s Thanksgiving Stuffing
Oh my gosh, leftovers! The second-best part of Thanksgiving dinner is definitely eating this stuffing recipe cold the next morning, but if you need to reheat it properly, I’ve got you covered. Since this stuffing recipe is so moist thanks to the broth and butter, it reheats beautifully if you handle it right. You don’t want it drying out or turning into a sad, mushy mess!
Here is my go-to guide for keeping this amazing savory dish fresh after the big holiday meal. Always let your stuffing cool down completely before you put it away. Storing warm food improperly is just asking for trouble, and we want to keep this recipe safe and delicious for days!
| Storage/Reheating Aspect | Instructions | Notes |
|---|---|---|
| Refrigeration Time | 3 to 4 days maximum | Store in an airtight container to prevent drying. |
| Freezing Potential | Up to 1 month | Freeze in single-serving portions for easy thawing. Wrap tightly in plastic wrap and foil. |
| Oven Reheating (Best Method) | 350\u00b0F (175\u00b0C) for 15-20 minutes | Add a tablespoon of broth or water per serving before covering with foil to restore moisture. |
| Microwave Reheating | Short bursts (30-60 seconds) | Good for quick portions, but it won’t crisp the top like the oven does. |
When reheating in the oven, that little bit of extra moisture you add back in is the secret weapon. It steams the stuffing back to life, keeping the interior tender while the foil protects it. Once it’s hot all the way through, you can take the foil off for the last five minutes if you want to bring back a tiny bit of that golden-brown top—though honestly, the very best part of the crispness is usually gone after the first day!
Frequently Asked Questions About This Stuffing Recipe
I get so many questions about this classic stuffing recipe because everyone wants their Thanksgiving dinner to be perfect! It’s a staple, and there are always little things people need clarification on, especially when planning holiday cooking around a big roasted turkey. Don’t stress about the small stuff; I’ve got the answers right here to make sure your savory dish turns out flawlessly.
Can I Make This Grandma’s Thanksgiving Stuffing Ahead of Time?
Yes, you absolutely can! This is one of the best things about this stuffing recipe. You can mix everything—the bread cubes, the sautéed vegetables, the herbs—together the night before. Just keep it covered tightly in the baking dish in the fridge. The next day, let it sit on the counter for about an hour before baking so it loses that deep chill. When you bake it, you might need to add an extra 10 minutes to the covered baking time since it’s starting cold. This totally helps manage the chaos of holiday cooking!
What If I Do Not Have Fresh Aromatic Herbs?
If you can’t find fresh sage, thyme, or rosemary, don’t despair! While I swear by the fresh stuff for the best savory dish flavor, dried herbs work in a pinch. The rule of thumb is that dried herbs are more potent, so you need less. For every one tablespoon of fresh herbs I call for, use just one teaspoon of dried. So, for the recipe, that means about 2 teaspoons of dried sage, 2 teaspoons of dried thyme, and 1 teaspoon of dried rosemary. Stir them in when you add the other herbs, and you’ll still get a wonderful flavor profile for your poultry side dish.
Nutritional Estimates for Your Holiday Cooking
Now, I know many of you follow my journey from my Easy Detox Recipes days, and you might be wondering how this classic stuffing fits into a cleaner lifestyle. Since this is traditional Southern comfort food, it uses butter and broth, so we need to be realistic about the numbers. Please remember, these figures are just estimates! They change wildly based on whether you use thick sourdough or light white bread, and how much butter you let soak in. I always tell folks to focus on the deliciousness and the joy this savory dish brings to the Thanksgiving dinner table, but here’s a general idea based on standard usage for 1/8th of the batch.
| Nutrient | Estimated Value |
|---|---|
| Calories | Estimate varies widely based on bread and broth |
| Carbohydrates | High |
| Fat | Moderate |
| Protein | Low to Moderate |
Since we are using low-sodium broth and focusing on those wonderful seasonal vegetables and aromatic herbs rather than heavy sausage, the sodium and fat can be controlled here. If you’re trying to watch your intake, make sure those bread cubes are dried well, and don’t drown the mixture in extra melted butter! This stuffing recipe is meant to be a treat for your holiday cooking, not an everyday meal, so enjoy it responsibly alongside your roasted turkey!
Share Your Experience Making This Recipe
Honestly, seeing your results makes all the recipe testing worth it! This Grandma’s Thanksgiving Stuffing is such a staple in my family, and I’m so excited for it to become a cherished part of your Thanksgiving dinner tradition too. I want to know how it turned out for you and your family!
Did you use sourdough bread cubes? Did those aromatic herbs really make your kitchen smell amazing? Tell me everything! Drop a rating down below—five stars if it was the best stuffing recipe you’ve ever made! And please, leave a comment telling me about your holiday cooking success. Hearing how this savory dish paired with your roasted turkey or poultry makes my day. Happy Thanksgiving, and thank you for trusting me with your holiday cooking!
Print
Grandma’s Thanksgiving Stuffing: 1 Flavor Win
- Total Time: 65 minutes
- Yield: 8-10 servings
- Diet: N/A
Description
This is a classic, flavorful Grandma’s Thanksgiving Stuffing recipe, perfect for your holiday table. It features aromatic herbs and tender vegetables mixed with dried bread cubes and savory broth.
Ingredients
- 10 cups cubed Bread (sourdough or French)
- 1 large Onion, finely diced
- 2 cups Celery, finely chopped (about 3-4 stalks)
- 2 tbsp fresh Sage, finely chopped
- 2 tbsp fresh Thyme, finely chopped
- 1 tbsp fresh Rosemary, finely chopped
- 4 cups Low-sodium broth (chicken or vegetable)
- ½ cup Unsalted butter, melted
- Salt and pepper, To taste
Instructions
- Preheat your oven to 350°F (175°C). Cube the bread and let it dry overnight or toast it lightly. Finely chop the onion, celery, and fresh herbs.
- Melt the butter in a large skillet over medium heat. Add the onion and celery, cooking until tender (5-7 minutes). Season lightly with salt and pepper.
- Place bread cubes in a large mixing bowl. Pour the sautéed vegetable mixture over them. Add chopped herbs, then season with additional salt and pepper. Gradually stir in warm broth until the mixture is evenly moistened.
- Transfer the stuffing to a greased baking dish. Cover with aluminum foil and bake for 30 minutes. Remove foil and bake an additional 15 minutes, or until the top is golden brown and crisp.
- Let the stuffing cool slightly before serving. Enjoy it as a side dish with turkey or other festive favorites!
Notes
- For a crispier texture, you can bake the stuffing uncovered the entire time, adjusting the time as needed.
- If you prefer a richer flavor, use chicken broth instead of vegetable broth.
- Taste the mixture before adding all the broth; you want it moist, not soggy.
- Prep Time: 20 minutes
- Cook Time: 45 minutes
- Category: Side Dish
- Method: Baking
- Cuisine: American