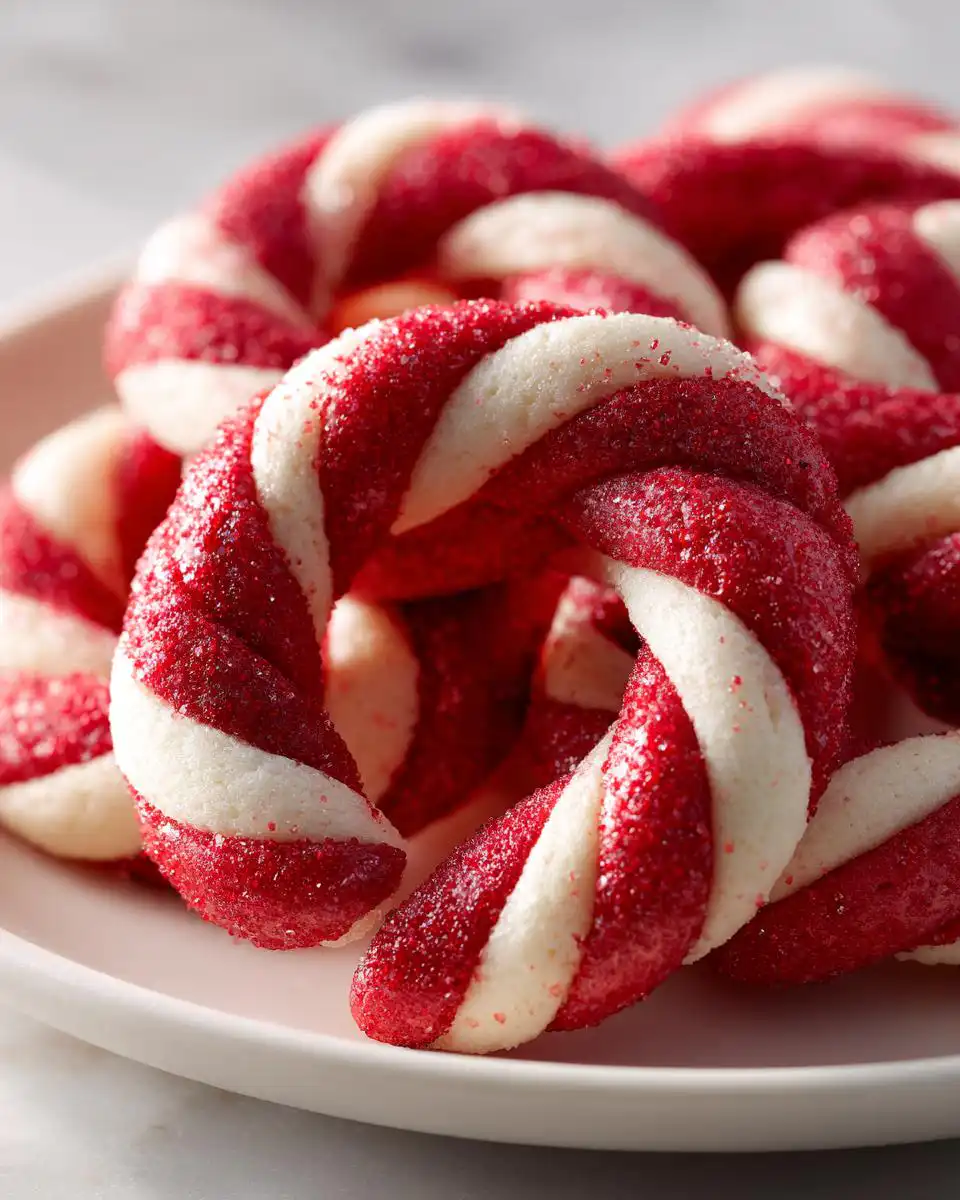
If you’re staring down a mountain of holiday baking and need something truly show-stopping but secretly simple, then these Candy Cane Cookies are your answer! Seriously, they look like you worked for days, but the magic happens when you twist two simple dough colors together to get that perfect striped look. It’s the festive presentation combined with that delicious hint of peppermint that makes these a Christmas cookie staple.
I’m Jordan Bell, and I know a thing or two about needing comfort food that doesn’t derail your goals. Down here in Asheville, NC, I’ve spent years transforming heavy Southern comfort food into lighter options—I even managed an 80-pound weight loss journey myself! That’s why I run the Easy Detox Recipes blog. But Christmas? That’s where tradition wins. These peppermint cookies are a perfect bridge: classic holiday flavor built on a wonderful, buttery vanilla dough base. You won’t believe how easy they are to make!
Gathering Your Ingredients for Perfect Candy Cane Cookies
Before we dive into the twisting part—which is seriously the most fun—we need to get our ducks in a row with the ingredients. Remember, these Candy Cane Cookies rely on a rich, buttery vanilla dough, so quality matters here. Don’t rush this part! Knowing exactly what you need makes the whole process smoother, especially when you have a big batch of holiday baking planned.
I’ve laid out everything below. You’ll notice we need two distinct doughs, but don’t panic; we start with one big batch and then color half of it. Make sure your butter is truly softened—not melted, just soft enough for your finger to make a gentle dent. That’s the secret to getting that light base!
| Item | Amount | Preparation Notes |
|---|---|---|
| Unsalted Butter | 1 cup | Softened, please! |
| Powdered Sugar | 1 cup | For that melt-in-your-mouth texture |
| Egg | 1 large | Must be room temperature |
| Vanilla Extract | 1 tsp | The classic flavor foundation |
| Peppermint Extract | ½ tsp | This brings the holiday cheer |
| All-Purpose Flour | 2½ cups | Sifted or whisked lightly |
| Salt | ½ tsp | To balance the sweetness |
| Red Food Coloring | As needed | Gel is highly recommended |
Essential Components for Buttery Vanilla Dough
The heart of these cookies is truly that buttery vanilla dough. We start with the wet ingredients: the cup of softened butter and the cup of powdered sugar. You have to cream those together until they look pale and fluffy—this step whips air into the dough, which is critical for texture later on. After that, the egg and the extracts go in. Make sure that egg is room temperature; a cold egg can cause your creamed butter mixture to curdle a little, and we want smooth sailing here!
Next up are the dry bits: the flour and salt. We blend these in slowly. The goal is a soft dough that holds its shape but isn’t sticky enough to glue itself to your hands. Once that’s mixed, we split it perfectly in half before introducing the color. Resist the urge to add extra flour if it seems soft; this dough is meant to be pliable!
Ingredient Notes and Substitutions for Candy Cane Cookies
I want to talk quickly about the coloring because it makes a huge difference in the final look of your Candy Cane Cookies. If you can swing it, use gel food coloring. Liquid coloring is mostly water, and adding too much water to this buttery dough will make it too soft to twist properly, causing your candy canes to just spread into flat, red circles. Yuck!
Also, about that egg—I mentioned room temperature, and I mean it. If you forget to pull it out, just place the whole egg (shell and all!) in a bowl of warm tap water for about five minutes. It warms up enough to mix beautifully without chilling the butter. Keeping the integrity of the buttery vanilla dough is key for those sharp stripes, so pay attention to those little details!
Equipment Needed for Your Candy Cane Cookies Recipe
You don’t need a massive setup for these festive treats, but a few key tools make the process much cleaner. Grab your stand mixer or a good electric hand mixer; creaming that butter and sugar takes a bit of elbow grease otherwise! You’ll definitely need parchment paper to line your baking sheets—this keeps the bottoms from browning too fast and makes cleanup a breeze.
Don’t forget mixing bowls, measuring cups, and spatulas, of course. The most important item, besides your heart full of holiday cheer, is a good sharp knife or bench scraper for dividing the dough evenly before you start twisting those colorful ropes!
Step-by-Step Instructions to Make Amazing Candy Cane Cookies
Alright, let’s get baking! This is where the fun really starts. We’re moving from preparing ingredients to actually creating the show-stopping look of these Candy Cane Cookies. Just follow these steps, take your time when twisting the dough, and you’ll have stunning Christmas cookies ready for the platter.
Preparing the Buttery Vanilla Dough Base
First thing first, get that oven preheated to 375°F (190°C) and grab your parchment paper to line those baking sheets. No excuses, we need that easy cleanup! Now, back to the dough. Put your softened butter and powdered sugar into your mixer bowl. Beat them together on medium speed for about three or four minutes until the mixture looks pale yellow and fluffy—it should look like whipped clouds, not gritty sand. This is the foundation for that lovely buttery vanilla dough!
Next, slow the mixer down and add your room temperature egg. Mix until it’s just combined. Then, drizzle in both the vanilla and the peppermint extract. Give that a quick scrape down the sides of the bowl. Finally, slowly add your flour and salt mixture. Mix on low speed until *just* combined. Stop as soon as you don’t see dry streaks of flour anymore. Overmixing here makes tough cookies, and we want tender ones!
Coloring and Shaping Your Festive Candy Cane Cookies
Now for the dividing act! Scoop the dough out and divide it evenly in half. Put one half back in the bowl or into a separate small bowl—this stays plain. Take the other half and add your red food coloring. If you’re using gel, start with a small dab and knead it in by hand until you get a vibrant, beautiful red. You want a strong color so it really pops against the white.
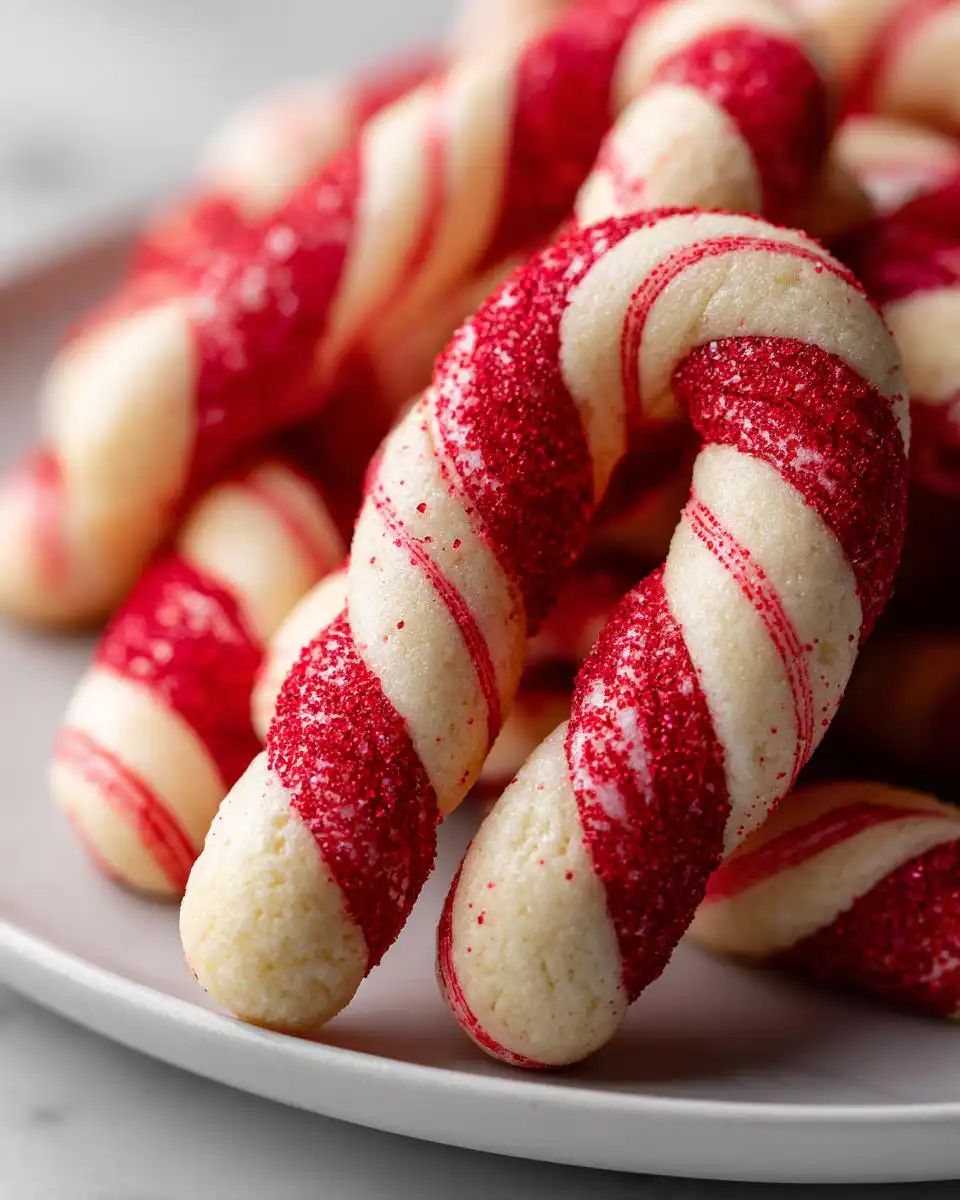
Time to roll! Grab about a teaspoon of the plain dough and a teaspoon of the red dough. Roll each piece between your palms into a rope that’s roughly four inches long. Try to keep them about the same thickness so they twist nicely together. Gently lay the red rope right next to the white rope, and then slowly twist them around each other like you’re braiding hair. Once twisted, bend that rope into a traditional candy cane shape and place it on your prepared sheet. Give them a little space—they spread just a tiny bit!
Baking and Cooling Your Peppermint Cookies
These peppermint cookies bake fast, so watch them closely! Pop the trays into that 375°F oven and bake for exactly 8 to 10 minutes. You are looking for the bottoms to just start turning lightly golden brown. If the tops look pale, that’s okay, but don’t let the bottoms burn!
When they come out, DO NOT touch them immediately! Let them sit right there on the hot baking sheet for a full five minutes. This allows them to firm up enough so they don’t break when you move them. After five minutes, gently transfer the cookies to a wire rack to cool completely. Patience during this cooling stage is crucial for keeping their shape intact!
Tips for Expert Candy Cane Cookies Success
If you want your Christmas cookies to look like they came from a professional bakery, I have a couple of quick tips based on what I’ve learned over the years. The biggest mistake people make is overworking the dough once the color is added. Once you twist those ropes, stop moving them! The more you handle the dough, the warmer it gets, and the more those colors start to blend together, losing that sharp striped look we are aiming for. You can see some of my other baking inspiration on my Pinterest page.
Another thing: don’t be shy with the peppermint extract, but don’t go overboard either! Half a teaspoon gives you that perfect cooling tingle without tasting medicinal. If you find your dough is getting too soft while you are shaping dozens of cookies, just pop the remaining dough balls into the fridge for ten minutes. A chilled dough is much easier to handle and roll into those neat little ropes. Remember, these are best when they are soft, so pull them out right when those bottoms turn that beautiful light gold!
Serving Suggestions for Your Holiday Baking Creations
These peppermint cookies are fantastic all on their own, especially with that rich, buttery vanilla flavor shining through. However, they look even better when paired with something creamy to cut through the peppermint zing. My favorite way to serve these during holiday baking is alongside rich mugs of hot chocolate—maybe a slightly lighter version I’ve worked up for the blog! Sugar cookies are another great pairing.
For a non-chocolate option, a simple glass of cold milk is always perfect for dipping. If you are serving them at a party, try arranging them on a white platter with some fresh cranberries scattered around; the red really pops against the white background. They also look wonderful tucked into small holiday tins as homemade gifts! Check out my Medium profile for more quick tips.
Frequently Asked Questions About Candy Cane Cookies
I always get so many questions when I bring these to family parties, so let’s tackle the most common ones right here so your baking goes perfectly!
How do I keep my Candy Cane Cookies soft?
The absolute number one reason these cookies get hard is overbaking! You need to pull them out when the edges are just set and the bottom is lightly golden. If you bake them until they are dark brown, they will be crunchy. Also, make sure you aren’t adding any extra moisture, especially if you are using liquid food coloring instead of gel—too much moisture being baked out means a dry final product.
Can I use liquid food coloring instead of gel for these peppermint cookies?
You absolutely can, but I advise against it for this specific recipe. Since we are relying on the stiffness of the buttery vanilla dough to hold that twisted shape, adding extra liquid from the coloring can make the dough too slack. If you must use liquid, use just a drop or two and mix it in very quickly, then chill the dough immediately before rolling.
How long does the buttery vanilla dough last if I need to chill it?
If your kitchen is hot or you just need a break between mixing and shaping, this dough does great chilled! Wrap each colored half tightly in plastic wrap and pop it in the fridge. It will keep beautifully for up to three days. When you take it out, let it sit on the counter for about 15 to 20 minutes just to soften up enough to roll into those neat little ropes.
Storing and Reheating Your Festive Treats
Keeping these cookies fresh past Christmas day is easy, but you need to be gentle with them since they are so tender. The key is an airtight container. You don’t want any extra moisture getting in or the peppermint scent escaping! Honestly, these Candy Cane Cookies taste even better on day two once the peppermint has really settled into that buttery vanilla dough.
| Storage Method | Duration | Notes |
|---|---|---|
| Airtight Container (Room Temp) | Up to 5 days | Use parchment paper layers between cookies. |
| Freezer (Unbaked Dough) | Up to 3 months | Freeze shaped cookies before baking for best results. |
| Reheating | 30 seconds | Microwave briefly if they feel too firm after a few days. |
If you freeze the shaped, unbaked cookies, just pop them onto a lined baking sheet and bake straight from frozen—you might need an extra minute or two in the oven. If your baked peppermint cookies feel a little stiff after a few days stored on the counter, just microwave a couple on a paper towel for about 30 seconds. That little bit of warmth brings back the wonderful softness!
Share Your Festive Candy Cane Cookies Experience
I truly hope you loved making these as much as I do! Seeing your beautiful, striped creations makes all the effort worthwhile. When you finish your batch of Candy Cane Cookies, please snap a photo and tag me online! Drop a comment below and let me know how the twisting went for you!
Tips for Expert Candy Cane Cookies Success
If you want your Christmas cookies to look like they came from a professional bakery, I have a couple of quick tips based on what I’ve learned over the years. The biggest mistake people make is overworking the dough once the color is added. Once you twist those ropes, stop moving them! The more you handle the dough, the warmer it gets, and the more those colors start to blend together, losing that sharp striped look we are aiming for.
Another thing: don’t be shy with the peppermint extract, but don’t go overboard either! Half a teaspoon gives you that perfect cooling tingle without tasting medicinal. If you find your dough is getting too soft while you are shaping dozens of cookies, just pop the remaining dough balls into the fridge for ten minutes. A chilled dough is much easier to handle and roll into those neat little ropes. Remember, these are best when they are soft, so pull them out right when those bottoms turn that beautiful light gold!
Serving Suggestions for Your Holiday Baking Creations
These peppermint cookies are fantastic all on their own, especially with that rich, buttery vanilla flavor shining through. However, they look even better when paired with something creamy to cut through the peppermint zing. My favorite way to serve these during holiday baking is alongside rich mugs of hot chocolate—maybe a slightly lighter version I’ve worked up for the blog! If you enjoy festive treats, you might also like my recipe for Cranberry Orange Cookies.
For a non-chocolate option, a simple glass of cold milk is always perfect for dipping. If you are serving them at a party, try arranging them on a white platter with some fresh cranberries scattered around; the red really pops against the white background. They also look wonderful tucked into small holiday tins as homemade gifts!
Frequently Asked Questions About Candy Cane Cookies
I always get so many questions when I bring these to family parties, so let’s tackle the most common ones right here so your baking goes perfectly!
How do I keep my Candy Cane Cookies soft?
The absolute number one reason these cookies get hard is overbaking! You need to pull them out when the edges are just set and the bottom is lightly golden. If you bake them until they are dark brown, they will be crunchy. Also, make sure you aren’t adding any extra moisture, especially if you are using liquid food coloring instead of gel—too much moisture being baked out means a dry final product. Handle that dough gently, too; too much handling warms it up and makes them bake up harder!
Can I use liquid food coloring instead of gel for these peppermint cookies?
You absolutely can, but I advise against it for this specific recipe. Since we are relying on the stiffness of the buttery vanilla dough to hold that twisted shape, adding extra liquid from the coloring can make the dough too slack. If you must use liquid, use just a drop or two and mix it in very quickly, then chill the dough immediately before rolling. We want those bright stripes, and gel coloring gives you the best results for these peppermint cookies.
How long does the buttery vanilla dough last if I need to chill it?
If your kitchen is hot or you just need a break between mixing and shaping, this dough does great chilled! Wrap each colored half tightly in plastic wrap and pop it in the fridge. It will keep beautifully for up to three days. When you take it out, let it sit on the counter for about 15 to 20 minutes just to soften up enough to roll into those neat little ropes. Chilling is a lifesaver during big holiday baking sessions! For more baking ideas, see my dessert recipes.
Storing and Reheating Your Festive Treats
Keeping these cookies fresh past Christmas day is easy, but you need to be gentle with them since they are so tender. The key is an airtight container. You don’t want any extra moisture getting in or the peppermint scent escaping! Honestly, these Candy Cane Cookies taste even better on day two once the peppermint has really settled into that buttery vanilla dough.
| Storage Method | Duration | Notes |
|---|---|---|
| Airtight Container (Room Temp) | Up to 5 days | Use parchment paper layers between cookies. |
| Freezer (Unbaked Dough) | Up to 3 months | Freeze shaped cookies before baking for best results. |
| Reheating | 30 seconds | Microwave briefly if they feel too firm after a few days. |
If you freeze the shaped, unbaked cookies, just pop them onto a lined baking sheet and bake straight from frozen—you might need an extra minute or two in the oven. If your baked peppermint cookies feel a little stiff after a few days stored on the counter, just microwave a couple on a paper towel for about 30 seconds. That little bit of warmth brings back the wonderful softness!
Share Your Festive Candy Cane Cookies Experience
I truly hope you loved making these as much as I do! Seeing your beautiful, striped creations makes all the effort worthwhile. When you finish your batch of Candy Cane Cookies, please snap a photo and tag me online! Drop a comment below and let me know how the twisting went for you!
Print
Amazing Candy Cane Cookies: 1 Simple Trick
- Total Time: 40 minutes
- Yield: About 3 dozen cookies
- Diet: Vegetarian
Description
These Candy Cane Cookies offer a festive, buttery vanilla flavor with a hint of peppermint, perfect for holiday baking. You create the classic striped look by twisting two colors of dough together before baking.
Ingredients
- 1 cup unsalted butter, softened
- 1 cup powdered sugar
- 1 large egg (room temp)
- 1 tsp vanilla extract
- ½ tsp peppermint extract
- 2½ cups all-purpose flour
- ½ tsp salt
- Red food coloring (gel preferred)
Instructions
- Preheat your oven to 375°F (190°C). Line baking sheets with parchment paper.
- Beat the softened butter and powdered sugar together until the mixture is light and fluffy, about 3 to 4 minutes.
- Mix in the room temperature egg and both vanilla and peppermint extracts until the mixture is smooth.
- Slowly blend the flour and salt into the wet ingredients until a soft, but not sticky, dough forms.
- Divide the dough evenly in half. Color one half with red food coloring until the desired shade is achieved.
- Take about 1 teaspoon of the plain dough and 1 teaspoon of the red dough. Roll each portion into a 4-inch long rope.
- Gently twist the two ropes together. Bend the twisted rope and shape it into a candy cane form. Place shaped cookies on the prepared baking sheets.
- Bake for 8 to 10 minutes, watching until the bottoms are lightly golden. Let the cookies cool on the baking sheet for 5 minutes before moving them to a wire rack to cool completely.
Notes
- Using gel food coloring yields a brighter red color without adding too much extra moisture to the dough.
- Ensure your egg is at room temperature so it incorporates evenly into the butter mixture.
- Do not overbake; these cookies are best when soft.
- Prep Time: 30 minutes
- Cook Time: 10 minutes
- Category: Dessert
- Method: Baking
- Cuisine: American