Oh, there’s just something about a classic apple pie, isn’t there? That warm, comforting hug in dessert form. This Easy Apple Pie Inspired by Mary Berry is my go-to when I want that homemade goodness without all the fuss. I remember one blustery autumn afternoon, craving something sweet, and this recipe just delivered. It’s simple, uses readily available ingredients, and turns out beautifully, just like Mary’s always do, with that perfect flaky crust and gloriously spiced apple filling. It really is a joy to make and even more so to eat!
Why You’ll Love This Easy Apple Pie Inspired by Mary Berry
- It’s wonderfully easy to make, even for a beginner baker!
- The flavour combination of sweet and tart apples with cinnamon is just heavenly.
- It brings that lovely cosy, comforting feeling to any occasion.
- Perfect for family dinners, special treats, or just because!
Ingredients for Your Easy Apple Pie
This is where the magic happens! Using ready-made pastry is a total lifesaver, making this recipe super accessible. Granny Smiths are my absolute favourite for pies because they’re lovely and tart, which balances out the sweetness perfectly. Don’t be tempted to skip the lemon zest – it just adds that little bit of brightness that makes everything sing!
- 7 large Granny Smith apples, peeled, cored, and sliced
- 100 g caster sugar
- 100 g light brown sugar
- 2 tbsp plain flour
- 1 tsp ground cinnamon
- 1/4 tsp ground nutmeg
- 1 tbsp lemon juice
- 1 tsp lemon zest
- 2 sheets ready-made shortcrust pastry
- 1 medium egg, beaten
- 2 tbsp demerara sugar
Step-by-Step Instructions for Your Easy Apple Pie
Right then, let’s get this brilliant pie in the oven! I always put a baking tray in while the oven is heating up – it stops the bottom crust from getting soggy, which is a classic issue, and it means your pie is ready to go straight onto a hot surface. Genius, really!
Step 1: Get your oven preheated to a nice 200°C (or 180°C fan, if you’ve got one). Pop a sturdy baking tray onto one of the shelves to heat up. This is a little trick to get that bottom pastry nice and crisp.
Step 2: Grab a big mixing bowl. Chuck in your lovely sliced Granny Smith apples, then add all your sugars (caster and light brown), the plain flour (this helps thicken the juices), your ground cinnamon, that little pinch of nutmeg, the lemon juice for tang, and the lemon zest for that extra zing. Give it all a really good toss until every apple slice is coated in that dreamy spice mix.
Step 3: Unroll one of your ready-made shortcrust pastry sheets. Gently line your 23cm pie dish with it, making sure it goes right into the corners. Don’t stretch it too much, or it might shrink in the oven. Just press it in nice and snugly.
Step 4: Now, carefully spoon your spiced apple mixture into the pastry-lined dish. Try to leave most of the excess liquid behind in the bowl – we want tender apples, not a swimming pool of juice!
Step 5: Unroll the second sheet of pastry. This is your pie’s lovely hat! Drape it carefully over the top of the apples, tucking it in around the edges.
Step 6: Time to seal the deal! Trim off any really wonky bits of excess pastry around the rim. Then, use your fingers or a fork to press down and crimp the edges all the way around. This not only looks pretty but also makes sure that gorgeous filling stays put.
Step 7: Heat’s rising in there! Using a sharp knife, cut about 4 small slits into the top of the pastry. This is super important to let the steam escape as it bakes, otherwise, you might get a puffier, less tidy pie – and we want neatness!
Step 8: For that beautiful golden finish, brush the top of the pie all over with your beaten egg. Then, sprinkle over that lovely demerara sugar. It gives it a gorgeous crunch and a little sparkle.
Step 9: Very carefully, take the hot baking tray out of the oven (use oven mitts, obviously!) and place your pie onto it. Slide the whole lot back into the oven and bake for a good 25 minutes. You’ll start to smell that amazing apple and cinnamon aroma!
Step 10: Now, reduce the oven temperature to 190°C (or 170°C fan). Let the pie bake for another 30 to 35 minutes. You’re looking for a gorgeously golden brown pastry all over, and you should see the apple filling bubbling merrily through those top slits. If it’s looking a bit too brown too quickly, just pop a bit of foil loosely over the top.
Step 11: Patience, my friend! Once it’s out of the oven, resist the urge to tuck in straight away. You absolutely need to let this pie cool down for at least a couple of hours. Trust me on this one! It allows the filling to set properly, so you get lovely neat slices, rather than a glorious apple avalanche. You can find some tips on making a vegan version if you fancy!
What to Serve with Your Easy Apple Pie Inspired by Mary Berry
This beautiful apple pie is wonderful on its own, but here are a few classic pairings that just take it to the next level. Trust me, they’re perfect for making your dessert moment extra special!
Proper Custard: You can’t beat a warm, thick custard poured over a slice of apple pie. It’s the ultimate comforting combination that feels like a big, cosy hug.
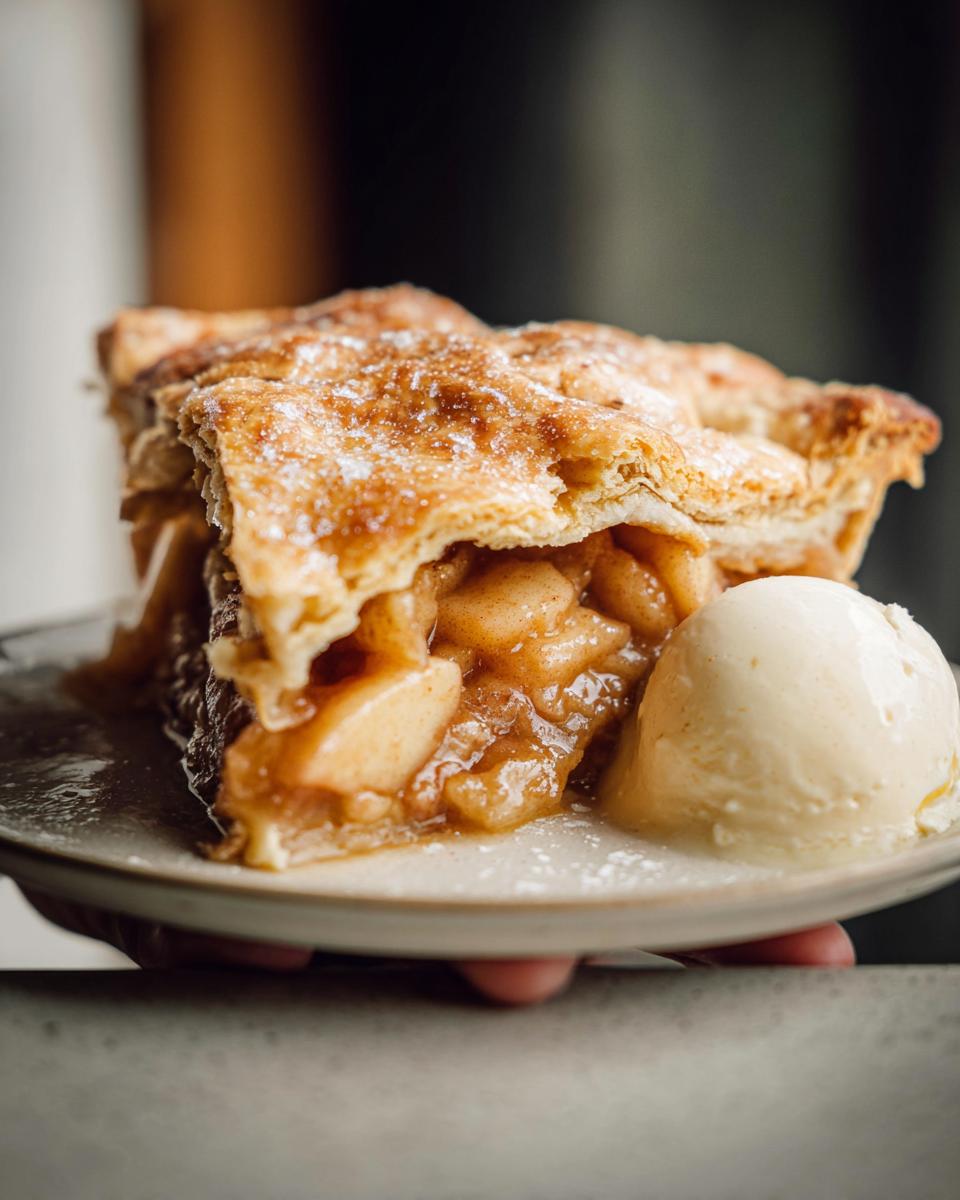
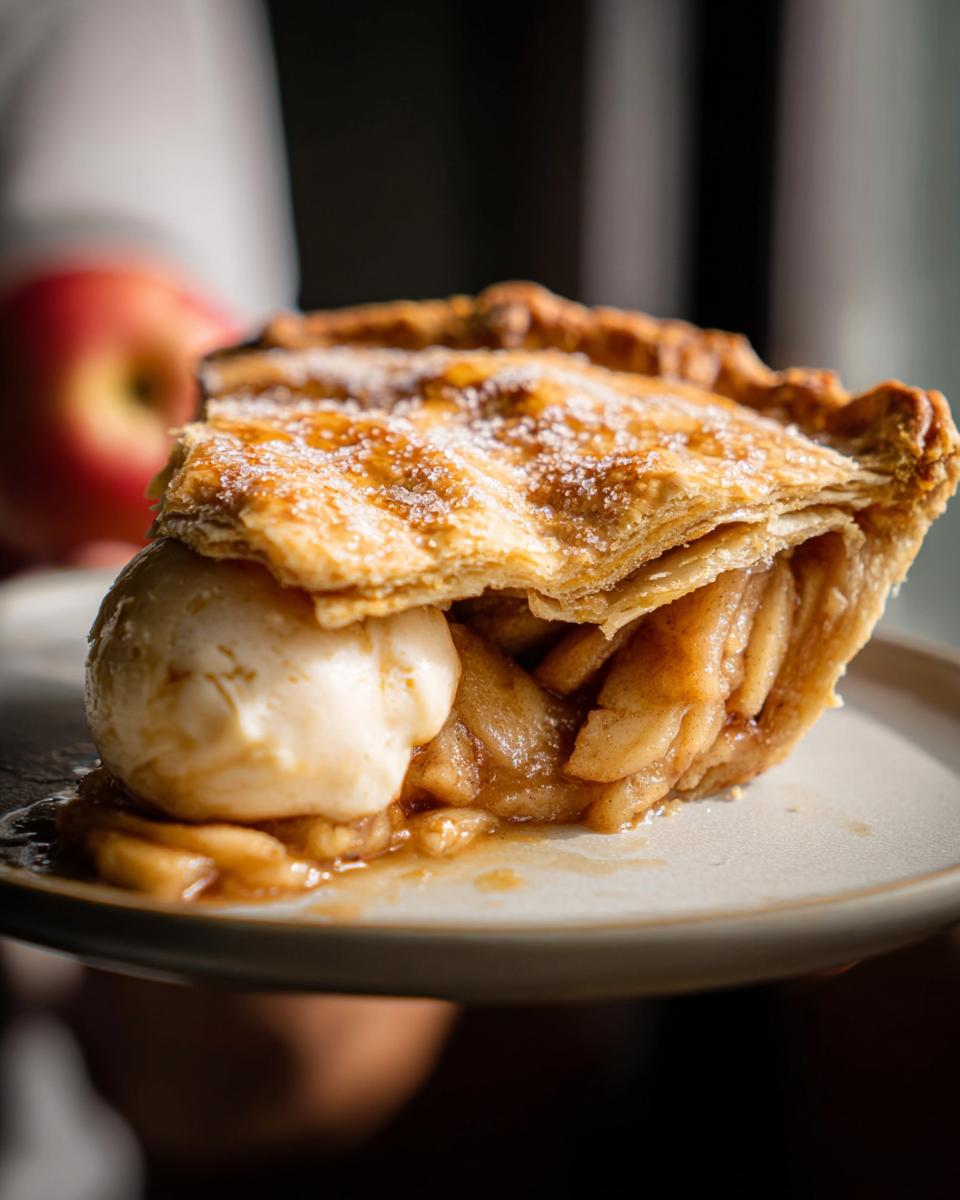
Vanilla Ice Cream: The contrast of warm pie and cold, creamy ice cream is simply divine. As the ice cream melts into the hot filling, it’s pure heaven.
Whipped Cream: For something a little lighter, a dollop of softly whipped cream balances the sweetness and adds a lovely fresh note to each bite.
Storing and Reheating Your Easy Apple Pie
Got leftover apple pie? Lucky you! Storing it properly is key to keeping it tasting almost as good as when it’s fresh. I usually just pop it straight into the fridge, but there are a few little things to keep in mind.
Once your gorgeous apple pie has completely cooled down – and I really do mean *completely*, as storing a warm pie can make the pastry soggy – cover it loosely with cling film or pop it into an airtight container. Pop that into the fridge, and it should be perfectly lovely for about 3-4 days. If you’re planning ahead, you can even make this pie the day before you need it; it’s a real lifesaver for busy weekends or if you’re hosting!
When you’re ready for a slice, reheating is simple! You can pop a slice back into a moderate oven, around 180°C (160°C fan), for about 10-15 minutes until it’s warmed through and the pastry is crisp again. A quick zap in the microwave for about 30 seconds will warm it up, but honestly, it can make the pastry a bit soft, so the oven is definitely my preferred method for the best results.
Frequently Asked Questions About Easy Apple Pie
Can I use different types of apples for this easy apple pie?
Oh, absolutely! While Granny Smith apples are my favourite for their tartness which balances the sweetness, you can certainly use a mix of apples. Honeycrisp, Gala, or Fuji work wonderfully too. Just try to use apples that hold their shape when baked, like Bramleys or a good baking apple variety, to avoid a mushy filling. My mum always used a mix, and it was delicious!
How do I stop the bottom crust of my apple pie from being soggy?
This is a classic problem, isn’t it! A few things help. Firstly, make sure your oven is properly preheated, and bake the pie straight onto a hot baking tray as I’ve recommended. This really helps cook the bottom pastry. Also, ensure you don’t have too much excess liquid from the apple filling; draining it off before filling the pie is key. Sometimes, a thin layer of breadcrumbs or semolina sprinkled on the bottom pastry before adding the apples can create a barrier, too!
Can I make this easy apple pie inspired by Mary Berry ahead of time?
Definitely! This is one of the things I love about this recipe, much like many of the brilliant baking techniques you can learn from someone like Mary Berry. You can prepare the pie completely, up to the point of baking, and then cover it well and pop it in the fridge for up to 24 hours. Just remember to bring it out about 30 minutes before you bake it, following the instructions as normal. It’s a fantastic option for entertaining or just getting ahead of yourself!
Before You Go
I really hope you give this lovely Easy Apple Pie Inspired by Mary Berry a go! It’s such a comforting classic. If you do bake it, please let me know how you get on in the comments below – I’d love to hear about it! And if you’re feeling generous, a quick rating would be amazing, or maybe share a pic on your favourite platform. Don’t forget to check out more delicious recipes on Pinterest!

Easy Apple Pie
- Total Time: 2 hours
- Yield: 8 servings
- Diet: Vegetarian
Description
A classic comforting dessert with tender cinnamon apples and flaky pastry, perfect for sharing.
Ingredients
- 7 large Granny Smith apples, peeled, cored, and sliced
- 100 g caster sugar
- 100 g light brown sugar
- 2 tbsp plain flour
- 1 tsp ground cinnamon
- 1/4 tsp ground nutmeg
- 1 tbsp lemon juice
- 1 tsp lemon zest
- 2 sheets ready-made shortcrust pastry
- 1 medium egg, beaten
- 2 tbsp demerara sugar
Instructions
- Preheat your oven to 200C or 180C fan. Place a baking tray in the oven to heat.
- In a large bowl, combine the sliced apples, caster sugar, light brown sugar, plain flour, cinnamon, nutmeg, lemon juice, and lemon zest. Toss until evenly coated.
- Roll out one sheet of shortcrust pastry and line a 23 cm pie dish, pressing it into the edges.
- Spoon the apple filling into the pastry case, leaving excess liquid behind in the bowl.
- Roll out the second pastry sheet and place it over the apples.
- Trim the excess pastry, then press and crimp the edges to seal the pie.
- Cut 4 small slits into the top of the pastry to allow steam to escape.
- Brush the top with beaten egg and sprinkle with demerara sugar.
- Place the pie onto the hot baking tray and bake for 25 minutes.
- Reduce the oven temperature to 190C or 170C fan and bake for 30 to 35 minutes until the pastry is golden brown and the filling is bubbling.
- Leave the pie to cool for at least 2 hours before slicing so the filling can set.
Notes
- Serve warm with custard, whipped cream, or vanilla ice cream.
- Prep Time: 1 hour
- Cook Time: 1 hour
- Category: Dessert
- Method: Baking
- Cuisine: British