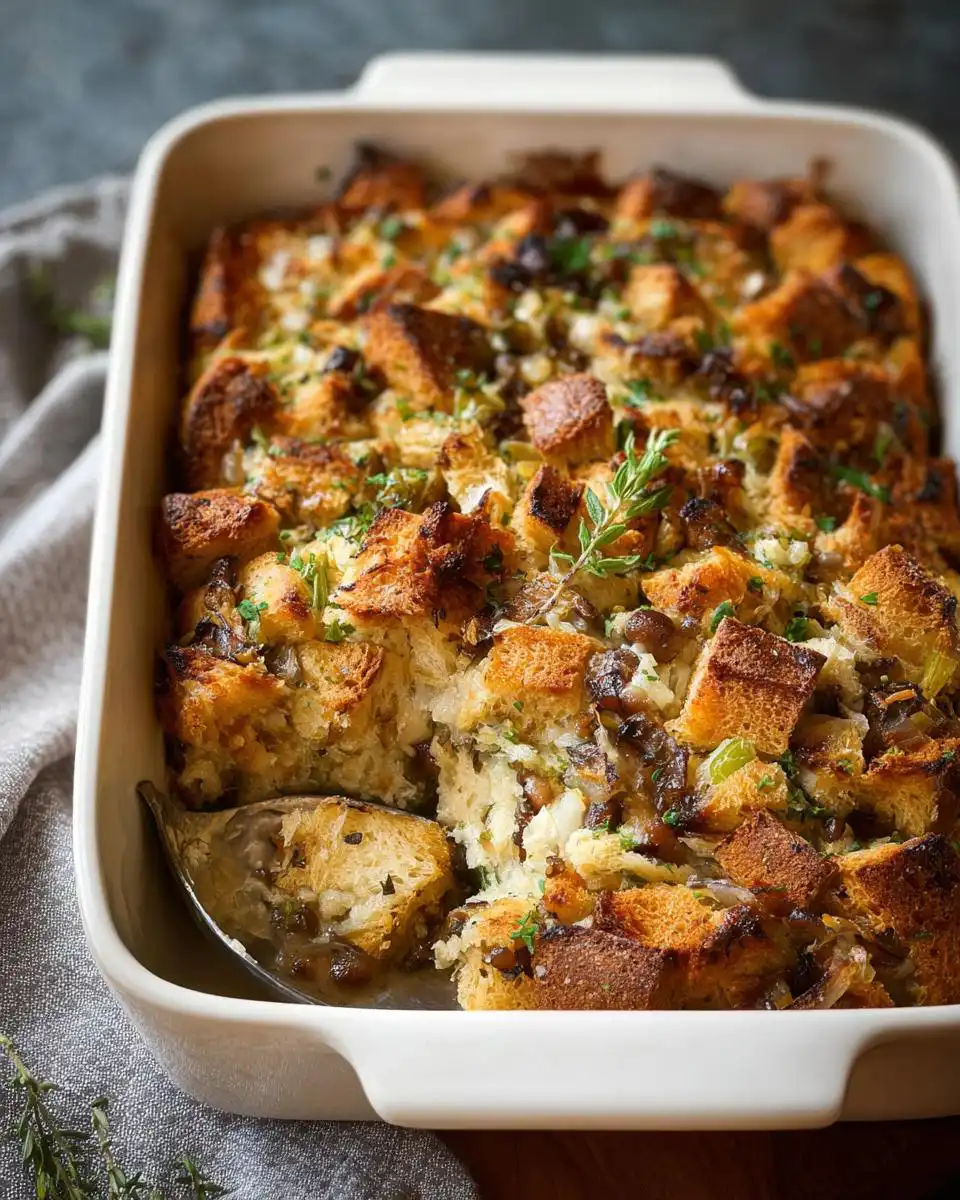
I think the secret to a truly memorable roast dinner isn’t just the main event, it’s the glorious, golden, flavour-packed stuffing on the side. I’ve always been a bit obsessed with it, and I vividly remember the first time I tried a proper Mary Berry chestnut herb stuffing at my Aunt’s Christmas dinner years ago. It wasn’t just dry breadcrumbs; it was rich, creamy, and bursting with the earthy sweetness of chestnuts and fresh herbs. That’s exactly what I’ve tried to recreate here. This version is my absolute go-to because it’s that perfect combination: deeply comforting, surprisingly easy to put together, and completely vegetarian so everyone can enjoy it. It just makes the whole meal feel special.
Why You’ll Love This Mary Berry Chestnut Herb Stuffing
Honestly, this stuffing stole the show at my last family roast. My brother-in-law, who’s usually all about the meat, asked for the recipe. It’s that good.
- Rich & Creamy Texture: It’s not your average dry stuffing. The double cream and eggs create this luxurious, almost pudding-like consistency that’s just pure comfort. Trust me, the texture is a total game-changer.
- Deep, Earthy Flavour: The combination of fresh sage, thyme, and rosemary with the sweet, nutty chestnuts is incredible. It tastes like a proper Sunday dinner in every bite.
- Surprisingly Easy: Don’t be fooled by how fancy it looks! The hardest part is chopping the veg. The method is so straightforward and forgiving.
- Perfect Make-Ahead Side: You can assemble the whole dish the day before and just pop it in the oven when you need it. It’s a lifesaver for big meals.
- Naturally Vegetarian: It’s a brilliant, satisfying side that doesn’t need any meat drippings to be delicious, so it’s perfect for feeding a crowd with different diets.
Oh, and here’s my expert tip: toasting the bread first is non-negotiable. It gives the whole dish that amazing structure so it doesn’t turn to mush, and adds a lovely subtle crunch. If you love stuffing, you have to try these pull-apart stuffing rolls too—they’re another family favourite.
Ingredients for Your Mary Berry Chestnut Herb Stuffing
I know it looks like a long list, but honestly, most of it is just chopping herbs and veg. It’s all about building those layers of flavour. Get everything measured out before you start, and the rest is a breeze.
- 1 large rustic white loaf (about 450g), cut into 2.5 cm cubes
- 6 tablespoons unsalted butter
- 2 celery stalks, finely diced
- 2 small brown onions, finely diced
- 1½ teaspoons salt
- 2 cups chicken stock
- 1 cup double cream
- 2 large eggs, lightly beaten
- 225g cooked chestnuts, roughly chopped (look for the pre-cooked, peeled ones in a packet or tin – it saves so much time!)
- 2 tablespoons fresh sage, finely chopped
- 2 tablespoons fresh thyme, finely chopped
- 1 tablespoon fresh rosemary, finely chopped
- 2 tablespoons fresh parsley, finely chopped
How to Make Mary Berry Chestnut Herb Stuffing: Step-by-Step
Don’t let the creamy result fool you; starting with dry, toasted bread is the secret. It soaks up all that lovely stock and cream without going soggy. And I always do the bread first—it gives you time to prep everything else without a rush.
Step 1: First, get your oven nice and hot at 190°C (that’s about 375°F for my friends across the pond). Spread your bread cubes out on a baking tray—try not to crowd them too much. Pop them in for about 12 minutes. You’re looking for them to be lightly golden and feel dry to the touch, not coloured all over. When they’re done, take them out and reduce your oven temperature to 180°C (350°F). This little pre-toast makes all the difference, I promise.
Step 2: While the bread is toasting, melt 2 tablespoons of your butter in a large pan over a medium heat. Add your finely diced celery and onions, sprinkle over about half a teaspoon of the salt, and give it all a good stir. Let this cook for 6 to 8 minutes, stirring now and then, until everything’s lovely and soft but not browned. This is where you build your base flavour, so don’t rush it!
Step 3: In a separate small saucepan, gently heat the chicken stock with the remaining 4 tablespoons of butter. You just want it warm enough to melt the butter—don’t let it boil. Meanwhile, tip your toasted bread cubes into the pan with the softened vegetables. Pour that warm, buttery stock all over the top and use a big spoon to gently toss it together. The bread will start to soak it all up immediately.
Step 4: Now for the creamy part! Pour in the double cream and fold it through carefully. You want to coat everything, but try to be gentle to keep some of the bread’s structure—we’re not making bread sauce here! In a separate bowl, whisk your lightly beaten eggs with the chopped chestnuts, all those gorgeous fresh herbs (sage, thyme, rosemary, parsley), and the rest of the salt.
Step 5: Time to bring it all together. Tip the chestnut and herb mixture into your bread pan. Now, fold everything together until it’s evenly mixed. I use a silicone spatula for this—it’s gentler on the bread. Transfer the whole lot to a well-greased baking dish (I use one about 20x30cm) and spread it out evenly.
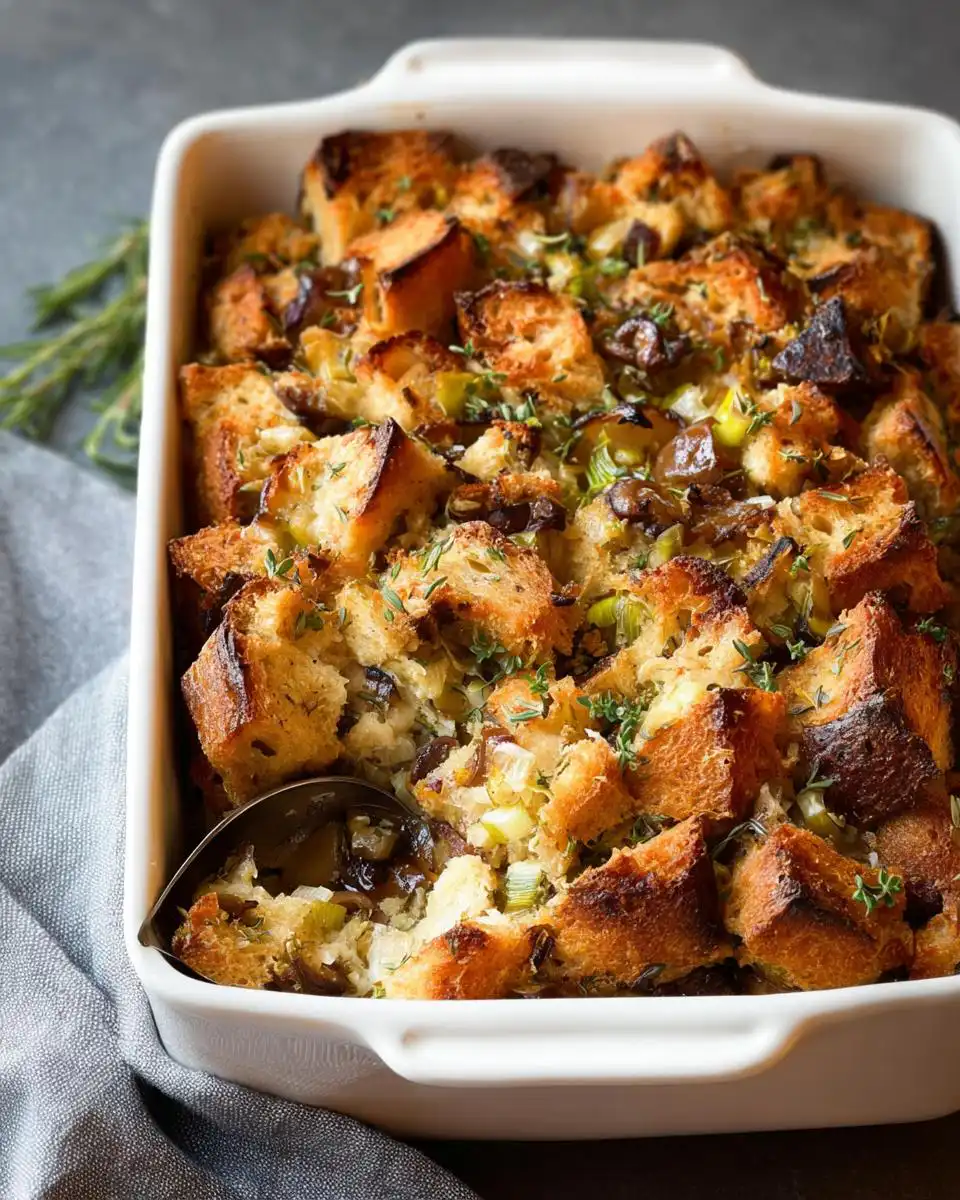
Step 6: Bake it in your preheated 180°C oven for 45 to 50 minutes. You’ll know it’s done when the top is a beautiful, deep golden brown and the centre feels set when you give the dish a little shake. Here’s my expert tip: if the top is browning too fast, just lay a piece of foil loosely over the top for the last 10-15 minutes.
Step 7: This might be the hardest step: let it rest! Take it out of the oven and leave it to sit for a good 5 minutes before you dive in. This lets everything settle, making it easier to slice and serve. It’s incredible straight from the dish, but the leftovers are dreamy in a creamy chicken casserole the next day, or even baked into these easy chicken and stuffing casserole cups.
What to Serve with Your Chestnut Herb Stuffing
Honestly, this stuffing is so good it could almost be a meal on its own, but trust me, it becomes something magical when it’s part of a proper feast. These are my go-to pairings for a perfect Sunday roast.
A Classic Roast Chicken: This is the absolute dream team. The stuffing’s creamy, earthy richness nestles perfectly against juicy chicken and crisps up beautifully where it touches the roasting tin. I always make extra to serve on the side. My favourite method is this roasted chicken with garlic and herbs – it’s foolproof.
Creamy Mashed Potatoes: You can’t have one without the other in my house! A big scoop of fluffy mash alongside the stuffing is the ultimate comfort food combination. The textures are just perfect together. For an extra herby kick, try my rosemary garlic mashed potatoes.
Honey-Glazed Roasted Carrots & Parsnips: The sweet, sticky glaze from the roasted veg cuts through the richness of the cream and butter in the stuffing so beautifully. It adds a lovely bit of colour and freshness to your plate too.
Simple Steamed Green Beans: Sometimes you just need something bright and crisp to balance everything out. A big bowl of steamed green beans with a knob of butter and a squeeze of lemon is the perfect, easy side that lets the stuffing really shine.
Storage, Reheating, and Make-Ahead Tips
The best part? This stuffing is a meal-prep hero. I almost always make an extra dish just for leftovers because it reheats so beautifully.
Let the stuffing cool completely, then pop it in an airtight container in the fridge. It’ll keep perfectly for up to 3 days. For the absolute best texture when reheating, I always use the oven. Just cover the dish with foil and warm it at 180°C for 15-20 minutes until piping hot.
You can also freeze the unbaked mixture! Assemble it in a freezer-safe dish, wrap it tightly, and freeze for up to a month. Thaw it overnight in the fridge before baking as usual. Honestly, my top tip for a stress-free dinner is to mix everything up the day before, cover the dish, and keep it in the fridge. Then, all you have to do on the day is slide it into a hot oven. Easy.
Your Mary Berry Chestnut Herb Stuffing Questions Answered
I get a few of the same questions every time I serve this, so I thought I’d pop the answers here to save you a bit of head-scratching!
Can I make this stuffing ahead of time?
Absolutely, and I highly recommend it! It’s one of my favourite make-ahead tricks. You can assemble the whole thing, cover the dish tightly, and keep it in the fridge for a full day before you need to bake it. Just take it out about 20 minutes before it goes in the oven to take the chill off, then bake as usual. It’s a total lifesaver for big dinners.
What type of bread can I use?
A good, sturdy rustic white loaf is my go-to because it toasts up nicely and holds its shape. But don’t worry if you don’t have one! A day-old sourdough works beautifully, or even a decent quality baguette. Just avoid very soft, sliced sandwich bread—it tends to turn a bit mushy. The key is getting those cubes dry and golden in the first step.
Is this suitable for vegetarians?
Yes, it’s completely vegetarian as written! I use a good, strong vegetable stock instead of chicken stock to make sure it’s veggie-friendly. It still has all that rich, creamy, herby flavour. It’s a crowd-pleaser that works for everyone at the table. For more comforting meal ideas, have a look at my Pinterest boards—I’m always pinning new finds!
Nutritional Information Disclaimer
Just a quick, friendly note about the numbers!
Please remember that any nutritional information is always an estimate. The exact values can change depending on the specific brands and types of ingredients you use, so it’s best to use them as a helpful guide rather than a strict measure.
Before You Go
I really hope you give this stuffing a go. It’s one of those recipes that feels like a warm hug on a plate, and it’s brought so many happy, full-bellied moments to my own family table.
If you make it, I’d love to hear how it turns out! Drop a comment below or share a photo and tag me. Nothing makes me happier than knowing one of my recipes has made it into your kitchen. Happy cooking!
Print
Mary Berry Chestnut Herb Stuffing
- Total Time: 65 min
- Yield: 8 servings
- Diet: Vegetarian
Description
A rich, creamy stuffing with toasted bread, chestnuts, and fresh herbs. A comforting side dish for family meals.
Ingredients
- 1 large rustic white loaf (about 450g), cut into 2.5 cm cubes
- 6 tablespoons unsalted butter
- 2 celery stalks, finely diced
- 2 small brown onions, finely diced
- 1½ teaspoons salt
- 2 cups chicken stock
- 1 cup double cream
- 2 large eggs, lightly beaten
- 225g cooked chestnuts, roughly chopped
- 2 tablespoons fresh sage, finely chopped
- 2 tablespoons fresh thyme, finely chopped
- 1 tablespoon fresh rosemary, finely chopped
- 2 tablespoons fresh parsley, finely chopped
Instructions
- Preheat your oven to 190°C. Spread the bread cubes on a baking tray and bake for 12 minutes until lightly golden and dry. Reduce the oven temperature to 180°C.
- Melt 2 tablespoons of butter in a large pan over medium heat. Add the celery, onions, and ½ teaspoon of salt. Cook for 6 to 8 minutes until softened.
- In a separate saucepan, heat the stock with the remaining butter until melted and warm.
- Add the toasted bread to the pan with the vegetables. Pour over the warm stock and gently toss to combine.
- Stir in the double cream, mixing carefully so the bread holds its shape.
- In a bowl, combine the eggs, chestnuts, sage, thyme, rosemary, parsley, and the remaining salt.
- Fold the chestnut mixture into the bread mixture until evenly distributed.
- Transfer the mixture to a greased baking dish and spread it evenly.
- Bake for 45 to 50 minutes until golden on top and set in the centre.
- Rest for 5 minutes before serving.
Notes
- For extra texture, leave some chestnut pieces slightly larger for a rustic finish.
- Prep Time: 15 min
- Cook Time: 50 min
- Category: Side Dish
- Method: Baking
- Cuisine: British